3 ENGLISH 4 DEUTSCH 15 FRANCAIS 27 NEDERLANDS 38 ESPAÑOL 49 ITALIANO 61 PORTUGUÊS 73 84 HQC483, HQC482, HQC440 TÜRKÇE 97
4 ENGLISH Introduction ◗ Dear customer, you have made the right choice! Your new Philips hair clipper adapts to the contours of the head and enables comfortable use. ◗ To enjoy using the hair clipper for a long time, we advise you to read the following information. Important Read these instructions for use carefully before using the appliance and save them for future reference.
ENGLISH 5 charge and store the appliance at a C ◗ Use, temperature between 15c and 35c. ◗ This appliance is only intended for clipping human hair. Do not use it for any other purpose. Charging (HQC482 and HQC483 only) Charge the appliance for at least 12 hours before you start using it for the first time. A fully charged appliance has a cordless operating time of up to 35 minutes. Do not charge the appliance for more than 24 hours. C 1 Make sure the appliance is switched off while charging.
6 ENGLISH - Remove the adapter plug from the wall socket when the battery is fully charged. - If the appliance has not been used for a long time, it must be recharged for at least 12 hours. Corded clipping HQC482, HQC483: Do not run the appliance from the mains when the battery is fully charged. ◗ To use the hair clipper connected to the mains: Switch the hair clipper off, connect it to the mains and wait a few seconds before switching it on.
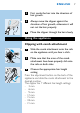
ENGLISH C 3 First comb the hair into the direction of hair growth. 4 Always move the clipper against the direction of hair growth, otherwise it will not cut the hair properly. 5 Move the clipper through the hair slowly. Using the appliance Clipping with comb attachment C C 1 Slide the comb attachment onto the rails on the appliance until you hear a click. 2 Make sure that the arms of the comb attachment have been properly slid onto the rails on both sides.
8 ENGLISH Start at the setting for maximum hair length (21 mm) to familiarise yourself with the clipper. 4 Make sure that the flat part of the comb attachment is always fully in contact with the scalp to obtain an even cutting result. 5 Pass the clipper slowly over the crown from different directions to achieve an even cutting result. 6 Make overlapping passes over the head to ensure that the clipper catches all the hairs that need to be cut.
ENGLISH 9 1 Start clipping at the setting for maximum hair length (i.e. position 21 mm). 2 Then choose a shorter setting and cut the hair on all parts of the head except the top, where you want the hair to be longer. 3 You can repeat this procedure until the hair on every part of the head has the desired length. Precise contouring without comb attachment You can use the clipper without comb attachment to contour the neckline and the area around the ears.
10 ENGLISH C 5 Only cut the hair ends.The hairline should be close to the ear. C 6 To contour the nape hairline and the sideburns, turn the clipper and make downward strokes. 7 Move slowly and smoothly. 8 Just follow the natural hairline. C Cutting over styling comb or fingers This technique can be used to obtain hair lengths over 21 mm. Bear in mind that this technique is difficult to master and should only be applied by experienced users. 1 Remove the comb attachment.
ENGLISH 4 11 Continue this procedure and comb frequently to remove cut hair and to check for unevenly cut sections. Cleaning Clean the appliance every time you have used it. Do not use abrasives, scourers or liquids such as alcohol, petrol or acetone to clean the appliance. C C 1 Make sure the appliance is switched off and disconnected from the mains before you start cleaning it. 2 Remove the comb attachment.
12 ENGLISH 6 Make sure you push the cutting unit back until you hear a click. Replacement A worn or damaged cutting unit should only be replaced with an original Philips cutting unit. C 1 Push the middle part of the cutting unit upwards with your thumb until it opens and then pull it off the appliance. C 2 Place the lug of the cutting unit into the slot and push the cutting unit back until you hear a click.
ENGLISH 1 Disconnect the appliance from the mains and let the appliance run until the motor stops. C 2 Open and remove the cutting unit. C 3 Remove the metal clip by means of a screwdriver. 13 4 Open the housing. C Insert a screwdriver into one of the grooves next to the socket for the appliance plug.Turn the screwdriver to separate the two housing halves. C 5 Insert a screwdriver into the small slot in the printed circuit board marked with an arrow.
14 ENGLISH Guarantee & service If you need information or if you have a problem, please visit the Philips website at www.philips.com or contact the Philips Customer Care Centre in your country (you will find its phone number in the worldwide guarantee leaflet). If there is no Customer Care Centre in your country, turn to your local Philips dealer or contact the Service Department of Philips Domestic Appliances and Personal Care BV.
DEUTSCH 15 Einführung ◗ Sehr geehrter Kunde, Sie haben die richtige Wahl getroffen! Ihr neuer Philips Haarschneider passt sich an die Konturen Ihres Kopfes an und ist sehr komfortabel im Gebrauch. ◗ Damit Sie lange Zeit Freude an diesem Haarschneider haben, sollten Sie die folgenden Informationen lesen. Wichtig Lesen Sie diese Bedienungsanleitung vor dem ersten Gebrauch des Geräts gründlich durch und bewahren Sie sie zur späteren Einsichtnahme auf.
16 DEUTSCH Sie darauf, dass Gerät und Netzteil C ◗ Achten nicht nass werden. ◗ Halten Sie das Gerät außer der Reichweite von Kindern. und laden Sie das Gerät bei C ◗ Benutzen Temperaturen zwischen 15c C und 35c C. Bewahren Sie es auch in diesem Temperaturbereich auf. ◗ Das Gerät ist ausschließlich zum Schneiden von menschlichem Haar vorgesehen. Verwenden Sie es nicht für andere Zwecke. Aufladen (nur HQC482 und HQC483) Laden Sie das Gerät vor dem ersten Gebrauch mindestens 12 Stunden lang auf.
DEUTSCH 17 Kontrolllampe leuchtet auf und zeigt an, C ◗ Die dass der Akku geladen wird. Die Lebensdauer des Akkus optimieren - Entladen Sie den Akku zweimal pro Jahr komplett, indem Sie das Gerät laufen lassen, bis der Motor anhält. - Ziehen Sie das Netzteil aus der Steckdose, sobald der Akku voll geladen ist. - Wurde das Gerät längere Zeit nicht benutzt, muss es erneut mindestens 12 Stunden lang geladen werden.
18 DEUTSCH Vorbereitung zum Gebrauch Haare mit dem Kamm-Aufsatz schneiden C C 1 Die Person, deren Haare Sie schneiden wollen, sollte sich auf Brusthöhe vor Ihnen befinden. 2 Beste Ergebnisse erzielen Sie bei trockenem Haar.Verwenden Sie den Haarschneider nicht bei frisch gewaschenem Haar. 3 Kämmen Sie das Haar zunächst in Richtung des Haarwuchses. 4 Führen Sie den Haarschneider immer entgegen der Haarwuchsrichtung, damit alle Haare ordentlich geschnitten werden.
DEUTSCH 2 C 19 Vergewissern Sie sich, dass die Schienen am Kamm-Aufsatz richtig in den Führungen am Gerät sitzen. 3 Wählen Sie die gewünschte Haarlängeneinstellung. Drücken Sie den Regler auf der Rückseite des Geräts, und schieben Sie den Kamm-Aufsatz in die gewünschte Position. Der Haarschneider weist 7 Einstellungen für die Haarlänge auf: - 3 mm - 6 mm - 9 mm - 12 mm - 15 mm - 18 mm - 21 mm Beginnen Sie mit der maximalen Haarlänge (21 mm), um sich mit dem Haarschneider vertraut zu machen.
20 DEUTSCH 7 Kämmen Sie die Haare gelegentlich in Richtung des Haarwuchses, damit der Haarschneider die Haare besser erfassen kann. 8 Um auch bei lockigem, schütterem oder langem Haar gute Ergebnisse zu erzielen, können Sie die Haare mit einem Kamm in Richtung des Haarschneiders führen. 9 Wir empfehlen, die Haare während des Schneidens regelmäßig aus dem KammAufsatz zu entfernen.
DEUTSCH 21 Präzise Konturen ohne KammAufsatz Sie können den Haarschneider ohne KammAufsatz verwenden, um die Konturen im Nacken und an den Ohren zu definieren. Seien Sie vorsichtig, wenn Sie ohne den Kamm Aufsatz arbeiten, da die Schneideeinheit sofort alle Haare schneidet, mit denen sie in Berührung kommt. 1 Ziehen Sie den Kamm-Aufsatz vom Haarschneider. 2 Kämmen Sie das Haar über die Ohren, bevor Sie die Kontur schneiden. 3 Knicken Sie das Ohr, um besser an die Haare zu gelangen.
22 DEUTSCH C 7 Bewegen Sie das Gerät langsam und gleichmäßig. 8 Folgen Sie einfach der natürlichen Haarlinie. Haare über einen Frisierkamm oder die Finger schneiden Diese Technik kann benutzt werden, um Frisuren mit Haarlängen über 21 mm zu schneiden. Diese Technik setzt aber ein gewissses Geschick voraus und sollte nur von erfahrenen Benutzern angewendet werden. 1 Nehmen Sie den Kamm-Aufsatz vom Gerät. C 2 Kämmen Sie einige Haare nach oben.
DEUTSCH 23 Reinigung Reinigen Sie das Gerät nach jedem Gebrauch. Verwenden Sie zum Reinigen keine Scheuermittel oder Lösungmittel wie Alkohol, Benzin oder Azeton. 1 Achten Sie vor dem Reinigen darauf, dass das Gerät ausgeschaltet und nicht an das Stromnetz angeschlossen ist. C 2 Nehmen Sie den Kamm-Aufsatz vom Gerät. C 3 Drücken Sie mit dem Daumen auf die Mitte der Schneideeinheit, bis sie sich öffnet und nach oben vom Gerät abheben lässt. Lassen Sie die Schneideeinheit nicht fallen.
24 DEUTSCH Ersatz der Schneideeinheit Eine abgenutzte oder beschädigte Schneideeinheit darf nur durch eine Philips Schneideeinheit ersetzt werden. C 1 Drücken Sie mit dem Daumen auf die Mitte der Schneideeinheit, bis sie sich öffnet und nach oben vom Gerät abheben lässt. C 2 Schieben Sie den Vorsprung an der Schneideeinheit in den Schlitz und drücken Sie die Schneideeinheit auf das Gerät, bis sie hörbar einrastet.
DEUTSCH 25 1 Ziehen Sie den Stecker aus der Steckdose, und lassen Sie den Motor so lange laufen, bis er anhält. C 2 Öffnen Sie die Schneideeinheit und heben Sie sie vom Gerät ab. C 3 Entfernen Sie die Metallklammer mit einem Schraubendreher. 4 Öffnen Sie das Gehäuse. C Drücken Sie den Schraubendreher in eine der Rillen neben der Stromkabelbuchse. Drehen Sie den Schraubendreher, um die beiden Gehäusehälften zu trennen.
26 DEUTSCH Garantie und Kundendienst Benötigen Sie weitere Informationen oder treten Probleme auf, wenden Sie sich bitte an Ihren Philips-Händler oder setzen Sie sich mit einem Philips Service-Center in Ihrem Land in Verbindung (Tel. Nr. 0180/5356767). Besuchen Sie auch die Philips Website www.philips.
FRANÇAIS 27 Introduction ◗ Cher consommateur, vous avez fait le bon choix! Votre nouvelle tondeuse Philips s'adapte aux contours de votre coiffure en facilitant ainsi son utilisation. ◗ Afin de pouvoir utiliser au mieux votre tondeuse, nous vous conseillons de suivre les instructions qui suivent. Important Avant d'utiliser l'appareil, lisez les instructions cidessous et conservez ce mode d'emploi pour un usage ultérieur.
28 FRANÇAIS ◗ Cet appareil a été conçu pour tailler les cheveux exclusivement.Toute autre utilisation en est interdite. Charge (HQC482 et HQC483 uniquement) Chargez l'appareil 12 heures au moins avant la première utilisation. Une charge complète vous autorise une utilisation de 35 min environ. Ne chargez pas l'appareil pendant plus de 24 heures. C 1 Assurez-vous que l'appareil est éteint lors de la charge. 2 Insérez le connecteur dans l'appareil. 3 Insérez l'adaptateur dans la prise murale.
FRANÇAIS 29 - Si l'appareil n'a pas été utilisé pendant une longue période, rechargez-le pendant 12 heures au moins. Utilisation sur secteur HQC482, HQC483: N'utilisez pas l'appareil directement sur secteur si les batteries sont complètement chargées. ◗ Vous pouvez utiliser l'appareil directement sur le secteur. Arrêtez l'appareil, branchez la fiche dans la prise de courant et attendez quelques secondes avant de mettre l'appareil en marche.
30 FRANÇAIS Ne l'utilisez pas sur des cheveux qui viennent d'être lavés. C 3 Peignez les cheveux dans le sens de la pousse. 4 Déplacez toujours la tondeuse dans le sens inverse de la pousse des cheveux pour une coupe soignée. 5 Déplacez la tondeuse lentement. Utilisation de l'appareil Taille avec guide de coupe C 1 Faites glisser le guide de coupe sur les glissières de l'appareil jusqu'à ce que vous entendiez un clic.
FRANÇAIS 31 Commencez par la hauteur la plus élevée (21 mm) pour vous familiariser avec la tondeuse. 4 Assurez-vous que le guide de coupe est toujours bien en contact avec le cuir chevelu. 5 Déplacez la tondeuse lentement pardessus la calotte, en partant de la nuque vers le dessus de la tête. 6 Donnez de petits coups de tondeuse supplémentaires pour vous assurer que la tondeuse a coupé les poils rebelles.
32 FRANÇAIS 1 Commencez à tondre en utilisant le réglage maximum de hauteur de coupe (position 21 mm). 2 Ensuite choisissez un réglage inférieur et coupez les cheveux à l'arrière de la tête, sauf le sommet. 3 Vous pouvez répéter cette procédure jusqu'à ce que les cheveux de la nuque et des côtés aient la longueur désirée. Dessiner un contour précis sans guide de coupe Vous pouvez utiliser la tondeuse sans guide de coupe pour dessiner le contour de la nuque et des oreilles.
FRANÇAIS 33 C 5 Coupez uniquement les bouts des cheveux en suivant le contour naturel de la racine des cheveux. C 6 Pour dessiner le contour de la nuque et des pattes, tournez la tondeuse et déplacez-la vers le bas. 7 Faites des mouvements lents et uniformes. 8 Suivez le contour naturel de la racine des cheveux. C Coupe au peigne ou avec les doigts En utilisant cette technique vous pouvez obtenir une longueur de cheveux supérieure à 21 mm.
34 FRANÇAIS C 3 Coupez les mèches qui dépassent du peigne ou des doigts. 4 Continuez cette procédure et peignez à intervalles réguliers pour retirer les mèches coupées et pour uniformiser les zones irrégulières. Nettoyage Nettoyez l'appareil après chaque utilisation. N'utilisez pas de produits abrasifs, de tampons à récurer ou des substances telles que l'alcool ou l'acétone pour nettoyer l'appareil. 1 Avant de commencer à nettoyer l'appareil, assurez-vous de l'avoir éteint et débranché.
FRANÇAIS C 35 5 Fixez le crochet de l'unité de coupe dans la fente et repoussez l'unité dans l'appareil (clic). 6 Repoussez l'unité de coupe jusqu'à entendre un clic. Remplacement Utilisez uniquement une unité de coupe Philips d'origine pour remplacer la votre, si elle est usée ou endommagée. C 1 Retirez le couteau en poussant dessus, au centre jusqu'à ce qu'il se détache. C 2 Placez le crochet de la nouvelle unité de coupe dans la fente et poussez l'unité dans l'appareil (clic).
36 FRANÇAIS Lorsque vous vous séparerez de votre appareil en fin de vie, retirez la batterie. Ne jetez pas la batterie avec les ordures ménagères habituelles, mais déposez-la dans un lieu assigné à cet effet. Vous pouvez également déposer votre appareil dans un Centre Service Agréé Philips, où l'on s'en chargera avec plaisir. C C 1 Débranchez l'appareil de la prise de courant, et laissez-le fonctionner jusqu'à qu'à l'arrêt complet du moteur. 2 Ouvrez et retirez l'unité de coupe.
FRANÇAIS C 6 37 Otez la batterie. Déposez la batterie et les autres composants dans un lieu assigné à cet effet. Ne branchez pas l'appareil sur le secteur après l'avoir ouvert. Garantie et service Pour toute réparation/information, ou en cas de problème, visitez notre website: www.philips.com. Ou veuillez contacter le Service Consommateurs Philips de votre pays (vous trouverez le numéro de téléphone dans le dépliant sur la garantie internationale).
38 NEDERLANDS Inleiding ◗ Beste klant, u heeft de juiste keuze gemaakt! Uw nieuwe Philishave haartrimmer volgt de contouren van het hoofd en is gemakkelijk in het gebruik. ◗ Om lang plezier te hebben van uw Philishave haartrimmer, raden we u aan de onderstaande informatie te lezen. Belangrijk Lees deze gebruiksaanwijzing zorgvuldig door voordat u het apparaat gaat gebruiken. Bewaar de gebruiksaanwijzing om hem indien nodig te kunnen raadplegen.
NEDERLANDS 39 het apparaat op, gebruik het en bewaar C ◗ Laad het bij een temperatuur tussen 15c en 35c. ◗ Dit apparaat is uitsluitend bedoeld voor het knippen van haar bij mensen. Gebruik het niet voor andere doeleinden. Opladen (alleen HQC482 en HQC483) Laad het apparaat minstens 12 uur op voordat u het voor de eerste keer gebruikt. Een volledig opgeladen apparaat heeft een snoerloze kniptijd tot 35 minuten. Laad het apparaat niet langer dan 24 uur achter elkaar op.
40 NEDERLANDS - Haal de adapter uit het stopcontact wanneer de accu volledig is opgeladen. - Als u het apparaat langere tijd niet gebruikt heeft, laad het dan minstens 12 uur aaneengesloten op. Knippen met snoer HQC482 en HQC483: Laat het apparaat niet op netspanning werken wanneer de accu volledig opgeladen is. ◗ Om de haartrimmer op netspanning te gebruiken: Schakel het apparaat uit, sluit het aan op de netspanning en wacht enkele seconden voordat u het apparaat inschakelt.
NEDERLANDS C 41 2 Gebruik de haartrimmer alleen op droog haar en was het haar niet voordat u de haartrimmer gaat gebruiken voor het beste resultaat. 3 Kam het haar in de groeirichting. 4 Beweeg de haartrimmer altijd tegen de haargroeirichting in, anders zal het haar niet goed afgeknipt worden. 5 Maak langzame en vloeiende bewegingen. Gebruik van het apparaat Knippen met opzetkam C 1 Schuif de armen van de opzetkam voorzichtig op de richels van het apparaat totdat u de kam hoort vastklikken.
42 NEDERLANDS - 12 mm - 15 mm - 18 mm - 21 mm Begin te knippen op de hoogste kniplengtestand (21 mm) om vertrouwd te raken met de haartrimmer. 4 Zorg ervoor dat de opzetkam steeds goed in contact is met de hoofdhuid om een gelijkmatig knipresultaat te bereiken. 5 Wanneer u de kruin knipt, beweeg de haartrimmer dan vanuit verschillende richtingen langzaam over de kruin om een gelijkmatig knipresultaat te bereiken.
NEDERLANDS 43 Een gradatiecoupe knippen Met de Philishave haartrimmer kunt u niet alleen het haar over het gehele hoofd op één lengte knippen, u kunt ook een gelijkmatige overgang van langer haar bovenop het hoofd naar korter haar aan de achterkant en zijkanten van het hoofd creëren. 1 Begin te knippen op de hoogste kniplengtestand (21 mm). 2 Kies dan een kortere kniplengtestand en knip al het haar behalve het deel bovenop het hoofd dat u langer wilt houden op deze kortere lengte.
44 NEDERLANDS 2 Kam eerst de uiteinden van het haar over het oor heen wanneer u de haarlijn rond de oren wilt gaan bijwerken. 3 Buig indien nodig het oor uit de weg. C 4 Houd de haartrimmer een beetje schuin zodat één hoek van het knipelement de haarpunten raakt. C 5 Knip alleen de haarpunten. De haarlijn moet dicht langs het oor lopen. C 6 Om de haarlijn in de nek en de bakkebaarden bij te werken moet u de haartrimmer omdraaien en neerwaartse bewegingen maken.
NEDERLANDS 45 1 Verwijder de opzetkam. C 2 Kam een lok haar omhoog.Til de haarlok op met de kam of neem deze tussen uw wijsvinger en middelvinger zodat alleen het gedeelte dat afgeknipt moet worden nog boven de kam of uw vingers uitsteekt. C 3 Knip vervolgens het haar dat boven de kam of uw vingers uitsteekt af. 4 Ga op deze manier verder. Kam tijdens het knippen het haar regelmatig om losse haren te verwijderen en om te controleren of kapsel gelijkmatig geknipt is.
46 NEDERLANDS C 3 Duw met uw duim het middelste gedeelte van het knipelement omhoog totdat het openklapt en trek het knipelement dan van het apparaat af. Pas op dat het knipelement niet op de grond valt. C 4 Maak het knipelement en de binnenkant van het apparaat schoon met het bijgeleverde borsteltje. C 5 Plaats het nokje van het knipelement in de opening en duw het knipelement terug op het apparaat. 6 Duw net zolang op het knipelement totdat u het hoort vastklikken.
NEDERLANDS 47 Milieu (alleen HQC482 en HQC483) De ingebouwde accu bevat stoffen die schadelijk kunnen zijn voor het milieu. Verwijder de accu wanneer u het apparaat afdankt. Gooi de accu niet bij het normale huisvuil, maar lever deze in op een door de overheid aangewezen plaats. U kunt het apparaat ook naar een Philips servicecentrum brengen, waar men de accu voor u zal verwijderen en ervoor zal zorgen dat deze op milieuvriendelijke wijze wordt verwerkt.
48 NEDERLANDS C 5 Steek een schroevendraaier in het smalle gleufje in de printplaat dat gemarkeerd is met een pijl. Duw de schroevendraaier naar beneden totdat een gedeelte van de printplaat afbreekt. C 6 Haal de accu uit het apparaat. Zorg voor een milieuvriendelijke verwerking van de accu en de andere onderdelen.
ESPAÑOL 49 Introducción ◗ Estimado cliente: ¡Ha acertado en su elección! El nuevo cortapelos de Philips se adapta a los contornos de la cabeza y permite utilizarlo con comodidad. ◗ Para que disfrute durante más tiempo del cortapelos, le recomendamos que lea la siguiente información. Importante Antes de utilizar el aparato, lea atentamente estas instrucciones de uso y guárdelas para consultarlas en el futuro.
50 ESPAÑOL cargue y guarde el aparato a una C ◗ Utilice, temperatura entre 15 c y 35c ◗ Este aparato está pensado para cortar únicamente el pelo humano. No lo utilice con otra finalidad. Cómo cargar el aparato (sólo para modelos HQC482 y HQC483) Cargue el aparato durante al menos 12 horas antes de utilizarlo por primera vez. Un aparato completamente cargado tiene un tiempo de autonomía sin cable de hasta 35 minutos. No cargue la batería durante más de 24 horas.
ESPAÑOL 51 - Desenchufe el adaptador de la red cuando la batería esté completamente cargada. - Si no ha utilizado el aparato durante mucho tiempo, debe recargarlo durante al menos 12 horas. Corte con el aparato enchufado a la red HQC482, HQC483: No utilice el aparato enchufado a la red cuando la batería esté completamente cargada. ◗ Para utilizar el cortapelos enchufado a la red: Desconecte el cortapelos, enchúfelo a la red y espere unos segundos antes de conectarlo.
52 ESPAÑOL C 2 Para conseguir los mejores resultados, utilice el cortapelos sólo con el pelo seco. No lo utilice cuando el pelo esté recién lavado. 3 Primero peine en el sentido del crecimiento del pelo. 4 Mueva siempre el cortapelos en dirección contraria al crecimiento del pelo. En caso contrario, no realizará un buen corte. 5 Mueva despacio el cortapelos por toda la cabeza.
ESPAÑOL 53 El cortapelos tiene 7 posiciones diferentes de longitud de corte: - 3 mm - 6 mm - 9 mm - 12 mm - 15 mm - 18 mm - 21 mm Empiece con la posición de longitud de corte más larga (21 mm) para familiarizarse con el cortapelos. 4 Asegúrese de que la parte plana del accesorio de peine esté siempre en contacto con el cuero cabelludo para conseguir un corte aún más uniforme. 5 Pase el cortapelos despacio por la coronilla en diferentes direcciones para conseguir un corte aún más uniforme.
54 ESPAÑOL 9 Es aconsejable que retire con regularidad el pelo cortado del peine mientras esté cortando. Graduación El cortapelos Philishave no sólo le permite cortar el pelo por igual por toda la cabeza, sino que además podrá realizar un corte más largo en la parte superior de la cabeza y un corte más corto por la parte de atrás y laterales sin que se note. 1 Empiece a cortar con la posición máxima de longitud de corte (p.ej. posición 21 mm).
ESPAÑOL 55 1 Quite el accesorio de peine sacándolo del cortapelos. 2 Antes de retocar la línea de pelo de alrededor de la orejas, peine las puntas sobre las orejas. 3 Doble la oreja de la persona para apartarla. C 4 Incline el cortapelos de forma que sólo un extremo del elemento cortante llegue a las puntas C 5 Corte sólo las puntas. La línea del pelo debe quedar cerca de la oreja.
56 ESPAÑOL Corte de pelo por encima de un peine o de los dedos Puede utilizar esta técnica para conseguir una longitud de corte superior a 21 mm.Tenga en cuenta que esta técnica es difícil de dominar y sólo deben utilizarla los usuarios con experiencia. 1 Quite el accesorio de peine. C 2 Peine un poco de pelo hacia arriba. Levante el pelo con el peine de peluquería o sujételo entre los dedos hasta que sobresalga únicamente lo que va a cortar. C 3 Corte el pelo que sobresale del peine o los dedos.
ESPAÑOL C 2 C 3 57 Quite el accesorio de peine. Presione el centro de la unidad de corte con el pulgar hacia arriba hasta que se abra y después tire de ésta para sacarla. Tenga cuidado de que la unidad cortante no se caiga al suelo. C 4 Limpie la unidad de corte y el interior del aparato con el cepillo que se suministra. C 5 Coloque la agarradera de la unidad de corte en la ranura y vuelva a encajar la unidad en el aparato hasta que oiga un clic.
58 ESPAÑOL C 1 Presione el centro de la unidad de corte con el pulgar hacia arriba hasta que se abra y después tire de ésta para sacarla. C 2 Coloque la agarradera de la unidad de corte en la ranura y vuelva a encajar la unidad en el aparato hasta que oiga un clic. Medio ambiente (sólo modelos HQC482 y HQC483) La batería recargable incorporada contiene sustancias que pueden contaminar el medio ambiente. Quite la batería recargable cuando vaya a deshacerse del aparato.
ESPAÑOL 59 C 2 Abra y quite la unidad de corte. C 3 Utilizando un destornillador, quite la brida metálica. 4 Abra la carcasa. C Inserte un destornillador en una de las ranuras junto a la toma de corriente del enchufe del aparato. Gire el destornillador para separar las dos mitades de la carcasa. C 5 Inserte un destornillador en la pequeña ranura marcada con una flecha en el circuito impreso. Presione con el destornillador hacia abajo hasta que un trozo del circuito impreso se rompa.
60 ESPAÑOL Garantía y servicio Si necesita información o tiene algún problema, visite la página web de Philips en www.philips.com, o póngase en contacto con el Servicio Philips de Atención al Cliente de su país (hallará el número de teléfono en el folleto de la Garantía Mundial). Si en su país no hay Servicio Philips de Atención al Cliente, diríjase a su distribuidor local Philips o póngase en contacto con el Service Department of Philips Domestic Appliances y Personal Care BV.
ITALIANO 61 Introduzione ◗ Caro Cliente, hai fatto la scelta giusta! Il nuovo Regolacapelli Philips si adatta perfettamente al contorno della tua testa rendendo ancora più pratico il suo impiego. ◗ Per una maggior durata del Regolacapelli, vi consigliamo di leggere attentamente le seguenti informazioni. Importante Prima di usare l'apparecchio, leggete con attenzione queste istruzioni e conservatele per eventuali riferimenti futuri.
62 ITALIANO C ◗ Tenete l'apparecchio fuori dalla portata dei bambini. ◗ Usate, ricaricate e riponete l'apparecchio ad una temperatura compresa fra 15c and 35c. ◗ L'apparecchio è stato realizzato appositamente per tagliare i capelli. Non utilizzatelo per altri scopi. Ricarica (solo HQC482 e HQC483) Prima di usare l'apparecchio per la prima volta, caricatelo per almeno 12 ore. L'apparecchio a piena carica ha un'autonomia senza filo di circa 35 minuti. Non caricate l'apparecchio per più di 24 ore.
ITALIANO 63 Come ottimizzare la durata della batteria - Scaricate completamente la batteria due volte all'anno, facendo funzionare il motore fino a quando si spegne. - Quando la batteria è completamente carica, togliete la spina dell'adattatore dalla presa di corrente. - Se l'apparecchio non viene usato per un periodo prolungato, dovrà essere ricaricato per almeno 12 ore.
64 ITALIANO Come preparare l'apparecchio per l'uso Come tagliare i capelli usando il pettine distanziatore C C 1 Prima di iniziare, verificate che la testa della persona a cui dovete tagliare i capelli si trovi all'altezza del vostro torace. 2 Per ottenere risultati ottimali, usate l'apparecchio solo sui capelli asciutti. Non usatelo sui capelli appena lavati. 3 Pettinate i capelli nella direzione della crescita.
ITALIANO C 65 3 Scegliete l'impostazione desiderata per la lunghezza del taglio. Premete il pulsante di regolazione posto sul retro dell'apparecchio e infilate il pettine nella posizione desiderata. Il regolacapelli è provvisto di 7 diverse impostazioni per la lunghezza del taglio: - 3 mm - 6 mm - 9 mm - 12 mm - 15 mm - 18 mm - 21 mm Iniziate impostando la lunghezza massima (21 mm) per familiarizzare con l'apparecchio.
66 ITALIANO 8 Per ottenere un ottimo risultato in caso di capelli ricci, radi, lunghi o sottili, usate un pettine per avvicinare i capelli all'apparecchio. 9 Vi consigliamo di eliminare spesso i capelli tagliati dall'apparecchio. Per procedere gradualmente Il regolacapelli Philishave vi permette non solo di tagliare i capelli in modo uniforme e alla stessa lunghezza su tutta la testa, ma anche di ottenere gradualmente capelli più lunghi in cima alla testa e più corti ai lati e sulla nuca.
ITALIANO 67 Fate attenzione quando usate l'apparecchio senza pettine, in quanto il regolacapelli taglierà tutti i capelli che toccherà. 1 Togliete il pettine estraendolo dal tagliacapelli. 2 Prima di rifinire i contorni attorno alle orecchie, pettinate i capelli sopra le orecchie. 3 Se necessario, piegate leggermente l'orecchio della persona a cui state tagliando i capelli. C 4 Inclinate il regolacapelli in modo tale che solo un bordo dell'elemento di taglio sfiori la punta dei capelli.
68 ITALIANO C 7 Cercate di compiere passate lente e regolari. 8 Seguite il naturale contorno dei capelli. Come tagliare i capelli con il pettine a mano o con le dita Questa tecnica può essere usate per ottenere lunghezze superiori a 21 mm. Ricordate che si tratta di una tecnica particolarmente difficile da apprendere, consigliata solo agli utenti più esperti. 1 Togliete il pettine distanziatore. C 2 Pettinate una piccola parte di capelli verso l'alto.
ITALIANO 69 Pulizia Pulite l'apparecchio ogni volta che lo usate. Non usate detergenti abrasivi, spugnette o liquidi come alcool, benzina o acetone per pulire l'apparecchio. 1 Controllate che l'apparecchio sia spento e scollegato dalla presa di corrente prima di procedere alla pulizia. C 2 Togliete il pettine distanziatore. C 3 Premete la parte centrale del blocco coltelli verso l'alto usando il pollice, fino a quando si apre, poi estraetelo dall'apparecchio.
70 ITALIANO Sostituzione Il blocco coltelli danneggiato o usurato dovrà essere sostituito con un pezzo originale Philips. C 1 Premete la parte centrale del blocco coltelli verso l'alto usando il pollice, fino a quando si apre, poi estraetelo dall'apparecchio. C 2 Inserite la linguetta del blocco coltelli nella fessura e premete il blocco coltelli fino a quando sentirete un click.
ITALIANO C 2 Aprite e togliete il blocco coltelli. C 3 Togliete la clip di metallo usando un cacciavite. 71 4 Aprite l'alloggiamento. C Inserite la punta di un cacciavite in una delle fessure accanto alla presa per lo spinotto. Ruotate il cacciavite per separare le due parti. C 5 Inserite la punta di un cacciavite nella piccola fessura del circuito stampato contrassegnato da una freccia. Premete il cacciavite verso il basso fino a rompere il circuito stampato.
72 ITALIANO Garanzia e Assistenza Se avete bisogno di informazioni o in caso di problemi, vi preghiamo di visitare il sito www.philips.com oppure contattate il Centro Assistenza Clienti Philips del vostro paese (per conoscere il numero, consultate l'opuscolo della garanzia). Qualora nel vostro paese non ci sia un Centro Assistenza Clienti, contattate il vostro rivenditore di fiducia oppure il Service Department of Philips Domestic Appliances and Personal Care BV.
PORTUGUÊS 73 Introdução ◗ Caro cliente, acaba de fazer a escolha certa! O seu novo Aparador de Cabelo Philishave adapta-se aos contornos da cabeça e oferece uma utilização confortável. ◗ Para disfrutar do seu aparador durante mais tempo, aconselha-se a leitura das informações que se seguem. Importante Leia estas instruções atentamente antes de usar o aparelho e guarde-as para uma eventual consulta futura.
74 PORTUGUÊS carregue e guarde o aparelho numa C ◗ Use, temperatura entre 15c e 35c. ◗ Este aparelho destina-se unicamente a cortar cabelo humano. Não deve utilizá-lo para qualquer outra finalidade. Carga (apenas HQC482 e HQC483) Antes de usar pela primeira vez, carregue o aparador durante pelo menos 12 horas. Com carga total, o aparador tem uma autonomia de funcionamento de até 35 minutos. Não deixe em carga por mais de 24 horas seguidas. C 1 Enquanto estiver em carga, o aparador deve estar desligado.
PORTUGUÊS 75 - Retire a ficha do adaptador da tomada eléctrica quando a bateria estiver com carga total. - Se o aparelho não for usado durante muito tempo, deverá ser posto à carga durante pelo menos 12 horas. Funcionamento com fio HQC482, HQC483: Se o aparador estiver com carga total, não o utilize ligado à corrente. ◗ Para usar o aparador ligado à corrente: Desligue o aparador, ligue-o à corrente e aguarde alguns segundos antes de o pôr a trabalhar.
76 PORTUGUÊS Não use o aparador em cabelos acabados de lavar. C 3 Primeiro penteie o cabelo na direcção do seu comprimento. 4 Movimente sempre o aparador na direcção oposta ao crescimento do cabelo. Caso contrário, o cabelo não fica bem cortado. 5 Movimente o aparador suavemente. Utilização Aparar com o pente acessório C C 1 Faça deslizar o pente pelas ranhuras de encaixe até ouvir um clique. 2 Certifique-se que os braços do pente ficaram bem encaixados de ambos os lados.
PORTUGUÊS 77 - 15 mm - 18 mm - 21 mm Comece pela regulação de comprimento máximo (21 mm) para se familiarizar com o aparador. 4 Certifique-se que a parte plana do pente fica sempre em contacto com o couro cabeludo para que os resultados sejam bons. 5 Passe o aparador suavemente sobre a cabeça a partir de diferentes direcções para conseguir um resultado uniforme. 6 Faça passagens sobrepostas sobre a cabeça para que o aparador apanhe todos os cabelos que precisam de ser cortados.
78 PORTUGUÊS em toda a cabeça, como também permite fazer uma transição suave de cabelo mais comprido na parte de cima da cabeça para cabelo mais curto no pescoço e dos lados. 1 Comece pela regulação de comprimento máximo (isto é, posição de 21 mm). 2 Em seguida, escolha uma regulação mais baixa e corte o cabelo em todos os sítios excepto na parte de cima da cabeça onde pretende que o cabelo fique mais comprido.
PORTUGUÊS 79 3 Dobre a orelha para a afastar do aparador. C 4 Incline o aparador de forma que apenas uma extremidade da lâmina toque nas pontas do cabelo. C 5 Corte apenas as extremidades. O contorno da cabeça deve ficar junto à orelha. C 6 Para contornar a linha da nuca e as patilhas, vire o aparador e faça passagens para baixo. 7 Movimente lentamente e com suavidade. 8 Limite-se a seguir o contorno natural da cabeça.
80 PORTUGUÊS C 2 Penteie uma pequena parte do cabelo para cima. Levante o cabelo com um pente ou segure-o entre os dedos até deixar de fora apenas o cabelo que precisa de ser cortado. C 3 Corte o cabelo que fica a sair do pente ou dos dedos. 4 Continue desta forma e penteie o cabelo com frequência para remover os cabelos cortados e verificar se há irregularidades no corte. Limpeza Limpe o aparador após cada utilização.
PORTUGUÊS 81 C 4 Limpe a unidade de corte e o interior da máquina com a escovinha fornecida. C 5 Coloque a saliência da unidade de corte na ranhura e empurre para encaixar no aparelho. 6 Empurre a unidade de corte até ouvir um clique. Substituição Uma unidade de corte gasta ou estragada só deverá ser substituída por uma peça de origem Philips. C 1 Com o polegar, empurre a parte central da unidade de corte para cima até abrir e depois puxe-a para fora do aparelho.
82 PORTUGUÊS Quando se desfizer do aparador, retire-lhe a bateria recarregável. Não deite a bateria fora juntamente com o restante lixo doméstico. Coloque-a nos ecopontos próprios. Também poderá levar o aparador a um concessionário Philips autorizado para que procedam à retirada da bateria e se desfaçam dela de forma a respeitar o meio ambiente. C C 1 Desligue a máquina da corrente e deixe-a a trabalhar até o motor parar. 2 Abra e retire a unidade de corte.
PORTUGUÊS C 6 83 Puxe a bateria para fora do aparador. Deite a bateria e os outros componentes nos locais próprios, de forma a proteger o ambiente. Não volte a ligar o aparador à corrente depois de lhe retirar a bateria! Garantia e assistência Se necessitar de informações ou se tiver algum problema, por favor visite o site da Philips em www.philips.pt ou contacte o Centro de Informação ao Consumidor Philips do seu país (encontrará os números de telefone no folheto da garantia mundial).
84 ◗ , ! Philips "# $ % & . ◗ ( " ", ) & $ % . * ) & ) % $ + $ .
C 85 " $ 1 " % ) . ◗ 6 . ◗ 6 " ) . , $ % C ◗ 7 1 1 % + 15c 35c. ◗ %# " 5 . 3 ) . ;" ( " HQC482 HQC483) ; % 12 5 % % 5 $ .
86 ) " 1 4 C ◗ C ) %+ " $ %# . B % # % - E $ % 5 % ) $ " $ " . - B & " %# " $ % % . - ) 1 % " ) , 1 + $ % 12 5 .
87 HQC440: ◗ C 1 % & & %# . ! "# ! $ C C 1 * % , & & 1 % " $ " % 1 4 & % %) 4 1 . 2 ( , % " . 3 % $ . 3 * 5 % 1 $ 5 .
88 ' "# ! $ C C 1 6 % + . 2 B & 1 % " + 1 1 % " ) . 3 , + 1 5 . * % 1 % % + 1 1 . 7 ) $ 1 % 5 .
89 5 * $ " ) $ 1 " $ . 6 6 " $ & & 1 % " " . 7 ) %# $ 5 5 .
90 1 % 1 () . 21 mm). 2 3 + " 1 "4 " $ " " , 1 % . 3 3 % & ) ) % 1 " . - ! "# ! $ 3 % % + "4 % " " .
91 C 4 0 " 5 " " 5 . C 5 6"4 " 5 . 5 1 % . C 6 ( 4 % & $ & % , % . 7 6 . 8 1 5 .
92 C 2 7 % " 5 . G 5 ) + " # %. C 3 6"4 + " ) . 4 G % ) ) % %# $ % + % ) % . . 6 1 % 1 .
C 93 3 * % ) % %+ & + " . * ) ) ) . C 4 6 1 % ) " & . C 5 C 1 + ) . 6 B & 1 % " 5+ ) % .
94 ) . * & (3" HQC482 HQC483) $ #" % % % & . $ % " ) " %4 . 3 + % #% 1 %) )5 % % .
C 3 B " " & ) . 95 & 1 C B4 %+ %& . &%) % " )% $ & . ( % &%) + % ) . C 5 B &%) 5 % & . G 5+ &%) 5 . C 6 C & + % " .
96 $ - 1 $ % "& , $ % %) Philips ) 1 www.philips.com + 5 Philips 5 (1 & % $ ) 1 $ ) ). , ) + 5 5 , 1 1 % " " Philips & 2 5 G 5 G 5 * ; %) BV Philips.
TÜRKÇE 97 Giriş ◗ Değerli müşterimiz, doğru seçim yaptınız! Yeni Philips saç kesme cihazınız başınızın tüm hatlarına uyum sağlar ve rahat bir kullanım sunar. ◗ Saç kesme cihazından uzun süre faydalanmak için, verilen bilgileri okumanızı tavsiye ederiz. Önemli Cihazı kullanmadan önce kullanma kılavuzunu okuyun ve saklayın. C C ◗ Cihazı prize takmadan önce, fiş üzerinde belirtilen voltajın, evinizdeki şebeke voltajı ile uyumlu olup olmadığını kontrol edin.
98 TÜRKÇE Şarj etme (sadece HQC482 ve HQC483 için) Cihazı ilk defa kullanmaya başlamadan önce 12 saat boyunca şarj edin. Tam olarak şarj edilmiş bir cihaz, kablosuz olarak 35 dakikaya kadar çalışabilir. Cihazı 24 saatten uzun bir süre şarj etmeyiniz. C 1 Cihaz şarj olurken, cihazın kapalı olduğundan emin olunuz. 2 Cihazın fişini şarj aletine takınız. 3 Adaptörün fişini duvar prizine takın. şarj olduğunu gösteren pilot ışık C ◗ Cihazın yanmaya başlayacaktır.
TÜRKÇE 99 Kordonlu saç kesme HQC482, HQC483: Şarj piliniz tamamen doluyken cihazınızı elektrikle kullanmamanız tavsiye edilir. ◗ Saç kesme cihazını prize takılı olarak kullanmak için: Saç kesme cihazını kapatın, prize takın ve cihazı açmadan önce birkaç saniye bekleyin. Eğer pil tamamıyla boşsa, cihazı açmadan önce birkaç dakika bekleyin. HQC440: ◗ Cihazın fişini cihaza takın ve adaptörün fişini duvar prizine takın.
100 TÜRKÇE 5 Saç kesme cihazını saç içinde yavaşça hareket ettirin. Kullanma Tarak aparatı ile saç kesme C 1 Tarak aparatını cihazın tekerleri üzerine bir klik sesi duyana kadar kaydırarak takın. 2 Tarak aparatının millerinin her iki taraftaki tekerlerin üzerine tam olarak oturduğundan emin olun. 3 Uygun saç uzunluk ayarını seçin. C Cihazın arkasında bulunan ayar düğmesine basın ve tarak aparatını kaydırarak istenilen pozisyona getirin.
TÜRKÇE 101 5 Kesimde eşitliği sağlamak için saç kesme cihazını farklı yönlerde tepe üzerinden yavaşça geçirin. 6 Saç kesme cihazının kesilmesi gerekli olan tüm saçı yakalamasını sağlamak için, baş üzerinde üst üste geçişler yapın. 7 Saçı zaman zaman uzama yönünde tarayın, böylece saç kesme cihazı saçı daha kolay yakalar. 8 Kıvırcık, seyrek veya uzun saçlarda iyi bir sonuç elde etmek için, saçı saç kesme cihazına yöneltmek için bir tarak kullanın.
102 TÜRKÇE 3 Bu işlemi, başın her kısmındaki saç istenilen uzunluğa gelene kadar sürdürebilirsiniz. Tarak aparatı olmadan hassas şekillendirme Kulak çevresi ve ensedeki saç çizgisini şekillendirmek için tarak aparatını kullanmadan cihazı saç kesme cihazını kullanabilirsiniz. Saç kesme cihazı temas ettiği her saçı keseceği için, tarak aparatı olmadan saç kesimi yaparken dikkatli olun. 1 Tarak aparatını saç kesme cihazından çekerek çıkartın.
TÜRKÇE C C 103 6 Ense saç çizgisine ve favorilere şekil vermek için, saç kesme cihazını çevirin ve aşağıya doğru darbeler uygulayın. 7 Yavaşça ve düzgünce hareket edin. 8 Sadece doğal çizgisini takip edin. Tarak ve parmak arası kesim Bu teknik 21 mm üzerinde saç uzunluğu elde etmek için kullanılabilir. Bu tekniğin uygulanmasının zor olduğunu ve sadece deneyimli kullanıcılar tarafından uygulanması gerektiğini aklınızdan çıkartmayın . 1 Tarak aparatını çıkarınız.
104 TÜRKÇE Temizlik Cihazı her kullanımdan sonra temizleyin. Cihazın temizliğinde alkol, aseton, benzin gibi temizlik maddeleri kullanmayın. C C 1 Cihazınızı temizlemeden önce, cihazı kapatarak fişini prizden çekin. 2 Tarak aparatını çıkarın. 3 Kesici ünitenin orta kısmına ünite açılana kadar baş parmağınızla bastırın ve kesici üniteyi çıkartmak için yukarı doğru çekin. Kesici ünitesinin yere düşmemesine dikkat edin.
TÜRKÇE 105 C 1 Kesici ünitenin orta kısmına ünite açılana kadar baş parmağınızla bastırın ve kesici üniteyi çıkartmak için yukarı doğru çekin. C 2 Kesici ünitenin kulplarını oluklara yerleştirin ve üniteyi cihazın üstüne geri itin. Çevre (sadece HQC482 ve HQC483 modelleri için) İçerdikleri maddeler dolayısıyla, şarj pilleri çevreyi kirletebilirler. Cihazı çöpe atarken pillerini cihazdan ayırınız. Pilleri normal ev çöpüne atmayın, resmi bir toplama noktasında imha edin.
106 TÜRKÇE C 3 Bir tornavida yardımıyla vidayı ve metal tutucuyu çıkarınız. 4 Kutuyu açınız. C Tornavidayı cihaz fişinin duyu yanındaki oluklardan birine sokun. İki kaplamayı tornavidayı çevirerek birbirinden ayırın. C 5 Tornavidayı devre bilgilerinin yer aldığı, okla gösterilen küçük boşluğa sokunuz. Tornavidayı devrelerin bulunduğu kutuyu açana kadar bastırınız. C 6 Pili cihazdan dışarıya doğru çekin. Pilleri ve diğer devre elemanlarını çevreye zarar vermeyecek şekilde imha ediniz.
TÜRKÇE 107 Garanti ve Servis Eğer daha fazla bilgiye ihtiyaç duyarsanız veya bir problem yaşarsanız, lütfen Philips Web Sitesini www.philips.com.tr adresinden ziyaret ediniz veya ülkenizde bulunan Philips Müşteri Danışma Merkezi ile iletişime geçiniz (dünya genelindeki telefon numaralarını verilen garanti belgeleri içerisinde bulabilirsiniz). Eğer ülkenizde Müşteri Danışma Merkezi yoksa, yerel Philips yetkilinize başvurun veya Philips Ev Aletleri ve Kişisel Bakım BV Servis Departmanı ile iletişime geçin.
108
109
110 4203 000 52252