
User manual


12
ENGLISH
Note: The cooking time of the pasta varies depending on personal preferences, pasta
shapes, and number of servings.
Important!
The pasta recipes provided in the recipe book have been tested for success. If you experiment
with or use other pasta recipes, the our and water/egg ratios will need to be adjusted. The
pasta maker will not operate successfully if you do not adjust the new recipe accordingly.
Note
y To ensure the quality of the pasta, use gluten our to make pasta. Follow the
recommended proportion to add the ingredients.
y Seasonal changes and using ingredients from dierent regions may aect the our/
water ratio. You may adjust based on the recommended proportion.
y When making egg pasta or vegetable pasta, make sure you whisk the egg mixture or
vegetable juice evenly with the water before pouring into the chamber through the slot
in the lid. When adding ingredients, make sure the ingredient is in a liquid form.
y See the recipe book provided for additional pasta recipe variations.
y When making gluten free pasta/noodles or cookies, do not follow the recommended
liquid amount indicated by the appliance.
Cleaning
1 Disconnect the plug from the power outlet. (Fig.28)
2 Remove the mixing chamber lid. (Fig.3)
3 Loosen the front panel control knobs. (Fig.4)
Note: The front panel is heavy. Take extra caution when removing it.
4 Disassemble the front panel, the shaping disc, the shaping disc holder, the mixing paddle,
and the mixing chamber in order. (Fig.5)
5 Use a dry cloth to clean our residue on the main unit. (Fig.29)
6 Clean the shaping disc with the supplied cleaning tool to remove the dough residues.
After that, you can clean it with water. (Fig.30)
Note: For the spaghetti, thick spaghetti, angel hair and fettuccine shaping discs, let the
discs air-dry 2 to 4 hours. Then use the corresponding cleaning tool to poke out the dough
in the holes.
7 Clean all detachable parts, and wipe them dry. (Fig.6)
8 Use a dry cloth to clean the control panel, and the exterior of the pasta maker. (Fig.31)
Storage
1 Unplug the appliance and let it cool down.
Note: Make sure all parts are clean and dry before storing.
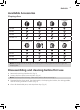
2 You can store the shaping discs in the storage drawer. (Fig.32)