Register your product and get support at www.philips.
1 2 3 4 5 6 7 Notice Copyright Compliance Trademarks 4 4 4 4 Important 5 5 5 6 Main unit Remote control Your home theater 6 6 7 Connect your home theater 8 Use your home theater 12 12 12 13 14 14 15 16 17 17 18 Change settings 19 19 19 20 20 21 21 Update software 22 22 22 Safety Care for your product Care of the environment 8 Product specifications 23 9 Troubleshooting 24 10 Index English Contents 26 Speakers 8 Connectors 9 Connect to TV 10 Connect audio from TV and other d
1 Notice Trademarks This section contains the legal and trademark notices. Copyright This item incorporates copy protection technology that is protected by U.S. patents and other intellectual property rights of Rovi Corporation. Reverse engineering and disassembly are prohibited. Compliance This product is in compliance with the essential requirements and other relevant provisions of Directives 2006/95/EC (Low Voltage), 2004/108/ EC (EMC). Manufactured under license from Dolby Laboratories.
Important Read and understand all instructions before you use your home theater. If damage is caused by failure to follow instructions, the warranty does not apply. Safety Risk of electric shock or fire! • Never expose the product and accessories to rain or water. Never place liquid containers, such as vases, near the product. If liquids are spilt on or into the product, disconnect it from the power outlet immediately. Contact Philips Consumer Care to have the product checked before use.
Care of the environment Your product is designed and manufactured with high quality materials and components, which can be recycled and reused. When this crossed-out wheeled bin symbol is attached to a product it means that the product is covered by the European Directive 2002/96/ EC. Please inform yourself about the local separate collection system for electrical and electronic products. Please act according to your local rules and do not dispose of your old products with your normal household waste.
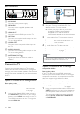
a This section includes an overview of the remote control. b 1 2 3 23 22 8 9 10 • 21 d Navigation buttons • Navigate menus. • In video mode, press left or right to fast backward or fast forward; press up or down to slow backward or slow forward. In radio mode, press left or right to search a radio station; press up or down to fine tune a radio frequency. 20 • 19 18 e OK 17 f Confirm an entry or selection. g 11 BACK Return to a previous menu screen.
m KARAOKE Access karaoke options. n MIC VOL +/- Increase or decrease the microphone volume. o VOCAL Turn the vocals on or off. p SUBTITLE Select subtitle language for video. q AUDIO SYNC • Select an audio language or channel. • Press and hold to access audio delay setting, then press +/- to delay the audio to match the video. r SURR Select surround sound or stereo sound. s (Stop) Stop play. t (Play/Pause) Start, pause or resume play.
•• Surround sound depends on factors such as room shape and size, type of wall and ceiling, windows and reflective surfaces, and speaker acoustics. Experiment with the speaker positions to find the optimum setting for you. Follow these general guidelines, and then set up your speakers. Seating position: This is the center of your listening area. FRONT CENTER (front center) speaker: Place the center speaker directly in front of the seating position, either above or below your TV.
Back connectors TV a AC MAINS Connect to the power supply. b SPEAKERS Connect to the supplied speakers and subwoofer. 2 c HDMI OUT Connect to the HDMI input on the TV. d OPTICAL Connect to an optical audio output on the TV or a digital device. e VIDEO OUT Connect to the composite video input on the TV. 3 4 f AUDIO IN-AUX Connect to an analog audio output on the TV or an analog device. Connect to TV Connect your home theater to a TV to watch videos.
2 3 On your TV, switch to the correct video input. To play audio from TV programs through your home theater, connect an additional audio cable (see ‘Connect audio from TV and other devices’ on page 11). On your home theater, press SOURCE repeatedly to select the correct audio input. Basic quality audio Using an analog cable, connect the AUX connectors on your home theater to the AUDIO OUT connectors on the TV or other device.
5 Use your home theater This section helps you use the home theater to play media from a wide range of sources. Before you start • Make the necessary connections described in the Quick start guide and the user manual. • Switch the TV to the correct source for the home theater. Choose sound This section helps you choose the ideal sound for your video or music. Sound mode Select predefined sound modes to suit your video or music. Press SOUND repeatedly to select a sound mode.
Display menu for MP3/JPEG Button Action Navigation buttons OK (Play/ Pause) Navigate menus. Confirm an entry or selection. Start, pause or resume play. Stop play. Skip to the previous or next / track, chapter or file. Fast backwards or fast / forwards. Press repeatedly to change the search speed. Navigation Rotate the picture clockwise or buttons (left/ counter-clockwise. right) Navigation Flip the picture vertically or buttons (up/ horizontally. down) SUBTITLE Select subtitle language for video.
Play files 1 2 3 4 Connect the USB storage device to the home theater. Press USB. »» A content browser is displayed. Select a file, and then press OK. Press the playback buttons to control play (see ‘Play buttons’ on page 13). DivX Play DivX videos from : • a disc (see ‘Discs’ on page 12), • a USB storage device (see ‘USB storage devices’ on page 13). VOD code for DivX Before you purchase DivX videos and play them on your home theater, register the home theater on www.divx.com using the DivX VOD code.
1 2 3 4 5 6 Connect a karaoke microphone to the MIC connector on your home theater. Switch your TV to the correct source for your home theater. Play a karaoke disc. Press VOCAL to turn off the vocals and sing through the microphone. Press MIC VOL +/- to change the microphone volume. Press KARAOKE repeatedly to select a Karaoke option, the press Navigation buttons (left/right) and OK to change the settings. • [Mic Off]/[Mic On]: Turn the microphone on or off.
Picture slideshows Button Action View a slideshow of your pictures stored in your disc or a USB storage device. Select a picture from a disc or USB storage . device, and then press Press to stop the slideshow. / Navigation buttons (left/right) Navigation buttons (up/down) Select a preset radio station. Search for a radio station. 1 2 Musical slideshows Create a musical slideshow to play music and pictures at the same time. Select a music track, and then press OK.
MP3 player CREATE MP3 1 2 3 Connect the MP3 player to the home theater as described in the Quick start guide. Press AUDIO SOURCE repeatedly until ‘MUSIC I-LINK’ appears on the display panel. Press the buttons on the MP3 player to select and play audio files or music. 1 2 3 4 Select [Yes], and then press OK. »» The create MP3 screen is displayed. The right panel contains MP3 settings and the left panel shows the audio tracks.
EasyLink The home theater supports Philips EasyLink, which uses the HDMI-CEC (Consumer Electronics Control) protocol. EasyLink-compliant devices that are connected through HDMI can be controlled by a single remote control. Philips does not guarantee 100% interoperability with all HDMI-CEC devices. What you need • HDMI-CEC compliant devices. • An HDMI connection between the connected devices. Switch on 1 2 3 4 5 On the TV and other connected devices, turn on the HDMI-CEC operations.
Change settings This section helps you to change the settings of your home theater. Caution •• Most of the settings are already configured with the best value for your home theater. Unless you have a reason to change a setting, it is best to leave it at the default value. Note •• You cannot change a setting that is grayed out. •• To return to the previous menu, press BACK. To exit the menu, press SETUP. Picture Change the picture settings to suit your preferences.
Language 4 Select a language for the home menu, audio, and subtitles. Home menu 1 2 3 4 Press SETUP. Select [General Setup], and then press OK. Select [OSD Language], and then press OK. Select a menu language for your home theater, and then press OK. Disc audio 1 2 3 4 Press SETUP. Select [Preference Setup], and then press OK. Select [Audio], and then press OK. Select an audio language for discs, and then press OK.
Screen saver To restrict access to discs that are not encoded with ratings and parental control, lock the disc manually. You can lock upto 20 discs on your home theater. While playing a disc, press SETUP. Select [General Setup], and then press OK. Select [Disc Lock] > [Lock], and then press OK. »» A message prompts you to enter the password. Automatically switch your home theater to screen saver mode if: • it is in pause or stop mode, and • no button is pressed for 10 minutes. Press SETUP.
7 Update software To continue to get the best features and support for your home theater, update the software regularly. Compare the version of your current software with the latest version on www.philips. com/support. Check software version 1 2 3 Press SETUP. Select [Preference Setup], and then press OK. Select [Version Info.], and then press OK. »» The software version is displayed. Update software through USB or CD-R What you need • A CD-R or a USB flash drive with at least 75MB of memory.
Product specifications Amplifier • • • Note • •• Specifications and design are subject to change without notice. Video Region codes The type plate on the back or bottom of the home theater shows which regions it supports.
• • • • • Latin America/Asia Pacific: 110-240V~, 50-60 Hz Power consumption: 55 W Standby power consumption: ≤ 0.9 W Dimensions (WxHxD): 360 x 58 x 325 mm Weight: 2.3 kg Subwoofer • • • • • • Output power: 50 W RMS (30% THD) Impedance: 4 ohm Speaker drivers: 133 mm (5.25”) woofer Dimensions (WxHxD): 160 x 265 x 265 mm Weight: 2.50 kg Cable length: 3 m Speakers Center speaker: • Output power: 50 W RMS (30% THD) • System: 1 x 63.5 mm (2.5”) full range • Speaker impedance: 4 ohm • Speaker drivers: 1 x 63.
No sound from home theater speakers. • Connect the audio cable from your home theater to your TV or other devices (see ‘Connect audio from TV and other devices’ on page 11). • Set up the audio for the connected device (see ‘Set up audio for connected devices’ on page 11). • Reset your home theater to its factory settings (see ‘Apply factory settings’ on page 21), then switch it off and switch on again. • On your home theater, press SOURCE repeatedly to select the correct audio input.
10 Index A amplifier audio HDMI audio predefined modes quality settings source speaker setup specifications audio language audio options auto standby B brightness 23 19 12 11 19 11 9 23 20 15 21 21 C care environment product connect audio (analog cable) audio (optical cable - digital) audio from TV and other devices speakers TV (Composite) TV (HDMI) connectors front connectors control disc play Easylink (HDMI-CEC) main unit parental control radio copyright protection create MP3 6 5 11 11 11 9 10 10
language audio disc menu onscreen menu subtitle 20 20 20 20 M main unit overview specifications troubleshooting manually setup speakers media formats MP3 connector create MP3 display contents play N night mode O one-touch play one-touch standby options picture overview connectors HDMI-CEC main unit remote control settings speaker setup 6 23 24 9 23 9 17 13 17 12 18 18 15 9 18 6 7 19 9 picture options play discs MP3 radio slideshows troubleshooting USB position connectors position preference audio
S safety disposal use of the product screen saver settings audio auto standby default disc language HDMI audio HDMI video HDMI-CEC menu language parental rating password picture power restore screen saver sleep timer subtitle language video setup speakers manually sleep timer slideshows musical picture software check current version update sound predefined sound mode surround sound synchronize picture and sound troubleshooting speakers connect manual setup position setup specifications surround sound subti
Language Code
© 2011 Koninklijke Philips Electronics N.V. All rights reserved.