Micro Hi-Fi System MC145 User PÛÍÓ‚Ó‰ÒÚ‚Ó ÔÓθÁÓ‚‡ÚÂÎfl pg001-020_MC145_98_Eng 1 10/1/06, 11:40
pg001-020_MC145_98_Eng 2 10/1/06, 11:40 MC-320/22-1
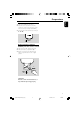
* 4 7 3 0 ( 5 0 8 6 ! $ 9 & # 1 9 2 3 4 5 6 0 ! @ # $ 7 % 8 ^ 3 pg001-020_MC145_98_Eng 3 3 10/1/06, 11:40 xxxxx
CAUTION Use of controls or adjustments or performance of procedures other than herein may result in hazardous radiation exposure or other unsafe operation.
English Index English ------------------------------------------------ 6 Р ус с к и й -------------------------------------------------------- 21 êÛÒÒÍËÈ ---------------------------------------------------------- 36 5 pg001-020_MC145_98_Eng 5 10/1/06, 11:40 xxxxx
Contents English General Information Maintenance .............................................. 16 Environmental information ................................ 7 Supplied accessories ............................................ 7 Safety information ................................................ 7 Clock/Timer Preparation Rear connections ............................................. 8–9 Before using the remote control ...................... 9 Replacing battery (lithium CR2032) into the remote control ..
Supplied accessories – 2 speaker boxes – remote control with battery Environmental Information All unnecessary packaging has been omitted. We have tried to make the packaging easy to separate into three materials: cardboard (box), polystyrene foam (buffer) and polyethylene (bags, protective foam sheet). Your system consists of materials which can be recycled and reused if disassembled by a specialized company.
Preparations English FM antenna Speaker (right) Speaker (left) FM ANT 110V 220V AC ~ AC power cord Rear connections B Speakers Connection The type plate is located at the back of the system. A Power – Before connecting the AC power cord to the wall outlet, ensure that all other connections have been made. – If your system is equipped with a Voltage Selector, set the VOLTAGE SELECTOR to the local power line voltage. WARNING! – For optimal performance, use only the original power cable.
English Preparations Before using the remote control 1 2 3 Pull out the plastic protective sheet. Select the source you wish to control by pressing one of the source select keys on the remote control (for example CD, TUNER). Then select the desired function (for example É, í, ë). Replacing battery (lithium CR2032) into the remote control 1 Pull out the knob A slightly to the right. 2 Pull out the battery compartment B .
Controls (illustrations on page 3) English Controls on the system and remote control # DBB (Dynamic Bass Boost) – 1 LCD Display – – % shows the status of the system. enhances the bass. G / H (3 / 4 on remote control) adjusts volume level. . $ VOLUME 2 iR SENSOR – – ^ Tape Deck Operation infrared sensor for remote control. 3 PROG OPEN•CLOSE ..Opens the tape key cover. RECORD 0 ....... starts recording. PLAY 2 ................. starts playback. à / á ...............
English Basic Functions Adjusting volume and sound IMPORTANT: Before you operate the system, complete the preparation procedures. Switching the system on ● Press POWER (y on the remote control) or SOURCE. ➜ The system will switch to the last selected source. ● Press SOURCE (CD, TUNER or TAPE on the remote control). ➜ The system will switch to the selected source. 1 Press VOLUME G / H (3 / 4 on remote control) to increase or decrease volume. ➜ Display shows the volume level UoL and a number from 0-32.
CD Operation English 4 Press 2; to start playback. ➜ Current track number followed by elapsed playing time of the track are displayed during disc playback. ➜ Press DISPLAY/CLOCK to display total remain playing time. 5 To pause playback press 2;. Press 2; again to resume play. ➜ Display: The elapsed time flashes when playback is paused. 6 To stop disc playback, press 9. Note: CD play will also stop when; – the CD door is opened. – the disc has reached the end. – you select another source: TAPE, TUNER.
Programming track numbers Different play modes: SHUFFLE and REPEAT Programme in the STOP position to select and store your disc tracks in the desired sequence. If you like, store any track more than once. Up to 20 tracks can be stored in the memory. You can select and change the various play modes before or during playback. REPEAT ............ plays the current track continuously REPEAT ALL ... repeats the entire disc/ programme SHUFFLE .........
Radio Reception English Programming radio stations You can store up to a total of 20 (10 FW and 10 MW) radio stations in the memory. Automatic programming Automatic programming will start with a chosen preset number 1. From this preset number upwards, former programmed radio stations will be overridden. 1 Press STOP/BAND (on the set) or TUNER (on the remote control) once or more to select your waveband.
English Tape Operation / Recording General information on recording Tape playback 1 Select TAPE source. ➜ Display: shows operation. throughout tape 2 Pull down the plate marked “OPEN•CLOSE” at the bottom of the main set. 3 Press STOP•OPENÇç to open the tape door. ● Recording is permissible insofar as copyright or other rights of third parties are not infringed. ● For recording, use only NORMAL (IEC type I) tapes on which the tabs have not yet been broken.
Tape Operation / Recording English To select and record a particular passage within a CD track: ● Press and hold down on à or á. Release the control when you recognize the passage you want. ● To interrupt CD playback press 2; . ● Recording starts from this exact point in the track when you press RECORD 0. 6 7 Recording from the radio 1 Tune to the desired radio station (see Tuning to radio stations). 2 Press STOP•OPENÇç to open the tape door. 3 To pause, press PAUSE Å. Press again to resume.
Setting the timer ● The system can be used as an alarm clock. CD or TUNER can be set to switch on at a preset time. The clock time needs to be set first before the timer can be used. ● If no button is pressed within 90 seconds during timer setup, the system will exit timer setting mode automatically. Setting the clock 1 In Standby mode, press DISPLAY/CLOCK button. ➜ The clock digits for the hours flash. 2 3 Press ¡1 / 2™ to set the hours. 4 5 Press ¡1 / 2™ to set the minutes.
Clock/Timer English Activating and deactivating SLEEP The sleep timer enables the system to switch off by itself after a set period of time. ● Press SLEEP on the remote control repeatly to select desired time before system shuts off. ➜ Display shows SLEEP and series of time options for selection: 60, 45, 30,15, 0, 60. ● To deactivate, press SLEEP on the remote control once or more until ‘0’ is shown, or press POWER / y on the system or remote control. Specifications AMPLIFIER Output power ................
WARNING Under no circumstances should you try to repair the system yourself, as this will invalidate the warranty. Do not open the system as there is a risk of electric shock. If a fault occurs, first check the points listed below before taking the system for repair. If you are unable to remedy a problem by following these hints, consult your dealer or service centre. Problem Solution CD OPERATION “no cd” is displayed. – Insert a disc. – Check if the disc is inserted upside down.
Troubleshooting English The remote control does not function properly. The timer is not working. The Clock/Timer setting is erased. – Select the source (CD or TUNER, for example) before pressing the function button (É,í,ë). – Reduce the distance between the remote control and the system. – Insert the batteries with their polarities (+/– signs) aligned as indicated. – Replace the batteries. – Point the remote control directly toward IR sensor on the front of the system. – Set the clock correctly.