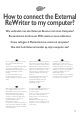
How to...
US D F 2 Contents Inhalt Table des matières I Indice NL Inhoud How to connect the External ReWriter to my computer? How to disconnect the External ReWriter without shutting down the computer? How to capture video from a digital DV-camcorder? How to make a video disc from video files which are on the hard disk or a disc? How to copy a disc? How to make a Data disc? How to make an Audio disc? Warranty, Environment, Safety and Frequently Asked Questions (FAQ) Wie verbindet man den Externen Brenner
E PT TR Índice Índice İçindekiler PL Spis treści SV Innehåll ¿Cómo conectar Grabadora externa al ordenador? ¿Cómo desconectar Grabadora externa sin apagar el ordenador? ¿Cómo capturar secuencias de vídeo de una videocámara digital DV? ¿Cómo crear un disco de vídeo a partir de archivos de vídeo en el disco duro u otro disco? ¿Cómo copiar un disco? ¿Cómo crear un disco de datos? ¿Cómo crear un disco de audio? Garantía, Medioambiente, Seguridad y Preguntas frecuentes (FAQ) 57 67 69 Como ligar o Gra
How to connect the External ReWriter to my computer? Wie verbindet man den Externen Brenner mit einen Computer? Raccordement du Graveur DVD externe à mon ordinateur Come collegare il Masterizzatore esterno al computer? Hoe sluit ik de Externe brander op mijn computer aan? US The next pages show how to connect your new External ReWriter to a computer. Since there are many brands and types of computers available, the next photographs show only examples on how your External ReWriter could be installed.
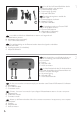
US You will find an External ReWriter device and following cables in the retail box: A: External rewriter device. B: Power supply (2 parts). C: HiSpeed USB Cable. 1 D Der Verpackungskarton enthält die folgenden Teile: A: Externer Brenner Laufwerk. B: Netzteil (2 Teile). C: HiSpeed USB-Kabel.
3 US Connect the power cables together and connect them to the External ReWriter and a power outlet. D Verbinden Sie die Stromversorgungskabel miteinander und mit dem Externen Brenner und einer Steckdose. F Raccordez les câbles d’alimentation l’un à l’autre puis branchez-les au Graveur DVD externe et à une prise secteur. I Collegate i cavi di alimentazione tra loro e collegateli tra il Masterizzatore esterno ed una presa elettrica.
US Search for the HiSpeed USB connector on your PC. A: Logo for the preferred HiSpeed USB or connector. B: Logo for the alternative LowSpeed USB connector. When connected to LowSpeed USB (or USB 1.x), speeds are limited (4x writing and 6x reading on CD, 0,7x reading on DVD) and it is not possible to write on DVD or to watch video. 5 D Suchen Sie den HiSpeed USB-Anschluss an Ihrem PC. A: Logo für den bevorzugten HiSpeed USBAnschluss. B: Logo für den alternativen LowSpeed USBAnschluss.
7 US D Schließen Sie das USB-Kabel an den Computer an. F Branchez le câble USB à l’ordinateur. I Collegate il cavo USB al computer. NL 8 Connect the USB cable to the computer. Sluit de USB-kabel op de computer aan. US Windows XP will warn you when you connect the External ReWriter to a slow USB 1 connection. Check step 5 again. This is valid for Windows XP only. D Windows XP warnt Sie, wenn Sie den Externen Brenner mit einem langsamen USB 1-Anschluss verbinden. Kontrollieren Sie erneut Schritt 5.
US Insert the Nero Disc in the External ReWriter. Go to step 15! 10 D Legen Sie die Nero-CD in den Externen Brenner-Laufwerk ein. Fahren Sie mit Schritt 15 fort! F Insérez le disque Nero dans le Graveur DVD externe. Passez à l'étape 15. I Inserite il disco di Nero nel Masterizzatore esterno. Procedete al punto 15! NL Leg de Nero-CD in de Externe brander. Ga naar stap 15! US Windows 98 Second Edition only! Insert the Nero disc in the CD-ROM device of your computer, not in the External ReWriter.
12 US Windows 98 Second Edition only! Wait until this screen pops up. D Nur Windows 98 Second Edition! Warten Sie, bis diese Anzeige erscheint. F Windows 98 Deuxième Édition uniquement ! Attendez que cet écran apparaisse. I Solo per Windows 98 Second Edition! Attendete la comparsa di questa finestra. NL Alleen voor Windows 98 Tweede Edition! Wacht tot het volgende scherm verschijnt. 13 US Windows 98 Second Edition only! Connect the USB cable to the computer.
US Windows 98 Second Edition only! The "Add New Hardware Wizard" will pop up. Follow these steps: A. Click “Next” in "The wizard searches for new drivers…:". B. Choose "Search for the best drivers…". C. Choose "Specify a location". D. Browse to the directory "Philips drivers" on the Nero disc and click Next. E. The drivers will be installed. F. Continue with step 15. D Nur Windows 98 Second Edition! Der Assistent zum Hinzufügen neuer Hardware ("Add New Hardware Wizard") erscheint.
15 US Click on "Install Suite" to install the main software. The software will ask to reboot the PC at the end of the installation process. D Klicken Sie auf "Suite installieren", um die Haupt-Software zu installieren. Die Software fordert Sie am Ende des Installationsvorgangs auf, den PC neu zu booten. F Cliquez sur "Install Suite" (installer la suite) pour installer le programme principal. À la fin de l’installation, vous êtes invité à redémarrer le PC.
US After installing the software, you should reboot your computer. Congratulations. Your Philips device is now ready for use. How to use it and what software applications you need to perform your tasks, is described in the next chapters of this How To Manual. D Nach der Installation der Software sollten Sie Ihren Computer neu starten. Herzlichen Glückwunsch. Ihr Philips Gerät ist jetzt einsatzbereit.
How to disconnect the External ReWriter without shutting down the computer? Wie kann man die Verbindung zum Externen Brenner trennen, ohne den Computer herunterzufahren? Comment débrancher le Graveur DVD externe sans arrêter l’ordinateur? Come si disconnette il Masterizzatore esterno senza spegnere il computer? Hoe ontkoppel ik de Externe brander zonder de computer uit te zetten? US The next pages show how to disconnect your new External ReWriter to a computer.
US To disconnect the External ReWriter without shutting down your computer, click on this symbol. 1 D Um die Verbindung zum Externen Brenner zu trennen, ohne den Computer herunterzufahren, klicken Sie auf dieses Symbol. F Pour déconnecter le Graveur DVD externe sans arrêter l’ordinateur, cliquez sur cette icône. I Per disconnettere il Masterizzatore esterno senza spegnere il computer, fate clic su questo simbolo.
How to capture video from a digital DV-camcorder? Videos von einem digitalen DV-Camcorder aufnehmen Comment acquérir les images vidéo d’une caméra numérique DV ? Come registrare un video da una DV-camcorder digitale Hoe kopieer ik de opnames van een digitale DV-camcorder naar mijn computer? US This manual shows an example on how to capture video from a digital DV-camcorder which is connected via FireWire (IEEE1394) to the computer.
US Start "Nero StartSmart" from the desktop. 1 D Starten Sie "Nero StartSmart" von Ihrer Oberfläche aus. F Lancez "Nero StartSmart" depuis le bureau. I Aprire "Nero StartSmart" dal desktop. Start "Nero StartSmart" vanaf het bureaublad. NL US Connect your camera to the computer and switch it on. 2 D Verbinden Sie Ihre Kamera mit dem Computer und schalten Sie sie ein. F Connectez votre caméra à l’ordinateur et allumez-la. I Collegare la camera al computer ed accendere.
4 US Choose your DV-Camcorder and use the buttons to control your DV-camera. Press the "Record" button to record video. D Wählen Sie Ihren DV-Camcorder und benutzen Sie die Tasten, um Ihre DV-Kamera zu steuern. Drücken Sie die Taste "Aufnehmen", um Videoinformationen aufzunehmen. F Choisissez votre caméscope DV et utilisez les boutons de commande. Appuyez sur le bouton "Enregistrer" pour enregistrer de la vidéo. I Selezionate il Camcorder DV ed utilizzate i tasti per controllare la camera-DV.
US Choose "Make DVD with captured video" and "DVD-Video". 7 D Wählen Sie "DVD mit aufgenommenen Videodaten erstellen" und "DVD-Video". F Choisissez "Créer un DVD avec la vidéo capturée" et "DVD-Vidéo". I Selezionare "Crea DVD con video acquisito" e "DVD-Video". NL Kies "DVD met vastgelegde video maken" en dan "DVD-Video". US D Now, go to step 5 of the next chapter (How to make a video disc from files…) to continue.
How to make a video disc from video files which are on the hard disk or a disc? Wie erstellt man eine Video Disk von Video-Dateien,die sich auf der Festplatte oder einer Disk befinden? Comment créer un disque vidéo à partir de fichiers vidéo enregistrés sur le disque dur ou sur un disque ? Come si crea un video disc con file video memorizzati sull'hard disk o su un disco? Hoe maak ik een videodisc met bestanden die nu op de harde schijf of een andere disc staan? US This manual will show you how to make a D
US Start "Nero StartSmart" from the desktop. Starten Sie "Nero StartSmart" von Ihrer Oberfläche aus. D F Lancez "Nero StartSmart" depuis le bureau. I Aprire "Nero StartSmart" dal desktop. 1 Start "Nero StartSmart" vanaf het bureaublad. NL US Choose "Photo and video" and "Make DVD-Video". 2 D Wählen Sie "Foto und Video" und "Eigenes DVD-Video erstellen". F Choisissez "Photo et vidéo" puis cliquez sur "Créer votre propre DVD-vidéo". I Selezionare "Foto e video" e "Creare il proprio DVD-Video".
4 US Choose the files you want to add and click "Open". D Wählen Sie die hinzuzufügenden Dateien und klicken Sie auf "Öffnen". F Sélectionnez les fichiers à ajouter puis cliquez sur "Ouvrir". I Selezionare i file da aggiungere e fare clic su "Apri" NL Kies de bestanden die u wilt toevoegen en klik op "Openen". 5 US The movies you loaded are shown here. You can edit them by choosing "Edit Movie". D Hier werden die geladenen Filme gezeigt. Sie können sie editieren, indem Sie "Film bearbeiten" wählen.
US You can also trim the recorded video. When done, choose "Next". 7 D Sie können das aufgezeichnete Videomaterial auch schneiden. Wenn Sie fertig sind, wählen Sie "Weiter". F Vous pouvez également couper la vidéo enregistrée. Lorsque vous avez terminé, choisissez "Suivant". I E' anche possibile tagliare il video registrato. Al termine, fare clic su "Avanti". NL Ook kunt u de opgenomen video verfraaien. Klik op "Volgende" zodra u tevreden bent. US After editing all files, choose "Next".
10 US You can change the layout, the background, add titles, … here. When done, choose "Next". D Hier können Sie das Layout und den Hintergrund ändern, Titel hinzufügen, usw. Wenn Sie fertig sind, wählen Sie "Weiter". F Cet écran vous permet de modifier la disposition, l'arrière-plan, d'ajouter des titres, etc. Lorsque vous avez terminé, choisissez "Suivant". I Qui è possibile modificare la disposizione, lo sfondo, aggiungere titoli.... Al termine, fare clic su "Avanti".
US NeroVision Express is transcoding and burning your disc. 13 D NeroVision Express transcodiert und brennt Ihre Disk. F NeroVision Express procède au transcodage et à la gravure de votre disque. I NeroVision Express è in fase di trascodifica e scrittura del disco. NL NeroVision Express zet de informatie om en brandt die op de disc. US Congratulations, your disc has been written successfully. Click "OK". You may exit the application now. D Herzlichen Glückwunsch – Ihre Disk wurde erfolgreich erstellt.
How to copy a disc? Eine Disk kopieren Comment copier un disque? Come copiare un dischi? Hoe kopieer ik een disc? US This manual shows an example of how to copy a disc. I Questo manuale contiene informazioni su come copiare un dischi. D In diesem Handbuch wird an einem Beispiel gezeigt, wie eine Disk kopiert wird. F Ce manuel illustre la procédure de copie d’un disque. NL Deze handleiding beschrijft het kopiëren van een disc.
US Start "Nero StartSmart" from the desktop. Starten Sie "Nero StartSmart" von Ihrer Oberfläche aus. D F Lancez "Nero StartSmart" depuis le bureau. I Aprire "Nero StartSmart" dal desktop. 1 Start "Nero StartSmart" vanaf het bureaublad. NL US Choose "Copy and Backup" and click "Copy CD" or "Copy DVD". 2 D Wählen Sie "Kopieren und Sichern" und klicken Sie auf "CD kopieren" oder "DVD kopieren". F Choisissez "Copier et sauvegarder" puis cliquez sur "Copier CD" ou "Copier DVD".
4 US Choose the destination drive. D Wählen Sie das Ziellaufwerk. F Choisissez l’unité de destination. I Selezionare drive di destinazione. NL 5 Kies het doelstation. US If possible, you may mark the checkbox "Quick copy" if your source drive is fast enough. Otherwise, unmark the checkbox. Click "Burn". D Wenn Ihr Quelllaufwerk schnell genug ist, können Sie bei Bedarf das Kästchen "Direktkopie" ankreuzen. Andernfalls löschen Sie das Kreuz oder Häkchen in dem Kästchen. Klicken Sie auf "Kopieren".
US "Nero" will now burn your disc. D "Nero" wird jetzt Ihre Disk brennen. F "Nero" grave alors votre disque. I "Nero" inizierà a scrivere sul disco. NL "Nero" zal nu uw CD branden. US Congratulations, your disc has been written successfully. Click "OK". You may exit the application now. D Herzlichen Glückwunsch – Ihre Disk wurde erfolgreich erstellt. Klicken Sie auf "OK". Sie können jetzt die Anwendung verlassen. F Félicitations, votre disque est prêt. Cliquez sur "OK".
How to make a Data disc? Eine Daten-Disk erstellen Comment créer un disque de données ? Come creare un dischi di dati? Hoe maak ik zelf een data-disc? US This manual shows you an example of how to make a Data disc. I Questo manuale contiene informazioni su come creare un dischi di dati. D In diesem Handbuch wird an einem Beispiel gezeigt, wie eine Daten-Disk erstellt wird. F Ce manuel illustre la procédure de création d’un disque de données.
US Start "Nero StartSmart" from the desktop. Starten Sie "Nero StartSmart" von Ihrer Oberfläche aus. D F Lancez "Nero StartSmart" depuis le bureau. I Aprire "Nero StartSmart" dal desktop. 1 Start "Nero StartSmart" vanaf het bureaublad. NL US Choose "Data" and click "Make a data CD" or "Make a data DVD". 2 D Wählen Sie "Daten" und klicken Sie auf "Daten CD erstellen" oder "Daten DVD erstellen". F Choisissez "Données" puis cliquez sur "Créer un CD de données" ou "Créer un DVD de données".
4 US Choose the files to burn and click "Add". Wählen Sie die zu brennenden Dateien und klicken Sie auf "Hinzufügen". D F Choisissez les fichiers à graver puis cliquez sur "Ajouter". I Selezionare i file da scrivere e fare clic su "Aggiungi". NL Selecteer de bestanden die u op de disc wilt branden en klik op "Toevoegen". 5 US When all files are added, click "Finished". Wenn alle Dateien hinzugefügt sind, klicken Sie auf "Fertig". D F Une fois tous les fichiers ajoutés, cliquez sur "Terminé".
US Choose the drive you use for burning and click "Burn". 7 D Wählen Sie das Laufwerk zum Brennen der Disk und klicken Sie auf "Brennen". F Choisissez le lecteur à utiliser pour la gravure puis cliquez sur "Graver". I Selezionare l'unità da utilizzare per la scrittura e fare clic su "Scrivi". NL Kies de recorder waarmee u de disc wilt branden en klik op "Branden". US D Legen Sie eine leere Disk ein. F Insérez un disque vierge. I Inserire un disco vuoto. NL Plaats een lege disc in uw recorder.
10 US Congratulations, your disc has been written successfully. Click "OK". You may exit the application now. D Herzlichen Glückwunsch – Ihre Disk wurde erfolgreich erstellt. Klicken Sie auf "OK". Sie können jetzt die Anwendung verlassen. F Félicitations, votre disque est prêt. Cliquez sur "OK". Vous pouvez maintenant fermer l’application. I Congratulazioni, il disco è stato scritto correttamente. Fare clic su "OK". Ora è possibile chiudere l'applicazione. NL Gefeliciteerd! Uw disc is met succes gebrand.
How to make an Audio disc? Erstellen einer Audio-Disk Comment créer un disque audio ? Come creare un dischi Audio? Hoe maak ik zelf een muziek-disc? US This manual shows you an example of how to make an Audio disc which can be played in any CD-Player I Questo manuale contiene informazioni su come creare un dischi Audio che potrà essere letto da un CD-Player. D F n diesem Handbuch wird beschrieben, wie eine Audio-Disk erstellt wird, die von jedem CD-Player abgespielt werden kann.
US Start "Nero StartSmart" from the desktop. Starten Sie "Nero StartSmart" von Ihrer Oberfläche aus. D 1 F Lancez "Nero StartSmart" depuis le bureau. I Aprire "Nero StartSmart" dal desktop. Start "Nero StartSmart" vanaf het bureaublad. NL US Choose "Audio" and "Make Audio CD". Wählen Sie "Audio" oder "Audio CD erstellen". 2 D F Choisissez "Audio" puis "Créer un CD audio". I Selezionare "Audio" e fare clic su "Crea CD audio". NL Kies "Audio" en dan "Audio-cd maken". US Click "Add".
4 US Select the audio files (*.wav) you want to have on your new audio disc and click "Add". D Wählen Sie die Audio-Dateien (*.wav), die Sie auf Ihrer neuen Audio-Disk wünschen, und klicken Sie auf "Hinzufügen". F Sélectionnez les fichiers audio (*.wav) que vous souhaitez placer sur le nouveau disque puis cliquez sur "Ajouter". I Selezionare i file audio (*.wav) da includere nel nuovo disco audio e fare clic su "Aggiungi". NL Selecteer de audiobestanden (*.
US Choose your recorder and click "Burn". Wählen Sie Ihren Recorder und klicken Sie auf "Brennen". D 7 F Choisissez le périphérique d'enregistrement puis cliquez sur "Graver". I NL Kies uw recorder en klik op "Branden". US Insert an empty disc. D Legen Sie eine leere Disk ein. F Insérez un disque vierge. I Inserire un disco vuoto. NL Plaats een lege disc in uw recorder. US "Nero" will now burn your disc. D "Nero" wird jetzt Ihre Disk brennen. F "Nero" grave alors votre disque.
10 US Congratulations, your disc has been written successfully. Click "OK". You may exit the application now. D Herzlichen Glückwunsch – Ihre Disk wurde erfolgreich erstellt. Klicken Sie auf "OK". Sie können jetzt die Anwendung verlassen. F Félicitations, votre disque est prêt. Cliquez sur "OK". Vous pouvez maintenant fermer l’application. I Congratulazioni, il disco è stato scritto correttamente. Fare clic su "OK". Ora è possibile chiudere l'applicazione. NL Gefeliciteerd! Uw disc is met succes gebrand.
US Warranty,Environment,Safety and Frequently Asked Questions (FAQ) How to find warranty information? 1 2 3 4 Insert the Nero disc again, and click "Exit". Click on the "My Computer" icon on your desktop or click "Start", "My Computer". Click with the right mouse button on the "Nero" icon and choose "Explore". Choose the "Philips Warranty" folder and you will find the warranty documents.
Frequently Asked Questions (FAQ) Question 1: I have a Windows 98 Second Edition PC and there is no CDROM device in the computer but I have another PC. How do I install the drivers? 1. Start another computer. 2. Insert the Nero disc for the External ReWriter into the CDROM device. 3. Click "Exit" when the Nero Installation screen appears. 4. Click on "My Computer". 5. Click on the "Nero"-logo. 6. Click on the right mouse button and choose "Explore". 7. Go to the directory "Philips Drivers". 8.
Question 6: I inserted a disc and it is not played. 1. Ensure the disc label is facing up. 2. Clean the disc. 3. Check whether the disc has the same region code as the player. 4. Check if the disc is defective by trying another disc. 5. Check to see if the disc is defective, badly scratched or warped (not flat). Question 7: Player does not respond to some operating commands during playback. Check whether a PC connection is active. Unplug the USB cable to de-activate the PC connection.
D Garantie,Umwelt,Sicherheit und Häufig gestellte Fragen (FAQ) Wie findet man Garantie-Informationen? 1 2 3 4 Legen Sie die Nero Disk wieder ein und klicken Sie auf "Exit". Klicken Sie auf das Symbol "My Computer" auf Ihrer Oberfläche oder klicken Sie auf "Start", "My Computer". Klicken Sie mit der rechten Maustaste auf das Symbol "Nero" und wählen Sie "Explore". Wählen Sie den Ordner "Philips Warranty"; hier finden Sie die Garantiedokumente.
Häufig gestellte Fragen (FAQ) Frage 1: Ich habe einen PC mit Windows 98 Second Edition und es befindet sich kein CDROM-Laufwerk im Computer, aber ich habe noch einen anderen PC. Wie kann ich die Treiber installieren? 1. Starten Sie den anderen Computer. 2. Legen Sie die Nero-CD für den Externen Brenner in das CDROM-Laufwerk ein. 3. Klicken Sie auf "Beenden", wenn die Anzeige für die Nero Installation erscheint. 4. Klicken Sie auf "Arbeitsplatz". 5. Klicken Sie auf das "Nero"-Logo. 6.
Frage 5: Das Brennen oder Lesen dauert viel zu lange. Woran liegt das? 1. Sie haben den Externen Brenner mit einem langsamen USB-Anschluss verbunden, der einen sehr begrenzten Durchsatz hat. Verbinden Sie das Laufwerk mit einem Highspeed-USB-Adapter. 2. Eventuell müssen Sie Treiber für Ihren USB-Adapter installieren. Sehen Sie im Handbuch nach oder laden Sie die Treiber von der Website des Herstellers herunter. Frage 6: Ich habe eine CD eingelegt und es wird nichts wiedergegeben. 1.
F Garantie,Environnement,Sécurité et Questions fréquentes (FAQ) Comment trouver les informations relatives à la garantie? 1 2 3 4 Réinsérez le disque Nero et cliquez sur "Quitter". Cliquez sur l’icône "Poste de travail" de votre bureau ou cliquez sur "Démarrer" puis "Poste de travail". Cliquez avec le bouton droit sur l’icône "Nero" et choisissez "Explorer". Choisissez le dossier "Philips Warranty" : vous y trouverez les documents relatifs à la garantie.
Questions fréquentes (FAQ) Question 1 : Je possède un PC fonctionnant sous Windows 98 Deuxième Édition sans lecteur de CD-ROM, mais je possède aussi un autre PC. Comment installer les pilotes ? 1. Démarrez un autre ordinateur. 2. Insérez le disque Nero du Graveur DVD externe dans le lecteur de CD-ROM. 3. Cliquez sur "Exit" lorsque la fenêtre Nero Installation apparaît. 4. Cliquez sur "Poste de travail". 5. Cliquez sur le logo "Nero". 6. Cliquez avec le bouton droit de la souris et choisissez "Explorer". 7.
Question 6 : J’ai inséré un disque, mais la lecture est inopérante. 1. Assurez-vous que l’étiquette du disque est sur le dessus. 2. Nettoyez le disque. 3. Vérifiez que le disque a le même code de zone que le lecteur. 4. Vérifiez si le disque n’est pas défectueux en insérant un autre disque. 5. Vérifiez si le disque n’est pas défectueux, rayé ou gondolé. Question 7 : Le lecteur ne répond pas à certaines commandes pendant la lecture. Vérifiez si la connexion avec le PC est active.
I Garanzia, Ambiente,Sicurezza e Domande frequenti (FAQ) Come si accede alle informazioni sulla garanzia memorizzate? 1 2 3 4 Inserire nuovamente il disco Nero e fare clic su "Esci". Fare clic sull'icona "Risorse del computer" nel desktop oppure fare clic su "Start", "Risorse del computer". Fare un clic destro sull'icona "Nero" e selezionare "Esplora". Selezionare la cartella "Philips Warranty" che contiene i documenti relativi alla garanzia.
Domande frequenti (FAQ) Domanda 1: Utilizzo un PC con Windows 98 Second Edition in cui non è installata un'unità CDROM, ma posseggo un altro PC. Come devo procedere per installare i driver? 1. Avviate l'altro computer. 2. Inserite il disco di Nero per il Masterizzatore esterno nell'unità CDROM. 3. Fate clic su "Exit" (Esci) alla comparsa dello schermo d'installazione di Nero. 4. Fate clic su "Risorse del computer". 5. Fate clic sul logo "Nero". 6. Fate un clic destro e selezionate "Esplora". 7.
Domanda 6: Ho inserito un disco, ma non viene riprodotto. 1. Verificate che l'etichetta del disco sia rivolta verso l'alto. 2. Pulite il disco. 3. Controllate se il disco è codificato per lo stesso codice regionale impostato nel lettore. 4. Controllate se il disco è difettoso, provandone un altro. 5. Verificate la superficie del disco per rilevare difetti, graffi o deformazioni (disco non piano) Domanda 7: Il lettore non risponde ad alcuni comandi operativi, durante la riproduzione.
NL Garantie,Milieu, Veiligheid en Vaak gestelde vragen (FAQ) Waar vind ik informatie over de garantie? 1 2 3 4 Leg de Nero-CD weer in de lade en klik op "Sluiten". Klik op het bureaublad op het pictogram "Deze computer" of klik op "Start" en dan op "Deze computer". Klik met de rechtermuisknop op het pictogram "Nero" en daarna op "Verkennen". Ga naar de map "Philips Warranty". Daar vindt u documentatie over de garantie.
Vaak gestelde vragen (FAQ) Vraag 1: Mijn computer met Windows 98 Tweede Edition heeft geen CD-ROM-station, maar ik heb een andere PC. Hoe kan ik de stuurprogramma's installeren? 1. Start de andere computer op. 2. Leg de Nero-CD voor de Externe brander in het CD-ROM-station. 3. Klik op "Verlaten" zodra het Nero-installatiescherm verschijnt. 4. Klik op "Deze computer". 5. Klik op het "Nero"-logo. 6. Klik met de rechtermuisknop en kies "Verkennen". 7. Ga naar de map "Philips drivers". 8.
Vraag 6: Ik heb een disc geplaatst, maar die wordt niet afgespeeld. 1. Controleer of de disc met de bedrukte zijde naar boven is geplaatst. 2. Maak de disc schoon. 3. Controleer of de disc en de speler dezelfde regiocode hebben. 4. Plaats een andere disc om na te gaan of de eerste defect is. 5. Controleer of de disc defect, sterk bekrast of verbogen is. Vraag 7: Tijdens het afspelen reageert de speler niet op sommige bedieningshandelingen. Controleer of de verbinding met de PC correct is aangesloten.
¿Cómo conectar Grabadora externa al ordenador? Como ligar o Gravador Externo ao meu computador? Bilgisayarıma Harici DVD Yazıcı’yi takma şekli? Jak mogę podłączyć Napęd Zewnętrzny do komputera? Hur ansluter jag Extern DVD brännare till min dator? E En las páginas siguientes se muestra cómo conectar la nueva Grabadora externa a un ordenador.
E En la caja encontrará un dispositivo Grabadora externa y los siguientes cables: A: Dispositivo Grabadora externa. B: Fuente de alimentación (2 piezas). C: Cable HiSpeed USB. 1 PT No pacote do produto Gravador Externo que adquiriu irá encontrar, entre outros, os seguintes itens: A: Dispositivo Gravador Externo. B: Cabo de alimentação (2 peças). C: Cabo USB HiSpeed. TR Perakende kutusunda, bir Harici DVD Yazıcı aygıtı ve aşağıdaki kablolar bulunmaktadır A: Harici DVD Yazıcı aygıtı.
3 E Conecte los cables de alimentación entre sí y conéctelos a Grabadora externa y a una toma eléctrica. PT Ligue os cabos de alimentação entre si e ligue-os em conjunto ao Gravador Externo e a uma tomada eléctrica. TR Güç kablolarını birlikte bağlayıp Harici DVD Yazıcı ve bir güç prizine onları takınız. PL Połącz kable zasilające i podłącz je do Napędu Zewnętrzny i wyjścia zasilania. SV Koppla ihop strömkablarna och anslut dem till Extern DVD brännare och ett strömuttag.
E Busque el conector HiSpeed USB en el PC. A: Logotipo del conector HiSpeed USB preferente. B: Logotipo del conector LowSpeed USB alternativo. Con la conexión a LowSpeed USB (o USB 1.x), las velocidades están limitadas (escritura a 4x y lectura a 6x en CD, lectura a 0,7x en DVD) y no es posible grabar en DVD ni ver vídeo. 5 PT Procure o conector USB HiSpeed no PC. A: Logotipo de ligação ou conector USB HiSpeed preferencial. B: Logotipo de conector USB LowSpeed alternativo.
7 8 E Conecte el cable USB al ordenador. PT Ligue o cabo USB ao computador. TR USB kablosunu bilgisayara takınız. PL Podłącz kabel USB do komputera. SV Anslut USB-kabeln till datorn. E Windows XP le avisará cuando conecte Grabadora externa a una conexión USB 1 lenta. Revise de nuevo el paso 5. Esto es válido sólo para Windows XP. PT O Windows XP irá avisá-lo quando ligar o Gravador Externo a uma ligação USB 1 lenta. Consulte novamente o passo 5. Esta indicação é válida apenas para o Windows XP.
E Inserte el disco de Nero en Grabadora externa. Vaya al paso 15. 10 PT Introduza o disco do software Nero no Gravador Externo. Avance para o passo 15! TR Harici DVD Yazıcı’ye Nero diskini yerleştiriniz. 15. adıma geçiniz! PL Włóż płytę programu Nero do napędu Extern DVD brännare. Przejdź do punktu 15! SV Sätt in Nero-skivan i Extern DVD brännare. Gå till steg 15! E ¡Sólo para Windows 98 Second Edition! Inserte el disco de Nero en la unidad de CD-ROM del ordenador, no en Grabadora externa.
12 E ¡Sólo para Windows 98 Second Edition! Espere a que aparezca esta pantalla. PT Apenas para o Windows 98 Second Edition! Espere até que este ecrã seja apresentado. TR Sadece Windows 98 Second Edition (İkinci Sürüm)! Bu ekran açılıncaya kadar bekleyiniz. PL Dotyczy tylko systemu Windows 98 Second Edition! Zaczekaj, aż zostanie wyświetlony ten ekran. SV Endast Windows 98 Second Edition! Vänta tills den här skärmen visas. 13 E ¡Sólo para Windows 98 Second Edition! Conecte el cable USB al ordenador.
E ¡Sólo para Windows 98 Second Edition! Aparece el "Asistente para agregar nuevo hardware". Siga estos pasos: A. Haga clic en "Siguiente" en "El asistente buscará nuevos controladores…:". B. Seleccione "Buscar los mejores controladores…". C. Seleccione "Especificar una ubicación". D. Busque el directorio "Philips drivers" en el disco de Nero y haga clic en Siguiente. E. Los controladores se instalarán. F. Continúe con el paso 15.
15 E Haga clic en "Install Suite" para instalar el software principal. El programa le pedirá que reinicie el PC al final del proceso de instalación. PT Clique em "Install Suite" (Instalar conjunto) para instalar o software principal. O software irá pedir-lhe que reinicie o PC no final do processo de instalação. TR Ana yazılımın kurulumunu yapmak için "Install Suite" (Yazılım Paketini Kur) üzerine tıklatınız. Kurulum işleminin sonunda yazılım, PC’yi yeniden başlatmanızı isteyecektir.
E Una vez instalado el software, debe reiniciar el ordenador. Enhorabuena. Ahora podrá utilizar el dispositivo Philips. En los capítulos siguientes de este manual se describe cómo utilizar el dispositivo y las aplicaciones de software que necesita para realizar cada tarea. PT Depois de instalar o software, deve reiniciar o seu computador. Parabéns. O seu dispositivo Philips está agora pronto a usar.
¿Cómo desconectar Grabadora externa sin apagar el ordenador? Como desligar o Gravador Externo sem desligar o computador? Bilgisayarı kapatmadan Harici DVD Yazıcı’nin bağlantısını kesme şekli? Jak odłączyć Napęd Zewnętrzny nie wyłączając komputera? Hur kopplar jag bort Extern DVD brännare utan att stänga av datorn? E En las páginas siguientes se explica cómo desconectar su nueva Grabadora externa de un ordenador. Las ilustraciones representan el sistema operativo Microsoft Windows XP™.
E Para desconectar Grabadora externa sin apagar el ordenador, haga clic en este símbolo. 1 Para desligar o Gravador Externo sem desligar o computador, clique neste símbolo. PT TR Bilgisayarınızı kapatmaksızın Harici DVD Yazıcı’nin bağlantısını kesmek için, bu sembol üzerine tıklatınız. PL Aby odłączyć napęd Napęd Zewnętrzny nie wyłączając komputera, kliknij ten symbol. SV Klicka på den här symbolen om du vill koppla bort Extern DVD brännare utan att stänga av datorn.
¿Cómo capturar secuencias de vídeo de una videocámara digital DV? Como capturar vídeos de um DV camcorder digital? Bir dijital/sayısal DV-camcorder’den (DV-kaydedici kamera) nasıl görüntü yakalanır? Przechwytywanie obrazu wideo z kamery cyfrowej DV Hur du fångar video från en digital DV-camcorder E Este manual muestra un ejemplo que explica cómo capturar una secuencia de vídeo de una videocámara digital DV conectada al ordenador mediante el puerto FireWire (IEEE1394).
E Inicie "Nero StartSmart" desde el escritorio. Inicie o "Nero StartSmart" a partir da área de trabalho. PT TR Masaüstünden "Nero StartSmart"ı başlatınız. PL Uruchom program "Nero StartSmart" z pulpitu. SV Starta "Nero StartSmart" från skrivbordet. E Conecte la cámara al ordenador y enciéndala. PT Conecte a sua câmera ao computador e ligue-a. TR Kameranızı bilgisayara takıp çalıştırınız. PL Podłącz kamerę do komputera i uruchom. SV Anslut din kamera till datorn och slå på den.
4 E Seleccione su videograbadora digital y utilice los botones para controlar su cámara digital. Pulse el botón "Grabar" para grabar vídeo. PT Escolha o seu DV Camcorder e use os botões para controlar a sua DV câmera. Pressione o botão "Gravar" para gravar o vídeo. TR DV-Camcorder’ınızı (DV-kaydedici kamera) seçip DV-kameranıza kumanda etmede düğmeleri kullanız. Videoyu kaydetmek için "Kaydet" düğmesine basınız. PL Wybierz posiadaną kamerę DV i użyj przycisków, aby nią sterować.
E Seleccione "Crear DVD con vídeo capturado" y "DVD-Vídeo". 7 PT Escolha "Criar DVD com o vídeo capturado" e "DVD-Video". TR "Yakalanan video ile DVD yap" ve "DVDVideo"yu seçiniz. PL Kliknij "Utwórz DVD z przechwyconych wideo" i "DVD-Video". SV Välj "Skapa DVD med fångad video" och "DVD-video". E PT Ahora pase al paso 5 del siguiente capítulo (Cómo crear vídeo a partir de archivos…) para continuar Agora, vá para a etapa 5 do próximo capítulo (Como criar DVDs de arquivos…) para continuar.
¿Cómo crear un disco de vídeo a partir de archivos de vídeo en el disco duro u otro disco? ?Como criar DVDs de arquivos de vídeo armazenados no disco rígido ou em um disco? Sabit disk ya da bir disk üzerinde bulunan video dosyalarından nasıl bir video diski yapılır? Tworzenie płyty wideo z plików wideo zapisanych na dysku twardym lub płycie Hur du gör en videoskiva från video-filer som finns på en hårddisk eller en skiva? E Este manual le muestra cómo crear un DVD-Vídeo a partir de archivos de origen alma
E Inicie "Nero StartSmart" desde el escritorio. Inicie o "Nero StartSmart" a partir da área de trabalho. PT TR 1 Masaüstünden "Nero StartSmart"ı başlatınız. PL Uruchom program "Nero StartSmart" z pulpitu. SV Starta "Nero StartSmart" från skrivbordet. E Seleccione "Foto y vídeo" y haga clic en "Crear DVD de vídeo proprio". 2 PT Escolha "Foto e Vídeo" e "Crie seu próprio DVD de vídeo". TR "Fotoğraf ve video" ve "Kendi DVD-Video’nu yarat"ı seçiniz.
4 E Seleccione los archivos que desea añadir y haga clic en "Abrir". PT Escolha os arquivos que deseja adicionar e clique em "Abrir". TR Eklemek istediğiniz dosyaları seçip "Aç" üzerine tıklatınız. PL Wybierz pliki, które chcesz dodać i kliknij "Otwórz". SV Välj filerna som ska läggas till och klicka på "Öppna". 5 E Los vídeos que ha cargado se muestran aquí. Puede editarlos seleccionando "Editar película". PT Os filmes carregados serão exibidos aqui. É possível editá-los escolhendo "Editar filme".
E También puede recortar el vídeo grabado. Cuando termine, haga clic en "Siguiente". 7 PT Também é possível fazer adaptações no vídeo gravado. Ao concluir o procedimento, escolha "Avançar". TR Kaydedilen video üzerinde kırpma da yapabilirsiniz. Tamamlandığında, "İleri"yi seçiniz. PL Możesz również przycinać nagrane wideo. Po zakończeniu kliknij "Dalej". SV Du kan också trimma en inspelad video. När du är klar, välj "Nästa". E Cuando haya editado todos los archivos, haga clic en "Siguiente".
10 E Aquí puede cambiar la presentación, el fondo, añadir títulos, etc. Cuando termine, haga clic en "Siguiente". PT É possível alterar o layout, o plano de fundo, adicionar títulos etc. aqui. Ao finalizar o procedimento, clique em "Avançar" duas vezes. TR Burada…, yerleşimi, arkaplanı değiştirebilir, başlık ekleyebilirsiniz. Tamamlandığında, "İleri"yi iki kez seçiniz. PL Tutaj możesz zmienić układ, tło oraz dodać tytuły. Po zakończeniu kliknij dwukrotnie "Dalej".
E NeroVision Express está transcodificando y grabando el disco. 13 PT O NeroVision Express irá transcodificar e gravar o seu disco. TR NeroVision Express; kod çevrimi yapıyor ve diskiniz yazıyor/kaydediyor. PL Program NeroVision Express transkoduje i nagrywa płytę. SV NeroVision Express omvandlar kod och bränner din skiva. E Enhorabuena, su disco se ha grabado correctamente. Haga clic en "Aceptar". Ahora puede cerrar la aplicación. PT Parabéns, o seu disco foi gravado com êxito. Clique em "Não".
¿Cómo copiar un disco? Como copiar um disco? Bir disk nasıl kopyalanır? Kopiowanie płyt Hur du kopierar en skiva E Este manual muestra un ejemplo de cómo copiar un disco. PL Ta instrukcja prezentuje przykładowy sposób kopiowania płyty. PT Este manual mostra um exemplo de como copiar um disco. TR Bu kılavuz, bir diski nasıl kopyalayacağınız hakkında bir örnek göstermektedir. SV Den här bruksanvisningen visar ett exempel på hur du kopierar en skiva.
E Inicie "Nero StartSmart" desde el escritorio. Inicie o "Nero StartSmart" a partir da área de trabalho. PT TR 1 Masaüstünden "Nero StartSmart"ı başlatınız. Uruchom program "Nero StartSmart" z pulpitu. PL SV Starta "Nero StartSmart" från skrivbordet. E Seleccione "Copiar y copia seg." y haga clic en "Copiar CD" o "Copiar DVD". 2 PT Escolha "Fazer cópia" e clique em "Copiar CD" ou "Copiar DVD". TR "Kopyala ve Yedekle"yi seçiniz ve "CD Kopyala" ya da "DVD Kopyala" üzerine tıklatınız.
4 5 E Seleccione la unidad de destino. PT Escolha o drive de destino. TR Hedef sürücüyü seçiniz. PL Wybierz napęd docelowy. SV Välj målenheten. E Si la velocidad de la unidad de origen lo permite, marque la casilla "Copia rápida". En caso contrario, deje la casilla sin marcar. Haga clic en "Copiar". PT Se possível, você poderá marcar a caixa de seleção "Cópia rápida" se a unidade de origem for rápida o suficiente. Caso contrário, desmarque-a. Clique em "Gravar".
E "Nero" grabará ahora el disco. PT O "Nero" irá gravar o seu disco. TR "Nero" artık diskinizin üzerine yazacaktır. PL Program "Nero" rozpocznie nagrywanie płyty. SV "Nero" kommer nu att bränna din skiva. E Enhorabuena, su disco se ha grabado correctamente. Haga clic en "Aceptar". Ahora puede cerrar la aplicación. PT Parabéns, o seu disco foi gravado com êxito. Clique em "OK". Agora, você poderá fechar o aplicativo. TR Tebrikler, diskinize başarıyla yazdırıldı. "OK" üzerine tıklatınız.
¿Cómo crear un disco de datos? Como criar um disco de dados? Bir disk nasıl yaratılır? Nagrywanie płyt z danymi Hur du gör en dataskiva E Este manual muestra un ejemplo de cómo crear un disco de datos. PL Ta instrukcja prezentuje przykładowy sposób nagrywania płyty z danymi. PT Este manual mostra um exemplo de como criar um disco de dados. TR Bu kılavuz, nasıl bir diski nasıl yaratacağınız hakkında bir örnek göstermektedir. SV Den här bruksanvisningen visar ett exempel på hur du gör en dataskiva.
E Inicie "Nero StartSmart" desde el escritorio. Inicie o "Nero StartSmart" a partir da área de trabalho. PT TR 1 Masaüstünden "Nero StartSmart"ı başlatınız. Uruchom program "Nero StartSmart" z pulpitu. PL SV Starta "Nero StartSmart" från skrivbordet. E Seleccione "Datos" y haga clic en "Crear CD de datos" e "Crear DVD de datos". 2 PT Escolha "Dados" e clique em "Criar CD de Dados" ou "Criar DVD de Dados". TR "Veri"yi seçip "Veri CD’si Yarat" ya da "Veri DVD’si Yarat" üzerine tıklatınız.
4 E Seleccione los archivos que desee grabar y haga clic en "Añadir". PT Escolha os arquivos a serem gravados e clique em "Adicionar". TR Kaydedilecek/Yazdırılacak dosyaları seçip "Ekle" üzerine tıklatınız. PL Wybierz pliki do nagrania i kliknij "Dodaj". Välj filerna som ska brännas och klicka på "Lägg till". SV 5 E Una vez añadidos todos los archivos, haga clic en "Finalizado". PT Ao finalizar a inclusão de todos os arquivos, clique em "Concluído".
E Seleccione la unidad para la grabación y haga clic en "Grabar". 7 PT Escolha a unidade utilizada para gravação e clique em "Gravar". TR Yazdırma/kaydetme için kullandığınız sürücüyü seçip "Yazdır" üzerine tıklatınız. PL Wybierz napęd używany do nagrywania i kliknij "Zapis". SV Välj filerna enheten som ska användas för att bränna och klicka på "Bränn". 86 E Ponga un disco vacío. PT Insira um disco vazio. TR Boş bir disk yerleştiriniz. PL Włóż czystą płytę. SV Sätt i en tom skiva.
10 E Enhorabuena, su disco se ha grabado correctamente. Haga clic en "Aceptar". Ahora puede cerrar la aplicación. PT Parabéns, o seu disco foi gravado com êxito. Clique em "OK". Agora, você poderá fechar o aplicativo. TR Tebrikler, diskinize başarıyla yazdırıldı. "OK" üzerine tıklatınız. Şimdi uygulamadan çıkabilirsiniz. PL Gratulacje! Zapis płyty zakończył się pomyślnie. Kliknij "OK". Możesz zakończyć pracę programu. SV Grattis! din skiva har bränts utan fel. Klicka på "OK". Du kan avsluta programmet nu.
¿Cómo crear un disco de audio? Como criar um disco de áudio? Bir Ses diski nasıl yaratılır? Nagrywanie płyt audio Hur du gör en audioskiva E Este manual muestra un ejemplo de cómo crear un disco de audio PL Ta instrukcja prezentuje przykładowy sposób nagrania płyty Audio CD, którą można będzie odtwarzać w dowolnym odtwarzaczu CD. PT Este manual mostra como criar um CD de áudio que poderá ser reproduzido em qualquer CD player.
E Inicie "Nero StartSmart" desde el escritorio. Inicie o "Nero StartSmart" a partir da área de trabalho. PT TR 1 Masaüstünden "Nero StartSmart"ı başlatınız. Uruchom program "Nero StartSmart" z pulpitu. PL SV E Seleccione "Audio" y "Crear CD de audio". PT Escolha "Áudio" e "Criar CD de Áudio". TR "Ses" ve "Müzik/Ses CD’si Yarat"ı seçiniz. PL Kliknij "Audio" i "Utwórz Audio CD". SV Välj "Audio" och "Skapa Audio-cd". E 90 Starta "Nero StartSmart" från skrivbordet. Haga clic en "Añadir".
4 E Seleccione los archivos de audio (*.wav) que desea incluir en su nuevo disco de audio y haga clic en "Añadir". PT Selecione os arquivos de áudio (*.wav) que deseja gravar em seu novo disco e clique em "Adicionar". TR Yeni ses diskiniz üzerinde olmasını istediğiniz ses dosyalarını (*.wav) seçip "Ekle" üzerine tıklatınız. PL Wybierz pliki audio (*.wav), które chcesz umieścić na nowej płycie audio i kliknij "Dodaj". SV Välj audiofilerna (*.
E Escolha o seu gravador e clique em "Gravar". TR Kaydedicinizi seçip "Yazdır" üzerine tıklatınız. PL Wybierz nagrywarkę i kliknij "Zapis". SV Välj din spelare klicka på "Bränn". E Ponga un disco vacío. PT Insira um disco vazio. TR Boş bir disk yerleştiriniz. PL Włóż czystą płytę. SV Sätt i en tom skiva. E 92 Seleccione su grabadora y haga clic en "Grabar". PT "Nero" grabará ahora el disco. PT O "Nero" irá gravar o seu disco. TR "Nero" artık diskinizin üzerine yazacaktır.
10 E Enhorabuena, su disco se ha grabado correctamente. Haga clic en "Aceptar". Ahora puede cerrar la aplicación. PT Parabéns, o seu disco foi gravado com êxito. Clique em "OK". Agora, você poderá fechar o aplicativo. TR Tebrikler, diskinize başarıyla yazdırıldı. "OK" üzerine tıklatınız. Şimdi uygulamadan çıkabilirsiniz. PL Gratulacje! Zapis płyty zakończył się pomyślnie. Kliknij "OK". Możesz zakończyć pracę programu. SV Grattis! din skiva har bränts utan fel. Klicka på "OK". Du kan avsluta programmet nu.
E Garantía,Medioambiente,Seguridad y Preguntas frecuentes (FAQ) ¿Cómo encontrar información sobre la garantía? 1 2 3 4 Vuelva a colocar el disco de Nero y haga clic en "salir". Haga clic en el icono "Mi PC" del escritorio o bien haga clic en "Inicio" y "Mi PC". Haga clic con el botón derecho del ratón en el icono "Nero" y elija "Explorar". Seleccione la carpeta "Philips Warranty", en la que encontrará los documentos de la garantía.
Preguntas frecuentes (FAQ) Pregunta 1: Tengo un PC con Windows 98 Second Edition que no tiene CDROM, pero tengo otro PC. ¿Cómo instalo los controladores? 1. Inicie el otro ordenador. 2. Inserte el disco de Nero para Grabadora externa en el CDROM. 3. Haga clic en "Exit" (Salir) cuando aparezca la pantalla de instalación de Nero. 4. Haga clic en "Mi PC". 5. Haga clic en el logotipo de "Nero". 6. Haga clic con el botón derecho del ratón y elija "Explore" (Explorar). 7. Vaya al directorio "Philips Drivers". 8.
Pregunta 6: He insertado un disco pero no se reproduce. 1. Asegúrese de que la etiqueta del disco está hacia arriba. 2. Limpie el disco. 3. Compruebe si el disco tiene el mismo código de región que el reproductor. 4. Compruebe si el disco está defectuoso probando con otro disco. 5. Compruebe si el disco está defectuoso, muy arañado o deformado (no es plano). Pregunta 7: El reproductor no responde a algunos comandos durante la reproducción. Compruebe si una conexión de PC está activa.
PT Garantia, Ambiente,Segurança e Perguntas mais frequentes (FAQ) Como encontrar informações sobre garantia? 1 2 3 4 Insira o disco do Nero novamente e clique em "Sair". Clique no ícone "Meu computador" na área de trabalho ou clique em "Iniciar", "Meu computador". Clique com o botão direito do mouse no ícone "Nero" e escolha "Explorar". Escolha a pasta "Phlips Warranty" (Garantia Philips) onde você encontrará os documentos de garantia.
Perguntas mais frequentes (FAQ) Questão 1: Tenho um PC com o Windows 98 Second Edition e não tenho uma unidade de CD-ROM no computador mas tenho outro PC. Como posso instalar os controladores? 1. Ligue o outro computador. 2. Introduza o disco do software Nero para o Gravador Externo na unidade de CD-ROM. 3. Clique em "Exit" (Sair) quando surgir o ecrã de instalação do Nero. 4. Clique em "My Computer" (O meu computador). 5. Clique no logotipo "Nero". 6.
Questão 6: Introduzo um disco e este não é reproduzido. 1. Assegure-se de que o lado com a etiqueta do disco está virado para cima. 2. Limpe o disco. 3. Verifique se o disco tem o mesmo código de região que o leitor. 4. Verifique se o disco está defeituoso experimentando reproduzir outro disco. 5. Verifique se o disco está defeituoso, muito riscado ou deformado (não plano). Questão 7: O leitor não responde a alguns comandos de operação durante a reprodução. Verifique se existe uma ligação ao PC activa.
TR Garanti,Çevre,Güvenlik ve Sıkça Sorulan Sorular (FAQ) Garanti bilgisi nasıl bulunur? 1 2 3 4 Nero diskini yeniden yerleştirip, "çık" üzerine tıklatınız. Masaüstünüzde "Bilgisayarım" ikonu/simgesi üzerine tıklatınız ya da "Başlat", "Bilgisayarım" üzerine tıklatınız. "Nero" ikonu/simgesi üzerine sağ fare düğmesi ile tıklatıp "Araştır"ıı seçiniz. "Philips Garanti" klasörünü seçtiğinizde garanti belgelerini bulacaksınız.
Sıkça Sorulan Sorular (FAQ) Soru 1: Windows 98 Second Edition (İkinci Sürüm) PC’im ve bilgisayarımda CDROM aygıtı yok ancak bir başka PC’im var. Sürücülerin kurulumunu nasıl yapabilirim? 1. Başka bir bilgisayarı başlatınız. 2. CDROM aygıtına Harici DVD Yazıcı için Nero diskini yerleştiriniz. 3. Nero Kurulum ekranı belirdiğinde "Exit" (Çık) üzerine tıklatınız. 4. "My Computer" (Bilgisayarım) üzerine tıklatınız. 5. "Nero"-logosu üzerine tıklatınız. 6.
Soru 6: Bir disk yerleştirdim ancak çalmıyor. 1. Diskin etiketinin yukarı bakıyor olduğundan emin olunuz. 2. Diski temizleyiniz. 3. Diskin çalar ile aynı bölge koduna sahip olup olmadığını kontrol ediniz. 4. Bir başka diski deneyerek diski kusurlu olup olmadığını kontrol ediniz. 5. Disk kusurlu, kötü şekilde çizilmiş yada eğilmiş (düz değil) olup olmadığını görmek için kontrol ediniz. Soru 7: Çalar, yeniden çalma esnasından bazı çalıştırma kumandalarına yanıt vermiyor.
PL Gwarancja, środowisko, bezpieczeństwo oraz Często zadawane pytania (FAQ) Wyświetlanie informacji o gwarancji 1 2 3 4 Ponownie włóż płytę programu Nero i kliknij "Zakończ". Kliknij ikonę "Mój komputer" na pulpicie lub kliknij "Start", "Mój komputer". Kliknij prawym przyciskiem myszy ikonę "Nero" i wybierz "Eksploruj". Otwórz folder "Philips Warranty", w którym znajdziesz dokumentację gwarancyjną.
Często zadawane pytania (FAQ) Pytanie 1: Posiadam Windows 98 Second Edition PC i na w komputerze nie mam czytnika CDROM, ale mam drugi komputer PC. Jak mam zainstalować sterowniki? 1. Uruchom drugi komputer. 2. Włóż płytę Nero dla Napęd Zewnętrzny do napędu CDROM. 3. Kliknij "Exit" (Wyjście) gdy pojawi się ekran instalacyjny Nero. 4. Kliknij "My Computer" (Mój Komputer). 5. Kliknij na logo "Nero". 6. Kliknij prawy przycisk myszy i wybierz "Explore" (Eksploruj). 7.
Pytanie 6: Została włożona płyta, ale odtwarzanie nie rozpoczęło się. 1. Sprawdź czy płyta została włożona etykietą do góry. 2. Wyczyść płytę. 3. Sprawdź czy płyta ma taki sam kod regionu jak odtwarzacz. 4. Sprawdź, czy płyta nie jest uszkodzona, próbując odtwarzać inna płytę. 5. Sprawdź czy płyta nie jest uszkodzona, zadrapana lub wykrzywiona (nie płaska). Pytanie 7: Odtwarzacz nie reaguje na polecenia podczas odtwarzania. Sprawdź czy połączenie z komputerem jest aktywne.
SV Garanti,miljö,säkerhet och vanliga frågor (FAQ) Visa garantiinformation 1 2 3 4 Sätt i Nero-skivan igen och klicka på "avsluta". Klicka på ikonen "Den här datorn" på skrivbordet eller klicka på "Start", "Den här datorn". Högerklicka på "Nero"-ikonen och välj "Utforska". Välj mappen "Phlips Warranty" där du hittar alla garantidokument. Om du inte har Adobe Acrobat Reader, finns det i mappen "Acrobat Reader" på den här skivan eller hämta den gratis på http://www.adobe.
Vanliga frågor (FAQ) Fråga 1: Jag har en dator med Windows 98 Second Edition och det finns ingen CD-ROMenhet i datorn men jag har en annan dator. Hur installerar jag drivrutinerna? 1. Starta den andra datorn. 2. Sätt i Nero-skivan för Extern DVD brännare i CD-ROM-enheten. 3. Klicka på "Exit" (Avsluta) när installationsskärmen för Nero visas. 4. Klicka på "My Computer" (Den här datorn). 5. Klicka på "Nero"-logotypen. 6. Klicka på höger musknapp och välj "Explore" (Utforska). 7.
Fråga 6: Jag har satt i en skiva och den spelas inte upp. 1. Se till att skivans etikett är vänd uppåt. 2. Rengör skivan. 3. Kontrollera att skivan har samma regionkod som spelaren. 4. Kontrollera om skivan är defekt genom att prova med en annan skiva. 5. Kontrollera om skivan är defekt, har allvarliga repor eller är skev (inte plan). Fråga 7: Spelaren reagerar inte på vissa driftskommandon vid uppspelning. Kontrollera om datoranslutningen är aktiv.
Safety Precautions USA/Canada: This player is for use only with IBM compatible UL listed Personal Computers or Macintosh UL listed workstations, weighing less than 18 kg. LASER SAFETY This unit employs a laser. Do not remove the cover or attempt to service this device when connected due to the possibility of eye damage. LASER-SICHERHEIT In das Gerät ist ein Laser eingebaut. Nehmen Sie die Abdeckung nicht ab und versuchen Sie nicht, das Gerät zu reparieren, solange es angeschlossen ist.
Notes 111
Additional information available at our website: www.philips.com/storage www.philips.com/storageupdates Specifications subject to change without notice. All dimensions shown are approximate. © 2006 Koninklijke Philips Electronics N.V. All rights reserved. Reproduction, copying, usage, modifying, hiring, renting, public performance, transmission and/or broadcasting in whole or part is prohibited without the written consent of Philips Electronics N.V. 9305 125 2004.