
User manual


24
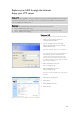
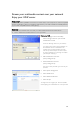
9. Select ‘File sharing’
10. Click on ‘Public’
11. Click ‘Accept’
12. Enter a password in the password fields to
protect your shared folder
When you have lost this password you can enter
a new password here
This option does not change the password that is
needed to access the administration console
13. Click ‘Accept’
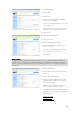
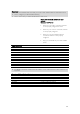
14. Go to ‘System Management’
15. Go to ‘LAN setup’
16. Select ‘Manually assign IP settings’
You need this IP address for configuring your
router in a later step
By switching to ‘Manually assign IP settings’ you
prevent problems with your network
17. Click ‘Accept’
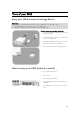
What is DDNS
To explore your NAS through the internet you need to know your public IP address. This address is
dynamic and can change from time to time. By enlisting for a DDNS service provided by a third party,
you alias a dynamic IP address to a static hostname, allowing your NAS to be more easily accessed from
the Internet
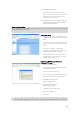
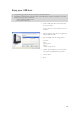
18. Enable ‘DDNS Enable’
19. Select a DDNS service provider in the drop
down box
20. Click on ‘Go To Provider Site’
21. Register yourself for DDNS services at the
service provider’s website (for example the
free service DynDNS)
DDNS Username, Password and Hostname are
provided during the registration process
22. Complete the fields, with the DDNS service
information provided during above mentioned
registration process:
DDNS Username
DDNS Password
DDNS Host Name