6917 Series User Manual 32PHD6917 43PFD6917 Register your product and get support at www.philips.
Contents 1 Home Screen 4 10.4 Manage Apps 27 1.1 Home Screen and Channels 4 11 Sources 28 1.2 Open the Home Screen 4 11.1 Switch to a device 28 1.3 Home Screen Update 4 12 Settings 29 2 Setting Up 6 12.1 TV Options 29 2.1 Read Safety 6 12.2 Picture Settings 29 2.2 TV Stand and Wall Mounting 6 12.3 Sound Settings 30 2.3 Tips on Placement 6 12.4 Power Settings 31 2.4 Power Cable 6 12.5 Advanced Options 31 2.5 Antenna Cable 6 12.
21 Safety and Care 48 21.1 Safety 48 21.2 Screen Care 49 22 Terms of Use 23 Copyrights 50 51 23.1 HDMI 51 23.2 HEVC Advance 51 23.3 Dolby ATMOS 51 23.4 DTS-HD 51 23.5 DTVi 51 23.6 Wi-Fi Alliance 51 23.7 Kensington 51 23.
This channel contains your Recommended, Subscriptions or Trending YouTube videos. 1 Home Screen Customize channels Click the Customize channels button to add and remove channels from your Home screen. 1.1 Home Screen and Channels See also www.support.google.com/androidtv The Home launcher To enjoy the benefits of your Android TV, connect the TV to the Internet. Press Home on your remote control to get your new Android Home screen.
1.3 Home Screen Update You may receive the update notification from Google and have a new version of Home launcher installed. With the new Home launcher, you will have a new look and features on your TV’s Home screen. New highlights on your home screen With multiple tabs like Home, Discover, Apps and Search, you can discover movies and shows from your services and popular apps.
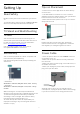
2 2.3 Setting Up Tips on Placement • Position the TV where light does not shine directly on the screen. • The ideal distance to watch TV is 2 to 5 times its diagonal screen size. When seated, your eyes should be level with the center of the screen. • When wall mounted, position the TV up to 6 inches away from the wall. 2.1 Read Safety Read the safety instructions first before you use the TV. To read the safety instructions, go to Safety and Care section on this Help manual for the information. 2.
2.5 Antenna Cable Insert the antenna plug firmly into the Antenna socket at the back of the TV. You can connect your own antenna or an antenna signal from an antenna distribution system. Use an IEC Coax 75 Ohm RF antenna connector. Use this antenna connection for antenna digital or analog input signals.
3 • To pair the remote control to the TV. Remote Control 10 - Google Assistant™ To launch the Google Assistant™. 3.1 Key Overview Middle Top 1 - Power (Standby/On) To switch the TV on or back to Standby. 2- 1 - OK key To confirm a selection or setting. To open the channel list while watching TV. VOICE microphone 3 - MENU To open the TV Menu with typical TV functions. 2 - Back • To return to previous menu or TV source. • To go back to the previous App.
2 - The remote control must be kept close to the TV (within 3 feet) during pairing in order to ensure success. 3 - If the TV does not launch the voice control field when you press Google Assistant™, pairing was unsuccessful. 4 - It is advisable to wait until the set has fully started up and launched all background processes before pairing mode is entered as the toast message containing further instructions may appear too late, thereby negatively impacting the pairing procedure.
Warning Do not put any objects in front of IR sensor of the TV as it may block the IR signal. 3.5 Batteries If the TV does not react on a key press on the remote control, the batteries might be empty. To replace the batteries, open the battery compartment on the back-bottom of the remote control. 1 - Slide the battery door in the direction shown by the arrow. 2 - Replace the old batteries with 2 type AAA-1.5V batteries. Make sure the + and the - ends of the batteries line up correctly.
4 Switching On and Off Make sure the TV is connected to the mains AC power. The indicator light at the bottom of the TV lights up. Switch on Press Power on the remote control to turn the TV on. You can also press the small joystick key on the bottom of the TV to turn the TV on in case you can't find the remote control or its batteries are dead. Switch to standby To turn the TV to standby, press Power on the remote control. You can also press the small joystick key on the bottom of the TV.
5 5.3 Channel Installation Cable Installation Please note that before installing channels, you should first change the Channel Installation Mode to the one you want to install. For the Cable channel installation, you need to change Channel Installation Mode to Cable first and then start the installation. 5.
menu. * Note: Depending on your installation country or operator setting, channel number editing is not always available.
6 Open a Channel List Channels Next to the list with all channels, you can select a filtered list or you can select one of the favorite lists you created. 6.1 About Channels and Switch Channels To open the current channel list… 1 - While watching TV, press OK to open the current channel list. 2 - The channel list only includes the channels from current broadcast source.
6 - Press Back repeatedly if necessary, to close the menu. Channel List Sorting You can do channel list sorting with all channels. You can set the channel list to show only TV channels or only Radio stations. For Antenna channels you can set the list to show the Free or the Scrambled channels. Now you can upload the copied channel list onto another Philips TV. To set a filter on a list with all channels… 1 - Press OK to open the current channel list. 2 - Press Yellow key for Select More.
7 - Press Back, repeatedly if necessary, to close the menu. 5 - Press Back, repeatedly if necessary, to close the menu. Program Restrictions 6.4 Favorite Channels To prevent children from watching a program that may not be suitable for them, you can set a rating. About Favorite Channels Digital channels can have their programs rated. When the rating of a program is equal to or higher than the rating you have set, the program will be locked.
menu.
7 HDMI ARC Connect Devices Only HDMI 1 connection on the TV has HDMI ARC (Audio Return Channel). 7.1 If the device, typically a Home Theater System (HTS), also has the HDMI ARC connection, connect it to HDMI 1 on this TV. With the HDMI ARC connection, you do not need to connect the extra audio cable that sends the sound of the TV picture to the HTS. The HDMI ARC connection combines both signals.
Power on the TV with HDMI devices. Home > Settings > Device Preferences > Inputs > TV auto power on. Audio to video synchronization (sync) If the sound does not match the video on screen, you can set a delay on most Home Theater Systems with a disc player to match the sound with the video. CEC Device List Check the connected HDMI CEC device list. 7.3 Home > Settings > Device Preferences > Inputs > CEC device list. Video Device HDMI Note: • HDMI CEC might not work with devices from other brands.
Installation Before you can pause or record a broadcast, you must connect and format a USB Hard Drive. Formatting removes all files from the USB Hard Drive. 1 - Connect the USB Hard Drive to one of the USB connections on the TV. Do not connect another USB device to the other USB ports when formatting. 2 - Switch on the USB Hard Drive and the TV. 3 - When the TV is tuned to a digital TV channel, press Pause. Trying to pause will start the formatting. Follow the instructions on screen.
device to the other USB ports when formatting. 2 - Switch on the USB Hard Drive and the TV. 3 - Press MENU while watching TV, then press Navigation keys down to Record > Device info. 4 - Select the device you want to format and press OK. 5 - Select Format to star the formatting. All files and data will be removed after formatting. 6 - When the USB Hard Drive is formatted, it is recommended to leave it connected permanently. 3 - Select your flash drive and press OK. 4 - Select Eject and press OK.
8 8.3 Bluetooth Select a Device To select a wireless device… 8.1 1 - Press MENU > TV options > Settings > Remote & Accessories and press OK. 2 - In the list, select the wireless device and press OK. 3 - Press Back, repeatedly if necessary, to close the menu. What You Need You can connect a wireless device with Bluetooth® to this TV – a wireless speaker or headphones*. To play the TV sound on a wireless speaker, you must pair the wireless speaker with the TV.
4 - Press Back, repeatedly if necessary, to close the menu.
9 Problems Connect your Android TV Wireless network not found or distorted • Microwave ovens, DECT phones or other Wi-Fi 802.11b/g/n devices in your proximity might disturb the wireless network. • Make sure that the firewalls in your network allow access to the TV's wireless connection. • If the wireless network does not work properly in your home, try the wired network installation. 9.
setting of the router. DHCP should be turned on. address and press OK. 6 - Enter your password and press OK to sign in. 7 - Press Navigation keys left repeatedly if necessary, to close the menu. **To fulfill EMC regulations, use a shielded FTP Cat. 5E Ethernet cable. Network settings Android Settings Proxy Settings MENU > TV options > Settings > Internet > Proxy settings. You can set or view several Android specific settings or information.
Find more information on www.support.google.com/androidtv 10 Apps Music 10.1 About Apps You can find your favorite Apps on Home menu. With YouTube Music you can play your favorite music on TV and buy new music on your computer or mobile device. Or, on your TV, you can sign up for All Access, the YouTube Music subscription. Alternatively, you can play the music you already own, stored on your computer.
4 - When done, press Back repeatedly or press EXIT or stop the app with its dedicated exit/stop button. Payments To make a payment on Google Play on TV, you must add a form of payment - a credit card (outside the United States) - to your Google Account. When you purchase a movie or TV show, you will be charged on this credit card. If the App is not on you Home screen, you can add via the Apps page or by the Add app to favorites item on the Apps row.
11 Sources 11.1 Switch to a device From the list of Sources, you can switch to any of the connected devices. You can switch to a tuner to watch TV or switch to your connected devices to watch their program, a digital receiver or a Blu-ray Disc player. To switch to a connected device… 1 - Press SOURCES to open the Sources menu. 2 - Select one of the items in the source list and press OK. The TV will show the program or content of the device.
12 Display Mode Settings If the picture is not filling the whole screen, if black bars are showing on the top or bottom or at both sides, you can adjust the picture to fill the screen completely. 12.1 TV Options To select one of the basic settings to fill the screen… Press MENU while watching TV, press Navigation keys up or down to select one of below menus. Press Navigation keys right or left to view more options from the selected menu. MENU > TV options > Picture > Display mode.
Saturation 12.3 Adjust the color saturation value of the picture. Sound Settings Hue Sound Mode Adjust the hue value of the picture. MENU > TV options > Sound > Sound Mode > and press OK. Sharpness Adjust the level of sharpness in fine detail of the picture. For easy sound adjustment, you can select a preset setting with sound mode.
Dolby Audio Processing Set auto sleep timer Set the advance settings. Power > Auto sleep. • Volume Leveler: select On to adjust the volume automatically. • Dialogue Enhancer: select to get an improved sound quality for speech program. • Surround Virtualizer: select On to create a virtual surround sound experience. • Dolby Atmos: select On to enable Dolby Atmos, which can add height dimension in sound. With height dimension, sound can be precisely placed and moved in three-dimensional space.
Chromecast built-in Language Adjust the settings for Chromecast built-in. You can view the Open-source licenses and the version number. Set or change the menu language. Keyboard Screen Saver Set the on-screen keyboard type. Adjust the screen saver setting for your preference. Inputs Location Rename the Inputs name and adjust the settings for Consumer Electronic Control (CEC). Set the location status.
performance. Correct clock manually Automatic date & time > Off. 12.8 Select Set date and Factory Reset Note: Reset all settings value to original TV settings If none of the automatic settings display the time correctly, you can set the time manually. Home > Settings > Factory reset. Set time to adjust the value. Device Preferences > About > This will erase all data from your device's internal storage, including: your Google account, system app data, download apps and settings.
Visually Impaired Accessibility > Visually Impaired. When Audio Description is on, more Visually Impaired options are available. Set the speaker, headphone volume of the normal audio with the audio commentary or set the extra audio effects in the commentary audio. You can adjust the effect with below settings. • Speaker • Headphone • Volume • Pan and Fade • Audio for Visually Impaired • Fader Control Audio Hearing Impaired Accessibility > Audio Hearing Impaired.
13 13.3 Videos, Photos, Music & Text View your Photos View Photos View a photo 1 - Press Home, select MMP from the Apps list and press OK. 2 - Use Navigation keys to select Photo. 3 - Select one of the photos, and press OK. 13.1 From a USB Connection You can view your photos or play your music and videos from a connected USB flash drive. When browsing photo thumbnails, press MENU to... With the TV turned on, plug in a USB flash drive to one of the USB connections.
Display the information of the picture file. Press OK to play or pause the text file preview. Photo Frame image Repeat Set the picture as Photo Frame image. Preview the text files repeatedly or once. Picture Shuffle On, Shuffle Off Adjust the picture settings. Preview the text files in sequential order, or at random. 13.4 Font Play your Music Adjust the text Size, Style and Color. Show Info Play music 1 - Press Home, select MMP from the Apps list and press OK.
14 TV guide 14.1 TV Guide Data With the TV Guide you can view a list of the current and scheduled TV programs of your channels. Not all channels offer TV Guide information. The TV Guide receives information (data) from broadcasters. The TV can collect TV Guide information for the channels that are installed on the TV. The TV cannot collect the TV Guide information for channels viewed from a digital receiver or decoder. 14.
3 - Select Set PVR to assign the device for recording data storage. The device will be marked with PVR on Device info list. 15 Recording and Time Shift You cannot record when you are using Time shift function. 15.1 In terms of enforcement of copyright legislation, some channel providers can apply different restriction by means of DRM (Digital Right Management) technology. In case of broadcasting protected channels, recording, record validity or number of views may be restricted.
List of Recordings Pause a program You can view and manage your recordings in the list of recordings. To pause and resume a broadcast… • To pause a broadcast, press Pause. A progress bar at the bottom of the screen appears briefly. • To call up the progress bar, press Pause again. • To resume watching, press Play. To open the list of recordings… 1 - Press MENU > Navigation keys down > Record > Record list and press OK.
16 Smartphones and Tablets 16.1 Google Cast What You Need If an app on your mobile device has Google Cast, you can cast your app on this TV. On the mobile app, look for the Google Cast icon. You can use your mobile device to control what's on TV. Google Cast works on Android and iOS. Your mobile device must be connected to the same Wi-Fi home network as your TV. Apps with Google Cast New Google Cast apps come available every day.
17 Netflix If you have a Netflix subscription, you can enjoy Netflix on this TV. Your TV must be connected to the Internet. In your region, Netflix might only come available with future software updates. To open Netflix, press NETFLIX on the remote control to open the Netflix App. You can open Netflix immediately from a TV in standby. www.netflix.
18 Software 18.1 Update Software Local Updates You need a computer with a high-speed Internet connection and a USB flash drive to upload the software on the TV. Use a USB flash drive with at least 2GB free space. Make sure that write protection is switched off. 1 - Press Home > Settings > Device Preferences > System update > Local Updates and press OK. 2 - Follow the instructions on screen. Update from Internet If the TV is connected to the Internet, you may receive a message to update the TV software.
19 19.2 Specifications Power 19.1 Product specifications are subject to change without notice. For more specification details of this product, see www.philips.com/TVsupport Environmental Power • Mains power: AC 110-240V +/-10% • Ambient temperature: 5°C to 35°C (40°F to 95°F) • Power saving features: Sleep timer, Switch off timer, Picture off, No Signal Auto Power Off, Auto sleep.
Resolution — Refresh rate – Character encodings: UTF-8(Unicode), UTF-16, Simplified Chinese, Central Europe, Cyrillic, Western Europe, Greek, Turkish, Hebrew, Korean • Maximum Supported Data Rate: – MPEG-4 AVC (H.264) is supported up to High Profile @ L5.1. 30Mbps – H.265 (HEVC) is supported up to Main/Main 10 Profile up to Level 5.
Help and Support reconnected to the power supply, the startup screen is displayed at the next startup. To turn on the TV from standby, press power key on the remote control or on the TV. 20.1 The standby light keeps on blinking 20 Register your TV Disconnect the power cable from the power outlet. Wait 5 minutes before you reconnect the power cable. If the blinking reoccurs, contact Philips TV Consumer Care.
this channel with Manual Installation. HDMI and USB Poor picture from a device • Make sure that the device is connected properly. Make sure the device's output video setting is the highest possible resolution if applicable. • Restore picture style or change to other picture styles. HDMI • Note that HDCP (High-bandwidth Digital Content Protection) support can delay the time taken for a TV to display content from an HDMI device.
information on indoor range, transfer rate and other factors of signal quality. • Use a high-speed (broadband) Internet connection for your router. your question directly or send a question by email. You can download new TV software or the manual to read on your computer. DHCP • If the connection fails, you can check the DHCP (Dynamic Host Configuration Protocol) setting of the router. DHCP should be turned on. 20.
ensure that the power voltage matches the value printed on the back of the TV. Never connect the TV to the power outlet if the voltage is different. 21 Safety and Care 21.1 Stability Hazards Safety A television set may fall, causing serious personal injury or death. Many injuries, particularly to children, can be avoided by taking simple precautions such as: Important Read and understand all safety instructions before you use the TV.
• Disposal of a battery into fire or a hot oven, or mechanically crushing or cutting of a battery, that can result in an explosion. • Leaving a battery in an extremely high temperature surrounding environment that can result in an explosion or the leakage of flammable liquid or gas. • A battery subjected to extremely low air pressure that may result in an explosion or the leakage of flammable liquid or gas. 21.2 Screen Care • Never touch, push, rub or strike the screen with any object.
Therefore, please note this is not subject to repair, exchange or refund within and/or outside of the warranty period. 22 Terms of Use TP Vision is committed to developing, producing and marketing products that cause no adverse health effects. TP Vision confirms that, as long as its products are handled properly for their intended use, they are safe to use according to scientific evidence available today.
23 23.4 Copyrights DTS-HD DTS-HD 23.1 For DTS patents, see http://patents.dts.com. Manufactured under license from DTS Licensing Limited. DTS, the Symbol, DTS and the Symbol together, DTS-HD, and the DTS-HD logo are registered trademarks or trademarks of DTS, Inc. in the United States and/or other countries. © DTS, Inc. ALL RIGHTS RESERVED. HDMI HDMI The terms HDMI, HDMI High-Definition Multimedia Interface and the HDMI Logo are trademarks or registered trademarks of HDMI Licensing Administrator, Inc.
23.7 Kensington (If applicable) Kensington and Micro Saver are registered US trademarks of ACCO World Corporation with issued registrations and pending applications in other countries throughout the world. 23.8 Other Trademarks All other registered and unregistered trademarks are the property of their respective owners.
24 Disclaimer regarding services and/or software offered by third parties Services and/or software offered by third parties may be changed, suspended or terminated without prior notice. TP Vision does not bear any responsibility in these sorts of situations.
Index Problems, Connection, Wi-Fi Problems, HDMI Connection Problems, Picture Problems, Remote control Problems, Sound Problems, USB Connection Problems, Wrong menu language Product Fiche A Age Rating Android Settings Apps 16 25 26 B Bluetooth Bluetooth, Devices Bluetooth, Remove device Bluetooth, Select device 22 22 22 22 R Recording Register your product Repair C Channel Channel Install, Antenna Channel List Channel List sorting Channel, age rating Channel, switch to a channel Channel, TV guide Conn
Powered by TCPDF (www.tcpdf.