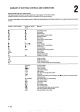
CONTENTS Chapter 1 INTRODUCTION Features 2 SUMMARY OF BUTTONS, CONTROLS AND CONNECTIONS Safety instructions 3 INSTALLATION Connecting the aerial Tuning your TV set to the video recorder 4 REMOTE CONTROL 5 STORING TV STATIONS 6 DIRECT RECORDING Loading a cassette 7 PLAYING A CASSETTE 8 SETTING THE CLOCK 9 DIGITAL SPECIAL EFFECTS 10 TIMED RECORDING Video Program System {VPS) One Touch Recording (OTR) 1 EXTRAS 12 OTHER RECORDING POSSIBILITIES Recording from another video recorder {copying) 13 WATCHING TV VIA T
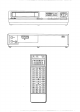
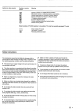
SUMMARY OF BUTTONS, CONTROLS AND CONNECTIONS Getting familiar with your video recorder The symbols below are listed in the same sequence as they appear on the video recorder. Detailed information concerning their functions are explained in the relevant sections. I¢ symbols only appear on the remote control or differ from the symbols on the video recorder, they are placed between brackets in the text.
Symbol on video recorder Symbol on remote Meaning control Picture in picture on / Digital effects off-button ({m) Stilt picture memory / memorized picture retail-button ) Picture swap-button for "Picture in Picture® feature {E™) Picture shift-button for "Picture in Picture” feature () TV stations summary-button 3-screen selection button (89) Picture updating (strobe-iike ({3} Picture memory-bunion Extra functions if TV/VCR selector is In position TV: {only for specially equipped TV sets) (et} o= Down velum
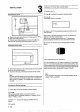
INSTALLATION Connecting the aerial Remove the aerial cable farm your TV.and plug.it into "™ at the back of the video recorder. & Take the aerial cable supplied and connect it to{f¥ of the video recorder and to the aerial-input socket on your TV. Connecting o the mains = @ Insert the female plug of the mains lead into the mans socket at the rear of the video recorder. # Insert the other plug of the mains lead into the wall socket.
REMOTE CONTROL You can operate most of the functions of the idea retarder using the remote control unit. Inserting the batteries & Open the cover on the back of the remote control. ® Insert the batteries as indicated in the battery haler. If you want to control video recorder functions: & Set (TV/VCR) o position ‘VORTEX. ® Alm the remote control at the video recorder and press the reacquired button.
(7) Press STORE again to store the TV channel on the pres election number. * Repeat steps @) all preferred channels, Channel search and storage Switch on the TV. On the TV select the pres election (program) number for the video recorder. ) Switch on the video recorder using 1) and select pres election (program) number 1 using the digit buttons (0-9) on the remote central, @) Press SEARCH. The video recorder searches for a TV station.
Loading a cassette and recording (1) Hold the cassette with the title bale facing you and the window side up, Push the cassette until it is pulled inside automatically, Inserting a cassette will switch on the video recorder automatically, Do not try to pull out the cassette during automatic loading. (2 If necessary, press (rewind the tape. if you want to switch between the used time { L1}, the time left { £ )other tape counter during the {re}winding, recording or playback: ® Press ( @8 ) one or more times.
® Crass + or or the digit buttons on the remote control to set the correct year. @) Press ) again. The Display shows,for example: @& Press the digit button on the cremate control to set the correct month (between 1 and 12). &) Press {D) again. The Display shows a date. » Press the digit button on the remote control to set the correct date (between 1 and 31). @ Crass once more to complete and to store setting the clock.
® When the ({1 button is pressed, still picture of that moment's action wiki appear in the bosom right quarter of the screen. & Every rime the ((9) button is pressed, the moving picture of this moment will be displaced as a still picture. ® When the ) button Is pressed, still pictures taken in short intervals will be displayed (strobe-take effect). ® By pressing the ({3} button repeatedly, the position of the small picture can be changed. ® Tore tum to the normal playback or TV broadest, press button 2 mes.
Programming a timed recording on the remote control You can program timed recordings on the remote control using { @RO) and the digit bunions (0-8) and then transmit the programming details to the video recorder using (HO). On the Display of the remote control all the programming steps will be shown. The contents of all "TIMER" blocks will control. be stored in the remote Note: If during programming a button Is not pressed within 1 minute, you have to start the programming sequence from he beginning again.
When the programming has been completed correctly, the Display shows for example: {prospers ({0 ) to send the recording details to the video recorder. During the transmission the symbol O fights up. The Display shows, for example: The Display of the video recorder saws: “TIMER", and and a number of the selected block if the transmission is accepted. “ERROR" if an error occurred during the transmission, or the transmitted data are start time legal to stop time).
OTHER RECORDING POSSIBILITIES Recording from another video retarder (copying) Copying via the 21-pin connectors. Connect the 21-pin connector on your recording video recorder B and the playback video recorder A using a special cable. Your dealer can advise you which cable to use. (8) Insert the per-recorded cassette in the playback video recorder A and a cassettes with infarct erase tab in your recording video recorder B.
CASSETTES VHS cassettes can be used on one side only. What you should do: ~ Buy only high quality cassettes, cassettes of inferior quality make your valuable video heads dirty. Do not: -~ dismantle the cassette =~ touch the tape drop or shake the cassette. Storing cassettes: Always rewind the tape to the beginning before storage. Store the cassettes: vertically ~ at room temperature.
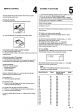
TECHNICAL DATA* General Mains voltage Mains frequency Power consumption Windscreen dime Ambient temperature during aeration Humidity Dimensions Weight Position for use Number of pres elections Number of days in advance Video Input via 21-pin connector Quit put via 21-pin connector Resolution Signal/noise ratio during playback Audio input via 21-pin connector Output via 21-pin connector Signal/noise ratio Harmonic distortion Audio frequency response * Data subject to change without notice.