
User Guide


3
En
INSTRUCTION MANUAL
10
13
14
15
16
11
12
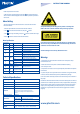
10. Lanyard Attachment
11. Locking Ring
12. Cold Shoe / ¼”x20 threaded lug
13. 3.5mm Sync Port
14. USB Port
15. 5V DC Port
16. Battery Compartment
Before using
Please Note:
1. When using Phottix Odin II TCU and Receiver the ash on the receiver must
be in i-TTL mode. Do not set the ash to slave mode. The Odin II system will not
work properly if the ash is set in slave mode.
2. Be sure to use the foot locking mechanisms to ensure a secure connection
between Odin II TCU and the camera hot shoe, as well as the Odin II Receiver
and the ash.
3. When connecting and disconnecting from the camera, please switch o
the power to all devices including ash, studio lights, camera, Odin II TCU and
Receivers.
4. Although many brands and models of ash units have been tested with
the Phottix Odin II, there is no guarantee all third-party TTL ashes will work
correctly. This product is optimized to work with Phottix and Nikon i-TTL hot
shoe ashes, and the Phottix Indra TTL Studio Light series.
Inserting batteries
1. Push the Battery Cover on the Odin II TCU or Receiver in the direction
indicated by the arrows on the Battery Cover to slide it open.
2. Insert the batteries according to markings in the battery compartment.
3. Close the Battery Cover and push back into the locked position.
4. When TCU and Receiver LCD Screens display the low battery symbol (below
)
,
replace the batteries.
TCU low battery indicator:
Receiver low battery indicator:
Please Note
The Odin circuitry is designed to be used with either Alkaline, Ni-CD or Ni-MH
rechargeable batteries. Do not use Lithium AA batteries in these units.
Turning the TCU and Receiver ON/OFF
Turn ON: Press and hold the power button until the LCD Screen displays the
menu.
Turn OFF: Press and hold the power button until the LCD Screen goes blank.
Connecting the Odin II TCU to the Camera Hot Shoe
1. Turn OFF the camera and Odin II TCU
2. Slide the Odin TCU into the camera’s hot shoe mount.
3. Slide the Locking Ring to the right until a ’click’ is heard, making sure the TCU
is locked in position.
4. Turn ON the camera and TCU.
Disconnecting the Odin II TCU from the Camera Hot Shoe
1. Turn OFF the camera and Odin II TCU
2. Lock release: Press and hold the Lock Release Button on the Locking Ring,
and slide the Locking Ring to the left.
3. Slide the Odin II TCU from the camera hot shoe.
Connecting a ash to the Odin II Receiver hot shoe
1. Turn OFF the ash and the Phottix Odin II Receiver.
2. Slide the ash into the receiver’s hot shoe mount.
3. Lock the ash with the ash’s locking mechanism.
4. Turn ON the ash and the Phottix Odin II receiver.
Disconnecting a ash from the Odin II Receiver hot shoe
1. Turn OFF the ash and the Phottix Odin II Receiver.
2. Unlock the ash with the ash’s locking mechanism.
3. Slide the ash from the Receiver’s hot shoe mount.
4. Turn ON the ash and the Phottix Odin II receiver.
Connecting the Odin II Receiver to Flash or Studio Light by cable
1. Turn OFF the ash/studio light and the Phottix Odin II receiver.
2. Insert the one end of the 3.5mm Cable to the Receiver’s 3.5mm port.
3. Connect the other end of the 3.5mm Cable to the Flash/Studio light. (A 6.3
mm adapter is included for studio strobes with larger ports).
4. Turn ON the ash / Studio light and Odin II Receiver.
5. Set the ash in Manual mode (if required) – no TTL functions can be used
when a compatible ash is triggered by cable.
Please Note:
The Flash may re when the receiver is turned on.
Flash Groups, Channels and ID setting
The Phottix Odin II System has:
• 5 ash groups: A, B, C, D and E;
• 32 transmission channels; (Default at Channel 32)
• Digital ID Setting with 0000-9999 settings available.
Receivers can be assigned to a group, a channel and an ID at the same time.
The TCU can adjust the EV, Power Levels and Zoom for each group (A, B, C,