
Operation Manual
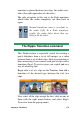

184 Pinnacle Studio
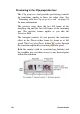
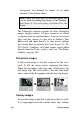
If an image needs rotating by 90 degrees to
bring it into “landscape” mode (wider than
high), start by clicking one of the image
rotation buttons. If needed, click the button more than
once until the clip is properly oriented.
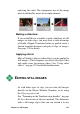
If you want to reframe the image, click directly on
the tool’s preview window and, while holding the left
mouse-button down, drag the image in any direction
until it is properly positioned. Release the button to
complete the operation. Next, use the Zoom slider to
magnify or reduce the image size as desired. Adjust the
position and magnification with these controls until the
image is cropped and framed to your satisfaction.
The Reset button removes all your position and zoom
changes, restoring the original framing of the image.
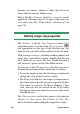
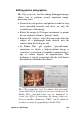
The red-eye reduction feature helps restore
a natural appearance to photos in which the
subject’s eyes are tinged with red. (This
problem is caused by light from the flash unit bouncing
off the retina of the eye when the subject is looking
directly into the camera.)
To activate red-eye reduction, click the left button in
the red eye group. The button stays down when clicked.
Now click the image preview with the left mouse-
button above and to the left of the area in which red-
eye reduction should be applied. While holding the
button down, drag down and to the right until the area
is fully enclosed. When you release the mouse-button,
the red-eye reduction effect is instantly applied within
the rectangle you have outlined.
It is usually not necessary to be highly precise when
marking out the red-eye reduction area. In fact, a larger
rectangle may even yield a better result than a smaller