
Operation Manual


26 Pinnacle Studio
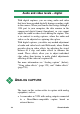
4. Click the Start capture button on the Diskometer.
The Capture Video dialog box is displayed.
5. Type in a name for the video capture file you are
about to create, or accept the default name. You can
optionally also enter a limiting duration for the
capture.
6. If you are capturing from an analog camcorder or
VCR, start playback now. This step is unnecessary
with a digital-source capture, as Studio will control
the playback equipment automatically when
needed.
7. Click the Start capture button in the Capture Video
dialog box. The button caption changes to Stop
capture.
Capture begins. The Player displays the incoming
digitized video that is being saved to your hard
drive (unless you have unchecked Capture preview
on the Capture source options panel).
During capture, Studio performs automatic scene
detection based on the current setting in the
Capture source options panel.
8. Click the Stop capture button to end capture at a
point you select.
Studio automatically stops capturing if your hard
drive fills up or the maximum duration you entered
is reached.
Scene detection
Automatic scene detection is a key feature of Studio.
As video capture proceeds, Studio detects natural
breaks in the video and divides it up into scenes. A new