
Owner's Manual

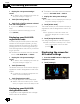

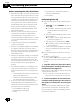


Table Of Contents
- Quick Start Guide
- Operation Manual (Supplied on CD-ROM Only)
- Restore Default Settings
- Table of Contents
- Using This Manual
- Parts & Controls
- Operation
- Basic Operation
- Using the Navigation Menu Screens
- Using the Map
- Eco-Friendly Driving Functions
- Searching for and Selecting a Location
- After the Location is Decided
- Checking and Modifying the Current Route
- Registering and Editing Locations
- Using Traffic Information
- Registering and Connecting a Bluetooth Device
- Using Hands-Free Phoning
- Basic Operations of the AV Source
- Using the Radio
- HD Radio
- Playing Audio CDs
- Playing Music Files on ROM
- Playing a DVD-Video
- Playing a DivX Video
- DVD-Video or DivX Setup
- Playing Music Files (from USB or SD)
- Playing Video Files (from USB or SD)
- Using an iPod
- Using Pandora
- Using Aha Radio
- Using the Bluetooth Audio Player
- Using the XM Tuner
- Using the SIRIUS Tuner
- Using AV Input
- Using the External Unit (EXT1, EXT2)
- Customizing Preferences
- Operating your Navigation System with Voice
- Setting the Anti-Theft Function
- Returning the Navigation System to the Default or Factory Settings
- Troubleshooting
- Messages
- Additional Information
- Glossary
- Specs
- Installation Manual
- Upgrade Instructions and Operation Manual Addendum (Use after Upgrading with 130SD239FM)
- Table of Contents
- Compatibility
- Using This Manual
- iPod Compatibility
- Instructions for Upgrading
- How to use the Navigation Menu Screens
- How to use the Map
- Eco-Friendly Driving Functions
- Searching for and Selecting a Location
- After the Location is Decided
- Checking and Modifying the Current Route
- Registering and Editing Locations
- Using Hands-Free Phoning
- Fuel Cost Management
- Using Applications
- Basic Operations of the Audio Source
- Using the Tuner
- HD Radio
- Playing Audio CDs
- Playing Music Files on ROM
- Playing Music Files on USB
- Using an iPod
- Using the XM Tuner
- Using the SIRIUS Tuner
- Using an External Unit (EXT1, EXT2)
- Using the AUX Source
- Customizing Preferences
- Other Functions
- Troubleshooting
- Messages
- Important Information for the User
- Scan of CD-ROM
- Warranty

Before operating the Auto EQ function
! Perform Auto EQ in as quiet a place as pos-
sible, with the vehicle engine and air condi-
tioning switched off. Also, cut power to car
phones or cellular phones in the vehicle, or
remove them from the vehicle before per-
forming Auto EQ. Sounds other than the
measurement tone (surrounding sounds,
engine sound, telephones ringing, etc.)
may prevent correct measurement of the
vehicle’s acoustics.
! Be sure to perform Auto EQ using the mi-
crophone for acoustical measurement
(sold separately). Using another micro-
phone may prevent measurement, or result
in incorrect measurement of the vehicle’s
acoustics.
! To perform Auto EQ, the front speakers
must be connected.
! When this navigation system is connected
to a power amp with input level control,
Auto EQ may not be able to be performed if
the power amp’s input level is set below
the standard level.
! When this navigation system is connected
to a power amp with an LPF, turn the LPF
off before performing Auto EQ. Also, set
the cut-off frequency for the built-in LPF of
an active subwoofer to the highest fre-
quency.
! The distance has been calculated by com-
puter to provide the optimum delay to en-
sure accurate results. Do not change this
value.
— The reflected sound within the vehicle is
strong and delays occur.
— The LPF on active subwoofers or exter-
nal amps delay the lower sounds.
! If an error occurs during measurement, a
message appears and measurement is
canceled. Check the following before mea-
suring the vehicle’s acoustics.
— Front speakers (left/right)
— Rear speakers (left/right)
— Noise
— Microphone for acoustical measure-
ment (sold separately)
— Low battery
Performing Auto EQ
p Auto EQ changes the audio settings as fol-
lows:
! “Auto EQ” on the “EQ Menu” screen is
set to “On”.
= For details, refer to Using the auto-ad-
justed equalizer on the previous
page.
! The fader/balance settings return to the
center position.
= For details, refer to Using balance ad-
justment on page 175.
! The equalizer curve switches to “Flat”.
= For details, refer to Using the equali-
zer on page 175.
! The front and rear speakers will automa-
tically be adjusted to a high pass filter
setting.
p Previous settings for Auto EQ will be over-
written.
p For AVIC-Z130BT users
Do not press the h button to open or close
the panel when you are using the micro-
phone.
1 Stop the vehicle in a place that is quiet,
close all the doors, windows and sun roof,
and then turn the engine off.
If the engine is left running, engine noise may
prevent correct Auto EQ.
p If driving restrictions are detected during
measurement, measurement is canceled.
2 Fix the microphone for acoustical mea-
surement (sold separately) in the center of
the headrest of the driver’s seat, facing for-
ward.
The Auto EQ may differ depending on where
you place the microphone. If desired, place
the microphone on the front passenger seat
and perform Auto EQ.
En
178
Chapter
32
Customizing preferences