CD CDV LD PLAYER I R=..,'.,_,_,=. CLD-D704 Mllm=Wql_l il_'ilY_ L L A SER D/SC DIGITAL AUDIO • • This player does not apply to business use. CD-ROM, LD-ROM and CD graphic discs cannot be played with this player. F_y_IIE_I31 _e. CLD 704 _-,, .B3_i!I ._',-.r4-_ ____ _ I, _!, i .I Thank you for buying this Pioneer product. Please read through these operating instructions so you will know how to operate your model properly.
IMPORTANT CAUTION The lightning flash wit n a,i uwllead, w_[l/i:l a/_uquliaIb¢. I triangle, is intended to alert the user to the presence of uninsulated "dangerous voltage" within the product's enclosure that may be of sufficient magnitude to constitute a risk of electric shock to persons. CAUTION: ]he TO PREVEN I I HE RISK OF ELECI RIC SHOCK, DO NOT REMOVE COVER fOR BACK). NO USER-SERVICEABLE PARTS INSIDE. REFER SERVICING TO QUALIFIED SERVICE PERSONNEL.
CAUTION • Use of controls or adjustments or performance of procedures other than those specified exposure. • The use of optical instruments with this product will increase eye hazard. herein may result in hazardous radiation Information to User Alteration or modifications carried out without appropriate authorization may invalidate the user's right to operate the equipment.
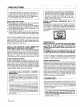
We Want You Listening IJSrE_ING f _)e.a.,t C_.' Selecting fine audio equipment _uch as the unit you've just purchased is only the start of your musical enjoyment. Now it's time to consider how you can maximize the fun and excitement your equipment offers. This manufacturer and the Electronic Industries Association's Consumer Electronics Group want you to get the most out of your equipment by playing it at a safe level.
CONTENTS ACCLSSOHILU ................................................. 5 PRECAUTIONS ................................................................ 6 FEATURES AND FUNCTIONS OF THE PLAYER ............. 7 TYPES OF DISCS THAT CAN BE PLAYED WITH THIS UNIT ............................................... 8 CARE OF DISCS ............................................................ 10 CONNECTIONS .............................................................
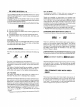
PRECAUTIONS If it becomes necessary to transport or ship this unit in the future, be sure to first remove the disc (if loaded), and retract the disc table to its closed position and turn the power off. After the "OFF" display goes out on the display, disconnect the power cord. Take the following precautions to avoid accidentst Be careful not to catch your finger in the disc table section while the disc table is being retracted into the unit.
FEATURES AND FUNCTIONS LP,a.boo. Funct,o°s Program Playback Up to 24 chapters can be programmed desired sequence. OF THE PLAYER 1 ] Digital NR system Most LD discs contain noise and/or color distortion in the source. This player uses a digital noise reduction system which effectively reduces noise and color distortion and allows you to independently change the brightness and saturation as desired. Digital processing reproduces images with superior picture quality.
TYPES OF DISCS THAT CAN BE PLAYED WITH THIS UNIT This unit is a CD VIDEO SYSTEM ('1) compatible player which can play CDs, CDV discs, and LDs. The five disc types listed in the table below can be played with this unit. • The marks shown in the left column are printed on the labels and jackets of the corresponding discs. DIGITAL <_=r===_ CDV CD VIDEO CD (Compact Disc) Single 3-inch One side Digital (20 minutes max.) TOC (*2) CD (Compact Disc) 5-inch One side Digital (74 minutes max.
CD VIDEO SYSTEM ('1) The CD VIDEO SYSTEM is the standard name for the "optical video disc with digital audio" system that encompasses both LDs and CDV discs. The following mark is the standard mark for the CD VIDEO SYSTEM and is found on all players and discs which conform to the CD VIDEO SYSTEM format.
I CARE OF DISCS How to hold discs When loading or removing discs, try not to touch their playing surfaces. NEVER PLAY CRACKED OR WARPED DISCS. • The disc revolves in the player at a high speed when it is played. Never play a cracked, scratched or warped disc. This may damage the player or cause it to malfunction. After using discs, store them upright After playing a disc, always remove it from the player and return it to its jacket. Then store it standing upright away from heat and humidity.
CONNECTIONS USING TELEVISION WITH AUDIO AND VIDEO Player, stereo system, monitor television @ 1 . Only televisions equipped with a video input u_. be connected to this unit. JACKS ] When connection S VIDEO jack, insert the plug with care. Forcing the plug into the jack with the wrong orientation may UHF television antenna VHF television antenna jack.
CONNECTIONS Stereo amplifier connections NOTES: • When making optical digital connections, this player can only be connected to an ampfifier which uses the same type of optical transmission/reception module. • Fully insert the optical fiber cable plugs all the way into the jacks. • Be careful not to fold or crimp the cable. When coiling an optical fiber cable for storage, make sure the diameter of the coil is 15 cm (6 inches) or larger. • Use an optical fiber cable with a length of 3 m (10 feet) or less.
SYSTEM REMOTE CONTROL CONNECTION WHEN COMBINED WITH OPTIONAL PIONEER PROJECTION MONITOR (or COMPONENT DISPLAY) Connect the VIDEO OUT jack of the player to the video input jack of the projection monitor (or component display), and connect the AUDIO OUT jacks of the player to the audio input jacks of the projection monitor (or component display).
I CONNECTIONS NOTE: PERFORMING SYSTEM CONTROL WHEN THE PLAYER IS COMBINED WITH A PRODUCT THAT When a connecting cord has been connected to the CONTROL IN jack, direct control of the player with the remote control unit is not possible. Operate the player with the remote control unit by aiming it at the AV ampfifier. HAS THE System control can be performed when the player is combined with an optional AV amplifier, which can provide centralized control of Pioneer products with the _ mark.
NAMES AND FUNCTIONS COMPONENTS OF REMOTE CONTROL UNIT A detailed description is provided on the indicated page (s). Remote control buttons with the same names or marks as buttons on the front panel of the player control the same operations as the corresponding front panel buttons. AUDIO button ... p. 21 D/A/CX button ... p. 20, 21 POWER button Pressto turn the power on and off. V-DNR button ... p. 24 DISPLAY button ... p. 38 EJECT button (m/A) ... p. 18, 20 -PGM button ... p. 34 REPEAT A/B buttons .
NAMES AND FUNCTIONS A detailed descreption OF FRONT PANEL COMPONENTS is provided on the indicated page(s). CD Disc table ... p. 22 Disc table ... p. 19 CDC{.)v LDPLAYER CLD--704 I_IPlONEF-.R PHONES LEVEL control Turn this control in the 'MAX" direction to increase rF the output level from the PHONES jack, Turn this control in the 'MIN" direction to decrease the output level from the PHONES jack. PHONES jack ... p.
Open/Close DIRECT CD button ... p. 22 I Play/Still Digital Memoly SlOE BOTH,_,, (_A)button ... p. 18, 20, 22 (1_/1_1<) button ... p. 19, 22, 30 :)IRE( T CO ® DISC SIDE A/B buttons ... p. 18 Stop (11)button HILITE/INTRO HI -T-T,';; 2 ;-_VlJN'-H_L E I• ... p. 20 button ... p. 26 REPEAT /I RAN_ v-o..oFF s_°?_& REPEAT button ... p. 32 py RANDOM ___ _,f_-_- PLAY button ... p. 29 _ Jog dial ... p. 24, 25 o FILM 5 MODfi Shuttle ring ... p. 23, 24, 25 I SKIP (l
TO PLAY AN LD, CDV OR CD DISC SIDE A - DISC SIDE B l I I, l ,! 2 Z 1 Turn on the monitor power to TV and/or the FL OFF 3 5 2 3 Turn on the power to this unit. Open the disc table. audio system. POWER When a stereo system is used for audio listening: Turn on the power of the amplifier, and set its input selector to the pro per position for listening to the player, such as "LD".
CDICDV/LD I Front panel buttons and remote control unit buttons name or mark have the same function. 3 Operations the remote indicated by the [ _ control unit. 4 with the same ] mark are performed with 5 Load a disc. As shown groove Start playback. in the following corresponding diagram, place the disc on the disc table in the to the size of the disc. If the disc is not centered correctly on the disc table, the disc will not be played or the disc or the player may be damaged.
I TO PLAY AN LD, CDV OR CD (Continued) .................. ® 0 0 ! i I_ rl_l_l A m A II m To pause playback temporarily To stop playback To stop playback and take out the disc I'1 PAUSE B Or or EJECT The sound and/or video image disappears and the II indicator lights in the display window. Press PAUSE II again to resume playback from the position where pause mode was entered, • During playback of CD or CDVaudio part, front panel.
LD/CDV/CD II To listen to only one channel of a stereo disc, or to select the audio on a sound multiplex disc: To listen During playback During playback D Played audio Stereo disc Stereo Sound multiplex disc Audio 1/L (Left) Audio 2/R (Right) digital Display on the display window to the analog audio of an LD audio disc: D/A/CX Played audio 1/L 2/R Digital DIGITAL SOUND indicator Ligits AUDIO Left Audio 1/L (Left) 1/L D/A/CX Analog ! Right Audio 2/R (Right) I
CD/CDV PARTICULAR FUNCTIONS FOR CD- (Audio Direct CD part) 1 Direct CD Since the picture circuit is deactivated and the interference between signals is eliminated with the Direct CD function, more pure sound can be reproduced. • When the Direct CD function is activated, the player does not display information on the monitor screen. • In Direct CD mode, time for starting play becomes short compared with that of normal play operation. Start play.
LD/CDV/CD TO ADJUST THE SOUND VOLUME The SHUTTLE ring on the front panel or remote control unit can be used to lower sound volume by up to -25 dB. By rotating the ring to the right, the reduced sound volume can be returned to the 0 dB setting. • The same kind of setting can be performed when using headphones. • The modified sound level automatically returns to the 0 dB default setting when the power is turned off.
I TO ADJUST THE PICTURE QUALITY (V-DNR) NOTE: • When the power is turned on after connecting the power cord, the V-DNR mode is set to the STANDARD mode. • The selected mode and settings are stored in the player's memory while the power cord is connected. • When the V-DNR button on the remote control unit is pressed once, the last selected mode is displayed on the screen for about 2 seconds. To change the V-DNR mode to the next one, press the V-DNR button while the mode is displayed.
LIJICDV I_,LD TO SEARCH FOR A PARTICULAR PASSAGE J Search using the SHUTTLE l ring and JOG dial Using the Shuttle Ring and Jog Dial changes playback speed and direction. This function is useful to search for a desired passage. Remote control Front panel SCAN ® ] Io o ® PUW ® JOG MODE indicator/ Jog indicator :Jl/ unit -C J m oo/| Jog dial Shuttle Jog dial ring Shuttle ring I, .
LD/CDV/CD TO SEARCH FOR A PARTICULAR CHAPTER/TRACK Hi-Lite Scan/Intro I Hi-Lite Scan/Intro Scan Scan Hi-Lite scan (CD or audio part of CDV) When HILITE/INTRO is pressed in the stop mode, playback starts from a point 1 minute after the beginning of the track, and each track is played for about 8 seconds. The INTRO indicator is Siton the display in the Hi-Lite Scan mode. (On the screen, "Hilite" is displayed.
LD/CDV/CD I TO SEARCH FOR A PARTICULAR CHAPTER/TRACK Chapter (Track) Search/Chapter (Track) Skip The term "chapter" refers to each section on an LD, and the term "track" refers to each section on a CD or CDV disc. If chapter or track numbers are encoded on a disc, it is so indicated on the disc jacket. • Chapter Search is not possible with discs which are not divided into chapters.
LL,II L;DV/L;IJ TO SEARCH FOR A PARTICULAR TIME/FRAME Time Number 1 Time Number Search/Track Search time Search/ABS Number Search - Example: To search for the scene located at time number 12 min. 34 sec (CLV) 1. Press CHP/TM during playback. When the display shows chapter No., press this button again. 20 Enter If you Press press 3. Press PLAY_-.
LD with TOC/CD/CDV TO PLAY ALL CHAPTERS/TRACKS - Random IN A RANDOM ORDER Playback Random Playback allows all chapters/tracks disc in random order. Press RANDOM PLAY or RANDOM. of one side of a Display during Random Play (CD) To display the music calender, press DISPLAY so that the display shows time display. r 3 RANDOM PLAY _ 0. 12 PLAY Disc Time ABS 9.
EXTRA PLAYBACK I Still frame and Frame-by-Frame advance function ] During playback if STEP (_111or II1_) on the remote control unit is pressed, the picture will be frozen. At this point, the disc can be played one frame at a time in either the forward or reverse direction by pressing one of these buttons. The sound is muted during still frame or frame advance operation. To return to normal operation, press PLAY p,-. • Front panel I_/1_1< is also used to display the still frame.
LD/CDV (Video part) [ J One-Shot Memory The One-Shot Memory function stores the image of a single frame in the player's memory. When the One-Shot Memory function is activated and playback of the current disc is completed, the stored image is recalled and displayed on the screen. Since the image is displayed even after playback is completed, this function is convenient for displaying an image on the screen while changing discs.
I TO REPEATEDLY Memory PLAY A DESIRED PAssAGE- Repeat PiaYback Repeat - To specify a point to return to later 1 PLAY REPEAT P,ayback Press REPEAT A at the point you want to see or listen to again (point A). The A indicator lights in the display window of the front panel. A-B Repeat - To repeat a specified I I When you wish to return to point A, press PLAY (m,,)on the remote control unit. section Playback REPEAT Press REPEAT A at the start point of the section to be repeated.
LD/CDV/CD 1 I One Side Repeat - To repeat an entire side of a disc 1 When playback reaches the end of the playback side, the player returns to the beginning of the disc and the same side is played back repeatedly. Press REPEAT B twice while the side to be repeated is played back. The REPEAT SIDE A or B indicator lights in the display window of the front panel. I Two-Side Repeat - To repeat both side of a disc (for two-sided LDs only) Press REPEAT B three times during 1 normal playback.
TO PLAY ONLY DESIRED SCENES/TRACKSSelected chapters (LD) or tracks (CDV/CD) can be played in any desired order (max. 24 chapters or tracks). • • ProgramPlayback You can view the state of programming on the monitor TV screen. With CDs or CDV discs, the total time of the programmed tracks can be displayed. Display with a disc containing a TOC Press PGM. PGM 8 2 Select the desired chapters or tracks.
LD/CDV/CD 1 ] -To check the program contents During program playback or in stop mode, press PGM to display the program contents on the monitor screen. When PGM is pressed again, the program contents disappear. l J o modify the program contents To erase a programmed chapter/track or pause 1 Press PGM. 2 Press SKIP 14< or _ to place the cursor (),) on the left side of the chapter/track or pause to be erased. 3 Press CLEAR. 4 Press PGM to complete programming.
LD with TOC/CD/CDV PROGRAMMING CHAPTERS/TRACKS TO BE PLAYED BACK WITHIN A SPECIFIED TIME PERIOD - CompuProgram/Auto ProgramEdit If the total playing time of both sides of the tape is specified, chapters/tracks are automatically programmed for both sides of the tape. Compu Program Edit The player selects the chapters/tracks so that their total playing time becomes the specified playing time as near as possible. Auto Program Edit Chapters/tracks are selected starting from the first track.
To clear program contents: Press CLEAR on the remote control unit. NOTES: To specify the first track to be programmed: Only the track to be played first can be specified. 1 Press EDIT. 2 Select the desired track by pressing SKIP _ 3 Set the playing time with the digit buttons. • If the specified time is too short programmed: Programming cannot be performed. • for • • or _. any track to be With discs contained 33 tracks or more, programming may not be correctly performed.
DISPLAY SWITCHING Information regarding the operations being carried out carl be displayed on the screen of the monitor TV. When DISPLAY on the remote control unit is pressed the first time, the screen display appears. Remote control CLV With LD discs containing a TOC ...
With OD discs ... Each time DISPLAY is pressed, the display changes in the following order: elapsed play time of the track being played --* Disc Time ABS (elapsed play time from the beginning of the disc) _ Remain Time TRK (remaining play time of the track being played) _ Remain Time ALL (remaining play time of the disc) --* Total Time (total play time from the beginning of the disc) _ display off. With LD discs not containin 9 a TOC...
j TROUBLESHOOTING ................................................................................. Incorrect operations are often for trouble and malfunctions. If you think that there is something wrong with this component, check the points below. Sometimes the trouble may lie in another component. Inspect the other components and electrical appliances being used.
WHEN A LASERVISION DISC IS BEING PLAYED SYMPTOM CAUSE 5. Disc is rotating no picture. but 6. Picture continuously vertically, 7. Particular disc there is moves does not REMEDY • • The TV set is not turned on. Wrong connections from player to TV. • • Turn on TV. Make correct connections. • The TV vertical hold control is not adjusted properly. • Adjust vertical-hold • The playing surface of the disc is dirty. • • The disc is warped.
TROUBLESHOOTING CAUSE SYMPTOM 13. Certain discs take too long to start or do not start. 14. The player takes too long to find point A during A-B (INTERVAL) REPEAT operation. • 15. Picture other than instructed is searched in TIME NUMBER SEARCH mode. • REMEDY There are errors when the disc code is read (There is no damage to the unit). • Press • and stop the playback. Press PLAY =,and start the playback again. (Repeat this operation a few times.) Same as item 12 above. • Same as item 12 above.
SPECIFICATIONS 1. General System ................................... LaserVision Disc system and Compact Disc digital audio system Laser ................... Semiconductor laser wavelength 780 nm Power requirements ................................... AC 120 V, 60 Hz Power consumption ..................................................... 46 W Weight .................................................... 8.4 kg (18 Ibs 8 oz) Dimensions ........................
CORRECTION INCORRECT CORRECT fA-C-3 RF OUT terminal fAC-3 RF OUT terminal This terminal is intended for use with Dolby AC-3 components (.1) planned for future release. With this terminal, you will be able to connect an AC-3 RF input of amplifiers and surround processors, and playback laser discs formatted with Dolby AC-3 (.2). This terminal is intended for use with Dolby AC-3 components (.1) planned for future release.
SPECIFICATIONS 8.