Français Español Deutsch Owner’s Manual Mode d’emploi Manuale d’istruzioni Manual de instrucciones Bedienungsanleitung Handleiding Руководство пользователя Italiano DEH-X3500UI DEH-2500UI English CD RDS RECEIVER AUTORADIO CD RDS SINTOLETTORE CD RDS REPRODUCTOR DE CD CON RECEPTOR RDS CD RDS-EMPFÄNGER CD RDS-ONTVANGER CD RDS ПРИЕМНИК Nederlands Русский
Section Before you start 01 Thank you for purchasing this PIONEER product To ensure proper use, please read through this manual before using this product. It is especially important that you read and observe WARNINGs and CAUTIONs in this manual. Please keep the manual in a safe and accessible place for future reference. Before you start About this unit The tuner frequencies on this unit are allocated for use in Western Europe, Asia, the Middle East, Africa and Oceania.
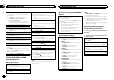
Section Operating this unit Operating this unit Head unit Part 1 234 5 6 7 Part DEH-X3500UI MIX (MIXTRAX) e DEH-2500UI iPod Indicator Detach button 1 Main information section CAUTION 78 9 a b cde DEH-2500UI 2 1 34 c 5 6 ! Use an optional Pioneer USB cable (CDU50E) to connect the USB storage device as any device connected directly to the unit will protrude out from the unit, which could be dangerous. ! Do not use unauthorized products.
Section Operating this unit 02 LANGUAGE (multi-language) This unit can display the text information from a compressed audio file even for information embedded in English or Russian. ! If the embedded language and the selected language setting are not the same, text information may not display properly. ! Some characters may not be displayed properly. 1 Turn M.C. to select the desired setting. ENG (English)—РУС (Russian) 2 Press M.C. to confirm the selection. CLOCK SET (setting the clock) 1 2 3 4 Turn M.
Section Operating this unit Tuner Operating this unit Basic operations Switching the display Selecting a band 1 Press BAND/ until the desired band (FM1, FM2,FM3 for FM or MW/LW) is displayed. Switching preset stations 1 Press c or d. ! Select PCH (preset channel) under SEEK to use this function. For details about the settings, refer to SEEK (left/right key setting) on the next page. Manual tuning (step by step) 1 Press c or d. ! Select MAN (manual tuning) under SEEK to use this function.
Section Operating this unit 02 Local seek tuning lets you tune in to only those radio stations with sufficiently strong signals for good reception. 1 Press M.C. to select the desired setting. FM: OFF—LV1—LV2—LV3—LV4 MW/LW: OFF—LV1—LV2 The highest level setting allows reception of only the strongest stations, while lower levels allow the reception of weaker stations. Playing songs on a USB storage device 1 Open the USB port cover. 2 Plug in the USB storage device using a USB cable.
Section Operating this unit Operations using special buttons Playing tracks in random order to turn random play on or off. 1 Press 5/ Tracks in a selected repeat range are played in random order. ! To change songs during random play, press d to switch to the next track. Pressing c restarts playback of the current track from the beginning of the song. Pausing playback 1 Press 4/PAUSE to pause or resume. Enhancing compressed audio and restoring rich sound (sound retriever) 1 Press 3/S.
Section Operating this unit 02 Operations using special buttons Selecting a repeat play range 1 Press 6/ to cycle between the following: ! ONE – Repeat the current song ! ALL – Repeat all songs in the selected list ! When the control mode is set to CONTROL iPod/CONTROL APP, the repeat play range will be same as what is set for the connected iPod. Selecting a random play range (shuffle) to cycle between the following: 1 Press 5/ ! SNG – Play back songs in the selected list in random order.
Section Operating this unit Operating this unit 02 SUB.W (subwoofer on/off setting) SLA (source level adjustment) LANGUAGE (multi-language) 1 Press M.C. to display the setting mode. 2 Turn M.C. to adjust the front/rear speaker balance. This unit is equipped with a subwoofer output which can be turned on or off. 1 Press M.C. to select the desired setting.
Section Operating this unit 02 Operating this unit ! SCAN (cycle through all colors) ! Sets of colors (WARM, AMBIENT, CALM) ! CUSTOM (customized illumination color) Activate this setting when using an auxiliary device connected to this unit. 1 Press M.C. to turn AUX on or off. MUTE MODE (mute mode) Sound from this system is automatically muted or attenuated when a signal from equipment with a mute function is received. 1 Press M.C. to display the setting mode. 2 Turn M.C. to select the desired setting.
Section Operating this unit MIXTRAX menu Only for DEH-X3500UI 1 Press M.C. to display the main menu. 2 Turn M.C. to change the menu option and press to select MIXTRAX. 3 Turn M.C. to select the MIXTRAX function. Once selected, the following MIXTRAX functions can be adjusted. The function is enabled when MIXTRAX is on. FLASH PATTERN (flash pattern) You can select flashing color patterns. 1 Press M.C. to display the setting mode. 2 Turn M.C. to select the desired setting.
Section Operating this unit 02 Installation 03 Connections 1 Insert the stereo mini plug into the AUX input jack. Important ! When installing this unit in a vehicle without an ACC (accessory) position on the ignition switch, failure to connect the red cable to the terminal that detects operation of the ignition key may result in battery drain.
Section Installation Installation Power cord 4 5 2 7 1 6 3 4 5 6 8 a 9 e b c d 1 To power cord input 2 Depending on the kind of vehicle, the function of 3 and 5 may be different. In this case, be sure to connect 4 to 5 and 6 to 3. 3 Yellow Back-up (or accessory) 4 Yellow Connect to the constant 12 V supply terminal. 5 Red Accessory (or back-up) 6 Red Connect to terminal controlled by ignition switch (12 V DC). 7 Connect leads of the same color to each other.
Section Installation 03 Additional information 2 Secure the mounting sleeve by using a screwdriver to bend the metal tabs (90°) into place. Removing the unit 1 1 2 1 Trim ring 2 Notched tab ! Releasing the front panel allows easier access to the trim ring. ! When reattaching the trim ring, point the side with the notched tab down. 1 Dashboard 2 Mounting sleeve # Make sure that the unit is installed securely in place. An unstable installation may cause skipping or other malfunctions.
Appendix Additional information Additional information Cause Action Message Cause Action Message Cause Action Message Cause Action Sometimes there is a delay between the start of playback and when you start to hear any sound. Wait until the message disappears and you hear sound. SKIPPED The connected USB storage device contains files embedded with Windows Mediaä DRM 9/ 10. Play an audio file not embedded with Windows Media DRM 9/10.
Appendix Additional information Do not insert anything other than a CD into the CD loading slot. Do not use cracked, chipped, warped, or otherwise damaged discs as they may damage the player. Additional information USB storage device Address any questions you have about your USB storage device to the manufacturer of the device. Connections via USB hub are not supported. Unfinalized CD-R/RW discs cannot be played back. Do not connect anything other than a USB storage device.
Appendix Additional information Playable files: up to 999 Multi-session playback: Compatible Packet write data transfer: Not compatible Regardless of the length of blank sections between the songs from the original recording, compressed audio discs play with a short pause between songs. USB storage device Playable folder hierarchy: up to eight tiers (A practical hierarchy is less than two tiers.
Appendix Additional information streaming via internet, intranets and/or other networks or in other electronic content distribution systems, such as pay-audio or audio-on-demand applications. An independent license for such use is required. For details, please visit http://www.mp3licensing.com. WMA Windows Media is either a registered trademark or trademark of Microsoft Corporation in the United States and/or other countries.
English 19 En
Section Avant de commencer 01 Nous vous remercions d’avoir acheté cet appareil PIONEER. Pour garantir une utilisation correcte, lisez bien ce mode d’emploi avant d’utiliser cet appareil. Il est particulièrement important que vous lisiez et respectiez les indications ATTENTION et PRÉCAUTION de ce mode d’emploi. Conservez-le dans un endroit sûr et facilement accessible pour toute consultation ultérieure.
Section Utilisation de l’appareil Utilisation de l’appareil Appareil central Partie DEH-X3500UI 1 234 5 6 7 Partie DEH-X3500UI MIX (MIXTRAX) e DEH-2500UI iPod cde DEH-2500UI 2 1 34 c 5 6 ! Utilisez un câble USB Pioneer optionnel (CDU50E) pour connecter le périphérique de stockage USB, faute de quoi ce dernier, comme n’importe quel périphérique relié directement à l’appareil, dépasserait de l’appareil et pourrait s’avérer dangereux. ! N’utilisez pas de produits non autorisés.
Section Utilisation de l’appareil 02 3 Appuyez sur M.C. pour sélectionner. 4 Effectuez les procédures suivantes pour configurer le menu. Pour passer à la prochaine option de menu, vous devez confirmer votre sélection. Utilisation de l’appareil 5 Pour terminer la configuration, tournez M.C. pour sélectionner YES. # Si vous souhaitez modifier à nouveau le réglage, tournez M.C. pour passer à NO. Appuyez pour sélectionner.
Section Utilisation de l’appareil Syntoniseur Opérations de base Utilisation de l’appareil Enregistrement et rappel des stations pour chaque gamme Utilisation des touches de présélection Changement de fréquence en mémoire 1 Appuyez sur c ou d. ! Sélectionnez PCH (canal présélectionné) sous SEEK pour utiliser cette fonction. Pour des détails sur les réglages, reportez-vous à la page suivante, SEEK (réglage de la touche droite/gauche). Accord manuel (pas à pas) 1 Appuyez sur c ou d.
Section Utilisation de l’appareil 02 Quand la fonction AF est utilisée, la fonction de recherche des stations régionales limite la sélection aux stations qui diffusent des programmes régionaux. 1 Appuyez sur M.C. pour mettre la fonction de recherche des stations régionales en service ou hors service.
Section Utilisation de l’appareil 2 Utilisez M.C. pour sélectionner le nom de fichier (ou nom de dossier) souhaité. Sélection d’un fichier ou d’un dossier 1 Tournez M.C. Affichage d’une liste des fichiers (ou des dossiers) dans le dossier sélectionné 1 Quand un dossier est sélectionné, appuyez sur M.C. Lecture d’une plage musicale dans le dossier sélectionné 1 Quand un dossier est sélectionné, appuyez de manière prolongée sur M.C.
Section Utilisation de l’appareil 02 Remarque Les informations textuelles TRACK INFO changent automatiquement. Recherche d’une plage musicale 1 Appuyez sur pour passer au menu principal de la recherche par liste. 2 Utilisez M.C. pour sélectionner une catégorie/plage musicale. Modification du nom d’une plage musicale/catégorie 1 Tournez M.C. Listes de lecture—interprètes—albums—plages musicales—podcasts—genres—compositeurs—livres audio Lecture 1 Quand une plage musicale est sélectionnée, appuyez sur M.C.
Section Utilisation de l’appareil ! iPhone % Appuyez sur BAND/ mode de commande. pour changer le Seulement pour DEH-2500UI Vous pouvez également changer le mode de commande en appuyant sur iPod. Remarques ! Régler le mode de commande sur CONTROL iPod/CONTROL APP met en pause la lecture d’une plage musicale. Utilisez l’iPod pour reprendre la lecture. ! Les opérations suivantes sont toujours accessibles à partir de l’appareil même si le mode de commande est réglé sur CONTROL iPod/CONTROL APP.
Section Utilisation de l’appareil 02 Cet appareil est équipé d’une sortie haut-parleur d’extrêmes graves qui peut être mise en service ou hors service. 1 Appuyez sur M.C. pour sélectionner le réglage souhaité. NOR (phase normale) — REV (phase inversée) — OFF (haut-parleur d’extrêmes graves désactivé) SUB.W CTRL (réglage du haut-parleur d’extrêmes graves) Seules les fréquences inférieures à celles de la plage sélectionnée sont produites par le haut-parleur d’extrêmes graves. 1 Appuyez sur M.C.
Section Utilisation de l’appareil PW SAVE (économie d’énergie) Activer cette fonction vous permet de réduire la consommation de la batterie. ! La mise en service de la source est la seule opération permise quand cette fonction est en service. 1 Appuyez sur M.C. pour mettre l’économie d’énergie en service ou hors service. 4 Tournez M.C. pour choisir la couleur d’éclairage. Vous pouvez sélectionner l’une des options de la liste suivante : 4 Tournez M.C. pour choisir la couleur d’éclairage.
Section Utilisation de l’appareil 02 3 Tournez M.C. pour afficher KEY COLOUR ou DISP COLOUR. Appuyez pour sélectionner. 4 Appuyez sur M.C. jusqu’à ce que le réglage de la couleur d’éclairage personnalisée apparaisse sur l’afficheur. 5 Appuyez sur M.C. pour sélectionner la couleur primaire. R (rouge)—G (vert)—B (bleu) 6 Tournez M.C. pour régler le niveau de la luminosité.
Section Utilisation de l’appareil FM STEP (incrément d’accord FM) SP-P/O MODE (réglage de la sortie arrière et du préamp) La sortie des bornes du haut-parleur arrière et la sortie RCA de cet appareil peuvent être utilisées pour connecter un haut-parleur pleine gamme ou un haut-parleur d’extrêmes graves. Sélectionnez l’option appropriée à votre connexion. 1 Appuyez sur M.C. pour afficher le mode de réglage. 2 Tournez M.C. pour sélectionner le réglage souhaité.
Section Installation 03 Installation Connexions F O N OF Important ! Lors de l’installation de cet appareil dans un véhicule sans position ACC (accessoire) sur le contact d’allumage, ne pas connecter le câble rouge à la borne qui détecte l’utilisation de la clé de contact peut entraîner le déchargement de la batterie.
Section Installation Installation Amplificateur de puissance (vendu séparément) Réalisez ces connexions lors de l’utilisation d’un amplificateur optionnel. 3 1 5 2 ! ! ! ! Montage avant/arrière DIN Important Vérifiez toutes les connexions et tous les systèmes avant l’installation finale. N’utilisez pas de pièces non autorisées car il peut en résulter des dysfonctionnements.
Section Installation 03 Retrait et remontage de la face avant Vous pouvez retirer la face avant pour protéger l’appareil contre le vol. Appuyez sur la touche de retrait, puis poussez la face avant vers le haut et tirez-la vers vous. Pour les détails, reportez-vous à Retrait de la face avant pour protéger l’appareil contre le vol et à la page 22, Remontage de la face avant.
Annexe Informations complémentaires Lecteur de CD Message Périphérique de stockage USB/iPod Causes possibles ERROR-07, Le disque est 11, 12, 17, 30 sale. Message Causes possibles Action corrective Nettoyez le disque. FORMAT READ Le début de la lecture et le début de l’émission des sons sont parfois décalés. Attendez que le message disparaisse pour entendre les sons. NO AUDIO Absence de pla- Transférez les figes musicales.
Annexe Informations complémentaires Message ERROR-23 ERROR-16 STOP NOT FOUND Causes possibles Action corrective Le périphérique de stockage USB n’a pas été formaté avec FAT12, FAT16 ou FAT32. Le périphérique de stockage USB doit être formaté avec FAT12, FAT16 ou FAT32. La version du firmware de l’iPod est ancienne. Mettez à jour la version de l’iPod. Panne iPod. Déconnectez le câble de l’iPod. Quand le menu principal de l’iPod est affiché, reconnectez et réinitialisez l’iPod.
Annexe Informations complémentaires DualDiscs Fréquence d’échantillonnage : 8 kHz à 48 kHz (32 kHz, 44,1 kHz, 48 kHz pour accentuation) Version étiquette ID3 compatible : 1.0, 1.1, 2.2, 2.3, 2.4 (la Version 2.x de l’étiquette ID3 a priorité sur la Version 1.x.) WMA Extension de fichier : .
Annexe Informations complémentaires ! ! ! ! ! iPhone 4S (version logicielle 5.1.1) iPhone 4 (version logicielle 5.1.1) iPhone 3GS (version logicielle 5.1.1) iPhone 3G (version logicielle 4.2.1) iPhone (version logicielle 3.1.2) Informations complémentaires 01 02 1 2 03 Selon la génération ou la version de l’iPod, certaines fonctions peuvent ne pas être disponibles. Les opérations peuvent différer selon la version du logiciel iPod.
Annexe Informations complémentaires Caractéristiques techniques Généralités Audio Puissance de sortie maximale ................................... 50 W × 4 70 W × 1/2 W (pour le hautparleur d’extrêmes graves) Puissance de sortie continue ................................... 22 W × 4 (50 Hz à 15 000 Hz, DHT 5 %, impédance de charge 4 W, avec les deux canaux entraînés) Impédance de charge ...... 4 W (4 W à 8 W acceptable) Niveau de sortie maximum de la sortie préamp ...................................
Sezione Prima di iniziare 01 Grazie per aver acquistato questo prodotto PIONEER Leggere attentamente questo manuale prima di utilizzare il prodotto, per assicurarne il corretto utilizzo. È particolarmente importante leggere e osservare le precauzioni contrassegnate da AVVERTENZA e ATTENZIONE contenute in questo manuale. Conservare il manuale in un luogo sicuro e accessibile, per consultazione futura.
Sezione Funzionamento dell’unità Funzionamento dell’unità Unità principale Componente DEH-X3500UI 1 234 5 6 7 Indicatore Componente DEH-X3500UI MIX (MIXTRAX) e DEH-2500UI iPod Tasto Rimozione 1 ATTENZIONE 78 9 a b cde DEH-2500UI 6 9 a b d e DEH-X3500UI Viene visualizzato quando esiste una cartella o un menu di livello inferiore. 3 Viene visualizzato quando l’impostazione 12H e selezionata in 12H/24H e l’impostazione CLOCK è selezionata in INFO DISPLAY.
Sezione Funzionamento dell’unità 02 LANGUAGE (multilingue) Questa unità è in grado di visualizzare le informazioni di testo dei file audio compressi se sono state incorporate in inglese o russo. ! Se la lingua incorporata e l’impostazione della lingua selezionata non corrispondono, le informazioni di testo potrebbero non essere visualizzate correttamente. ! Alcuni caratteri potrebbero non essere visualizzati correttamente. 1 Ruotare M.C. per selezionare l’impostazione desiderata.
Sezione Funzionamento dell’unità Sintonizzatore Funzionamento di base Funzionamento dell’unità Memorizzazione e richiamo delle stazioni per ciascuna banda Uso dei tasti di preselezione sintonia Selezione di una banda 1 Premere BAND/ fino a quando viene visualizzata la banda desiderata (FM1, FM2, FM3 per FM o MW/LW). Sintonizzazione manuale (passo per passo) 1 Premere c o d. ! Selezionare MAN (sintonizzazione manuale) in SEEK per utilizzare questa funzione.
Sezione Funzionamento dell’unità 02 La ricerca di sintonia in modo locale consente di sintonizzare solo le stazioni radio con segnali radio sufficientemente potenti per una buona ricezione. 1 Premere M.C. per selezionare l’impostazione desiderata. FM: OFF—LV1—LV2—LV3—LV4 MW/LW: OFF—LV1—LV2 L’impostazione di livello massimo consente la ricezione solo delle stazioni più forti, mentre i livelli più bassi consentono di ricevere stazioni più deboli. TA (attesa di notiziari sul traffico) 1 Premere M.C.
Sezione Funzionamento dell’unità 2 Utilizzare M.C. per selezionare il nome del file (o il nome della cartella) desiderato. Selezione di un file o di una cartella 1 Ruotare M.C. Riproduzione 1 Quando è selezionato un file o un brano, premere M.C. Visualizzazione di un elenco dei file (o delle cartelle) nella cartella selezionata 1 Quando è selezionata una cartella, premere M.C.
Sezione Funzionamento dell’unità 02 Riproduzione di un brano nella categoria selezionata 1 Mentre è selezionata una categoria, premere e tenere premuto M.C. Ricerca alfabetica nella lista 1 Quando viene visualizzata una lista per la cateper passare alla goria selezionata, premere modalità di ricerca alfabetica. ! È possibile anche passare alla modalità di ricerca alfabetica ruotando M.C. due volte. 2 Ruotare M.C. per selezionare una lettera. 3 Premere M.C. per visualizzare l’elenco in ordine alfabetico.
Sezione Funzionamento dell’unità Impostazioni delle funzioni 1 Premere M.C. per visualizzare il menu principale. 2 Ruotare M.C. per modificare l’opzione di menu; premere per selezionare FUNCTION. 3 Ruotare M.C. per selezionare la funzione. Dopo aver effettuato la selezione, è possibile regolare le funzioni descritte di seguito. AUDIO BOOK (velocità audiolibri) 1 Premere M.C. per visualizzare la modalità di impostazione. 2 Ruotare M.C. per selezionare l’impostazione preferita.
Sezione Funzionamento dell’unità 02 Se si desidera che i suoni bassi provenienti dalla gamma di frequenza dell’uscita subwoofer non siano riprodotti dagli altoparlanti anteriori o posteriori, attivare la funzione HPF (filtro passa alto). Solo le frequenze più alte di quelle comprese nell’intervallo selezionato vengono emesse dagli altoparlanti anteriori o posteriori. 1 Premere M.C. per visualizzare la modalità di impostazione. 2 Premere M.C.
Sezione Funzionamento dell’unità 4 Ruotare M.C. per selezionare il colore dell’illuminazione. È possibile selezionare una delle opzioni dall’elenco seguente: ! ! ! ! Colori preselezionati (da WHITE a ROSE) SCAN (passa in rassegna tutti i colori) Serie di colori (WARM, AMBIENT, CALM) CUSTOM (colore dell’illuminazione personalizzato) 4 Ruotare M.C. per selezionare il colore dell’illuminazione.
Sezione Funzionamento dell’unità 02 Menu MIXTRAX Solo per il modello DEH-X3500UI 1 Premere M.C. per visualizzare il menu principale. 2 Ruotare M.C. per modificare l’opzione di menu; premere per selezionare MIXTRAX. 3 Ruotare M.C. per selezionare la funzione MIXTRAX. Dopo aver effettuato la selezione, è possibile regolare le funzioni MIXTRAX descritte di seguito. La funzione è attivata se l’impostazione MIXTRAX è abilitata.
Sezione Funzionamento dell’unità Installazione 02 03 4 Ruotare M.C. per selezionare la funzione del menu di sistema. Dopo aver effettuato la selezione, è possibile regolare le funzioni del menu di sistema descritte di seguito. Per ulteriori dettagli, vedere Menu di sistema a pagina 48. Uso della sorgente AUX 3 Ruotare M.C. per visualizzare DEMO OFF, quindi premere per selezionare. 4 Ruotare M.C. per selezionare YES. 5 Premere M.C. per selezionare.
Sezione Installazione 03 1 2 3 4 5 6 Installazione Ingresso cavo di alimentazione Uscita posteriore o del subwoofer Uscita anteriore Ingresso antenna Fusibile (10 A) Ingresso telecomando cablato È possibile collegare un adattatore per telecomando cablato (venduto a parte). Cavo di alimentazione 3 4 5 2 7 1 6 3 4 5 6 8 a 9 e b c d 1 All’ingresso del cavo di alimentazione 2 A seconda del tipo di veicolo, la funzione di 3 e 5 potrebbe essere diversa.
Sezione Installazione Montaggio DIN anteriore Installazione 2 1 Inserire la fascetta di montaggio nel cruscotto. Se l’unità viene installata in uno spazio poco profondo, utilizzare la fascetta di montaggio fornita. Se dietro l’unità vi è spazio sufficiente, utilizzare la fascetta di montaggio fornita con il veicolo. Serrare due viti su ciascun lato. 3 1 2 03 Rimozione e reinserimento del frontalino È possibile rimuovere il frontalino per proteggere l’unità dai furti.
Appendice Informazioni supplementari Risoluzione dei problemi Sintomo Causa Il display torna automaticamente alla visualizzazione normale. Non è stata ese- Eseguire nuovaguita alcuna mente l’operaziooperazione per ne. 30 secondi. L’intervallo di riproduzione ripetuta cambia imprevedibilmente. A seconda dell’intervallo di riproduzione ripetuta, l’intervallo selezionato potrebbe cambiare quando si seleziona una cartella o un brano diverso, o quando si procede all’avanzamento rapido/modalità inversa.
Appendice Informazioni supplementari Informazioni supplementari Causa Azione Messaggio Causa Azione Messaggio Causa Azione Il dispositivo USB collegato non è supportato da questa unità. ! Collegare un dispositivo USB compatibile con lo standard MSC (Mass Storage Class). ! Scollegare il dispositivo e sostituirlo con un dispositivo di memoria USB compatibile. CHECK USB L’iPod funziona correttamente ma non si ricarica.
Appendice Informazioni supplementari Se si utilizzano dischi sui quali è possibile applicare etichette, controllare le istruzioni e le avvertenze dei dischi. L’inserimento e l’espulsione potrebbe non riuscire, a seconda dei dischi. L’uso di dischi di questo tipo potrebbe danneggiare questa unità. Non affiggere sui dischi etichette o altri materiali disponibili in commercio. ! I dischi potrebbero deformarsi e non sarà più possibile riprodurli.
Appendice Informazioni supplementari Disco Informazioni supplementari ATTENZIONE Riproduzione multi-sessione: compatibile ! Pioneer non garantisce la compatibilità con tutti i dispositivi di memoria USB e non si assume alcuna responsabilità per l’eventuale perdita di dati da lettori di file multimediali, smart phone o altri dispositivi anche se i dati vengono persi durante l’uso con questa unità. ! Non lasciare dischi o dispositivi di memoria USB in luoghi esposti ad alte temperature.
Appendice Informazioni supplementari D: C D: C D: C D: C D: C :Л :М :Н :О :П :Р :С :Т :У :Ф :Х :Ц :Ч : Ш, Щ :Ъ :Ы :Ь :Э :Ю :Я D: Display C: Carattere Copyright e marchi registrati iTunes Apple ed iTunes sono marchi di fabbrica di Apple Inc., registrati negli Stati Uniti ed in altri Paesi.
Appendice Informazioni supplementari Sintonizzatore MW Gamma di frequenze ........ da 531 kHz a 1 602 kHz Sensibilità ........................ 25 µV (rapporto S/R: 20 dB) Rapporto segnale/rumore ................................... 62 dB (rete IEC-A) Sintonizzatore LW Gamma di frequenze ........ da 153 kHz a 281 kHz Sensibilità ........................ 28 µV (rapporto S/R: 20 dB) Rapporto segnale/rumore ...................................
Sección Antes de comenzar 01 Gracias por haber adquirido este producto PIONEER Lea con detenimiento este manual antes de utilizar el producto por primera vez para que pueda darle el mejor uso posible. Es muy importante que lea y cumpla con la información que aparece bajo los mensajes de ADVERTENCIA y PRECAUCIÓN de este manual. Una vez leído, guarde el manual en un lugar seguro y a mano para poder consultarlo en el futuro.
Sección Utilización de esta unidad Utilización de esta unidad Unidad principal Parte DEH-X3500UI 1 234 5 6 7 Indicador Parte DEH-X3500UI MIX (MIXTRAX) e DEH-2500UI iPod Botón de soltar 1 PRECAUCIÓN 78 9 a b cde DEH-2500UI 2 1 34 c 5 6 ! Utilice un cable USB Pioneer opcional (CDU50E) para conectar el dispositivo de almacenamiento USB, ya que cualquier dispositivo conectado directamente a la unidad sobresaldrá de ésta y podría resultar peligroso. ! No utilice productos no autorizados.
Sección Utilización de esta unidad 02 LANGUAGE (idiomas múltiples) Esta unidad puede mostrar la información de texto de un archivo de audio comprimido incluso para aquella información integrada en inglés o ruso. ! Si el idioma integrado y el idioma seleccionado no coinciden, puede que la información de texto no se muestre correctamente. ! Es posible que algunos caracteres no se visualicen correctamente. 1 Gire M.C. para seleccionar el ajuste deseado. ENG (Inglés)—РУС (Ruso) 2 Pulse M.C.
Sección Utilización de esta unidad Sintonizador Funcionamiento básico Selección de una banda 1 Pulse BAND/ hasta que se visualice la banda deseada (FM1, FM2, FM3 para FM o MW/LW). Cambio de emisoras presintonizadas 1 Pulse c o d. ! Para utilizar esta función, seleccione PCH (canal presintonizado) en SEEK. Para obtener más información sobre la configuración, consulte SEEK (ajuste tecla izquierda/derecha) en la página siguiente. Búsqueda 1 Mantenga pulsado c o d y luego suéltelo.
Sección Utilización de esta unidad 02 La sintonización por búsqueda local le permite sintonizar solo las emisoras de radio con señales lo suficientemente intensas como para asegurar una correcta recepción. 1 Pulse M.C. para seleccionar el ajuste deseado. FM: OFF—LV1—LV2—LV3—LV4 MW/LW: OFF—LV1—LV2 El ajuste de nivel superior solo permite recibir las emisoras con las señales más intensas, mientras que los ajustes más bajos permiten recibir las emisoras con señales más débiles.
Sección Utilización de esta unidad Selección y reproducción de archivos/pistas de la lista de nombres 1 Pulse para cambiar al modo de lista por nombre de archivo/pista. 2 Utilice M.C. para seleccionar el nombre del archivo deseado (o de la carpeta). Selección de un archivo o una carpeta 1 Gire M.C. Reproducción 1 Tras seleccionar un archivo o una pista, pulse M.C. Visualización de una lista de los archivos (o las carpetas) de la carpeta seleccionada 1 Tras seleccionar una carpeta, pulse M.C.
Sección Utilización de esta unidad 02 2 Utilice M.C. para seleccionar una categoría/canción. Cambio del nombre de la canción o la categoría 1 Gire M.C. Listas de reproducción—artistas—álbumes— canciones—podcasts—géneros—compositores—audiolibros Reproducción 1 Tras seleccionar una canción, pulse M.C. Visualización de una lista de canciones de la categoría seleccionada 1 Tras seleccionar una categoría, pulse M.C.
Sección Utilización de esta unidad Ajustes de funciones 1 Pulse M.C. para acceder al menú principal. 2 Gire M.C. para cambiar la opción de menú y pulse para seleccionar FUNCTION. 3 Gire M.C. para seleccionar la función. Una vez seleccionado, se pueden ajustar las siguientes funciones. ! AUDIO BOOK no está disponible cuando se selecciona CONTROL iPod/CONTROL APP en modo de control. Para más información, consulte Uso de la función iPod de esta unidad desde el iPod en la página anterior.
Sección Utilización de esta unidad 02 Utilización de esta unidad SLA (ajuste del nivel de fuente) LANGUAGE (idiomas múltiples) SLA (ajuste del nivel de fuente) le permite ajustar el nivel de volumen de cada fuente para evitar cambios radicales en el volumen cuando se cambia entre las fuentes. ! Los ajustes se basan en el nivel de volumen de FM, que se mantiene inalterado. ! El nivel del volumen de MW/LW también se puede ajustar con esta función.
Sección Utilización de esta unidad 3 Gire M.C. para visualizar DISP COLOUR y púlselo para realizar la selección. 4 Gire M.C. para seleccionar el color de la iluminación.
Sección Utilización de esta unidad 02 Puede seleccionar patrones de parpadeo de colores. 1 Pulse M.C. para mostrar el modo de ajuste. 2 Gire M.C. para seleccionar el ajuste deseado. Se puede seleccionar cualquiera de las opciones de la lista siguiente: ! SOUND LEVEL 1 a SOUND LEVEL 6 – Los colores parpadearán una y otra vez, sincronizados con el nivel de sonido de una canción. Seleccione el modo deseado.
Sección Instalación Instalación Conexiones F O N OF Importante ! Cuando esta unidad se instale en un vehículo sin posición ACC (accesorio) en la llave de encendido, el cable rojo se debe conectar al terminal que pueda detectar la operación de la llave de encendido. De lo contrario, puede descargarse la batería. STAR T Posición ACC Sin posición ACC ! El uso de esta unidad en unas condiciones distintas de las indicadas a continuación podría causar incendios o fallos de funcionamiento.
Sección Instalación 03 Instalación Notas ! Cambie el menú inicial de esta unidad. Consulte SP-P/O MODE (ajuste de la salida posterior y del preamplificador) en la página 70. La salida de graves de esta unidad es monoaural. ! Al usar un altavoz de subgraves de 70 W (2 W), conecte el mismo a los cables violeta y violeta/negro de esta unidad. No conecte nada al cable verde ni al verde/negro. Amplificador de potencia (se vende por separado) Realice estas conexiones cuando utilice el amplificador opcional.
Sección Instalación Retirada y colocación del panel delantero Puede extraer el panel delantero para proteger la unidad contra robo. Pulse el botón de soltar, empuje el panel delantero hacia arriba y tire de él hacia sí. Para obtener más información, consulte Extracción del panel delantero para proteger la unidad contra robo y Colocación del panel delantero en la página 62.
Apéndice Información adicional Mensaje Causa ERROR-15 El disco inserSustituya el disco. tado aparece en blanco. ERROR-23 Formato de CD no compatible. Sustituya el disco. FORMAT READ A veces se produce un retraso entre el comienzo de la reproducción y la emisión del sonido. Espere hasta que el mensaje desaparezca y oiga sonido. NO AUDIO El disco insertado no contiene archivos reproducibles. Sustituya el disco. SKIPPED El disco inserSustituya el disco.
Apéndice Información adicional Mensaje Causa ERROR-16 La versión de Actualice la verfirmware del sión del iPod. iPod es antigua. Fallo del iPod. Resolución Desconecte el cable del iPod. Una vez que aparezca el menú principal del iPod, vuelva a conectar el iPod y reinícielo. No hay canciones en la lista actual. Seleccione una lista que contenga canciones. NOT FOUND No hay canciones relacionadas. Transfiera canciones al iPod.
Apéndice Información adicional La carga y expulsión frecuente de un disco DualDisc puede producir ralladuras en el disco; las ralladuras graves pueden producir problemas de reproducción en esta unidad. En algunos casos, un DualDisc puede atascarse en la ranura de carga del disco y no se expulsará, para evitarlo, recomendamos que no utilice DualDisc en esta unidad. Consulte la información del fabricante del disco para obtener más información sobre DualDisc.
Apéndice Información adicional Según la generación o versión del iPod, es posible que algunas funciones no estén disponibles. Las funciones pueden variar según la versión de software del iPod. Al utilizar un iPod se requiere un conector del Dock del iPod para el cable USB. El cable de la interfaz CD-IU51 de Pioneer también está disponible. Para obtener información, consulte con su proveedor. Si desea más información sobre la compatibilidad de archivos y formatos, consulte los manuales del iPod.
Apéndice Información adicional Especificaciones Generales Fuente de alimentación .... 14,4 V cc (10,8 V a 15,1 V permisible) Sistema de derivación a tierra ................................... Tipo negativo Consumo máximo de corriente ................................... 10,0 A Dimensiones (An × Al × Pr): DIN Bastidor ............. 178 mm × 50 mm × 165 mm Cara anterior ...... 188 mm × 58 mm × 15 mm D Bastidor ............. 178 mm × 50 mm × 165 mm Cara anterior ......
Español 79 Es
Abschnitt Bevor Sie beginnen 01 Vielen Dank, dass Sie sich für dieses PIONEER-Produkt entschieden haben. Bitte lesen Sie diese Anleitung vor der Verwendung dieses Produkts zur Gewährleistung seiner ordnungsgemäßen Verwendung durch. Lesen und befolgen Sie dabei insbesondere die Hinweise WARNUNG und VORSICHT. Bewahren Sie die Anleitung zur zukünftigen Bezugnahme sicher und griffbereit auf.
Abschnitt Bedienung des Geräts Hauptgerät VORSICHT DEH-X3500UI 1 234 78 5 6 9 a b Status Hauptinformationsbereich ! Tuner: Frequenzband und Frequenz ! RDS: Programm-ServiceName, PTY-Information und andere Textinformationen ! CD-Player, USB-Speichermedium und iPod: verstrichene Wiedergabezeit und Textinformationen DEH-X3500UI 9 a 6 b Bezeichnung d e Bezeichnung SRC/OFF 8 BAND/ (iPodSteuerung) 2 h (Auswurf) 9 (Zurück)/DIMMER (Dimmer) 3 MULTI-CONTROL (M.C.
Abschnitt Bedienung des Geräts 02 4 Gehen Sie zur Einstellung des Menüs folgendermaßen vor. Sie müssen Ihre Auswahl bestätigen, um die nächste Menüoption aufrufen zu können. LANGUAGE (Spracheinstellung) Das Gerät kann Textinformationen komprimierter Audiodateien auch dann anzeigen, wenn sie entweder in einem lateinischen oder kyrillischen Alphabet aufgezeichnet wurden.
Abschnitt Bedienung des Geräts Wählen einer Programmquelle 1 Drücken Sie SRC/OFF, um zwischen den folgenden Optionen umzuschalten: TUNER (Tuner)—CD (CD-Player)—USB (USB)/ iPod (iPod)—AUX (AUX) ! Nur für DEH-2500UI Wenn ein iPod angeschlossen und eine andere Quelle als iPod gewählt ist, können Sie durch Drücken von iPod zu iPod wechseln. Regeln der Lautstärke 1 Drehen Sie M.C., um die Lautstärke anzupassen. VORSICHT Parken Sie Ihr Fahrzeug aus Sicherheitsgründen zum Abnehmen der Frontplatte.
Abschnitt Bedienung des Geräts 02 L. CLASS (Leichte klassische Musik), CLASSIC (Klassische Musik) OTHERS (Sonstiges) EDUCATE (Bildung), DRAMA (Drama), CULTURE (Kultur), SCIENCE (Wissenschaft), VARIED (Gemischtes), CHILDREN (Kinderprogramme), SOCIAL (Soziales), RELIGION (Religion), PHONE IN (Telefongesprächsprogramme), TOURING (Reisen), LEISURE (Freizeit), DOCUMENT (Dokumentarsendungen) Funktionseinstellungen 1 Drücken Sie auf M.C., um das Hauptmenü anzuzeigen. 2 Drehen Sie M.C.
Abschnitt Bedienung des Geräts Umschalten der Anzeige Wählen der gewünschten Textinformationen 1 Drücken Sie auf DISP, um zwischen den folgenden Optionen umzuschalten: CD-DA ! ELAPSED TIME (Titelnummer und Wiedergabezeit) ! CLOCK (Programmquellname und Uhr) ! SPEANA (Spektralanalysator) CD-TEXT ! TRACK INFO (Titelname/Titel-Künstler/ Disc-Titel) ! ELAPSED TIME (Titelnummer und Wiedergabezeit) ! CLOCK (Programmquellname und Uhr) ! SPEANA (Spektralanalysator) MP3/WMA/WAV ! TRACK INFO (Titelname/Künstlername
Abschnitt Bedienung des Geräts 02 Hinweise ! Der iPod kann nicht ein- bzw. ausgeschaltet werden, wenn der Steuermodus CONTROL AUDIO gewählt wurde. ! Trennen Sie die Kopfhörer vom iPod, bevor Sie ihn mit diesem Gerät verbinden. ! Wenn die Zündung des Wagens ausgeschaltet wird (Zündschalter in der Position OFF), schaltet sich der iPod nach etwa zwei Minuten aus. Bedienung mithilfe der MIXTRAX-Taste MIXTRAX ein- oder ausschalten Nur für DEH-X3500UI 1 Drücken Sie auf MIX, um MIXTRAX ein- oder auszuschalten.
Abschnitt Bedienung des Geräts 2 Drehen Sie M.C., um den Modus zu wechseln, und drücken Sie ihn, um den angezeigten Modus zu wählen. ! ARTIST – Wiedergabe eines Albums des momentan spielenden Künstlers ! ALBUM – Wiedergabe eines Musiktitels eines Albums des momentan spielenden Künstlers ! GENRE – Wiedergabe eines Albums aus dem Genre des momentan spielenden Künstlers Der ausgewählte Musiktitel bzw. das ausgewählte Album wird nach dem gerade spielenden Musiktitel wiedergegeben.
Abschnitt Bedienung des Geräts 02 1 Drücken Sie auf M.C., um den Einstellmodus aufzurufen. 2 Drehen Sie M.C., um einen Equalizer zu wählen. POWERFUL—NATURAL—VOCAL—CUSTOM1—CUSTOM2—FLAT—SUPER BASS Das Equalizer-Band und der Equalizer-Pegel können individuell angepasst werden, wenn CUSTOM1 oder CUSTOM2 gewählt ist. Schließen Sie bei Wahl von CUSTOM1 oder CUSTOM2 den unten genannten Vorgang ab. Kehren Sie bei Wahl einer anderen Option durch Drücken auf M.C. zur vorherigen Anzeige zurück.
Abschnitt Bedienung des Geräts 1 Drücken Sie auf M.C., um den Einstellmodus aufzurufen. 2 Drücken Sie M.C., um den Teil der Zeitanzeige zu wählen, der eingestellt werden soll. Stunden—Minuten 3 Drehen Sie M.C., um die Uhrzeit einzustellen. 12H/24H (Uhrzeitformat) 1 Drücken Sie auf M.C., um die gewünschte Einstellung zu wählen.
Abschnitt Bedienung des Geräts 02 Hinweise ! Sobald Sie hier eine Farbe auswählen, wird diese automatisch für die Tasten und das Display dieses Geräts übernommen. ! Für Details zu den Farben der Liste siehe Wählen der Tastenfarben auf Seite 89. Umschalten der DimmerEinstellung Sie können die Helligkeit der Beleuchtung einstellen. 1 Drücken Sie auf M.C., um das Hauptmenü anzuzeigen. 2 Drehen Sie M.C., um die Option ILLUMI zur Anzeige zu bringen, und drücken Sie dann darauf, um Ihre Auswahl zu bestätigen.
Abschnitt Bedienung des Geräts Die MIXTRAX-Sondereffekte können ein- und ausgeschaltet werden. 1 Drücken Sie auf M.C., um die gewünschte Einstellung zu wählen. ON (MIXTRAX-Sondereffektanzeige)—OFF (normale Anzeige) CUT IN FX (manuelle Einblendeffekte) Die MIXTRAX-Soundeffekte können beim manuellen Wechseln der Titel aus- oder eingeschaltet werden. 1 Drücken Sie auf M.C., um die gewünschte Einstellung zu wählen.
Abschnitt Bedienung des Geräts 02 Installation 03 1 Drücken Sie auf M.C., um das Hauptmenü anzuzeigen. 2 Drehen Sie M.C., um die Menüoption zu wechseln, und drücken Sie auf SYSTEM, um die angezeigte Option zu wählen. 5 Drücken Sie zur Auswahl M.C. O Zündung mit Position ACC STAR 4 Drehen Sie M.C., um zu YES umzuschalten. F N 3 Drehen Sie M.C., um die Option DEMO OFF zur Anzeige zu bringen, und drücken Sie dann darauf, um Ihre Auswahl zu bestätigen.
Abschnitt Installation Installation ! Das schwarze Kabel gewährleistet die Erdung. Dieses Kabel wie auch die Erdungskabel anderer Produkte (insbesondere von Hochstromprodukten wie Leistungsverstärker) müssen separat verdrahtet werden. Anderenfalls kann es zu einem Brand oder einer Funktionsstörung kommen, wenn sich die Kabel versehentlich lösen.
Abschnitt Installation 03 Installation ! Installieren Sie dieses Gerät keinesfalls an folgenden Orten: — Orte, an denen das Gerät die Steuerung des Fahrzeugs behindern könnte. — Orte, an denen das Gerät die Insassen des Fahrzeugs im Anschluss an eine Schnellbremsung verletzen könnte. ! Der Halbleiterlaser kann durch Überhitzung beschädigt werden. Installieren Sie dieses Gerät deshalb in sicherer Entfernung von Hitzequellen, wie z. B. Heizöffnungen.
Anhang Zusätzliche Informationen Fehlerbehebung Symptom Ursache Symptom Abhilfemaßnahme Das Display schaltet automatisch in die normale Anzeige um. Sie haben keinen Bedienvorgang innerhalb von 30 Sekunden durchgeführt. Der Wiederholbereich ändert sich unerwartet. Ja nach Wieder- Wählen Sie den holbereich kann Wiederholbereich sich der ausge- erneut aus. wählte Bereich ändern, sobald ein anderer Ordner oder Musiktitel ausgewählt wird oder während des schnellen Vorund Rücklaufs.
Anhang Zusätzliche Informationen Meldung Ursache Abhilfemaßnahme Meldung Ursache Abhilfemaßnahme Meldung Ursache Abhilfemaßnahme Meldung Ursache Abhilfemaßnahme SKIPPED Das angeschlossene USB-Speichermedium enthält Dateien, die mit Windows Mediaä DRM 9/10 geschützt sind. Spielen Sie eine Audio-Datei ab, die keinen Schutz mit Windows Media DRM 9/10 aufweist. CHECK USB Das angeschlossene USB-Speichermedium verbraucht mehr als den maximal zulässigen Stromverbrauch.
Anhang Zusätzliche Informationen Verwenden Sie ausschließlich herkömmliche, runde Discs. Discs einer anderen Form sollten nicht verwendet werden. Zusätzliche Informationen Erschütterungen aufgrund von Unebenheiten der Fahrbahn können die Disc-Wiedergabe unterbrechen. Lesen Sie sich vor der Verwendung von Discs die Disc-spezifischen Sicherheitshinweise durch. In den CD-Ladeschacht darf kein anderer Gegenstand als eine CD eingeführt werden.
Anhang Zusätzliche Informationen MP3 Dateierweiterung: .mp3 Bitrate: 8 Kbit/s bis 320 Kbit/s (CBR), VBR Abtastfrequenz: 8 kHz bis 48 kHz (32 kHz; 44,1 kHz; 48 kHz für Emphase) Kompatible ID3-Tag-Version: 1.0, 1.1, 2.2, 2.3, 2.4 (ID3-Tag-Version 2.x erhält Vorrang vor Version 1.x) M3u-Spielliste: Nicht kompatibel MP3i (MP3 interaktiv), mp3 PRO: Nicht kompatibel WAV Zusätzliche Informationen Je nach der Anwendung, die für die Codierung der WMA-Dateien verwendet wurde, funktioniert dieses Gerät ggf.
Anhang Zusätzliche Informationen Beispiel einer Datenträger-Struktur Zusätzliche Informationen WMA Russischer Zeichensatz 01 02 1 2 03 3 4 04 5 6 05 Stufe 1 Stufe 2 Stufe 3 Stufe 4 : Ordner : Komprimierte Audio-Datei 01 bis 05: Ordnernummer 1 bis 6: Wiedergabereihenfolge Disc Die bei der Ordnerauswahl oder einem anderen Bedienvorgang angewendete Reihenfolge kann sich je nach der verwendeten Codierungs- bzw. Schreibsoftware ändern.
Anhang Zusätzliche Informationen CD-Player Typ ................................... Compact-Disc-Digital-Audiosystem Kompatible Discs ............. Compact Disc Signal-Rauschabstand ..... 94 dB (1 kHz) (IEC-A-Netz) Anzahl der Kanäle ............ 2 (Stereo) MP3-Decodiermodus ....... MPEG-1 und 2 Audio Layer 3 WMA-Decodiermodus ...... Vers. 7, 7.1, 8, 9, 10, 11, 12 (2Kanal-Audio) (Windows Media Player) WAV-Signalformat ............
Deutsch 101 De
Hoofdstuk Vóór u begint 01 Hartelijk dank voor uw keuze voor dit Pioneer-product. Lees deze handleiding voordat u het product in gebruik neemt zodat u het goed leert gebruiken. Lees vooral de gedeelten die met WAARSCHUWING en LET OP gemarkeerd zijn aandachtig. Bewaar deze handleiding na het lezen op een veilige, voor de hand liggende plaats zodat u hem indien nodig altijd kunt raadplegen.
Hoofdstuk Bediening van het toestel Bediening van het toestel Hoofdtoestel Onderdeel DEH-X3500UI 1 234 5 6 7 Onderdeel DEH-X3500UI MIX (MIXTRAX) e DEH-2500UI iPod Indicator Verwijderen 1 Basisinformatie LET OP 78 9 a b cde DEH-2500UI 2 1 34 c 5 6 ! Sluit een USB-opslagapparaat via een Pioneer USB-kabel (CD-U50E, optioneel) op dit toestel aan. Sluit het niet rechtstreeks op dit toestel aan omdat het dan uitsteekt en verwondingen of beschadigingen kan veroorzaken.
Hoofdstuk Bediening van het toestel 02 LANGUAGE (taalinstelling) Dit toestel kan Engelse of Russische tekstinformatie bij een gecomprimeerd audiobestand weergeven. ! Als de gebruikte taal niet overeenkomt met de taalinstelling van dit toestel, wordt tekst wellicht niet correct weergegeven. ! Het is mogelijk dat sommige tekens niet juist worden weergegeven. 1 Draai aan M.C. en selecteer de gewenste instelling. ENG (Engels)—РУС (Russisch) 2 Druk op M.C. om de selectie te bevestigen.
Hoofdstuk Bediening van het toestel Tuner Basisbediening Een frequentieband selecteren 1 Druk op BAND/ totdat de gewenste frequentieband (FM1, FM2, FM3 voor FM of MW/LW) op het display verschijnt. Overschakelen tussen voorkeuzestations 1 Druk op c of d. ! Om deze functie te gebruiken, moet u PCH (voorkeuzezender) selecteren onder SEEK. Raadpleeg voor meer informatie over de instellingen SEEK (instelling linker/rechter toets) op de volgende bladzijde. Handmatig afstemmen (stap voor stap) 1 Druk op c of d.
Hoofdstuk Bediening van het toestel 02 Als deze functie is ingeschakeld, stemt het toestel alleen af op zenders waarvan het signaal voldoende sterk is voor een goede ontvangst. 1 Druk op M.C. en selecteer de gewenste instelling. FM: OFF—LV1—LV2—LV3—LV4 MW/LW: OFF—LV1—LV2 Als u het hoogste niveau selecteert, wordt alleen afgestemd op de sterkste zenders. Bij lagere niveaus wordt ook afgestemd op zwakkere zenders. TA (stand-by voor verkeersberichten) 1 Druk op M.C.
Hoofdstuk Bediening van het toestel 2 Gebruik M.C. om de gewenste bestandsnaam (of mapnaam) te selecteren. Een bestand of map selecteren 1 Draai aan M.C. Afspelen 1 Selecteer een bestand of fragment en druk op M.C. Een lijst van de bestanden (mappen) in de geselecteerde map weergeven 1 Selecteer een map en druk op M.C. Een song in de geselecteerde map afspelen 1 Selecteer een map en houd M.C. ingedrukt.
Hoofdstuk Bediening van het toestel 02 Een song in de geselecteerde categorie afspelen 1 Selecteer een categorie en houd M.C. ingedrukt. Alfabetisch in een lijst zoeken 1 Geef de lijst voor de geselecteerde categorie weer en druk op om alfabetisch te zoeken. ! U kunt ook overschakelen naar alfabetisch zoeken door twee keer aan M.C. te draaien. 2 Draai aan M.C. om een letter te selecteren. 3 Druk op M.C. om de alfabetische lijst weer te geven. ! Druk op /DIMMER om het zoeken te annuleren.
Hoofdstuk Bediening van het toestel S.RTRV (sound retriever) Deze verbetert automatisch de weergave van gecomprimeerde audio en zorgt voor een vol geluid. 1 Druk op M.C. en selecteer de gewenste instelling. Raadpleeg De geluidskwaliteit van gecomprimeerde audio verbeteren (sound retriever) op de vorige bladzijde voor meer informatie. Audio-instellingen 1 Druk op M.C. om het hoofdmenu weer te geven. 2 Draai aan M.C., selecteer de menuoptie AUDIO en druk erop. 3 Draai aan M.C. en selecteer de audiofunctie.
Hoofdstuk Bediening van het toestel 02 Systeemmenu Belangrijk Als het toestel van de accu wordt losgekoppeld, wordt PW SAVE (energiezuinige modus) uitgeschakeld. Deze functie moet u weer inschakelen als het toestel terug met de accu wordt verbonden. Als het voertuig niet van een contactschakelaar met accessoirestand (ACC) is voorzien, is het (afhankelijk van de aansluiting) mogelijk dat het toestel de accu blijft belasten als PW SAVE (energiezuinige modus) is uitgeschakeld. 1 Druk op M.C.
Hoofdstuk Bediening van het toestel Bediening van het toestel U kunt de kleuren van de toetsen en het display van het toestel naar wens instellen. De verlichtingskleur zelf aanpassen 1 Druk op M.C. om het hoofdmenu weer te geven. Alleen voor DEH-X3500UI U kunt aangepaste kleuren maken voor KEY COLOUR en DISP COLOUR. 2 Draai aan M.C., geef ILLUMI weer en druk erop. 3 Draai aan M.C., geef BOTH COLOUR weer en druk erop. 4 Draai aan M.C. en selecteer de verlichtingskleur.
Hoofdstuk Bediening van het toestel 02 Beginmenu 1 Houd SRC/OFF ingedrukt tot het toestel uit gaat. 2 Houd SRC/OFF ingedrukt tot het hoofdmenu wordt weergegeven. 3 Draai aan M.C., selecteer de menuoptie INITIAL en druk erop. 4 Draai aan M.C. en selecteer de gewenste functie. U kunt de volgende functies in het beginmenu aanpassen. FM STEP (FM-afstemstap) Standaard wordt er bij automatisch afstemmen een FM-afstemstap van 50 kHz gebruikt, en 100 kHz als de functie AF of TA is ingeschakeld.
Hoofdstuk Installatie Installatie — Verwijder nooit de isolatie van de voedingskabel van dit toestel om andere apparaten van stroom te voorzien. De stroomcapaciteit van de voedingskabel is beperkt. — Gebruik een zekering met het voorgeschreven vermogen. — Verbind de negatieve luidsprekerkabel nooit rechtstreeks met de aarding. — Voeg de negatieve kabels van verschillende luidsprekers nooit samen.
Hoofdstuk Installatie 03 Installatie Versterker (apart verkrijgbaar) Maak deze verbindingen als de optionele versterker wordt gebruikt. 3 1 5 2 7 2 Zet de montagebehuizing vast door met een schroevendraaier de metalen lipjes op hun plaats te buigen (90°). Het toestel verwijderen 1 Verwijder de sierlijst. 1 4 5 60° 3 2 2 1 ! De halfgeleiderlaser raakt bij oververhitting beschadigd. Plaats dit apparaat niet op plaatsen waar het warm wordt, zoals nabij de uitlaat van een kachel.
Aanhangsel Aanvullende informatie Problemen verhelpen Symptoom Oorzaak Actie Het display keert automatisch terug naar het gewone display. U hebt gedurende ongeveer 30 seconden geen handeling uitgevoerd. Voer de handeling opnieuw uit. Het bereik voor herhaald afspelen wordt onverwachts gewijzigd. Afhankelijk van Selecteer het gehet herhaalbewenste herhaalreik kan het ge- bereik opnieuw.
Aanhangsel Aanvullende informatie Melding Oorzaak Actie Melding Oorzaak Actie Melding Oorzaak N/A USB Het aangesloten USB-apparaat wordt niet ondersteund door dit toestel. ! Gebruik een opslagapparaat dat compatibel is met USB Mass Storage Class. ! Ontkoppel het apparaat en sluit een compatibel USB-opslagapparaat aan. ERROR-19 Communicatiefout. Probeer de volgende mogelijkheden. – Zet het contact uit en dan weer aan. – Ontkoppel het USB-opslagapparaat.
Aanhangsel Aanvullende informatie Bij gebruik van discs met een bedrukbaar labeloppervlak moet u de instructies en waarschuwingen van de discs controleren. Afhankelijk van de disc kan laden of uitwerpen niet mogelijk zijn. Het gebruik van zulke discs kan dit toestel beschadigen. Plak geen in de handel verkrijgbare labels of andere materialen op de discs. ! De discs kunnen vervormen waardoor ze onafspeelbaar kunnen worden.
Aanhangsel Aanvullende informatie USB-opslagapparaat Mappenhiërarchie: maximaal acht niveaus diep (Voor praktisch gebruik kunt u beter niet meer dan twee niveaus gebruiken.) Afspeelbare mappen: maximaal 500 Afspeelbare bestanden: maximaal 15 000 Afspelen van auteursrechtelijk beschermde bestanden: Niet compatibel Gepartitioneerd USB-opslagapparaat: Alleen de eerste partitie kan worden afgespeeld.
Aanhangsel Aanvullende informatie iPod & iPhone iPhone, iPod, iPod classic, iPod nano en iPod touch zijn handelsmerken van Apple Inc., gedeponeerd in de VS en andere landen. “Gemaakt voor iPod” en “Gemaakt voor iPhone” wil zeggen dat een elektronische accessoire speciaal ontwikkeld is voor verbinding met respectievelijk een iPod of iPhone en door de maker gewaarborgd is als conform de Apple werkingsnormen.
Раздел Перед началом эксплуатации 01 Благодарим Вас за покупку этого изделия компании PIONEER. Для обеспечения правильности эксплуатации внимательно прочитайте данное руководство перед началом использования изделия. Особенно важно, чтобы Вы прочли и соблюдали инструкции, помеченные в данном руководстве заголовками ПРЕДУПРЕЖДЕНИЕ и ВНИМАНИЕ. Держите данное руководство под рукой для обращения к нему в будущем.
Раздел Управление данным устройством Основное устройство Элемент DEH-X3500UI 1 234 5 Управление данным устройством 6 7 Элемент DEH-X3500UI MIX (MIXTRAX) e DEH-2500UI iPod 9 a b cde DEH-2500UI 2 1 34 c 5 7 8 9 a 6 b d e ! Для подключения запоминающих устройств USB используйте USB-кабель Pioneer (CD-U50E, приобретается отдельно), поскольку любое устройство при подключении напрямую выступает из устройства, что создает потенциальную опасность.
Раздел Управление данным устройством 02 # Если вы хотите выполнить настройку позже, поверните M.C., чтобы выбрать NO. Нажмите для выбора. В случае выбора NO настройка в установочном меню невозможна. 3 Нажмите M.C. для выбора. 4 Для настройки выполните следующие процедуры. Для перехода к следующему пункту меню необходимо подтвердить выбор. LANGUAGE (выбор языка) Данное устройство может отображать текстовую информацию из сжатых аудиофайлов, в том числе информацию на английском и русском языках.
Раздел Управление данным устройством Часто используемые элементы меню Возврат к предыдущему дисплею Возврат к предыдущему списку (к папке на один уровень выше) /DIMMER. 1 Нажмите кнопку Возврат в исходный режим Выход из главного меню 1 Нажмите кнопку BAND/ . Возврат в исходный режим из списка 1 Нажмите кнопку BAND/ . Тюнер Основные операции Выбор диапазона 1 Нажимайте кнопку BAND/ , пока на дисплее не отобразится нужный диапазон (FM1, FM2, FM3 для FM или MW/LW).
Раздел Управление данным устройством 02 CLASSICS (классика) L. CLASS (легкая классическая музыка), CLASSIC (классическая музыка) OTHERS (прочее) EDUCATE (образовательные программы), DRAMA (постановки), CULTURE (культура), SCIENCE (наука), VARIED (разное), CHILDREN (детские программы), SOCIAL (социальные вопросы), RELIGION (религиозные программы), PHONE IN (ток-шоу), TOURING (путешествия), LEISURE (отдых), DOCUMENT (документальные программы) Настройка функций 1 Нажмите M.C., чтобы открыть главное меню.
Раздел Управление данным устройством Переключение дисплея Выбор текстовой информации 1 Нажимайте DISP для выбора из следующих функций: CD-DA ! ELAPSED TIME (номер дорожки и время воспроизведения) ! CLOCK (название источника сигнала и часы) ! SPEANA (анализатор спектра) CD-TEXT ! TRACK INFO (название дорожки/исполнитель/название диска) ! ELAPSED TIME (номер дорожки и время воспроизведения) ! CLOCK (название источника сигнала и часы) ! SPEANA (анализатор спектра) MP3/WMA/WAV ! TRACK INFO (название дорожки/и
Раздел Управление данным устройством 02 Переключение дисплея iPod Основные операции Воспроизведение музыки на iPod 1 Откройте крышку порта USB. 2 Подключите iPod с помощью кабеля USB с переходником Dock Connector. Воспроизведение начинается автоматически. Выбор композиции (раздела) 1 Нажмите кнопку c или d. Выбор альбома 1 Нажмите кнопку 1/ или 2/ . Ускоренная перемотка вперед или назад 1 Нажмите и удерживайте кнопку c или d.
Раздел Управление данным устройством Приостановка воспроизведения 1 Нажмите кнопку 4/PAUSE, чтобы включить паузу или возобновить воспроизведение. Улучшение качества звука сжатых аудиофайлов и восстановление полноты звучания (технология преобразования звука) 1 Нажимайте кнопку 3/S.Rtrv для выбора из следующих функций: 1—2—OFF (выкл) Настройка 1 эффективна для файлов с низкой степенью сжатия, а настройка 2 – для файлов с высокой степенью сжатия.
Раздел Управление данным устройством 02 3 Для выбора аудиофункции поворачивайте M.C. Следующие выбранные аудиофункции можно настраивать. ! Функция FADER недоступна, если в режиме SP-P/O MODE выбрано SUB.W/SUB.W. Подробнее см. в разделе SP-P/O MODE (настройка выхода заднего канала и предварительного усилителя) на стр. 131. ! Функции SUB.W, SUB.W CTRL и HPF SETTING недоступны, если в режиме SP-P/O MODE выбрано REAR/REAR. Подробнее см.
Раздел Управление данным устройством Меню системы Важно PW SAVE (режим энергосбережения) отключается при отсоединении аккумуляторной батареи автомобиля; при подсоединении батареи его потребуется включить снова. При выключенном режиме PW SAVE (режим энергосбережения) возможно, что, в зависимости от метода подключения, устройство будет потреблять энергию аккумулятора, если зажигание автомобиля не имеет положения АСС. 1 Нажмите M.C., чтобы открыть главное меню. 2 Поворачивайте M.C.
Раздел Управление данным устройством 02 4 Поворачивайте M.C., чтобы выбрать цвет подсветки. Можно выбрать любую настройку из следующего списка: ! предустановленные цвета (в диапазоне от WHITE до ROSE) ! SCAN (смена всех цветов по очереди) ! наборы цветов (WARM, AMBIENT, CALM) ! CUSTOM (пользовательский цвет подсветки) Примечание Подробную информацию о цветах в списке см. в разделе Выбор цвета подсветки кнопок на стр. 129.
Раздел Управление данным устройством Можно выбрать тип цветовой заставки. 1 Для отображения установочного меню нажмите M.C. 2 Поворачивайте M.C. для выбора настройки. Можно выбрать любую настройку из следующего списка: ! От SOUND LEVEL 1 до SOUND LEVEL 6 – цветовая пульсация будет включаться и выключаться в соответствии с уровнем громкости композиции. Выберите нужный режим. ! От LOW PASS 1 до LOW PASS 6 – цветовая пульсация будет включаться и выключаться в соответствии с уровнем низких частот композиции.
Раздел Управление данным устройством 02 Установка 03 2 Поворачивайте M.C. для прокрутки пунктов меню; нажмите, чтобы выбрать SYSTEM. 3 Поверните M.C., чтобы отобразить DEMO OFF, затем нажмите. Поверните M.C. для выбора YES. 5 Нажмите M.C. для выбора.
Раздел Установка Установка ! Черный кабель является заземляющим. Заземляющие кабели данного устройства и других устройств (особенно устройств, предназначенных для эксплуатации при больших токах, таких как усилитель мощности) должны монтироваться отдельно. В противном случае их случайное отсоединение может привести к пожару или неисправности.
Раздел Установка 03 Установка Установка ! ! ! ! Важно Перед окончательной установкой проверьте все соединения и системы. Не используйте детали, не разрешенные производителем к использованию, поскольку это может стать причиной неисправностей. Уточните у дилера компании, требует ли установка сверления отверстий или внесения иных изменений в конструкцию автомобиля. Не устанавливайте данное устройство в местах, где оно может: — помешать управлению автомобилем.
Приложение Дополнительная информация Устранение неисправностей Признак Причина Дисплей автоматически возвращается в исходный режим. В течение 30 Повторите опесекунд не рацию. было выполнено никаких операций. Диапазон повторного воспроизведения самопроизвольно изменяется. В зависимости от выбранного диапазона воспроизведения он может изменяться при выборе другой папки или дорожки, а также при перемотке вперед/назад. Выберите диапазон повторного воспроизведения еще раз.
Приложение Дополнительная информация Сообщение Причина PROTECT N/A USB CHECK USB CHECK USB 136 Ru Дополнительная информация Действие Сообщение Причина Все файлы на запоминающем устройстве USB закодированы Windows Media DRM 9/10. Перенесите аудиофайлы, не закодированные Windows Media DRM 9/10, на запоминающее устройство USB и подключите его. CHECK USB Подсоединенное устройство USB не поддерживается данным устройством. ! Подключите запоминающее устройство USB класса Mass Storage.
Приложение Дополнительная информация Используйте только обычные круглые диски. Не используйте диски необычной формы. Не вставляйте в щель для загрузки компактдиска ничего, кроме компакт-диска. Не используйте диски с трещинами, отколотыми краями, деформированные диски или диски с другими повреждениями, поскольку такие диски могут повредить проигрыватель. Не закрытые для записи диски CD-R/CD-RW воспроизвести нельзя. Не прикасайтесь к записанной поверхности дисков.
Приложение Дополнительная информация Совместимая версия тегов ID3: 1.0, 1.1, 2.2, 2.3, 2.4 (теги ID3 версии 2.x имеют приоритет перед версией 1.x.) Списки воспроизведения M3u: не поддерживаются MP3i (интерактивный MP3), mp3 PRO: не поддерживаются WAV Расширение: .
Приложение Дополнительная информация ВНИМАНИЕ Компания Pioneer не несет ответственности за потерю данных на iPod, даже если эти данные будут потеряны во время использования данного устройства. Последовательность воспроизведения аудиофайлов Пользователь не может назначать номера папок и устанавливать последовательность воспроизведения с помощью данного устройства.
Приложение Дополнительная информация Технические характеристики Общие Источник питания ........... 14,4 В постоянного тока (допустимый диапазон от 10,8 В до 15,1 В) Система заземления ..... Заземление отрицательного полюса Максимальный потребляемый ток ................................... 10,0 А Размеры (Ш × В × Г): DIN Шасси ............... 178 мм × 50 мм × 165 мм Передняя панель ..................... 188 мм × 58 мм × 15 мм D Шасси ............... 178 мм × 50 мм × 165 мм Передняя панель .................
Русский 141 Ru
Ru
Русский 143 Ru
PIONEER CORPORATION 1-1, Shin-ogura, Saiwai-ku, Kawasaki-shi, Kanagawa 212-0031, JAPAN PIONEER EUROPE NV Haven 1087, Keetberglaan 1, B-9120 Melsele, Belgium/Belgique TEL: (0) 3/570.05.11 PIONEER ELECTRONICS (USA) INC. P.O. Box 1540, Long Beach, California 90801-1540, U.S.A. TEL: (800) 421-1404 PIONEER ELECTRONICS OF CANADA, INC. 340 Ferrier Street, Unit 2, Markham, Ontario L3R 2Z5, Canada TEL: 1-877-283-5901 TEL: 905-479-4411 PIONEER ELECTRONICS ASIACENTRE PTE. LTD.