DEH-P6700MP Français Multi-CD control High power CD/MP3/WMA player with FM/AM tuner Syntoniseur FM/AM et lecteur de CD/MP3/WMA, Puissance élevée , avec contrôleur pour lecteur de CD à chargeur English Operation Manual Mode d emploi
Contents Thank you for buying this Pioneer product. Please read through these operating instructions so you will know how to operate your model properly. After you have finished reading the instructions, keep this manual in a safe place for future reference.
Contents English When playing back an MP3/WMA disc 26 When playing back a WAV disc 26 Scrolling text information in the display 27 Multi-CD Player Playing a CD 28 50-disc multi-CD player 28 Introduction of advanced multi-CD player operation 29 Repeating play 29 Playing tracks in a random order 29 Scanning CDs and tracks 30 Pausing CD playback 30 Using ITS playlists 30 Creating a playlist with ITS programming 30 Playback from your ITS playlist 31 Erasing a track from your ITS playlist 31 Erasin
Contents Using the AUX source 45 Selecting AUX as the source 45 Setting the AUX title 45 Using different entertainment displays 46 Introduction of XM operation 47 XM operation 47 Switching the XM display 47 Swiching the XM channel select setting 47 Introduction of DVD operation 47 Operation 48 Function menu switching 48 Using ITS playlist and disc title functions 48 Additional Information Understanding built-in CD player error messages 49 CD player and care 49 CD-R/CD-RW discs 49 MP3, WMA a
English Selecting fine audio equipment such as the unit you’ve just purchased is only the start of your musical enjoyment. Now it’s time to consider how you can maximize the fun and excitement your equipment offers. This manufacturer and the Electronic Industries Association’s Consumer Electronics Group want you to get the most out of your equipment by playing it at a safe level.
Section 01 Before You Start Information to User Alteration or modifications carried out without appropriate authorization may invalidate the user s right to operate the equipment. For Canadian model This Class B digital apparatus complies with Canadian ICES-003. CAUTION ! Do not allow this unit to come into contact with liquids. Electrical shock could result. Also, this unit damage, smoke, and overheat could result from contact with liquids.
Section 01 Before You Start Please contact the dealer or distributor from where you purchased this unit for after-sales service (including warranty conditions) or any other information. In case the necessary information is not available, please contact the companies listed below: Please do not ship your unit to the companies at the addresses listed below for repair without advance contact. U.S.A. Pioneer Electronics (USA) Inc. CUSTOMER SUPPORT DIVISION P.O.
Section 01 Before You Start About WMA dealer or nearest authorized Pioneer service station regarding the satellite radio tuner that can be connected to this unit. For satellite radio tuner operation, please refer to the satellite radio tuner owner s manual. Notes The Windows Media" logo printed on the box indicates that this unit can play back WMA data. WMA is short for Windows Media Audio and refers to an audio compression technology that is developed by Microsoft Corporation.
Section 01 Before You Start Removing the front panel Press OPEN to open the front panel. 2 Grip the left side of the front panel and pull it gently outward. Take care not to grip it too tightly or to drop the front panel and protect it from contact with water or other fluids to prevent permanent damage. Important The red lead (ACC) of this unit should be connected to a terminal coupled with ignition switch on/off operations. If this is not done, the vehicle battery may be drained.
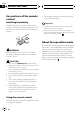
Section 01 Before You Start Use and care of the remote control Installing the battery Slide the tray out on the back of the remote control and insert the battery with the plus (+) and minus ( ) poles pointing in the proper direction. ! The remote control may not function properly in direct sunlight. Important ! Do not store the remote control in high temperatures or direct sunlight. ! Do not let the remote control fall onto the floor, where it may become jammed under the brake or accelerator pedal.
Section 02 What s What 5 4 6 2 3 e d 7 English 1 8 c Head unit 1 CLOCK button Press to change to the clock display. 2 PAUSE button Press to turn pause on or off. 3 DISPLAY button Press to select different displays. 4 FUNCTION button Press to select functions. 5 AUDIO button Press to select various sound quality controls. 6 ENTERTAINMENT button Press to change to the entertainment display. 7 OPEN button Press to open the front panel.
Section 02 What s What f a g 4 5 8 h j i Remote control Operation is the same as when using the buttons on the head unit. See the explanation of the head unit about the operation of each button with the exception of ATT, which is explained below. f VOLUME buttons Press to increase or decrease the volume. g ATT button Press to quickly lower the volume level, by about 90%. Press once more to return to the original volume level. h TUNER button Press to select the tuner as the source.
Section 03 Basic Operations Turning the unit on Selecting a source You can select a source you want to listen to. To switch to the built-in CD player, load a disc in the unit (refer to page 18). % When using the head unit, press SOURCE to select a source.
Section 03 Basic Operations Notes ! The built-in CD player plays one, standard, 12cm or 8-cm (single) CD at a time. Do not use an adapter when playing 8-cm CDs. ! Do not insert anything other than a CD into the CD loading slot. ! There is sometimes a delay between starting up CD playback and the sound being issued. When being read in, Format Read is displayed. ! If you cannot insert a disc completely or if after you insert a disc the disc does not play, check that the label side of the disc is up.
Section 04 Tuner Listening to the radio 5 English 1 23 4 4 To perform seek tuning, press and hold c or d for about one second and release. The tuner will scan the frequencies until a broadcast strong enough for good reception is found. # You can cancel seek tuning by briefly pressing either c or d. # If you press and hold c or d you can skip stations. Seek tuning starts as soon as you release the button. These are the basic steps necessary to operate the radio.
Section 04 Tuner Introduction of advanced tuner operation The selected radio station frequency has been stored in memory. The next time you press the same preset tuning button the radio station frequency is recalled from memory. Notes 1 1 Function display Shows the function status. % Press FUNCTION to display the function names. Press FUNCTION repeatedly to switch between the following functions: BSM (best stations memory) Local (local seek tuning) # To return to the frequency display, press BAND.
Section 04 Tuner English Storing the strongest broadcast frequencies BSM (best stations memory) lets you automatically store the six strongest broadcast frequencies under preset tuning buttons 1 6 and once stored there you can tune in to those frequencies with the touch of a button. 1 Press FUNCTION to select BSM. Press FUNCTION until BSM appears in the display. 2 Press a to turn BSM on. BSM begins to flash.
Section 05 Built-in CD Player Playing a CD Introduction of advanced built-in CD player operation 1 1 2 These are the basic steps necessary to play a CD with your built-in CD player. More advanced CD operation is explained starting on this page. 1 Track number indicator Shows the track currently playing. 2 Play time indicator Shows the elapsed playing time of the current track. 1 Press SOURCE to select the built-in CD player. Press SOURCE until you see Compact Disc displayed.
Section 05 Built-in CD Player ! TRACK Repeat just the current track If you perform track search or fast forward/reverse during TRACK, the repeat play range changes to DISC. # If the display has automatically returned to the playback display, select Scan again by pressing FUNCTION. English Note 3 When you find the desired track press b to turn scan play off. Scan :OFF appears in the display. The track will continue to play.
Section 05 Built-in CD Player Using compression and BMX Using the COMP (compression) and BMX functions let you adjust the sound playback quality of this player. Each of the functions have a two-step adjustment. The COMP function balances the output of louder and softer sounds at higher volumes. BMX controls sound reverberations to give playback a fuller sound.
Section 05 Built-in CD Player # When playing a CD TEXT disc, you cannot switch to TITLE. The disc title will have already been recorded on a CD TEXT disc. 3 Press button 1 to select the desired character type. Press button 1 repeatedly to switch between the following character types: Alphabet (upper case) Alphabet (lower case) European letters, such as those with accents (e.g.
Section 05 Built-in CD Player Displaying titles on CD TEXT discs % Press DISPLAY. Press DISPLAY repeatedly to switch between the following settings: Play time Disc Title (disc title) DiscArtist Name (disc artist name) Track Title (track title) TrackArtist Name (track artist name) # If specific information has not been recorded on a CD TEXT disc, No XXXX will be displayed (e.g., No Track Artist Name).
Section 06 MP3/WMA/WAV Player Playing MP3/WMA/WAV 2 3 4 These are the basic steps necessary to play an MP3/WMA/WAV with your built-in CD player. More advanced MP3/WMA/WAV operation is explained starting on the next page. 1 MP3/WMA/WAV indicator Shows when the MP3/WMA/WAV file is playing. 2 Folder number indicator Shows the number of folder currently playing. 3 Track number indicator Shows the track (file) currently playing.
Section 06 MP3/WMA/WAV Player Introduction of advanced built-in CD player (MP3/ WMA/WAV) operation 1 1 Function display Shows the function status. % Press FUNCTION to display the function names. Press FUNCTION repeatedly to switch between the following functions: Repeat (repeat play) Random (random play) Scan (scan play) Pause (pause) folder list Comp./BMX (compression and BMX) FF/REV (search method) # To return to the playback display, press BAND.
Section 06 MP3/WMA/WAV Player 2 Press c or d to scroll through the list of titles that have been entered. 4 When you find the desired track (or folder) press b to turn scan play off. Scan :OFF appears in the display. The track (or folder) will continue to play. 3 Press a to play your favorite folder title. That selection will begin to play. # If the display has automatically returned to the playback display, select Scan again by pressing FUNCTION.
Section 06 MP3/WMA/WAV Player 2 Press c or d to select the search method. Press c or d until the desired search method appears in the display. ! FF/REV Fast forward and reverse ! ROUGH SEARCH Searching every 10 tracks Searching every 10 tracks in the current folder If the current folder contains over 10 tracks, you can search every 10 tracks. When one folder contains a lot of tracks, you can roughly search for the track you want to play. 1 Select the search method ROUGH SEARCH.
Section 06 MP3/WMA/WAV Player English Scrolling text information in the display This unit can display the first 16 letters only of Folder Name, File Name, Track Title, Artist Name, Album Title and Comment. When the recorded information is longer than 16 letters, you can scroll the text to the left so that the rest of the text information can be seen. % Press DISPLAY and hold until the text information begins to scroll through the display. The text information scrolls.
Section 07 Multi-CD Player Playing a CD 3 To perform fast forward or reverse, press and hold c or d. 1 2 3 You can use this unit to control a multi-CD player, which is sold separately. These are the basic steps necessary to play a CD with your multi-CD player. More advanced CD operation is explained starting on the next page. 1 Disc number indicator Shows the disc currently playing. 2 Track number indicator Shows the track currently playing.
Section 07 Multi-CD Player 2 Press c or d to select the repeat range. Press c or d until the desired repeat range appears in the display. ! MCD Repeat all discs in the multi-CD player ! TRACK Repeat just the current track ! DISC Repeat the current disc 1 1 Function display Shows the function status. % Press FUNCTION to display the function names.
Section 07 Multi-CD Player Scanning CDs and tracks While you are using DISC, the beginning of each track on the selected disc plays for about 10 seconds. When you are using MCD, the beginning of the first track of each disc is played for about 10 seconds. 1 Select the repeat range. Refer to Repeating play on the previous page. 2 Press FUNCTION to select Scan. Press FUNCTION until Scan appears in the display. 3 Press a to turn scan play on. Scan :ON appears in the display.
Section 07 Multi-CD Player 5 Press BAND to return to the playback display. Note After data for 100 discs has been stored in memory, data for a new disc will overwrite the oldest one. Playback from your ITS playlist ITS play lets you listen to the tracks that you have entered into your ITS playlist. When you turn on ITS play, tracks from your ITS playlist in the multi-CD player will begin to play. 1 Select the repeat range. Refer to Repeating play on page 29. 2 Press FUNCTION to select ITS Play.
Section 07 Multi-CD Player 2 Press FUNCTION and hold until TITLE appears in the display, then press FUNCTION to select ITS. After TITLE is displayed, press FUNCTION until ITS appears in the display. 3 Press b to erase all tracks on the currently playing CD from your ITS playlist. All tracks on the currently playing CD are erased from your playlist and ITS Clear is displayed. 4 Press BAND to return to the playback display. Using disc title functions 3 Press button 1 to select the desired character type.
Section 07 Multi-CD Player Displaying disc titles You can display the title of any disc that has had a disc title entered. % Press DISPLAY. Press DISPLAY repeatedly to switch between the following settings: Play time Disc Title (disc title) When you select Disc Title, the title of the currently playing disc is shown in the display. # When a CD with a disc title is inserted, the disc title automatically begins to scroll through the display.
Section 07 Multi-CD Player Note When Ever Scroll is set to ON at the initial setting, CD text information scrolls continuously in the display. If you want to display the first 16 characters of text information temporarily and scroll from the beginning, press and hold DISPLAY. About Ever Scroll, refer to Switching the Ever Scroll on page 43. Using compression and bass emphasis You can use these functions only with a multiCD player that supports them.
Section 08 Audio Adjustments 1 1 Audio display Shows the audio adjustments status. % Press AUDIO to display the audio function names.
Section 08 Audio Adjustments # When the rear output setting is REAR SP :S/W, you cannot adjust front/rear speaker balance. Refer to Setting the rear output and subwoofer controller on page 42. 3 Press c or d to adjust left/right speaker balance. When you press c or d, Bal L/R 0 is displayed. Each press of c or d moves the left/ right speaker balance towards the left or the right. Bal L 9 Bal R 9 is displayed as the left/right speaker balance moves from left to right.
Section 08 Audio Adjustments Fine-adjusting equalizer curve Note If you make adjustments, CUSTOM curve is updated. English You can adjust the center frequency and the Q factor (curve characteristics) of each currently selected curve band (EQ LOW/EQ MID/ EQ HIGH). Adjusting bass and treble Level (dB) Q=2N Q=2W Center frequency Frequency (Hz) 1 Press AUDIO and hold until frequency and the Q factor (e.g., F 80 Q 1W) appears in the display.
Section 08 Audio Adjustments Selecting bass frequency You can select the bass frequency for level adjustment. 1 Press AUDIO to select Loud. Press AUDIO until Loud appears in the display. 1 Press AUDIO and hold until frequency and the Q factor (e.g., F 80 Q 1W) appears in the display. 2 Press a to turn loudness on. Loudness level (e.g., Loud MID) appears in the display. 2 Press AUDIO to select Bass. Press AUDIO until Bass appears in the display. 3 Press c or d to select a desired level.
Section 08 Audio Adjustments Adjusting subwoofer settings 1 Press AUDIO to select Sub-W2. Press AUDIO until Sub-W2 appears in the display. # You can also select the subwoofer setting menu by pressing SW on the unit. # When the subwoofer output is on, you can select Sub-W2. 2 Press c or d to select cut-off frequency. Each press of c or d selects cut-off frequencies in the following order: 50 80 125 (Hz) Only frequencies lower than those in the selected range are outputted from the subwoofer.
Section 08 Audio Adjustments Only frequencies higher than those in the selected range are outputted from the front or rear speakers. Adjusting source levels SLA (source level adjustment) lets you adjust the volume level of each source to prevent radical changes in volume when switching between sources. ! Settings are based on the FM tuner volume level, which remains unchanged. 1 Compare the FM tuner volume level with the level of the source you wish to adjust. 2 Press AUDIO to select SLA.
Section 09 Initial Settings Adjusting initial settings English 2 Press c or d to select the segment of the clock display you wish to set. Pressing c or d will select one segment of the clock display: Hour Minute As you select segments of the clock display the segment selected will blink. 1 Initial settings lets you perform initial setup of different settings for this unit. 1 Function display Shows the function status. 1 Press SOURCE and hold until the unit turns off.
Section 09 Initial Settings 1 Press FUNCTION to select AUX. Press FUNCTION repeatedly until AUX appears in the display. 2 Press a or b to turn AUX on or off. Pressing a or b will turn AUX on or off and that status will be displayed (e.g., AUX :ON). Switching the dimmer setting To prevent the display from being too bright at night, the display is automatically dimmed when the car s headlights are turned on. You can turn the dimmer on or off. 1 Press FUNCTION to select Dimmer.
Section 09 Initial Settings Notes Switching the telephone muting/attenuation When Ever Scroll is set to ON, CD text information scrolls continuously in the display. Set to OFF if you prefer the information to scroll just once. English ! Even if you change this setting, there is no output unless you turn the nonfading output (refer to Using nonfading output on page 39) or subwoofer output (refer to Using subwoofer output on page 38) in the audio menu on.
Section 10 Other Functions Using the operation mode 2 Switching to operation mode 2 enables you to operate the basic functions for each source easily. ! However, it may not possible to operate every function for each source with operation mode 2. Switch the operation mode to 1 to operate a function that does not correspond to operation mode 2. 1 Press ENTERTAINMENT and hold to switch to operation mode 2. Press ENTERTAINMENT and hold until Operation Mode 2 appears in the display.
Section 10 Other Functions Operation DISPLAY No function. Turning the clock display on or off FUNCTION No function. You can turn the clock display on or off. Television Button Operation PAUSE Press to turn loudness on or off. AUDIO Press and hold to turn best stations sequential memory on. Press to turn best stations sequential memory off. DISPLAY Press to quickly lower the volume level, by about 90%. Press once more to return to the original volume level. FUNCTION No function.
Section 10 Other Functions 1 After you have selected AUX as the source, press FUNCTION and hold until TITLE appears in the display. 2 Press button 1 to select the desired character type. Press button 1 repeatedly to switch between the following character types: Alphabet (upper case) Alphabet (lower case) European letters, such as those with accents (e.g., á, à, ä, ç) # You can select to input numbers by pressing button 2. 3 Press a or b to select a letter of the alphabet.
Section 10 Other Functions Introduction of XM operation 2 34 5 You can use this unit to control a XM satellite digital tuner (GEX-P910XM), which is sold separately. For details concerning operation, refer to the XM tuner s operation manuals. This section provides information on XM operations with this unit which differs from that described in the XM tuner s operation manual. 1 XM channel select setting indicator Shows what channel select setting has been selected. CH.
Section 10 Other Functions For details concerning operation, refer to the DVD player s or multi-DVD player s operation manual. This section provides information on DVD operations with this unit which differs from that described in the DVD player s or multi-DVD player s operation manual. Operation You can use the following function with this unit. (Reference page is in this manual.) ! Using ITS playlist and disc title functions (Refer to this page.
Appendix Additional Information When you contact your dealer or your nearest Pioneer Service Center, be sure to record the error message. Message Cause Action ERROR-11, 12, Dirty disc 17, 30 Clean disc. ERROR-11, 12, Scratched disc 17, 30 Replace disc. ERROR-10, 11, Electrical or me12, 15, 17, 30, chanical A0 Turn the ignition ON and OFF, or switch to a different source, then back to the CD player. ERROR-15 The inserted disc Replace disc.
Appendix Additional Information ! It may not be possible to play back CD-R/ CD-RW discs recorded on a music CD recorder or a personal computer because of disc characteristics, scratches or dirt on the disc, or dirt, condensation, etc., on the lens of this unit. ! Playback of discs recorded on a personal computer may not be possible, depending on the application settings and the environment. Please record with the correct format. (For details, contact the manufacturer of the application.
Appendix Additional Information Important ! When naming an MP3/WMA/WAV file, add the corresponding filename extension (.mp3, .wma or .wav). ! This unit plays back files with the filename extension (.mp3, .wma or .wav) as an MP3/ WMA/WAV file. To prevent noise and malfunctions, do not use these extensions for files other than MP3/WMA/WAV files. MP3 additional information ! Files are compatible with the ID3 Tag Ver. 1.0, 1.1, 2.2, 2.3 and 2.
Appendix Additional Information About folders and MP3/ WMA/WAV files ! An outline of a CD-ROM with MP3/WMA/ WAV files on it is shown below. Subfolders are shown as folders in the folder currently selected. 1 2 3 1 First level 2 Second level 3 Third level Notes ! This unit assigns folder numbers. The user can not assign folder numbers. ! It is not possible to check folders that do not include MP3/WMA/WAV files. (These folders 52 En will be skipped without displaying the folder number.
Appendix Additional Information Terms ID3 tag This is a method of embedding track-related information in an MP3 file. This embedded information can include the track title, the artist s name, the album title, the music genre, the year of production, comments and other data. The contents can be freely edited using software with ID3 Tag editing functions. Although the tags are restricted as to the number of characters, the information can be viewed when the track is played back.
Appendix Additional Information Packet write This is a general term for a method of writing on CD-R, etc., at the time required for a file, just as is done with files on floppy or hard discs. VBR VBR is short for variable bit rate. Generally speaking CBR (constant bit rate) is more widely used. But by flexibly adjusting the bit rate according to the needs of audio compression, it is possible to achieve compressionpriority sound quality. WAV WAV is short for waveform.
Appendix Additional Information Specifications Audio CD player General Continuous power output is 22 W per channel minimum into 4 ohms, both channels driven 50 to 15,000 Hz with no more than 5% THD. Maximum power output ....... 50 W × 4 50 W × 2/4 W + 70 W × 1/2 W (for subwoofer) Load impedance ...................... 4 W (4 8 W [2 W for 1 ch] allowable) Preout max output level/output impedance ..................................................... 2.
Appendix Additional Information Three-signal intermodulation (desired signal level) ..................................................... 30 dBf (two undesired signal level: 100 dBf) AM tuner Frequency range ...................... 530 1,710 kHz (10 kHz) Usable sensitivity ..................... 18 µV (S/N: 20 dB) Signal-to-noise ratio ............... 65 dB (IHF-A network) Note Specifications and the design are subject to possible modifications without notice due to improvements.
Table des matières Nous vous remercions d avoir acheté cet appareil Pioneer. Nous vous prions de lire ces instructions d utilisation afin que vous sachiez utiliser votre appareil correctement. Quand vous aurez fini la lecture de ces instructions, rangez ce mode d emploi dans un endroit sûr pour référence ultérieure.
Table des matières Sélection de la méthode de recherche 84 Recherche toutes les 10 plages dans le dossier en cours 84 Affichage des informations textuelles d un disque MP3/WMA/WAV 84 Si vous lisez un disque MP3/ WMA 84 Si vous lisez un disque WAV 85 Défilement des informations textuelles sur l afficheur 85 Lecteur de CD à chargeur Écoute d un CD 86 Lecteur de CD 50 disques 86 Introduction au fonctionnement détaillé du lecteur de CD à chargeur 87 Répétition de la lecture 87 Écoute des plages musicales d
Table des matières Autres fonctions Utilisation du mode de fonctionnement 2 105 Syntoniseur 105 Lecteur de CD intégré 105 MP3/WMA/WAV et lecteur de CD à chargeur 106 Télévision 106 Lecteur de DVD et Lecteur de DVD à chargeur 106 AUX 106 Mise en service ou hors service de l affichage de l horloge 106 Utilisation de la source AUX 107 Choix de l entrée AUX comme source 107 Définition du titre de l entrée AUX 107 Utilisation des divers affichages divertissants 108 Introduction à l utilisation d
La sélection d’un équipement audio de qualité comme l’unité que vous venez d’acheter n’est que le début de votre plaisir musical. Maintenant, il est temps de penser à la manière de profiter au maximum des plaisirs que vous offre votre équipement. Ce fabricant et le Groupe “Consumer Electronics Group” de l’Association des Industries Electroniques veut que vous profitiez au maximum de votre équipement en l’utilisation à un niveau sûr.
Section 01 Avant de commencer Pour le modèle canadien Cet appareil numérique de la classe B est conformé à la norme NMB-003 du Canada. Les fréquences du syntoniseur de cet appareil sont attribuées pour une utilisation en Amérique du Nord. L utilisation de l appareil dans d autres régions peut provoquer une réception de mauvaise qualité. PRÉCAUTION ! Ne laissez pas cet appareil venir en contact avec de liquides. Cela pourrait provoquer une électrocution.
Section 01 Avant de commencer Enregistrement du produit Rendez-nous visite sur le site suivant : 1 Enregistrez votre produit. Nous conserverons sur fichier les détails de votre achat pour vous permettre de vous reporter à ces informations en cas de déclaration à votre assurance pour perte ou vol. 2 Recevez les mises à jour sur les derniers produits et les plus récentes technologies. 3 Téléchargez les modes d emploi, commandez les catalogues des produits, recherchez de nouveaux produits, et bien plus.
Section 01 Avant de commencer Remarques A propos de la marque SAT RADIO READY Te marquage SAT RADIO READY imprimé sur la face avant indique que le Syntoniseur Radio Satellite (Satellite Radio Tuner) pour Pioneer (vendu séparément sous les noms syntoniseur XM ou syntoniseur satellite Sirius) peut être contrôlé par cet appareil.
Section 01 Avant de commencer Mode inverse Pose de la face avant % Remettez la face avant en place en la plaçant verticalement devant l appareil et en l enclipsant fermement dans les crochets de fixation. Quelques mots sur le mode démonstration Cet appareil possède deux modes de démonstration. L un est le mode inverse, l autre le mode démonstration des fonctions. ! Vous ne pouvez pas annuler un mode démonstration quand la face avant est ouverte.
Section 01 Avant de commencer Démonstration des fonctions Utilisation et soin du boîtier de télécommande Utilisation de la télécommande Installation de la pile Sortez le porte-pile de l arrière de la télécommande et insérez la pile en respectant les polarités (+) et ( ). Français La démonstration des fonctions démarre automatiquement quand l alimentation de cet appareil est coupée alors que le contact d allumage est en position ACC ou ON.
Section 01 Avant de commencer Quelques mots sur le mode de fonctionnement Cet appareil possède deux modes de fonctionnement, les modes de fonctionnement 1 et 2. Le mode de fonctionnement 1 vous permet d utiliser toutes les fonctions de l appareil. Le mode de fonctionnement 2 vous permet d utiliser les fonctions de base de chaque source d une manière facile. Ce mode d emploi explique le mode de fonctionnement 1.
Section 02 Description de l appareil 1 5 4 6 2 3 e 8 c Appareil central 1 Touche CLOCK Appuyez sur cette touche pour modifier l affichage de l heure. 2 Touche PAUSE Appuyez sur cette touche pour mettre en service ou hors service la pause. 3 Touche DISPLAY Appuyez sur cette touche pour choisir un affichage différent. 4 Touche FUNCTION Appuyez sur cette touche pour choisir des fonctions. 5 Touche AUDIO Appuyez sur cette touche pour choisir les diverses commandes de correction sonore.
Section 02 Description de l appareil g Touche ATT Appuyez sur cette touche pour diminuer rapidement le niveau du volume d environ 90%. Appuyez à nouveau pour revenir au niveau de volume initial. f a g 4 5 8 h j i c Touche SOURCE Cet appareil est mis en service en sélectionnant une source. Appuyez sur cette touche pour parcourir les différentes sources disponibles. d Touche EQ Appuyez sur cette touche pour choisir les diverses courbes d égalisation.
Section 03 Opérations de base Mise en service de l appareil % Appuyez sur SOURCE pour mettre en service l appareil. Le fait de choisir une source met l appareil en service. Vous pouvez sélectionner une source que vous voulez écouter. Pour passer au lecteur de CD intégré, chargez un disque dans l appareil (reportez-vous à la page 74). % Pour choisir une source à partir de l appareil central, appuyez sur SOURCE.
Section 03 Opérations de base Logement pour CD Touche EJECT # Vous pouvez éjecter le CD en appuyant sur EJECT. # Pour éviter un mauvais fonctionnement, assurez-vous qu aucun objet métallique ne vienne en contact avec les broches quand la face avant est ouverte. Remarques ! Le lecteur de CD intégré joue un CD standard 12 cm ou 8 cm (single) à la fois. N utilisez pas un adaptateur pour jouer des CD 8 cm. ! N introduisez aucun objet dans le logement pour CD autre qu un CD.
Section 04 Syntoniseur Écoute de la radio 1 23 4 Voici les étapes élémentaires pour utiliser la radio. Une utilisation plus élaborée du syntoniseur est expliquée à partir de la page suivante. 1 Indicateur de stéréophonie (ST) Il signale que la station émet en stéréophonie. 2 Indicateur LOC Indique quand l accord automatique sur une station locale est en service. 3 Pour effectuer un accord manuel, appuyez brièvement sur c ou d. La fréquence augmente ou diminue par étapes.
Section 04 Syntoniseur Introduction au fonctionnement détaillé du syntoniseur 1 1 Afficheur des fonctions Il indique l état de la fonction. % Appuyez sur FUNCTION pour afficher le nom de chaque fonction. Appuyez de manière répétée sur FUNCTION pour choisir une des fonctions suivantes : BSM (mémoire des meilleures stations) Local (accord automatique sur une station locale) # Appuyez sur BAND pour revenir à l affichage de la fréquence.
Section 04 Syntoniseur signal. Quand l enregistrement est terminé, BSM cesse de clignoter. # Pour annuler la mise en mémoire, appuyez sur b. Remarque La mise en mémoire de fréquences à l aide de la fonction BSM peut provoquer le remplacement d autres fréquences déjà conservées grâce aux touches 1 6. 4 Pour revenir à l accord automatique ordinaire, appuyez sur b de façon à mettre hors service l accord automatique sur une station locale. Local :OFF apparaît sur l afficheur.
Section 05 Lecteur de CD intégré Écoute d un CD 1 2 Voici les étapes élémentaires pour lire un CD avec votre lecteur de CD intégré. Une utilisation plus élaborée du CD est expliquée à partir de la page suivante. 1 Indicateur du numéro de plage Il indique la plage en cours de lecture. 2 Indicateur du temps de lecture Il indique le temps de lecture depuis le début de la plage en cours de lecture. 1 Appuyez sur SOURCE pour choisir le lecteur de CD intégré.
Section 05 Lecteur de CD intégré Introduction au fonctionnement détaillé du lecteur de CD intégré 2 Appuyez sur c ou d pour choisir l étendue de répétition. Appuyez sur c ou d jusqu à ce que l étendue de répétition désirée apparaisse sur l afficheur. 1 1 Afficheur des fonctions Il indique l état de la fonction. % Appuyez sur FUNCTION pour afficher le nom de chaque fonction.
Section 05 Lecteur de CD intégré Examen du contenu d un CD Cette fonction vous permet d écouter les 10 premières secondes de chaque plage musicale gravée sur le CD. 1 Appuyez sur FUNCTION pour choisir Scan. Appuyez sur FUNCTION jusqu à ce que Scan apparaisse sur l afficheur. 2 Appuyez sur a pour activer la lecture du contenu du disque. Scan :ON apparaît sur l afficheur. Les 10 premières secondes de chaque plage sont lues.
Section 05 Lecteur de CD intégré 1 Appuyez sur FUNCTION pour choisir FF/REV. Appuyez sur FUNCTION jusqu à ce que FF/REV apparaisse sur l afficheur. # Si la méthode de recherche ROUGH SEARCH a été sélectionnée précédemment, ROUGH SEARCH s affiche. ! FF/REV Recherche rapide avant et arrière ! ROUGH SEARCH Recherche toutes les 10 plages Recherche toutes les 10 plages sur le disque en cours Si un disque contient plus de 10 plages, vous pouvez effectuer la recherche toutes les 10 plages.
Section 05 Lecteur de CD intégré 4 Appuyez sur a ou b pour choisir une lettre de l alphabet. Chaque appui sur a affiche une lettre de l alphabet dans l ordre A B C ... X Y Z, les chiffres et les symboles dans l ordre 1 2 3 ... @ # <. Chaque appui sur b affiche une lettre dans l ordre inverse Z Y X ... C B A. 5 Appuyez sur d pour placer le curseur sur la position suivante.
Section 05 Lecteur de CD intégré Défilement des titres sur l afficheur Cet appareil peut afficher les 16 premières lettres de Disc Title, DiscArtist Name, Track Title et TrackArtist Name. Quand l information textuelle dépasse 16 lettres, vous pouvez faire défiler l écran comme suit. Français % Maintenez la pression sur DISPLAY jusqu à ce que le titre commence à défiler sur l écran. Les titres défilent.
Section 06 Lecteur MP3/WMA/WAV Lecture de fichiers MP3/ WMA/WAV 1 2 3 4 Voici les étapes élémentaires pour lire un fichier MP3/WMA/WAV avec votre lecteur de CD intégré. Une utilisation plus élaborée des fichiers MP3/WMA/WAV est expliquée à partir de la page suivante. 1 Indicateur MP3/WMA/WAV Indique quand le fichier MP3/WMA/WAV est en cours de lecture. 2 Indicateur du numéro de dossier Il indique le numéro de dossier en cours de lecture.
Section 06 Lecteur MP3/WMA/WAV Introduction au fonctionnement détaillé du lecteur de CD (MP3/WMA/ WAV) intégré Français ! Le lecteur de CD intégré peut lire un fichier MP3/WMA/WAV enregistré sur un CD-ROM. (Reportez-vous à la page 111 pour connaître les types de fichiers qui peuvent être lus.) ! La lecture s effectue dans l ordre de numéro de fichier. Les dossiers qui ne contiennent pas de fichiers sont sautés. (Si le dossier 01 (ROOT) ne contient pas de fichier, la lecture commence au dossier 02.
Section 06 Lecteur MP3/WMA/WAV 1 Appuyez sur FUNCTION pour choisir Repeat. Appuyez sur FUNCTION jusqu à ce que Repeat apparaisse sur l afficheur. 2 Appuyez sur FUNCTION pour choisir Random. Appuyez sur FUNCTION jusqu à ce que Random apparaisse sur l afficheur. 2 Appuyez sur c ou d pour choisir l étendue de répétition. Appuyez sur c ou d jusqu à ce que l étendue de répétition désirée apparaisse sur l afficheur. 3 Appuyez sur a pour activer la lecture dans un ordre quelconque.
Section 06 Lecteur MP3/WMA/WAV 4 Quand vous trouvez la plage désirée (ou le dossier désiré) appuyez sur b pour arrêter la lecture du contenu du disque. Scan :OFF apparaît sur l afficheur. La lecture de la plage (ou du dossier) se poursuit. # Si les conditions de lecture se sont à nouveau affichées d elles-mêmes, choisissez Scan une fois encore en appuyant sur FUNCTION. Pause en lecture MP3/WMA/ WAV La pause est un arrêt momentané de la lecture du MP3/WMA/WAV. 1 Appuyez sur FUNCTION pour choisir Pause.
Section 06 Lecteur MP3/WMA/WAV Sélection de la méthode de recherche Vous pouvez choisir entre les méthodes recherche rapide avant, recherche rapide arrière et recherche toutes les 10 plages. 1 Appuyez sur FUNCTION pour choisir FF/REV. Appuyez sur FUNCTION jusqu à ce que FF/REV apparaisse sur l afficheur. # Si la méthode de recherche ROUGH SEARCH a été sélectionnée précédemment, ROUGH SEARCH s affiche. 2 Appuyez sur c, ou sur d pour choisir la méthode de recherche.
Section 06 Lecteur MP3/WMA/WAV Si vous lisez un disque WAV % Appuyez sur DISPLAY. Appuyez de manière répétée sur DISPLAY pour passer d un des paramètres à l autre : Temps de lecture Folder Name (nom du dossier) File Name (nom du fichier) fréquence d échantillonnage % Maintenez la pression sur DISPLAY jusqu à ce que l information textuelle commence à défiler sur l écran. L information textuelle défile.
Section 07 Lecteur de CD à chargeur Écoute d un CD # Vous pouvez également utiliser les touches a/ b pour choisir les disques en ordre. 1 2 3 Vous pouvez utiliser cet appareil pour commander un lecteur de CD à chargeur, vendu séparément. Voici les étapes élémentaires pour lire un CD avec votre lecteur de CD à chargeur. Une utilisation plus élaborée du CD est expliquée à partir de la page suivante. 1 Indicateur du numéro de disque Il indique le disque en cours de lecture.
Section 07 Lecteur de CD à chargeur Introduction au fonctionnement détaillé du lecteur de CD à chargeur 1 Afficheur des fonctions Il indique l état de la fonction. % Appuyez sur FUNCTION pour afficher le nom de chaque fonction. Appuyez de manière répétée sur FUNCTION pour choisir une des fonctions suivantes : Repeat (répétition de la lecture) Liste des titres des disques Random (lecture au hasard) Scan (examen des disques) ITS Play (lecture ITS) Pause (pause) Comp.
Section 07 Lecteur de CD à chargeur 3 Appuyez sur a pour activer la lecture dans un ordre quelconque. Random :ON apparaît sur l afficheur. Les plages seront jouées dans un ordre au hasard à l intérieur des limites MCD ou DISC sélectionnées précédemment. 4 Appuyez sur b pour mettre hors service la lecture dans un ordre quelconque. Random :OFF apparaît sur l afficheur. La lecture des plages musicales se poursuit dans l ordre.
Section 07 Lecteur de CD à chargeur Création d une liste de lecture avec la sélection instantanée des plages ITS 1 Jouez d un CD que vous voulez programmer. Appuyez sur a ou b pour sélectionner le CD. 2 Appuyez sur FUNCTION jusqu à ce que TITLE apparaisse sur l afficheur, puis appuyez sur FUNCTION pour sélectionner ITS.
Section 07 Lecteur de CD à chargeur 1 Jouez le CD qui contient la plage que vous voulez supprimer de votre liste ITS, et activez la lecture ITS. Reportez-vous à la page précédente, Lecture à partir de votre liste de lecture ITS. 2 Appuyez sur FUNCTION jusqu à ce que TITLE apparaisse sur l afficheur, puis appuyez sur FUNCTION pour sélectionner ITS. Une fois que TITLE est affiché, appuyez sur FUNCTION jusqu à ce que ITS apparaisse sur l afficheur. 3 Sélectionnez la piste désirée en appuyant sur c ou d.
Section 07 Lecteur de CD à chargeur TITLE (saisie du titre du disque) ITS (programmation en temps réel ITS) # Lors de la lecture d un disque CD TEXT sur un lecteur de CD à chargeur compatible CD TEXT, vous ne pouvez pas passer à TITLE. Sur un disque CD TEXT, le titre du disque a déjà été enregistré. Remarques ! Les titres demeurent en mémoire même après que vous ayez retiré le disque du chargeur, et sont rappelés quand le disque est réinséré.
Section 07 Lecteur de CD à chargeur 2 Appuyez sur c ou d pour faire défiler la liste des titres mis en mémoire. # Si un disque ne porte pas de titre, No D-Title s affiche. 3 Appuyez sur a pour commander la lecture du disque choisi. La lecture de la sélection commence. Utilisation des fonctions CD TEXT Vous ne pouvez utiliser ces fonctions que si le lecteur de CD à chargeur est compatible avec CD TEXT. Certains disques disposent d informations qui ont été codées pendant la fabrication du disque.
Section 07 Lecteur de CD à chargeur Français L utilisation des fonctions COMP (compression) et DBE (accentuation dynamique des graves) vous permet d ajuster la qualité du son du lecteur de CD à chargeur. Chacune de ces fonctions possède un réglage en deux étapes. La fonction COMP règle l équilibre entre les sons les plus forts et les plus faibles aux volumes élevés. DBE augmente le niveau des graves pour donner à la lecture un son plus riche.
Section 08 Réglages sonores Introduction aux réglages sonores 1 1 Affichage des réglages sonores Indique l état des réglages sonores. % Appuyez sur AUDIO pour afficher le nom des fonctions audio.
Section 08 Réglages sonores Réglage de l équilibre sonore Utilisation de l égalisation Vous pouvez régler l équilibre avant-arrière et droite-gauche de manière que l écoute soit optimale quel que soit le siège occupé. L égalisation vous permet de corriger les caractéristiques sonores de l intérieur du véhicule en fonction de vos goûts. 1 Appuyez sur AUDIO pour choisir Fad. Appuyez sur AUDIO jusqu à ce que Fad apparaisse sur l afficheur.
Section 08 Réglages sonores Réglage des courbes d égalisation Vous pouvez ajuster comme vous le désirez la courbe d égalisation actuellement sélectionnée. Les réglages de la courbe d égalisation ajustée sont mémorisés dans CUSTOM. 1 Appuyez sur AUDIO pour choisir EQ. Appuyez sur AUDIO jusqu à ce que EQ apparaisse sur l afficheur. 2 Appuyez sur c ou d pour choisir la bande de l égaliseur à régler.
Section 08 Réglages sonores Remarque Si vous effectuez des ajustements, la courbe CUSTOM est mise à jour. Utilisez cette fonction pour ajuster les graves et les aiguës. La possibilité de choisir la fréquence ainsi que le niveau vous donne un bon contrôle de l équilibre total du son. ! Si la fonction EQ-EX a été sélectionnée et si EQ-EX est en service et CUSTOM est sélectionné comme courbe d égalisation, vous pouvez ajuster les réglages des graves et des aiguës.
Section 08 Réglages sonores Réglage de la correction physiologique La correction physiologique a pour objet d accentuer les graves et les aigus à bas niveaux d écoute. 1 Appuyez sur AUDIO pour choisir Loud. Appuyez sur AUDIO jusqu à ce que Loud apparaisse sur l afficheur. 2 Appuyez sur a pour mettre en service la correction physiologique. Le niveau sonore (par exemple, Loud MID) apparaît sur l afficheur. 3 Appuyez sur c ou d pour sélectionner le niveau désiré.
Section 08 Réglages sonores 50 80 125 (Hz) Seules les fréquences inférieures à celles de la plage sélectionnée sont produites par le haut-parleur d extrêmes graves. Utilisation de la sortie sans atténuation progressive Quand la sortie sans atténuation progressive est activée, le signal audio ne passe pas par le filtre passe-bas de l appareil (pour le haut-parleur d extrêmes graves), mais est transmis via la sortie RCA.
Section 08 Réglages sonores 3 Appuyez sur c ou d pour choisir la fréquence de coupure. Chaque pression sur c ou d sélectionne les fréquences de coupure dans l ordre suivant : 50 80 125 (Hz) Seules les fréquences supérieures à celles de la plage sélectionnée sont émises par les haut-parleurs avant ou arrière.
Section 09 Réglages initiaux Ajustement des réglages initiaux FUNCTION jusqu à ce que l appareil se mette hors service. Réglage de l horloge Utilisez ces instructions pour régler l horloge. Les réglages initiaux vous permettent d établir les conditions de fonctionnement initiales de l appareil. 1 Afficheur des fonctions Il indique l état de la fonction. 1 Maintenez la pression sur SOURCE jusqu à ce que l appareil soit mis hors tension.
Section 09 Réglages initiaux Mise en service ou hors service du signal sonore d avertissement Si vous ne retirez pas la face avant de l appareil central dans les cinq secondes qui suivent la coupure du contact, un signal sonore d avertissement se fait entendre. Vous pouvez mettre hors service ce signal sonore d avertissement. 1 Appuyez sur FUNCTION pour choisir Warning. Appuyez de manière répétée sur FUNCTION jusqu à ce que Warning apparaisse sur l afficheur.
Section 09 Réglages initiaux Réglage de la sortie arrière et du contrôleur de hautparleur d extrêmes graves 1 Appuyez sur FUNCTION pour choisir REAR SP. Appuyez de manière répétée sur FUNCTION jusqu à ce que REAR SP apparaisse sur l afficheur. 2 Appuyez sur a ou b pour changer le réglage de la sortie arrière. Appuyer sur a ou b permet de basculer alternativement entre REAR SP :FULL (haut-parleur pleine plage de fréquences) et REAR SP :S/W (haut-parleur d extrêmes graves), et l état est affichée.
Section 09 Réglages initiaux Commutation coupure/ atténuation du son pendant un appel téléphonique Le son émis par l appareil est automatiquement coupé ou atténué quand un signal en provenance d un équipement possédant une fonction silencieux est reçu. ! Le son est coupé ou atténué, MUTE ou ATT s affiche et aucun réglage audio n est possible. ! Le son émis par l appareil redevient normal quand la coupure ou atténuation du son est annulée. 1 Appuyez sur FUNCTION pour choisir Telephone.
Section 10 Autres fonctions Utilisation du mode de fonctionnement 2 3 Touche DISPLAY 4 Touche FUNCTION 1 Appuyez de façon continue sur ENTERTAINMENT pour basculer en mode de fonctionnement 2. Appuyez sur ENTERTAINMENT jusqu à ce que Operation Mode 2 apparaisse sur l écran. En fonction de la source que vous avez sélectionnée, les touches PAUSE, AUDIO, DISPLAY et FUNCTION se modifient en la fonction affectée.
Section 10 Autres fonctions MP3/WMA/WAV et lecteur de CD à chargeur Utilisation Touche Utilisation DISPLAY PAUSE Appuyez sur cette touche pour mettre en service ou hors service la pause. Appuyez sur cette touche pour diminuer rapidement le niveau du volume d environ 90%. Appuyez à nouveau pour revenir au niveau de volume initial. FUNCTION Aucune fonction. AUDIO Appuyez sur cette touche pour choisir la plage de répétition.
Section 10 Autres fonctions Remarque Même quand les sources sont hors service, l horloge apparaît sur l afficheur. Appuyer sur CLOCK met l affichage de l horloge en service ou hors service. Un Interconnecteur IP-BUS-RCA tel que le CDRB20/CD-RB10 (vendu séparément) permet de connecter cet appareil à des équipements auxiliaires disposant d une sortie RCA. Pour avoir plus de détails, reportez-vous au mode d emploi de l Interconnecteur IP-BUS-RCA.
Section 10 Autres fonctions Utilisation des divers affichages divertissants Vous pouvez profiter des affichages divertissants tout en écoutant chaque source sonore. ! Quand le mode de fonctionnement 2 est sélectionné, cette fonction n est pas disponible. % Appuyez sur ENTERTAINMENT.
Section 10 Autres fonctions Pendant la lecture du DVD, appuyez sur c ou d pour choisir l étendue de répétition. Pendant la lecture d un CD vidéo ou d un CD, appuyez sur a ou b pour mettre la répétition de la lecture en ou hors fonction. Français Utilisation de la liste ITS et des fonctions de titre du disque Vous pouvez utiliser ces fonctions pendant la lecture d un CD quand vous utilisez cet appareil avec un lecteur de DVD à chargeur.
Annexe Informations complémentaires Signification des messages d erreur du lecteur de CD intégré Quand vous contactez votre distributeur ou le Service d entretien agréé par Pioneer le plus proche, n oubliez pas de noter le message d erreur. Message Causes possibles Action corrective ERROR-11, 12, Disque sale 17, 30 Nettoyez le disque. ERROR-11, 12, Disque rayé 17, 30 Utilisez un autre disque.
Annexe Informations complémentaires Disques CD-R et CD-RW ! Quand vous utilisez des disques CD-R/CDRW, la lecture n est possible qu avec des disques qui ont été finalisés. ! La lecture de disques CD-R/CD-RW enregistrés sur un enregistreur de CD musical ou un ordinateur personnel peut ne pas être possible à cause des caractéristiques du disque, de rayures ou de poussière sur le disque, ou de saleté, de condensation, etc. sur la lentille de l appareil.
Annexe Informations complémentaires ! Les fichiers MP3/WMA/WAV ne sont pas compatibles avec le transfert de données en écriture de paquets. ! Le nombre maximum de caractères qui peuvent être affichés pour un nom de fichier, incluant l extension (.mp3, .wma ou .wav) est 64 caractères à partir du premier. ! Le nombre maximum de caractères qui peut être affiché pour un nom de dossier est 64 caractères.
Annexe Informations complémentaires Informations WMA additionnelles Quelques mots sur les dossiers et les fichiers MP3/WMA/WAV ! Une vue générale d un CD-ROM contenant des fichiers MP3/WMA/WAV est montrée ci-dessous. Les sous-dossiers sont représentés comme des dossiers dans le dossier actuellement sélectionné. Français ! Cet appareil lit les fichiers WMA codés par Windows Media Player version 7, 7.1, 8 et 9. ! Vous pouvez seulement lire des fichiers WMA aux fréquences 32, 44,1 et 48 kHz.
Annexe Informations complémentaires ! Il n est pas possible de vérifier les dossiers qui ne contiennent pas de fichiers MP3/WMA/ WAV. (Ces dossiers seront sautés sans afficher le numéro de dossier.) ! L appareil peut lire des fichiers MP3/WMA/ WAV contenus dans 8 niveaux de dossiers au maximum. Toutefois, le démarrage de la lecture s effectue avec un certain retard sur les disques comportant de nombreux niveaux. Pour cette raison, nous recommandons de ne pas créer de disques avec plus de deux niveaux.
Annexe Informations complémentaires Termes utilisés Écriture par paquets C est un terme général pour une méthode d écriture sur CD-R, etc. au moment requis pour un fichier, exactement comme pour les fichiers sur disquette ou disque dur. Format ISO9660 C est le standard international pour la logique du format des dossiers et des fichiers des CDROM. Pour le format ISO9660, il existe des règles pour les deux niveaux suivants. Niveau 1 : Le nom de fichier est en format 8.
Annexe Informations complémentaires Nombre de bits de quantification Le nombre de bits de quantification est un des facteurs de la qualité sonore globale ; plus ce nombre est élevé, meilleure est la qualité sonore. Toutefois, augmenter la profondeur binaire augmente aussi la quantité de données et par suite l espace de stockage nécessaire.
Annexe Informations complémentaires Caractéristiques techniques Généralités Audio Puissance de sortie continue : 22 W par canal, minimum, sur 4 Ohms, les deux canaux étant conduits, entre 50 et 15.000 Hz, avec une DHT ne dépassant pas 5%. Puissance de sortie maximale ..................................................... 50 W × 4 50 W × 2/4 W + 70 W × 1/2 W (pour le haut-parleur d extrêmes graves) Impédance de charge ...........
Annexe Informations complémentaires Distorsion .................................... 0,3 % (à 65 dBf, 1 kHz, stéréo) 0,1 % (à 65 dBf, 1 kHz, mono) Réponse en fréquence .......... 30 15.000 Hz (±3 dB) Séparation stéréophonique ..................................................... 45 dB (à 65 dBf, 1 kHz) Sélectivité .................................... 80 dB (±200 kHz) Intermodulation trois signaux (niveau de signal désiré) .....................................................
PIONEER CORPORATION 4-1, MEGURO 1-CHOME, MEGURO-KU, TOKYO 153-8654, JAPAN PIONEER ELECTRONICS (USA) INC. P.O. Box 1540, Long Beach, California 90801-1540, U.S.A. TEL: (800) 421-1404 PIONEER EUROPE NV Haven 1087, Keetberglaan 1, B-9120 Melsele, Belgium TEL: (0) 3/570.05.11 PIONEER ELECTRONICS ASIACENTRE PTE. LTD. 253 Alexandra Road, #04-01, Singapore 159936 TEL: 65-6472-7555 PIONEER ELECTRONICS AUSTRALIA PTY. LTD.