DJ MIXER MESA DE MEZCLAS DJ Ņŋ ెॲᏣ DJM-250-K DJM-250-W http://www.prodjnet.com/support/ The Pioneer website shown above offers FAQs, information on software and various other types of information and services to allow you to use your product in greater comfort. El sitio Web de Pioneer indicado más arriba tiene una sección con las preguntas más frecuentes, y además ofrece información del software y varios tipos de información y servicios para que usted pueda usar su producto con la mayor comodidad.
Thank you for buying this Pioneer product. Please read through these operating instructions so you will know how to operate your model properly. After you have finished reading the instructions, put them away in a safe place for future reference. In some countries or regions, the shape of the power plug and power outlet may sometimes differ from that shown in the explanatory drawings. However the method of connecting and operating the unit is the same. WARNING This equipment is not waterproof.
NOTE: This equipment has been tested and found to comply with the limits for a Class B digital device, pursuant to Part 15 of the FCC Rules. These limits are designed to provide reasonable protection against harmful interference in a residential installation. This equipment generates, uses, and can radiate radio frequency energy and, if not installed and used in accordance with the instructions, may cause harmful interference to radio communications.
Contents How to read this manual The names of displays, menus, and buttons in this manual are enclosed in brackets. (e.g. [MASTER] channel, [ON/OFF], [File] menu) Before start Features........................................................................................................ 5 System setup example................................................................................ 5 What’s in the box.........................................................................................
English Before start Features This unit is a DJ mixer that carries over the technology of the Pioneer DJM series, the world standard in club sound. It is a standard type unit equipped with the basic functions required for mixing, enabling full-fledged DJ play easily. SOUND COLOR FILTER MIC/AUX INPUT Each channel is equipped with a SOUND COLOR FILTER function by which filter effects can be achieved simply by turning a large control. This lets you arrange and mix tracks intuitively for DJ performances.
Connections Be sure to turn off the power and unplug the AC adapter from the power outlet before making or changing connections between devices. Wait until all connections between devices have been completed before connecting the AC adapter. Only use the AC adapter included with this unit. Refer to the operating instructions for the component to be connected.
! When creating a DVS (Digital Vinyl System) combining a computer, audio interface, etc., be careful in connecting the audio interface to this unit’s input terminals and in the settings of the input selector switches. Also refer to the operating instructions of the DJ software and audio interface.
About the AC adapter Safety instructions To ensure your personal safety and to maximize the full operating potential of your unit, read and follow these safety instructions. Read & Retain Instructions Read all operating and user information provided with this product. Cleaning Use a damp cloth to clean the exterior housing. Avoid using any fluids including liquid, aerosol or alcohol-based cleaning products.
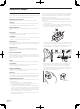
Slide the power plug along the guide rails in the AC adapter unit as shown on the diagram below, then press in until a click is heard. Power plug This product comes with the types of power plugs shown below. Use the appropriate power plug for the country or region you are in. English Mounting the power plug Type 1 (for Mexico, Taiwan, etc.
Operation Mixer section Control panel MIC/AUX section 9 MIC/AUX MIC OFF TRIM AUX 1 AUX 2 2 AUX 3 LEVEL Two sets of audio signals can be adjusted separately for basic DJ mixing (page 11).
9 TRIM CD a b PHONO /LINE CD TRIM PHONO /LINE c 9 9 HI HI a b MASTER CH-1 9 MID d EQ 9 LOW 1 Switch the channel whose sound is output from the speakers. — Left edge: The [CH-1] sound is output. — Center position: The sound of [CH-1] and [CH-2] is mixed and output. — Right edge: The [CH-2] sound is output. ! This operation is not necessary when the [THRU, , ] (crossfader curve selector) switch is set to [THRU].
3 Move the crossfader f gradually towards the right. While checking the sound output from the speakers, operate the crossfader to substitute the sound of [CH-1] with the sound of [CH-2]. Mixing is completed once only the [CH-2] sound is being output from the speakers.
1 Set [THRU, , ] (the crossfader curve selector switch) j to [ ] or [ ]. Using a microphone or external device (MIC/AUX section) MIC/AUX MIC 2 Press the [CH-1] or [CH-2] button i in the fader start section. Turn the fader start function on. OFF AUX 1 AUX 2 2 AUX 3 LEVEL 3 3 Move the crossfader f. 0 HI Move the crossfader to the opposite edge from the channel for which you want to use the fader start function. 4 4 Set the cue on the DJ player. The DJ player pauses playback at the cue point.
Additional information Troubleshooting ! ! Incorrect operation is often mistaken for trouble or malfunction. If you think that there is something wrong with this component, check the points below. Sometimes the trouble may lie in another component. Inspect the other components and electrical appliances being used. If the trouble cannot be rectified after checking the items below, ask your nearest Pioneer authorized service center or your dealer to carry out repair work.
! ! ! Pioneer is a registered trademark of PIONEER CORPORATION. The names of companies and products mentioned herein are the trademarks of their respective owners. When playing music files you have acquired on this unit, we kindly ask you to respect copyrights. MASTER output terminal RCA pin jacks..................................................................................... 1 set BALANCED OUTPUT output terminal XLR connector...........................................................................
Le damos las gracias por la adquisición de este producto Pioneer. Lea a fondo estas instrucciones de utilización para que aprenda a utilizar correctamente su modelo. Después de haber terminado de leer estas instrucciones, guárdelas en un lugar seguro para, en caso de ser necesario, consultarlas en el futuro. En algunos países o regiones, la forma de la clavija de alimentación y del enchufe de corriente pueden ser diferentes de la mostrada en las ilustraciones de explicación.
Contenido Cómo leer este manual Los nombres de las visualizaciones, menús y botones de este manual van entre corchetes. (p. ej.: Canal [MASTER], [ON/OFF], menú [File]) Antes de empezar a usar la unidad Características............................................................................................. 4 Ejemplo de configuración del sistema...................................................... 4 Contenido de la caja....................................................................................
Antes de empezar a usar la unidad Características Esta unidad es un mezclador DJ que emplea la tecnología de la serie DJM de Pioneer, la norma mundial en sonido de clubes. La unidad es del tipo estándar, equipada con las funciones básicas necesarias para mezclar sonidos, lo que permite al DJ realizar una reproducción completa. SOUND COLOR FILTER MIC/AUX INPUT Cada canal está equipado con una función SOUND COLOR FILTER por la cual pueden obtenerse efectos de filtro girando simplemente un control grande.
Conexiones Español Asegúrese de desconectar la alimentación y desenchufar el adaptador de CA de la toma de corriente antes de hacer o cambiar conexiones entre aparatos. Espere hasta que todas las conexiones entre los aparatos estén terminadas antes de conectar el adaptador de CA. Use sólo el adaptador de CA incluido con esta unidad. Consulte el manual de instrucciones del componente que va a ser conectado.
Conexión de los terminales de entrada/salida ! Cuando cree un DVS (sistema de vinilo digital) combinando un ordenador, interfaz de audio, etc., tenga cuidado en la conexión de la interfaz de audio a los terminales de entrada de esta unidad y en los ajustes de los conmutadores selectores de entrada. Consulte también el manual de instrucciones del software DJ y de la interfaz de audio.
Acerca del adaptador de CA Instrucciones de seguridad Para garantizar su seguridad personal y maximizar todo el potencial operativo de su unidad, lea y siga estas instrucciones de seguridad. Lea toda la información del funcionamiento y del usuario provista con este producto. Limpieza Use un paño húmedo para limpiar la caja exterior. Evite usar cualquier líquido, aerosoles o productos de limpieza con base de alcohol.
Montaje de la clavija de alimentación Deslice la clavija de alimentación a lo largo de los raíles guía de la unidad del adaptador de CA como se muestra en el diagrama de abajo, y luego presione hasta que se oiga un clic. Clavija de alimentación Este producto viene con los tipos de clavijas de alimentación mostrados más abajo. Use la clavija de alimentación apropiada para el país o región en que usted se encuentre. Tipo 1 (para México, Taiwan, etc.
Operación Sección de mezclador Panel de control 9 MIC/AUX MIC OFF TRIM AUX 1 AUX 2 2 AUX 3 LEVEL Para hacer la mezcla de DJ básica se pueden ajustar por separado dos juegos de señales de audio (la página 10).
Operaciones básicas (sección del mezclador) 9 TRIM CD a b PHONO /LINE CD TRIM PHONO /LINE c 9 9 HI HI Cambie el canal cuyo sonido sale por los altavoces. — Borde izquierdo: Sale el sonido [CH-1]. — Posición central: El sonido de [CH-1] y [CH-2] se mezcla y sale. — Borde derecho: Sale el sonido [CH-2]. ! Esta operación no es necesaria cuando el conmutador [THRU, , ] (selector de curva de crossfader) se pone en [THRU].
3 Mueva poco a poco el crossfader j hacia la derecha. Mientras verifica la salida de sonido de los altavoces, use el crossfader para sustituir el sonido de [CH-1] con el sonido de [CH-2]. La mezcla termina una vez que sale el sonido [CH-2] por los altavoces.
Para iniciar la reproducción usando el crossfader 1 Ponga [THRU, , ] (el conmutador selector de curva de crossfader) j en [ ] o [ ]. 2 Pulse el botón [CH-1] o [CH-2] i en la sección de inicio del fader. Active la función de inicio del fader. Utilizando un micrófono o aparato externo (Sección MIC/AUX) MIC/AUX MIC OFF AUX 1 AUX 2 2 AUX 3 LEVEL 3 0 HI 3 Mueva el crossfader f. Mueva el crossfader al borde opuesto al canal para el que usted quiera usar la función de inicio de fader.
Información adicional Solución de problemas ! La operación incorrecta se confunde a menudo con un problema o un fallo de funcionamiento. Si piensa que algo funciona mal con este componente, compruebe los puntos de abajo. Algunas veces, el problema puede estar en otro componente. Inspeccione los otros componentes y los aparatos eléctricos que esté utilizando.
Diagrama en bloques CD1 TRIM LINE1/ PHONO1 3Band EQ MASTER LEVEL METER FILTER CH 1 LEVEL METER HP CH 1 CH 1 FADER CD2 TRIM LINE2/ PHONO2 3Band EQ OFF AUX 1 CROSS FADER FILTER CH 2 LEVEL METER HP CH 2 MIC LEVEL MASTER 1 OUT CH 2 FADER MASTER VOL MASTER 2 OUT HP MASTER 2Band EQ AUX 2 HP MASTER AUX 3 HP CH 1 HP OUT HP CH 2 HP MIX Acerca de las marcas de fábrica y marcas registradas ! ! ! Pioneer es una marca registrada de PIONEER CORPORATION.
Español 15 Es
感謝您購買先鋒產品。 請詳閱操作手冊以瞭解正確操作購買機型的方式。 閱畢手冊後,請妥善收藏以便未來參考。 在有些國家或地區中,電源插頭和電源開關的形狀有時和說明圖片顯示的不同。但是連接和操作方法相同。 ឍ֚ Ґᐡϛ٪ЬȄ࣐٪ЦକЭܗដႬࢉٲȂ፝ϽҐᐡဋܺ ܼӉե౿၇షᡞޠৡᏣȞԄ߇౮ࣶ߇ܗȟߤߗܗڐኹ ܼᅔЬȃᘱЬȃߧϜܗዙᕇᕘძϜȄ D3-4-2-1-3_A1_Zhtw ឍ֚ ಒΚԪඩဋႬྜࠊȂ፝сಡᎨίӗഌϸȈ ႬྜٽޠႬᔇӱঢ়ܗӵୣՅȄ፝ጃᇰҐᐡٻңϟ ӵୣޠႬྜٽႬᔇಓӬҐᐡ८ݗαܛቹϟႬᔇȦپ ԄijĴıġŗܗIJijıġŗȧ्ؒȄ D3-4-2-1-4*_A2_Zhtw ឍ֚ ࣐٪ЦЭدȂ፝Ͻ݃ЭྜȞԄᘉᐾ្ޠᕏȟܺဋܼҐ ᐡαȄ D3-4-2-1-7a_A1_Zhtw सҐᐡϟһࢻႬྜඩᓟᇅ்మٻңޠһࢻႬྜඩ৵ϛ ಓȂܷ፝ίඩᓟٯඳαӬᎍޠȄ༊ѠҦཿস ܼҐᐡޠႬྜٽႬᢠαඳІԋ၇һࢻႬྜඩᓟȄ सӶഀ௦ՎһࢻႬඩ৵αਣϹᘟඩᓟȂѠᏳयដ ႬȄ፝ጃᇰඩ
目錄 閱讀本手冊的方式 本手冊中的顯示器、功能表及按鍵名稱皆以括號括起。 (例如 [MASTER] 聲道、[ON/OFF]、[File] 功能表) 開始前 功能與特色..................................... 4 系統設定範例................................... 4 包裝內容物..................................... 4 連接 零件名稱....................................... 5 連接輸入/輸出端子............................. 6 關於 AC 變壓器.................................. 7 操作 控制面板....................................... 9 關於本機的電源開關............................. 9 基本操作(混音器部分) . ....................... 10 使用濾波器功能(濾波器部分) ..................
開始前 功能與特色 本機屬承襲先鋒 DJM 系列一貫技術的 DJ 混音器,而此項技術堪稱俱樂部音效的世界級標準。此為配備基本混音功能 的標準機型,可讓技藝精湛的 DJ 輕鬆播放。 SOUND COLOR FILTER MIC/AUX INPUT 每聲道皆配備 SOUND COLOR FILTER 功能,轉動大型控制 鍵即可輕易達到濾波器音效。您可利用此特性來以直覺 方式改編及混合音軌進行 DJ 表演。 本機配備三組 AUX 輸入,可從外部裝置輸入音訊訊號(電 腦、可攜式音訊裝置、電視、合成器等),以及麥克風輸 入。 AUX 不僅可用於 DJ 表演,也可作為欣賞音樂的前置 擴大器。 3 頻段等化器 XLR OUTPUT 本機配備 3 頻段等化器,可分別調整高、中、低頻率範圍 的音量。不僅能調整至您喜好的音調,將控制鍵逆時鐘轉 到底(隔離器功能)還可完全關閉特定範圍的聲音。 本機配備 XLR 平衡輸出,並搭載少量音訊訊號品質遺失功 能,能讓 DJ 表演以高音質呈現。 此外,可連接至功率揚 聲器或其他支援 XLR 輸入而不必變更功率揚聲器端子的 裝置。 系統設定範例 透過結合本機與 DJ 播放機及周
連接 在裝置間連接或變更連線前,請確定關閉電源並從插座上拔下 AC 變壓器插頭。 在連接 AC 變壓器前,請等候至完成裝置間的所有連線為止。 只能使用本機隨附的 AC 變壓器。 有關已連接元件,請參閱操作手冊。 零件名稱 1 2 3 4 5 6 CH-2 ON PHONO / LINE OFF SIGNAL GND CD L LINE 7 3 4 CONTROL PHONO LINE 8 CH-1 PHONO / LINE 3 2 L MIC CONTROL PHONO 1 R L 9 AUX CD L R R DC IN 5 6 R 中文 後面板、前面板 R L 1GND 3 COLD 2 HOT MASTER 2 c b MASTER 1 a 1 ON/OFF 開關(第 9頁) 開啟及關閉本機電源。 2 DC IN 端子 使用隨附的 AC 變壓器(含安裝的電源插頭)連接電源 插座。 在連接 AC 變壓器前,請等候至完成所有設備連線為止。 僅能使用隨附的 AC 變壓器。 3 PHONO/LINE 選擇器開關(第 6頁)
連接輸入/輸出端子 ! 建立結合電腦、音訊介面等 DVS(數位乙烯系統)時,請小心連接音訊介面至本機的輸入端子及輸入選擇器切換的 設定。 另請參閱 DJ 軟體及音訊介面的操作手冊。 後面板、前面板 ጓپȈġ ńŅŋĮĴĶıġ ॲଊᒰΤഌϸ ॲਞጤ R Ņŋ ክܺᏣ L Щክܺᐡ L R AUDIO OUT ښጤ 1 CONTROL USB Վӵጤᆓφ Վॲଊᒰяᆓφ ӵጤ ॲਞጤ ബջॴ ബջॴഀ௦ጤ ࡤ८ݗ CH-2 ՎႬྜඩ৵ ON PHONO / LINE OFF SIGNAL GND CD L CH-1 PHONO / LINE LL L LINE CONTROL PHONO R LINE R PHONO DC IN R CD 3 L R 2 L CONTROL R R Վബջॴ AUX L L R RR MIC 1 L Ѡឺԓॲଊ၇ဋ 1GND ॲਞጤ 3 COLD 2 HOT łń ᡑᔇᏣ Ȟᓎߤȟ L R MASTER 2 Վॲଊᒰяᆓφ MASTER 1 Ⴌဟ ॲ
關於 AC 變壓器 安全說明 若要確保您的個人安全並將本機完整操作潛能發揮至最 大,請詳閱並遵循這些安全說明。 閱讀 & 保留說明 閱讀本產品隨附的所有操作及使用者資訊。 清潔 使用沾濕的布清潔外表機殼。 避免使用任何包含液體、 噴霧或酒精成分的流質清潔產品。 配件 請勿將本產品放置在不穩定的推車、架子或桌上。 本產 品可能會掉落並造成嚴重受損。 中文 水或濕氣 避免靠近水或其他液體來源操作或放置本產品。 ! 當本產品在效能上出現明顯的變化時 – 代表本產品 需要維修。 請檢查 AC 變壓器或電源插頭是否合乎規格,然後利用指 定的程序將電源插頭插入 AV 變壓器指定的位置,直到聽 見卡嗒聲。 關於詳細資訊,請參閱 第 8頁 上 安裝電源 插頭 。 若 AC 變壓器或電源插頭的規格不符,請向最近的先鋒授 權服務中心或經銷商要求進行維修。 ! 請勿將 AC 變壓器的電線纏繞在頸部周圍。 這麼做會 導致窒息。 ! AC 變壓器與電源插頭間塞住硬幣、迴紋針或其他金屬 物體時,請勿使用本機。 否則可能會導致短路,並造 成起火或觸電。 通風 使用本產品時請勿阻塞或覆蓋本產品。除非有適當通風, 否則本機不得採密閉
安裝電源插頭 如下圖所示,將電源插頭沿導軌滑進 AC 變壓器中,然後 再按下直到聽見卡嗒聲。 電源插頭 本產品隨附的電源插頭類型如下所示。 請使用適合您所 在國家或地區的電源插頭。 類型 1(適用墨西哥、台灣等) 類型 2 取出電源插頭 按下 AC 變壓器上的 [PUSH] 按鍵時,如下圖所示將電源 插頭滑離變壓器以取出。 只要安裝電源插頭,就無須取出。 類型 3(適用香港、馬來西亞、新加坡等) 類型 4(適用澳大利亞、紐西蘭等) 類型 5(適用泰國等) 8 Zhtw
操作 控制面板 混音器部分 可個別調整用於基本 DJ 混音的兩組音訊訊號(第 10頁)。 MIC/AUX ഌϸ ెॲᏣഌϸ 9 MIC/AUX MIC OFF TRIM AUX 1 AUX 2 2 AUX 3 LEVEL CD a b PHONO /LINE CD 9 CD、PHONO/LINE 輸入選擇器開關 ON 2 CHANNEL DJ MIXER c 9 OFF TRIM PHONO /LINE 9 HI HI a b a TRIM 控制鍵 DJM-250 b EQ(HI、MID、LOW)控制鍵 MASTER LEVEL MASTER 3 CH-1 9 MID d EQ 4 12 LOW 12 OVER +4 +4 +2 +2 0 9 12 LOW OVER 9 12 -6 -12 -18 -18 dB dB c 主要音量指示燈 MID d 聲道位準指示燈 EQ 0 -6 -12 0 9 d 中文 0 HI 1 CH-2 9 e 頻道音量滑鈕 LOW L
4 切換 [THRU、 、 ](交叉音控器曲線選擇器開關) j。 可切換交叉音控器曲線特性。 關於詳細資訊,請參閱 第 11頁 上 選擇交叉音控器的曲線特性(交叉音控器部分)。 基本操作(混音器部分) 9 TRIM CD a b PHONO /LINE CD TRIM PHONO /LINE c 9 9 HI HI a b MASTER CH-1 9 MID d EQ OVER +4 +4 +2 +2 0 9 LOW 1 CH-2 OVER 9 9 d MID EQ 0 -6 -6 -12 -12 -18 -18 dB dB 9 LOW LEVEL 2 9 SOUND COLOR FILTER LPF HPF LPF HPF 5 移動交叉音控器 f。 切換由揚聲器輸出聲音的聲道。 — 左邊:輸出 [CH-1] 聲音。 — 中央位置:混合 [CH-1] 及 [CH-2] 的聲音並輸出。 — 右邊:輸出 [CH-2] 聲音。 ! [THRU、 、 ](交互推桿曲線選擇器)開關設為 [THRU] 時,不必進行此操作
2 操作 [CH-2] 2。 如在 第 10頁 上 使用聲道推桿混音 下的步驟 2 到 6 所述 進行操作。 選擇交叉音控器的曲線特性(交叉音控器部 分) 3 將交叉音控器 f 逐漸向右移。 檢查揚聲器輸出的聲音時,操作交互推桿以使用 [CH-2] 替代 [CH-1] 的聲音。 一旦只由揚聲器輸出 [CH-2] 聲音即完成混音。 使用濾波器功能(濾波器部分) g 1 2 LPF HPF LPF h THRU j — [THRU]:不想使用交互推桿時請選擇此項目。 —[ ]:可在此設定逐漸升高的曲線。 —[ ]:可在此設定猛然升高的曲線。(從左側或右側 移動交互推桿時,聲音會立即從相反側輸出。) HPF 中文 SOUND COLOR FILTER CROSS FADER h 每聲道皆配備 SOUND COLOR FILTER 功能,轉動大型控制 鍵即可輕易達到濾波器音效。 轉動 [SOUND COLOR FILTER] 控制鍵 h 即可移除高音 或低音。 轉動 [CH-1] 1 或 [CH-2] 2 [SOUND COLOR FILTER] 控制 鍵 h。 音效會套用在聲音與指示
若要使用交互推桿開始播放 使用麥克風或外接裝置(MIC/AUX 部分) 1 將 [THRU、 、 ](交叉音控器曲線選擇器開關)j 設為 [ ]或[ ]。 MIC/AUX MIC OFF AUX 1 AUX 2 2 2 按下推桿啟動部分中的 [CH-1] 或 [CH-2] 按鍵 i。 開啟推桿啟動功能。 AUX 3 LEVEL 3 0 3 移動交叉音控器 f。 將交互推桿移動到要使用推桿啟動功能聲道的相反側。 HI 4 4 設定 DJ 播放機上的指令 DJ 播放機在指令點會暫停播放。 12 12 LOW 12 12 5 移動交叉音控器 f。 在 DJ 播放機上開始播放。 ! 若您將交叉音控器設回原始位置,則播放機會立即返 回已設定的指令點並暫停播放(返回指令)。 1 切換 [MIC、OFF、AUX 1、AUX 2、AUX 3] 輸入選擇 器開關 2。 — [MIC]:選擇連接至 [MIC] 端子的麥克風。 — [AUX1–3]:選擇連接至 [AUX1–3] 端子的外接 裝置。 監控耳機聲音(耳機部分) 2 順時鐘轉動 MIC/AUX 部分的 [LEVEL] 控制鍵
其他資訊 故障排除 ! 不正確的操作方式,常被誤以為是系統問題或故障。如果您認為本元件有問題,請就以下各重點進行檢查。有時候 問題可能出在其他元件上。仔細檢查其他使用的元件和電器設備。如果對照過底下列出的要點還是無法修正問題, 請洽詢離您最近的先鋒授權服務中心或您的經銷商以進行維修。 ! 本機可能會因靜電或其他外在影響導致無法操作。此時,關閉電源,等待 1 分鐘後再開啟,即可還原正常操作。 檢查 解決方法 電源是否未開啟。 是否確實連接隨附的 AC 變壓器? 確實連接隨附的 AC 變壓器至電源插座。 ( 第 6頁 ) 確實將隨附的 AC 變壓器電源線接至本機的線鉤。 ( 第 6頁 ) 電源供應器的 [ON/OFF] 開關是 否設為 [ON] ? 無音效或音效太小聲。 中文 問題 將電源供應器 [ON/OFF] 開關設為 [ON]。 ( 第 9頁 ) [CD、PHONO/LINE] 輸入選擇器 切換 [CD、PHONO/LINE] 輸入選擇器開關,至聲道 開關是否設為正確的位置? 的輸入來源。 ( 第 10頁 ) 本機後面板上的 [PHONO/LINE] 選擇器開關是否設為正確的位 置? 請使
區塊圖 CD1 TRIM LINE1/ PHONO1 3Band EQ MASTER LEVEL METER FILTER CH 1 LEVEL METER HP CH 1 CH 1 FADER CD2 TRIM LINE2/ PHONO2 3Band EQ CROSS FADER FILTER CH 2 LEVEL METER HP CH 2 MIC OFF AUX 1 LEVEL MASTER 1 OUT CH 2 FADER MASTER VOL MASTER 2 OUT HP MASTER 2Band EQ AUX 2 HP MASTER AUX 3 HP CH 1 HP OUT HP CH 2 HP MIX 關於商標及註冊商標 ! 先鋒是日本先鋒公司的註冊商標。 ! 此處提及之公司及產品名稱皆為個別擁有者所有之商 標。 ! 在播放您從本機取得的音樂檔案時,請您務必尊重版 權。 規格 AC 變壓器 功率.................AC 100 V 至 240 V,50 Hz/60 Hz 額定電流.........................
© 2011 PIONEER CORPORATION. All rights reserved. PIONEER CORPORATION 1-1, Shin-ogura, Saiwai-ku, Kawasaki-shi, Kanagawa 212-0031, Japan PIONEER ELECTRONICS ASIACENTRE PTE. LTD. 253 Alexandra Road, #04-01, Singapore 159936 TEL: 65-6472-7555 PIONEER ELECTRONICS AUSTRALIA PTY. LTD. 5 Arco Lane, Heatherton, Victoria, 3202, Australia, TEL: (03) 9586-6300 PIONEER ELECTRONICS (THAILAND) CO., LTD. 17th Fl.