DVD PLAYER DVJ-1000 Operating Instructions
IMPORTANT CAUTION RISK OF ELECTRIC SHOCK DO NOT OPEN The lightning flash with arrowhead symbol, within an equilateral triangle, is intended to alert the user to the presence of uninsulated "dangerous voltage" within the product's enclosure that may be of sufficient magnitude to constitute a risk of electric shock to persons. CAUTION: TO PREVENT THE RISK OF ELECTRIC SHOCK, DO NOT REMOVE COVER (OR BACK). NO USER-SERVICEABLE PARTS INSIDE. REFER SERVICING TO QUALIFIED SERVICE PERSONNEL.
NOTE: This equipment has been tested and found to comply with the limits for a Class B digital device, pursuant to Part 15 of the FCC Rules. These limits are designed to provide reasonable protection against harmful interference in a residential installation. This equipment generates, uses, and can radiate radio frequency energy and, if not installed and used in accordance with the instructions, may cause harmful interference to radio communications.
Before Operating Thank you for buying this Pioneer product. Please read through these operating instructions so you will know how to operate your model properly. After you have finished reading the instructions, put them away in a safe place for future reference. In some countries or regions, the shape of the power plug and power outlet may sometimes differ from that shown in the explanatory drawings. However the method of connecting and operating the unit is the same.
Before Operating Contents Before Operating Features ................................................................................... 6 Handling Precautions ............................................................... 8 Discs Usable with This Unit ..................................................... 9 Names and Functions of Parts ............................................... 12 Operation panel ................................................................ 12 Display ..............................
Before Operating (Features) Features This player has been designed to provide CD/DVD playback features and functions demanded by professional disco club DJs and VJs. It is a professional DVD player equipped with operational ease, sound quality, and functions superior to those found on the professional analog players conventionally used by DJs.
Before Operating (Features) RELOOP Once set, a loop can be returned to any number of times After canceling loop play, pressing the RELOOP/EXIT button causes playback to return and begin again from the previously set loop. Turning the function ON/OFF in time with the track’s rhythm allows a variety of new performance possibilities.
Before Operating (Handling Precautions) Handling Precautions Installation location About the carrying case ¶ Placing and using the player for long periods on heat-generating sources such as amplifiers or near spotlights, etc. will affect product performance. Avoid placing the player on heatgenerating sources. ¶ Install this player as far as possible away from tuners and TV sets. The player installed in close proximity to such equipment may cause noise or degradation of the picture.
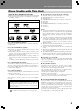
Before Operating (Discs Usable with This Unit) Discs Usable with This Unit Types of discs playable on this unit ¶ The following marks and logos are displayed on disc labels, packaging, or jackets.
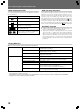
Before Operating (Discs Usable with This Unit) Marks displayed on DVD The following symbols and marks may be displayed on DVD labels or packaging: Mark Number of recorded audio tracks 2 2 Number of recorded subtitles Some DVDs are designed explicitly to prevent the use of certain operations or to prevent changing operation methods. As a result, the methods used to operate each disc may vary, and some techniques may not be usable with certain discs.
Before Operating (Discs Usable with This Unit) Disc composition Handling discs Digital Versatile Discs (DVD) DVD video, DVD-R or DVD-RW discs are recorded in units called “titles,” with each title being divided into one or more sub-divisions called “chapters.” Further, some, discs are furnished with menus for navigating the disc, but menus may not be included with all titles. In the case of commercial films, a single movie normally corresponds to a single title.
Before Operating (Names and Functions of Parts) Names and Functions of Parts Operation panel Buttons and controls with the Buttons and controls with the 1 2 POWER 45 OFF TIME MODE mark are disabled when the NORMAL/DJ switch is set to NORMAL. mark are disabled when the NORMAL/DJ switch is set to DJ.
Before Operating (Names and Functions of Parts) 19. JOG MODE select button Each time pressed, sets VINYL mode alternately ON/OFF. VINYL mode ON: If surface of jog dial is touched during playback, playback stops, and if the dial is then rotated, image and sound are output in response to the amount of rotation. (if the angled surface of the jog dial is rotated without touching the top, pitch bend operation is enabled.) ¶ The current jog mode is memorized even when power is turned off.
Before Operating (Names and Functions of Parts) Display 1 2 3 4 5 6 7 8 9 10 11 24 12 23 22 21 20 19 18 17 16 1. Title/Folder number display (TITLE/FLD 00 to 99) Indicates the DVD title number. During MP3 playback, displays folder number. Not displayed during CD playback. 2. Chapter number (CHP 000 to 999) Indicates the DVD chapter number. During CD/MP3 playback, “CHP” does not appear. 3. Track number (TRACK 00 to 99/000 to 999 (MP3)) Indicates CD or MP3 track number.
Before Operating (Names and Functions of Parts) Jog dial display 1 1. Operation display Displays play position, with one revolution equivalent to 135 frames. The display rotates during playback, and stops during pause. 2 2. Cue point position display 3 4 Displays the position of cue points. 3. Audio/video memory status display Flashes during writing to the audio/video memory. While indicator is flashing, it may not be possible to record real time cue points or hot cue points. 5 4.
Before Operating (Names and Functions of Parts) Main video output (VIDEO OUT) and preview video output (PREVIEW OUT) ★ The example shown here is an illustration meant to depict the general display contents, and may differ somewhat from actual monitor appearance. This unit is equipped with both main video output (VIDEO OUT) and preview video output (PREVIEW OUT) connectors. In NORMAL mode, both VIDEO OUT and PREVIEW OUT produce the same video signals.
Before Operating (Connections) Connections Before making or changing the connections, switch off the power and disconnect the power cord from the AC outlet. 1. Connections to a Pioneer DJ mixer (sold separately) (audio output and control connector) Using the accessory audio cable, connect the white plug to the L (left) connector, and connect the red plug to the R (right) connector.
Before Operating (Connections) 2. Control cord connection for relay play By using the accessory control cord to connect two DJ players, automatic relay play can be performed between the two units. (☞ P.45) DVJ-1000 AUDIO OUT R L DVJ-1000 AUDIO OUT CONTROL NORMAL DJ R CONTROL NORMAL DJ L COMPOSITE COMPOSITE VIDEO OUT DIGITAL OUT POWER OFF S AC IN VIDEO OUT ON Accessory control cord DIGITAL OUT S PREVIEW OUT POWER OFF ON S AC IN S SYNC IN PREVIEW OUT SYNC IN 3.
Before Operating (Connections) Note: Most DJ functions (cue, loop, reloop, tempo adjust, hot cue, jog dial, reverse play) are not supported when the NORMAL/DJ switch is set to “NORMAL”. In addition, the pause mode is silent, not audible. 5.
Before Operating (Connections) 6. Connection to video mixer Use a standard video cable (RCA plug) or S-Video cable for these connections.
Preparations (Setup) Setup Using the Setup Navigator Initial setup is required before playing DVDs. TV system setting for video output This setting is used to switch the TV system used for video output. Confirm on the following table the TV system format in which each kind of disc will be output.
Preparations (Setup) Select type of television connected Sets the type of television connected to the player. Press the cursor button’s up/down sides ( / ) to move the cursor to the item desired, then press ENTER button to confirm. Audio1 A2 Video1 V2 Language General Setup Navigator TV Connection TV Type ENTER Select SETUP Exit ★ Digital output during DJ mode is automatically converted to linear PCM only. Set the type of digital signal supported by the amplifier connected to the player.
Preparations (Setup) Setup Menu items Manual setup using the Setup Menu allows a greater variety of setup options than the Setup Navigator. Consult the pages Noted for more information about the contents of items and options listed on the menu. ¶ ❚ indicates factory default values. ¶ settings are displayed in the Setup Menu’s [Expert] mode.
Preparations (Setup) To return all settings to their factory defaults Use this command to return all changed settings to their factory default values. 1. Turn power OFF. 2. While holding the STOP button depressed, set the POWER switch to ON, and continue holding the STOP button until the “POWER ON” indication goes off. ¶ All setting contents will be returned to their factory default values.
Preparations (Setup) Advanced settings Digital output setting The Setup Menu includes two mode levels, [Basic] and [Expert]; the [Expert] mode allows more advanced settings. Audio1 A2 Video1 V2 Language General Setup Menu Mode — Expert Setup Navigator Basic Parental Lock — Off (us) Change menu mode Move SETUP Exit Expert: Displays advanced settings. Basic: ) are displayed Displays basic settings; simple explanations ( for the items selected (factory default settings).
Preparations (Setup) [Audio2] settings MPEG output Set this option to [MPEG] if the connected amplifier supports MPEG audio. Audio1 A2 Video1 V2 Language General Surround setting Audio DRC — Off Dolby Digital Out — Dolby Digital DTS Out — Off 96kHz PCM Out — MPEG MPEG Out — MPEG 3 PCM Change MPEG audio output mode Move ★ This option is not supported in DJ mode. This function is supported only when connected to the audio output connectors. Not supported during use of DTS audio, linear PCM 96 kHz audio.
Preparations (Setup) Hi-Bit function (Expert Mode) By converting 16-bit to 20-bit audio data to 24-bit, smooth, detailed sound quality is produced even at low listening levels. On: Hi-Bit function is enabled (factory default setting) Off: Hi-Bit function is disabled. A1 Audio2 Video1 V2 Language General Virtual Surround — Off Legato PRO — Off Hi–Bit — On Off ¶ In DJ mode, 24-bit processing is normally used, regardless of the setting selected. Move SETUP Exit [Video1] settings ¶ See P.
Preparations (Setup) Select S-Video output (Expert Mode) Set this option to select the video signal output from the S-Video connector. ¶ When the S-Video connector is used to connect the player to a television set, the image may appear vertically compressed (or stretched horizontally). In this case, select [S1].
Preparations (Setup) INDEX Adjusting picture quality 1. Use the four sides of the cursor button ( / / / ) to select [Video2] \ [Video Adjust] \ [Start], then press the ENTER button. The Picture Quality Controls menu will appear. 2. Use the cursor button’s up/down sides ( / ) to select [Video Setup] and press the ENTER button. 5. Repeat steps 3 and 4 for all desired setting items.
Preparations (Setup) Turn on-screen display ON/OFF (Expert Mode) Select the Audio Language Sets player’s onscreen display ON/OFF. Select the language heard in audio channels. This setting cannot be changed during playback.
Preparations (Setup) INDEX Automatic language and subtitle setting This function selects either automatic audio and subtitle language selection, or manual selection via the Setup Menu are used. This setting cannot be changed during playback. Audio1 A2 Video1 V2 Language General OSD Language — Audio Language — Subtitle Language — Auto Language — English English English On Off The Language selection menu will appear.
Preparations (Setup) Set Subtitle Display ON/OFF (Expert Mode) Set language for forced subtitles (Expert Mode) Select whether to turn subtitles ON, OFF, or to display assist subtitles. ¶ This setting cannot be changed during playback. On some DVDs, even when the [Subtitle Display] is set to [Off], some subtitles may be displayed automatically. Use this command to select the language used for such subtitles. ¶ This setting cannot be changed during playback.
Preparations (Setup) INDEX Setting Parental Lock Change the Parental Lock level 1. Select [Level] and press the ENTER button. Some DVDs containing violent or other mature material are provided with a parental lock function allowing parents to limit the disc’s viewing (see the disc’s jacket or label for information). By setting the player’s lock level lower than that of the disc, you can limit what discs can be viewed on the player.
Preparations (Setup) Country/Area Code List 3. Press the ENTER button. The [Change Code Number] screen will appear.
Basic Operations (Loading and Removing Discs) Loading and Removing Discs Forced eject function In event of a player malfunction or if the EJECT (0) button does not respond to allow removal of a disc, the disc can be removed by inserting the accessory pin into the forced eject hole on the front of the player. When using the forced eject function, be sure to following the accompanying precautions. 1 Turn off the player’s power and wait for at least one minute.
Basic Operations Buttons and controls with the Buttons and controls with the Basic Operations mark are disabled when the NORMAL/DJ switch is set to NORMAL. mark are disabled when the NORMAL/DJ switch is set to DJ.
Basic Operations Auto cue function ★ This function is not supported when the rear panel NORMAL/DJ switch is set to the NORMAL position. This function is used to skip non-recorded (silent) portions at the beginning of tracks and automatically set the cue point (☞ P. 40) immediately before actual sound begins when loading a disc, performing track search (chapter search), and when the playback track (chapter) changes.
Basic Operations NORMAL/DJ Press the REV1/FWD¡ button during playback or when in the pause mode. ANGLE POWER OFF TIME MODE DVD TITLE MP3 FOLDER / ON DVJ-1000 STOP LOCK UNLOCK AUTO CUE EJECT TEXT MODE DVD TITLE MP3 FOLDER HOT CUE ANGLE SUBTITLE AUDIO REALTIME CUE IN OUT IN ADJUST OUT ADJUST DISPLAY RELOOP/ EXIT DELETE 4-BEAT ONE-TRACK MEMORY MENU T.
Basic Operations Track search (skip) Use the PREVIOUS 4/NEXT¢ buttons. ¶ Each time the button is pressed, playback skips to the next chapter (DVD) or track (CD) in the direction indicated by the button pressed. To return to the start of the currently playing track, press the PREVIOUS 4 button once. To return to the beginning of the track preceding the currently playing track, press the PREVIOUS 4 button twice. ¶ Hold the button depressed to perform continuous track search.
Basic Operations ■ Setting a cue point with VINYL mode ON NORMAL/DJ POWER OFF TIME MODE ON DVJ-1000 STOP LOCK UNLOCK AUTO CUE EJECT TEXT MODE TEXT MODE DVD TITLE MP3 FOLDER HOT CUE DVD TITLE MP3 FOLDER / IN/ REAL TIME CUE/ IN ADJUST ANGLE SUBTITLE AUDIO REALTIME CUE IN OUT IN ADJUST OUT ADJUST DISPLAY RELOOP/ EXIT DELETE 4-BEAT ONE-TRACK MEMORY MENU T.
Basic Operations Setting master tempo ★ This function is not supported when the rear panel NORMAL/DJ switch is set to the NORMAL position. During playback, press the MASTER TEMPO button. The master tempo indicator lights and the “MT” indicator appears on the display. In this way, the music pitch will not vary even if the TEMPO control slider is used to change the tempo (speed). ¶ Note that sound quality will deteriorate, however, due to digital processing of the audio signals.
Basic Operations Mixing different tracks (splicing) NORMAL/DJ POWER OFF TIME MODE ON DVJ-1000 STOP LOCK UNLOCK AUTO CUE EJECT TEXT MODE TEXT MODE ★ This function is not supported when the rear panel NORMAL/DJ switch is set to the NORMAL position. (Example) To splice the next track (B) to the currently playing track (A). ¶ Connect the first player A to DJ mixer CH-1, and second player B to CH-2.
Advanced Operations Advanced Operations POWER IN/ REALTIME CUE/ IN ADJUST OFF TIME MODE ON DVJ-1000 STOP EJECT TEXT MODE HOT CUE ANGLE SUBTITLE AUDIO REALTIME CUE IN OUT IN ADJUST OUT ADJUST DISPLAY RELOOP/ EXIT DELETE 4-BEAT ONE-TRACK MEMORY MENU T.
Advanced Operations OUT/ OUT ADJUST BACK& RELOOP/ FORTH EXIT POWER IN/ REALTIME CUE/ IN ADJUST OFF TIME MODE ON DVJ-1000 STOP LOCK UNLOCK AUTO CUE EJECT TEXT MODE DVD TITLE MP3 FOLDER HOT CUE A NORMAL/DJ HOT CUE ANGLE SUBTITLE AUDIO REALTIME CUE IN OUT IN ADJUST OUT ADJUST DISPLAY RELOOP/ EXIT DELETE 4-BEAT ONE-TRACK MEMORY MENU T.
Advanced Operations ■ Automatic loop setting 4-beat loop During playback, press the 4-BEAT/ONE-TRACK button. ¶ The normal loop playback indicators will appear (OUT/OUT ADJUST and IN/REALTIME CUE/IN ADJUST buttons will flash). ¶ The point at which the button is pressed will become the loop-in point, and a loop-out point will be set automatically as described below; loop playback will then continue between the two points.
Advanced Operations To view guide displays Press the DISPLAY button to turn the guide displays ON/OFF. POWER TIME MODE OFF ON DVJ-1000 STOP LOCK UNLOCK AUTO CUE DISPLAY EJECT TEXT MODE DVD TITLE MP3 FOLDER ANGLE SUBTITLE AUDIO DISPLAY DELETE MEMORY MENU T.
Advanced Operations (Operations Using Memory Cards) Operations Using Memory Cards ¶ Removing the memory card MEMORY POWER OFF TIME MODE ON DVJ-1000 STOP LOCK UNLOCK AUTO CUE Open the memory card door and wait until the CARD indicator lamp goes out, then press in the memory card slightly and allow it to eject; grasp the end of the card and pull out carefully.
Advanced Operations (Operations Using Memory Cards) ■ Recording a loop point MEMORY POWER OFF TIME MODE ON DVJ-1000 STOP LOCK UNLOCK AUTO CUE EJECT TEXT MODE DVD TITLE MP3 FOLDER HOT CUE A HOT CUE ANGLE SUBTITLE AUDIO REALTIME CUE IN OUT IN ADJUST OUT ADJUST DISPLAY RELOOP/ EXIT DELETE 4-BEAT ONE-TRACK MEMORY MENU T.MENU CUE / LOOP CALL RETURN SETUP TOUCH/BRAKE ENTER ENTER LOOP JOG ADJUST B RELEASE/START LIGHT BACK & FORTH HEAVY REC MODE C HOT CUE REC MODE 1.
Advanced Operations (Operations Using Memory Cards) 2. Use the cursor button ( / / / ) to select the desired thumbnail image, and press the ENTER button. While reading data from a memory card, the main unit’s display will show the “CUE Readin” or “LOOP Readin” message. ¶ When playing a copy-protected disc, thumbnail image of set point data cannot be recorded to the memory card. If thumbnail images are not recorded, the 1–001 1–002 1–003 1–004 memory point time 0.23 0.04 0.05 0.
Advanced Operations (Operations Using Memory Cards) DELETE POWER OFF TIME MODE ON To copy memory card data MEMORY 1. With no disc or memory card loaded: Hold the MEMORY button pressed for 5 seconds or more. DVJ-1000 STOP UNLOCK AUTO CUE ¶ The display will scroll the “COPY MODE” “CARD A IN” messages. LOCK EJECT TEXT MODE DVD TITLE MP3 FOLDER HOT CUE ANGLE SUBTITLE AUDIO REALTIME CUE IN OUT IN ADJUST OUT ADJUST DISPLAY RELOOP/ EXIT DELETE 4-BEAT ONE-TRACK MEMORY MENU T.
Other (Troubleshooting) Troubleshooting Incorrect operations can be mistaken as malfunctions. If you believe the unit is not operating correctly, consult the chart below. Sometimes incorrect operation may be due to a malfunction in another component. If the problem is not fixed, check the other components used with the player. If the problem still persists, contact your nearest Pioneer authorized service center or dealer for service. Remedy Probable Diagnosis Symptom No power.
Other (Troubleshooting) Symptom Jog dial doesn’t respond. Jog dial performs different operation from that intended. Probable Diagnosis ¶ NORMAL/DJ switch is set to “NORMAL”. ¶ Jog mode is incorrect. ¶ Hyper-jog mode is incorrect. ¶ With DVD, some discs do not support point DJ operations during playback. Remedy ¶ Set NORMAL/DJ switch to “DJ”. ¶ Press the JOG MODE button to select desired jog mode (VINYL ON/OFF). ¶ Press the HYPERJOG MODE button to select desired mode.
Other (Troubleshooting) ¶ This component may fail to operate properly due to influence of static electricity or other external influences. In this case, try turning off the POWER switch, and turn on the power again only when the disc has fully stopped rotating. ¶ This unit cannot play DVD-R/DVD-RW discs recorded in video format unless they have been finalized. ¶ This unit cannot play DVD-R/DVD-RW discs recorded in VR format.
Other (Dot Matrix Guide Display Messages) Dot Matrix Guide Display Messages Message Event/Display Timing LOAD IN Displayed when loading a disc. END EJECT NO DISC Displayed when no disc is loaded. STOP RESUME STILL Displayed when playing a still image during DVD playback in NORMAL mode. PLAY Displayed during DVD playback in NORMAL mode. PAUSE Message Event/Display Timing Displayed at end of playback.
Other (Specifications) Specifications 1. General 4. Audio output section Type of Unit ........................................................ DVD video, CD Power ............................................................... AC 120 V, 60 Hz Power consumption .......................................................... 42 W Operating environment temperature ........................................ +5 °C to +35 °C (+41 °F to +95 °F) Operating environment humidity ...............................
To register your product, find the nearest authorized service location, to purchase replacement parts, operating instructions, or accessories, please go to one of following URLs : Pour enregistrer votre produit, trouver le service après-vente agréé le plus proche et pour acheter des pièces de rechange, des modes d’emploi ou des accessoires, reportez-vous aux URL suivantes : In the USA/Aux Etats-Unis http://www.pioneerelectronics.com In Canada/Aux Canada http://www.pioneerelectronics.