VSX-33_UXJCB.
VSX-33_UXJCB.book 2 ページ 2010年3月9日 火曜日 午前10時39分 IMPORTANT CAUTION RISK OF ELECTRIC SHOCK DO NOT OPEN The lightning flash with arrowhead symbol, within an equilateral triangle, is intended to alert the user to the presence of uninsulated “dangerous voltage” within the product’s enclosure that may be of sufficient magnitude to constitute a risk of electric shock to persons. CAUTION: TO PREVENT THE RISK OF ELECTRIC SHOCK, DO NOT REMOVE COVER (OR BACK). NO USER-SERVICEABLE PARTS INSIDE.
VSX-33_UXJCB.book 3 ページ 2010年3月9日 火曜日 午前10時39分 FEDERAL COMMUNICATIONS COMMISSION DECLARATION OF CONFORMITY This device complies with part 15 of the FCC Rules. Operation is subject to the following two conditions: (1) This device may not cause harmful interference, and (2) this device must accept any interference received, including interference that may cause undesired operation.
VSX-33_UXJCB.book 4 ページ 2010年3月9日 火曜日 午前10時39分 This product is for general household purposes. Any failure due to use for other than household purposes (such as long-term use for business purposes in a restaurant or use in a car or ship) and which requires repair will be charged for even during the warranty period.
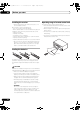
VSX-33_UXJCB.book 5 ページ 2010年3月9日 火曜日 午前10時39分 Thank you for buying this Pioneer product. Please read through these operating instructions so you will know how to operate your model properly. After you have finished reading the instructions, put them away in a safe place for future reference. Contents 01 Before you start Features. . . . . . . . . . . . . . . . . . . . . . . . . . . . . . . . . . . . 9 Checking what’s in the box . . . . . . . . . . . . . . . . . . . . . 9 Installing the receiver . . .
VSX-33_UXJCB.book 6 ページ 2010年3月9日 火曜日 午前10時39分 Bluetooth ADAPTER for Wireless Enjoyment of Music . . . . . . . . . . . . . . . . . . . . . . . . . . . . . . . . . . . . . 50 Wireless music play . . . . . . . . . . . . . . . . . . . . . . . . . 50 Pairing the Bluetooth ADAPTER and Bluetooth wireless technology device. . . . . . . . . . . . . . . . . . . . 50 Listening to music contents of a Bluetooth wireless technology device with your system . . . . . . . . . . . . .
VSX-33_UXJCB.book 7 ページ 2010年3月9日 火曜日 午前10時39分 12 Additional information Speaker Setting Guide . . . . . . . . . . . . . . . . . . . . . . . . 88 Positional relationship between speakers and monitor . . . . . . . . . . . . . . . . . . . . . . . . . . . . . . . . . . 89 Troubleshooting. . . . . . . . . . . . . . . . . . . . . . . . . . . . . 89 Power . . . . . . . . . . . . . . . . . . . . . . . . . . . . . . . . . . . 89 No sound . . . . . . . . . . . . . . . . . . . . . . . . . . . . . . . .
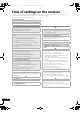
00he_Flow_chart.fm 8 ページ 2010年8月24日 火曜日 午後2時46分 Flow of settings on the receiver The unit is a full-fledged AV receiver equipped with an abundance of functions and terminals. It can be used easily after following the procedure below to make the connections and settings.
VSX-33_UXJCB.book 9 ページ 2010年3月9日 火曜日 午前10時39分 Before you start 01 Chapter 1: Before you start Features • Advanced Direct Energy design This receiver offers a new advancement in discrete design unique to Pioneer for high-power drivability, low distortion and stable imaging. • HDMI (Ver.1.4 with 3D, Audio Return Channel) A compatible component is required to use the above function.
VSX-33_UXJCB.book 01 10 ページ 2010年3月9日 火曜日 午前10時39分 Before you start Installing the receiver • When installing this unit, make sure to put it on a level and stable surface. Don’t install it on the following places: – on a color TV (the screen may distort) – near a cassette deck (or close to a device that gives off a magnetic field). This may interfere with the sound.
VSX-33_UXJCB.book 11 ページ 2010年3月9日 火曜日 午前10時39分 Controls and displays 02 Chapter 2: Controls and displays Remote control This section explains how to operate the remote control for the receiver. The remote has been conveniently color-coded according to component control using the following system: • White – Receiver control, TV control • Blue – Other controls (See page 41, 42, 45, 46, 50 and 70.
VSX-33_UXJCB.book 02 12 ページ 2010年3月9日 火曜日 午前10時39分 Controls and displays DIMMER – Dims or brightens the display (page 63). STEREO – Switches between stereo playback and Front Stage Surround Advance modes (page 54). 9 MULTI-ZONE select buttons Switch to perform operations in ZONE 2 and ZONE 3 (page 63). (The ZONE 3 button can only be used with the VSX-33.) STANDARD – Press for Standard decoding and to switch various modes (2 Pro Logic, Neo:6, etc.) (page 52).
VSX-33_UXJCB.book 13 ページ 2010年3月9日 火曜日 午前10時39分 Controls and displays 02 TUNER EDIT – Use with TUNE /, PRESET / and ENTER to memorize and name stations for recall (page 45). 4 STEREO – Switches between stereo playback and Front Stage Surround Advance modes (page 54). ADVANCED SURROUND – Use to switch between the various surround modes (page 53). STANDARD SURROUND – Press for Standard decoding and to switch various modes (2 Pro Logic, Neo:6, etc.) (page 52).
VSX-33_UXJCB.book 14 ページ 2010年3月9日 火曜日 午前10時39分 Controls and displays 02 2 TrueHD – Lights with Dolby TrueHD decoding. DTS – Lights with DTS decoding. DTS HD – Lights with DTS-HD decoding. 96/24 – Lights with DTS 96/24 decoding. WMA9 Pro – Lights to indicate that a WMA9 Pro signal is being decoded. DSD PCM – Light during DSD (Direct Stream Digital) to PCM conversion with SACDs. PCM – Lights during playback of PCM signals. MSTR – Lights during playback of DTS-HD Master Audio signals.
VSX-33_UXJCB.book 15 ページ 2010年3月9日 火曜日 午前10時39分 Connecting your equipment 03 Chapter 3: Connecting your equipment This receiver provides you with many connection possibilities, but it doesn’t have to be difficult. This chapter explains the kinds of components you can connect to make up your home theater system. Important • Illustration shows the VSX-33, however connections for the VSX-32 are the same except where noted.
VSX-33_UXJCB.book 03 16 ページ 2010年3月9日 火曜日 午前10時39分 Connecting your equipment Note • The input functions below are assigned by default to the receiver’s different input terminals. Refer to The Input Setup menu on page 39 to change the assignments if other connections are used.
03he_Connecting_up.fm 17 ページ 2010年8月24日 火曜日 午後2時49分 Connecting your equipment Determining the speakers’ application This unit permits you to build various surround systems, in accordance with the number of speakers you have. • Be sure to connect speakers to the front left and right channels (L and R). 03 This surround system produces a true-to-life sound over a wider area. [C] 7.
VSX-33_UXJCB.book 03 18 ページ 2010年3月9日 火曜日 午前10時39分 Connecting your equipment [E] 5.1 channel surround system & ZONE 2 connection (Multi Zone) • Speaker System setting: ZONE 2 With these connections you can simultaneously enjoy 5.1-channel surround sound in the main zone with stereo playback on another component in ZONE 2. (The selection of input devices is limited.) Placing the speakers Refer to the chart below for placement of the speakers you intend to connect.
VSX-33_UXJCB.book 19 ページ 2010年3月9日 火曜日 午前10時39分 Connecting your equipment • Place the center speaker above or below the TV so that the sound of the center channel is localized at the TV screen. Also, make sure the center speaker does not cross the line formed by the leading edge of the front left and right speakers. • It is best to angle the speakers towards the listening position. The angle depends on the size of the room. Use less of an angle for bigger rooms.
VSX-33_UXJCB.book 03 20 ページ 2010年3月9日 火曜日 午前10時39分 Connecting your equipment Installing your speaker system At the very least, front left and right speakers only are necessary. Note that your main surround speakers should always be connected as a pair, but you can connect just one surround back speaker if you like (it must be connected to the left surround back terminal). Standard surround connection The front height terminals can also be used for the front wide and Speaker B speakers.
VSX-33_UXJCB.
VSX-33_UXJCB.book 03 22 ページ 2010年3月9日 火曜日 午前10時39分 Connecting your equipment ZONE 2 setup Selecting the Speaker system The front height terminals can be used for front wide and Speaker B connections, in addition to for the front height speakers. Also, the surround back terminals can be used for bi-amping and ZONE 2 connections, in addition to for the surround back speakers. Make this setting according to the application. Front height setup With these connections you can simultaneously enjoy 5.
VSX-33_UXJCB.book 23 ページ 2010年3月9日 火曜日 午前10時39分 Connecting your equipment 03 If several video components are assigned to the same input function (see The Input Setup menu on page 39), the converter gives priority to HDMI, component, then composite (in that order). High picture quality Terminal for connection with source device Terminal for connection with TV monitor HDMI IN Y PB Y PB The HDMI connection transfers uncompressed digital video, as well as almost every kind of digital audio.
VSX-33_UXJCB.book 03 24 ページ 2010年3月9日 火曜日 午前10時39分 Connecting your equipment Connecting your TV and playback components Connecting using HDMI If you have an HDMI or DVI (with HDCP) equipped component (Blu-ray disc player (BD), etc.), you can connect it to this receiver using a commercially available HDMI cable. If the TV and playback components support the Control with HDMI feature, the convenient Control with HDMI functions can be used (see Control with HDMI function on page 56).
VSX-33_UXJCB.book 25 ページ 2010年3月9日 火曜日 午前10時39分 Connecting your equipment 03 Connecting your DVD player with no HDMI output This diagram shows connections of a TV (with HDMI input) and DVD player (or other playback component with no HDMI output) to the receiver. DVD player, etc.
VSX-33_UXJCB.book 03 26 ページ 2010年3月9日 火曜日 午前10時39分 Connecting your equipment Connecting your TV with no HDMI input This diagram shows connections of a TV (with no HDMI input) and DVD player (or other playback component) to the receiver. • With these connections, the picture is not output to the TV even if the DVD player is connected with an HDMI cable. Connect the DVD player’s video signals using a composite or component cord. DVD player, etc.
VSX-33_UXJCB.book 27 ページ 2010年3月9日 火曜日 午前10時39分 Connecting your equipment 03 Connecting an HDD/DVD recorder, BD recorder and other video sources This receiver has two sets of audio/video inputs and outputs suitable for connecting analog or digital video devices, including HDD/DVD recorders and BD recorders. When you set up the receiver you’ll need to tell the receiver which input you connected the recorder to (see also The Input Setup menu on page 39). HDD/DVD recorder, BD recorder, etc.
VSX-33_UXJCB.book 03 28 ページ 2010年3月9日 火曜日 午前10時39分 Connecting your equipment Connecting a satellite/cable receiver or other set-top box Satellite and cable receivers, and terrestrial digital TV tuners are all examples of so-called ‘set-top boxes’. Connecting other audio components This receiver has both digital and analog inputs, allowing you to connect audio components for playback. Most digital components also have analog connections.
VSX-33_UXJCB.book 29 ページ 2010年3月9日 火曜日 午前10時39分 Connecting your equipment 03 About the WMA9 Pro decoder This unit has an on-board Windows Media™ Audio 9 Professional1 (WMA9 Pro) decoder, so it is possible to playback WMA9 Pro-encoded audio using HDMI, coaxial or optical digital connection when connected to a WMA9 Pro-compatible player. However, the connected DVD player, set-top box, etc. must be able to output WMA9 Pro format audio signals through a coaxial or optical digital output.
VSX-33_UXJCB.book 03 30 ページ 2010年3月9日 火曜日 午前10時39分 Connecting your equipment Connecting external antennas Connecting AM/FM antennas Connect the AM loop antenna and the FM wire antenna as shown below. To improve reception and sound quality, connect external antennas (see Connecting external antennas below). 1 To improve FM reception, connect an external FM antenna to FM UNBAL 75 Ω. 75 Ω coaxial cable 2 AM LOOP 3 5 AM LOOP ANTENNA FM UNBAL 75 ANTENNA 4 fig. a fig. b FM UNBAL 75 fig.
VSX-33_UXJCB.book 31 ページ 2010年3月9日 火曜日 午前10時39分 Connecting your equipment 03 Making MULTI-ZONE connections MULTI-ZONE setup using speaker terminals (ZONE 2) It is possible to make these connections if you have a separate TV and speakers for your primary (ZONE 2) sub zone, and a separate amplifier (and speakers) for your secondary (ZONE 3) sub zone. You will also need a separate amplifier if you are not using the MULTI-ZONE setup using speaker terminals (ZONE 2) below for your primary sub zone.
VSX-33_UXJCB.book 32 ページ 2010年3月9日 火曜日 午前10時39分 Connecting your equipment 03 Connecting to the network through LAN interface Connecting Optional Bluetooth ® ADAPTER By connecting this receiver to the network via the LAN terminal, you can listen to Internet radio stations.1 When the Bluetooth ADAPTER (Pioneer Model No. ASBT100)2 is connected to this receiver, a product equipped with Bluetooth wireless technology (portable cell phone, digital music player, etc.
VSX-33_UXJCB.book 33 ページ 2010年3月9日 火曜日 午前10時39分 Connecting your equipment 03 Connecting an XM Radio tuner Connecting an iPod (VSX-33 only) This receiver has a dedicated iPod terminal that will allow you to control playback of audio content from your iPod using the controls of this receiver. After purchasing an XM Mini-Tuner and Home Dock (both sold separately), you will also need to activate the XM Radio service to begin receiving broadcasts.
VSX-33_UXJCB.book 03 34 ページ 2010年3月9日 火曜日 午前10時39分 Connecting your equipment Connecting a USB device It is possible to play audio and photo files by connecting USB devices to this receiver. It is also possible to connect a USB keyboard (US-international layout) to the receiver to enter text in the following GUI screens. • Change the input name in the Input Setup menu (page 39). • Add names to radio station presets (page 45). • Enter Internet radio station URLs (page 46).
VSX-33_UXJCB.book 35 ページ 2010年3月9日 火曜日 午前10時39分 Connecting your equipment Connecting an IR receiver If you keep your stereo components in a closed cabinet or shelving unit, or you wish to use the sub zone remote control in another zone, you can use an optional IR receiver (such as a Niles or Xantech unit) to control your system instead of the remote sensor on the front panel of this receiver.1 1 Connect the IR receiver sensor to the IR IN jack on the rear of this receiver.
VSX-33_UXJCB.book 03 36 ページ 2010年3月9日 火曜日 午前10時39分 Connecting your equipment Switching components on and off using the 12 volt trigger You can connect components in your system (such as a screen or projector) to this receiver so that they switch on or off using 12 volt triggers when you select an input function. However, you must specify which input functions switch on the trigger using the The Input Setup menu on page 39. Note that this will only work with components that have a standby mode.
VSX-33_UXJCB.book 37 ページ 2010年3月9日 火曜日 午前10時39分 Basic Setup 04 Chapter 4: Basic Setup Switching the speaker impedance We recommend using speakers of 8 Ω with this system, but it is possible to switch the impedance setting if you plan to use speakers with a 6 Ω impedance rating. 1 Switch the receiver into standby. 2 While holding down ENTER on the front panel, press STANDBY/ON. The display shows RESET NO .
VSX-33_UXJCB.book 38 ページ 2010年3月9日 火曜日 午前10時39分 Basic Setup 04 If you have a tripod, use it to place the microphone so that it’s about ear level at your normal listening position. If you do not have a tripod, use some other object to install the microphone.1 The Full Auto MCACC display appears once the microphone is connected.2 1a.Full Auto MCACC A/V RECEIVER Speaker System EQ Type MCACC THX Speaker : Normal(SB/FH) : SYMMETRY : M1.
VSX-33_UXJCB.book 39 ページ 2010年3月9日 火曜日 午前10時39分 Basic Setup • If Reverse Phase is displayed, the speaker’s wiring (+ and –) may be inverted. Check the speaker connections.1 – If the connections were wrong, turn off the power, disconnect the power cord, then reconnect properly. After this, perform the Full Auto MCACC procedure again. – If the connections were right, select GO NEXT and continue. 7 Make sure ‘OK’ is selected, then press ENTER.
VSX-33_UXJCB.book 04 40 ページ 2010年3月9日 火曜日 午前10時39分 Basic Setup • Input Skip – When set to ON, that input is skipped when selecting the input using INPUT SELECT. (DVD and other inputs can be still be selected directly with the input function buttons.
VSX-33_UXJCB.book 41 ページ 2010年3月9日 火曜日 午前10時39分 Basic playback 05 Chapter 5: Basic playback Playing a source with HDMI connection Playing a source Here are the basic instructions for playing a source (such as a DVD disc) with your home theater system. 1 Switch on your system components and receiver. Make sure that the TV’s video input is set to this receiver. 2 Select the input function you want to play.
VSX-33_UXJCB.book 42 ページ 2010年3月9日 火曜日 午前10時39分 Basic playback 05 Playing back audio files stored on an iPod Switching the iPod controls3 To navigate songs on your iPod, you can take advantage of the GUI screen of your TV connected to this receiver.1 You can also control all operations for music in the front panel display of this receiver. You can switch over the iPod controls between the iPod and the receiver.
VSX-33_UXJCB.book 43 ページ 2010年3月9日 火曜日 午前10時39分 Basic playback 05 Playing back audio files stored on a USB memory device The maximum number of levels that you can select in Step 2 (below) is 8. Also, you can display and play back up to 30 000 folders and files within a USB memory device.1 1 Use / to select ‘Music’ from the USB Top menu. 2 Use / to select a folder, then press ENTER to browse that folder. • To return to the previous level any time, press RETURN.
VSX-33_UXJCB.book 44 ページ 2010年3月9日 火曜日 午前10時39分 Basic playback 05 About playable file formats The USB function of this receiver supports the following file formats. Note that some file formats are not available for playback although they are listed as playable file formats. Music files Category Extension Stream MP3a .mp3 MPEG-1, 2, 2.5 Audio Layer-3 WAV WMA .wav .
VSX-33_UXJCB.book 45 ページ 2010年3月9日 火曜日 午前10時39分 Basic playback 05 Saving station presets Listening to the radio The following steps show you how to tune in to FM and AM radio broadcasts using the automatic (search) and manual (step) tuning functions. If you already know the frequency of the station you want, see Tuning directly to a station below. Once you are tuned to a station you can memorize the frequency for recall later—see Saving station presets below for more on how to do this.
VSX-33_UXJCB.book 05 46 ページ 2010年3月9日 火曜日 午前10時39分 Basic playback Listening to Internet radio stations Internet radio is an audio broadcasting service transmitted via the Internet.1 There are a large number of Internet radio stations broadcasting a variety of services from every corner of the world. Some are hosted, managed, and broadcast by private individuals while others are by the corresponding traditional terrestrial radio stations or radio networks.
VSX-33_UXJCB.book 47 ページ 2010年3月9日 火曜日 午前10時39分 Basic playback 05 3 Select ‘Internet Radio Setting’. The following programming screen will be shown on the browser. Top Top Menu Menu Pioneer Internet Radio Setting 1 Title URL 2 Title URL 3 Title URL 4 Title URL 5 Title URL 6 Title URL 7 Title URL 8 Title URL teams. Additional programming includes expert sports talk, uncensored entertainment, comedy, family programming, local traffic and weather and news from your most trusted sources.
VSX-33_UXJCB.book 05 48 ページ 2010年3月9日 火曜日 午前10時39分 Basic playback 1 Press / to enter the XM Channel Guide, navigate through the channels one at time with /, then press ENTER to listen to the XM radio broadcast. • To browse by genre, first press CATEGORY, use / to select a genre, then press ENTER. Tip • You can also press MEMORY during reception display to save the information of up to five songs. See Using the XM Menu below to recall this information.
VSX-33_UXJCB.book 49 ページ 2010年3月9日 火曜日 午前10時39分 Basic playback 05 • If after pressing SIRIUS the display shows Antenna Error, try disconnecting the antenna and reconnecting.1 If the display shows Check Sirius Tuner, check the connection of the AC adapter and this receiver to the SiriusConnect™ tuner. After connecting, you will be able to use this receiver to select channels and navigate categories using the GUI screen display.
VSX-33_UXJCB.
VSX-33_UXJCB.book 51 ページ 2010年3月9日 火曜日 午前10時39分 Basic playback 05 9 From the Bluetooth wireless technology device list, select Bluetooth ADAPTER and enter the Passcode selected in step 5.1 Listening to music contents of a Bluetooth wireless technology device with your system 1 Press ADAPTER on the remote control to switch the receiver to ADAPTER PORT input.2 2 From the Bluetooth wireless technology device, perform the operation to connect to the Bluetooth ADAPTER.
VSX-33_UXJCB.book 06 52 ページ 2010年3月9日 火曜日 午前10時39分 Listening to your system Chapter 6: Listening to your system Important • The listening modes and many features described in this section may not be available depending on the current source, settings and status of the receiver. Auto playback There are many ways to listen back to sources using this receiver, but the simplest, most direct listening option is the Auto Surround feature.
VSX-33_UXJCB.book 53 ページ 2010年3月9日 火曜日 午前10時39分 Listening to your system 06 • XM HD Surround (VSX-33 only) – Up to 7.1 channel sound, especially suited to music sources1 With multichannel sources, if you have connected surround back, front height or front wide speakers, you can select (according to format): • 2 Pro Logic IIx MOVIE – See above • Dolby Digital EX – Creates surround back channel sound for 5.1 channel sources and provides pure decoding for 6.
VSX-33_UXJCB.book 06 54 ページ 2010年3月9日 火曜日 午前10時39分 Listening to your system • TV SURROUND – Provides surround sound for both mono and stereo TV sources • ADVANCED GAME – Suitable for video games • SPORTS – Suitable for sports programs • CLASSICAL – Gives a large concert hall-type sound • While listening to a source, press RECEIVER , then press STEREO to select Front Stage Surround Advance modes. • STEREO – See Listening in stereo above for more on this.
VSX-33_UXJCB.book 55 ページ 2010年3月9日 火曜日 午前10時39分 Listening to your system Selecting MCACC presets • Default setting: MEMORY 1 If you have calibrated your system for different listening positions, you can switch between settings to suit the kind of source you’re listening to and where you’re sitting (for example, watching movies from a sofa, or playing a video game close to the TV). • While listening to a source, press RECEIVER , then press MCACC.
VSX-33_UXJCB.book 07 56 ページ 2010年3月9日 火曜日 午前10時39分 Control with HDMI function Chapter 7: Control with HDMI function Synchronized operations below with a Control with HDMI-compatible Pioneer TV or Blu-ray disc player or with a component of another make that supports the Control with HDMI functions are possible when the component is connected to the receiver using an HDMI cable.
VSX-33_UXJCB.book 57 ページ 2010年3月9日 火曜日 午前10時39分 Control with HDMI function • OFF – The Control with HDMI is disabled. Synchronized operations cannot be used. When this unit’s power is turned off, audio and video of sources connected via HDMI are not output. 6 Select the ‘Control Mode’ setting you want. Choose whether you want to enable HDMI for all linked functions or the PQLS function only. However, Display Power Off will activate the settings set forth in step 7 below.
VSX-33_UXJCB.book 07 58 ページ 2010年3月9日 火曜日 午前10時39分 Control with HDMI function The operations below can also be used on Pioneer Control with HDMI-compatible TVs. • When the receiver’s volume is adjusted or the sound is muted, the volume status is displayed on the TV’s screen. • When the OSD language is switched on the TV, the receiver’s language setting also switches accordingly.
VSX-33_UXJCB.book 59 ページ 2010年3月9日 火曜日 午前10時39分 Using other functions 08 Chapter 8: Using other functions Setting the Audio options There are a number of additional sound settings you can make using the AUDIO PARAMETER menu. The defaults, if not stated, are listed in bold. Important • Note that if a setting doesn’t appear in the AUDIO PARAMETER menu, it is unavailable due to the current source, settings and status of the receiver.
VSX-33_UXJCB.book 08 En 2010年3月9日 火曜日 午前10時39分 Using other functions Setting What it does LFE (LFE Attenuate) Some audio sources include ultra-low bass tones. Set the LFE attenuator as necessary to prevent the ultra-low bass tones from distorting the sound from the speakers. The LFE is not limited when set to 0 dB, which is the recommended value. When set to –5 dB, –10 dB, –15 dB or –20 dB, the LFE is limited by the respective degree. When OFF is selected, no sound is output from the LFE channel.
VSX-33_UXJCB.book 61 ページ 2010年3月9日 火曜日 午前10時39分 Using other functions 08 k.• You can’t use the Virtual Front Height mode when the headphones are connected to this receiver or when any of the stereo, Front Stage Surround Advance, Sound Retriever Air or Stream Direct modes is selected. • The Virtual Front Height mode cannot be used when no surround speaker is connected.
VSX-33_UXJCB.book 08 62 ページ 2010年3月9日 火曜日 午前10時39分 Using other functions d.This setting is only displayed when the video signals below are being input: • 480i, 576i, 480p, 576p, 720p, 1080i analog video signals • 480i, 576i, 480p, 576p, 720p, 1080i, 1080p, 1080p24 HDMI video signals e.• This setting is valid for component outputs and HDMI output. • This setting have the effect only for pictures recorded in the interlaced scan format (480i/576i or 1080i signals). • P.
VSX-33_UXJCB.book 63 ページ 2010年3月9日 火曜日 午前10時39分 Using other functions MULTI-ZONE remote controls Set the MULTI-ZONE operation switch to ZONE 2 or ZONE 3 to operate the corresponding zone. The following table shows the possible MULTI-ZONE remote controls: Button What it does Switches on/off power in the sub zone. INPUT SELECT Use to select the input function in the sub zone. Input function buttons Use to select the input function directly (this may not work for some functions) in the sub zone.
VSX-33_UXJCB.book 64 ページ 2010年3月9日 火曜日 午前10時39分 Using other functions 08 Switching the HDMI output Checking your system settings (VSX-33 only) Use the status display screen to check your current settings for features such as surround back channel processing and your current MCACC preset. Set which terminal to use when outputting video and audio signals from the HDMI output terminals. The HDMI OUT1 terminal is compatible with the Control with HDMI function. • Press RECEIVER , then press HDMI OUT.
VSX-33_UXJCB.book 65 ページ 2010年3月9日 火曜日 午前10時39分 Using other functions 08 Default system settings Setting Default Default DSP Digital Video Conversion ON Power On Level LAST SPEAKERS A Volume Limit OFF FULL Setting Normal (SB/FH) Mute Level Front SMALL Phase Control Center SMALL Sound Retriever Speaker System Speaker Setting ON iPod/USB, INTERNET ON RADIO, ADAPTER PORT function FH/FW SMALL Surr SMALL SB SMALLx2 Sound Delay 0.
VSX-33_UXJCB.book 09 66 ページ 2010年3月9日 火曜日 午前10時39分 Controlling the rest of your system Chapter 9: Controlling the rest of your system • For greater convenience, assign the TV connected to the MONITOR OUT terminal to the TV CTRL button, and assign your satellite/cable receiver or set-top box connected to the TV input terminal to the TV input button. If a single device is connected to both terminals, that device should be assigned to both the TV CTRL and TV input buttons.
VSX-33_UXJCB.book 67 ページ 2010年3月9日 火曜日 午前10時39分 Controlling the rest of your system 09 • The remote controls should be 3 cm (1 inch) apart. Programming signals from other remote controls If the preset code for your component is not available, or the available preset codes do not operate correctly, you can program signals from the remote control of another component. This can also be used to program additional operations (buttons not covered in the presets) after assigning a preset code.
VSX-33_UXJCB.book 68 ページ 2010年3月9日 火曜日 午前10時39分 Controlling the rest of your system 09 Erasing all learnt settings that are in one input function Setting the backlight mode This operation erases all the operational settings of other devices that have been programmed in one input function, and restores the factory default. The backlight lighting pattern can be selected from among four modes, in consideration of convenience and battery service life.
VSX-33_UXJCB.book 69 ページ 2010年3月9日 火曜日 午前10時39分 Controlling the rest of your system Similar to Multi operations, System off allows you to use two buttons to stop and switch off a series of components in your system at the same time.1 Only one System off operation sequence may be programmed. Press MULTI OPERATION and then SOURCE to: 1. Transmit a sequence of up to five programmed commands. 2. Switch off all Pioneer devices including the receiver (except DVD recorders and VCRs).
VSX-33_UXJCB.book 09 70 ページ 2010年3月9日 火曜日 午前10時39分 Controlling the rest of your system Resetting the remote control settings Controlling components Use this procedure to reset all the remote control’s settings to the factory default.1 This remote control can control components after entering the proper codes (see Setting the remote to control other components on page 66 for more on this). Use the input function buttons to select the component. 1 Press and hold R.
VSX-33_UXJCB.
VSX-33_UXJCB.
VSX-33_UXJCB.book 73 ページ 2010年3月9日 火曜日 午前10時39分 The Advanced MCACC menu 10 Chapter 10: The Advanced MCACC menu Making receiver settings from the Advanced MCACC menu The Advanced MCACC (Multi Channel ACoustic Calibration) system was developed in Pioneer’s laboratories with the aim of making it possible for home users to perform adjustments of the same level as in a studio easily and with high precision.
VSX-33_UXJCB.book 10 74 ページ 2010年3月9日 火曜日 午前10時39分 The Advanced MCACC menu 2 Select the parameters you want to set. Use / to select the item, then use / to set. • Auto MCACC – The default is ALL (recommended), but you can limit the system calibration to only one setting (to save time) if you want.1 3 Connect the microphone to the MCACC SETUP MIC jack on the front panel. Make sure there are no obstacles between the speakers and the microphone.
VSX-33_UXJCB.book 75 ページ 2010年3月9日 火曜日 午前10時39分 The Advanced MCACC menu If no operations are performed for 10 seconds while the speaker configuration check screen is being displayed, the Auto MCACC Setup will resume automatically. In this case, you don’t need to select ‘OK’ and press ENTER in step 8. • If you see an ERR message (or the speaker configuration displayed isn’t correct), there may be a problem with the speaker connection.
VSX-33_UXJCB.book 10 76 ページ 2010年3月9日 火曜日 午前10時39分 The Advanced MCACC menu • Standing Wave – Control overly resonant low frequencies in your listening room (see Standing Wave on page 76). The last two settings are specifically for customizing the parameters explained in Acoustic Calibration EQ Adjust on page 77: • EQ Adjust – Manually adjust the frequency balance of your speaker system while listening to test tones (see Acoustic Calibration EQ Adjust on page 77).
VSX-33_UXJCB.book 77 ページ 2010年3月9日 火曜日 午前10時39分 The Advanced MCACC menu 10 it results in an overly resonant (‘boomy’) sound. The Standing Wave Control uses filters to reduce the effect of overly resonant sounds in your listening area. During playback of a source, you can customize the filters used for Standing Wave Control for each of your MCACC presets.1 Tip • Changing the frequency curve of one channel too drastically will affect the overall balance.
VSX-33_UXJCB.book 78 ページ 2010年3月9日 火曜日 午前10時39分 The Advanced MCACC menu 10 Using Acoustic Calibration EQ Professional 1 2 Select ‘EQ Professional’, then press ENTER. Select an option and press ENTER. • Reverb Measurement – Use this to measure the reverb characteristics before and after calibration. • Reverb View – You can check the reverb measurements made for specified frequency ranges in each channel.
VSX-33_UXJCB.book 79 ページ 2010年3月9日 火曜日 午前10時39分 The Advanced MCACC menu Checking MCACC Data 10 1 Select ‘Channel Level’ from the MCACC Data Check menu. At the procedure of Automatically conducting optimum sound tuning (Auto MCACC) on page 37, the procedure of Automatic MCACC (Expert) on page 73 or after fineadjusting at Manual MCACC setup on page 75, you can check your calibrated settings using the GUI screen.
VSX-33_UXJCB.book 10 80 ページ 2010年3月9日 火曜日 午前10時39分 The Advanced MCACC menu Output MCACC data Before continuing, make sure you have completed step 2 in Checking MCACC Data on page 79. The data measured with the Advanced MCACC function is transmitted to the USB device.1 The 3D graphs of the reverb characteristics before and after calibration and the MCACC results (parameters) can be checked on your computer.
VSX-33_UXJCB.book 81 ページ 2010年3月9日 火曜日 午前10時39分 The Advanced MCACC menu 10 Copying MCACC preset data If you want to manually adjust the Acoustic Calibration EQ (see Manual MCACC setup on page 75), we recommend copying your current settings1 to an unused MCACC preset. Instead of just a flat EQ curve, this will give you a reference point from which to start. 1 Select ‘MCACC Memory Copy’ from the Data Management setup menu. 2 Select the setting you want to copy.
VSX-33_UXJCB.book 82 ページ 2010年3月9日 火曜日 午前10時39分 The System Setup and Other Setup menus 11 Chapter 11: The System Setup and Other Setup menus Making receiver settings from the System Setup menu The following section describes how to change the speaker-related settings manually and make various other settings (input selection, OSD language selection, etc.). 1 Switch on the receiver and your TV. Make sure that the TV’s video input is set to this receiver. 2 Press RECEIVER , then press HOME MENU.
VSX-33_UXJCB.book 83 ページ 2010年3月9日 火曜日 午前10時39分 The System Setup and Other Setup menus Speaker system setting • Default setting: Normal(SB/FH) There are several ways you can use the speaker terminals with this receiver. In addition to a normal home theater setup where they are used for the front height speakers or front wide speakers, they can be used for bi-amping the front speakers or as an independent speaker system in another room. 1 Select ‘Speaker System’ from the Manual SP Setup menu.
11he_System_setup.fm 11 84 ページ 2010年8月24日 火曜日 午後2時52分 The System Setup and Other Setup menus • Surr – Select LARGE if your surround speakers reproduce bass frequencies effectively. Select SMALL to send bass frequencies to the other speakers or subwoofer. If you didn’t connect surround speakers choose NO (the sound of the surround channels is sent to the front speakers or a subwoofer). • SB – Select the number of surround back speakers you have (one, two or none).
VSX-33_UXJCB.book 85 ページ 2010年3月9日 火曜日 午前10時39分 The System Setup and Other Setup menus X-Curve Most soundtracks mixed for cinema sound too bright when played back in large rooms. The X-Curve setting acts as a kind of re-equalization for home theater listening, and restores proper tonal balance of movie soundtracks.1 1 Select ‘X-Curve’ from the Manual SP Setup menu. 2 Choose the X-Curve setting you want. Use / to adjust the setting.
VSX-33_UXJCB.book 11 86 ページ 2010年3月9日 火曜日 午前10時39分 The System Setup and Other Setup menus IP Address The IP address to be entered must be defined within the following ranges. If the IP address defined is beyond the following ranges, you cannot play back audio files stored on components on the network or listen to Internet radio stations. Class A: 10.0.0.1 to 10.255.255.254 Class B: 172.16.0.1 to 172.31.255.254 Class C: 192.168.0.1 to 192.168.255.
VSX-33_UXJCB.book 87 ページ 2010年3月9日 火曜日 午前10時39分 The System Setup and Other Setup menus • HDMI Setup – Synchronizes this receiver with your Pioneer component supporting Control with HDMI (page 56). 5 When you’re finished, press RETURN. You will return to the Other Setup menu. • Volume Setup – Sets up the volume-related operations of this receiver (see below). Remote Control Mode Setup • Remote Control Mode Setup – Sets this receiver’s remote control mode (see below).
VSX-33_UXJCB.book 12 88 ページ 2010年3月9日 火曜日 午前10時39分 Additional information Chapter 12: Additional information Step 3: Adjusting the speaker orientation Speaker Setting Guide In order to achieve an even better surround effect, it is important to accurately position the speakers and make their volume and tone characteristics uniform so as to finely focus the multi-channel sound.
VSX-33_UXJCB.book 89 ページ 2010年3月9日 火曜日 午前10時39分 Additional information 12 Positional relationship between speakers and monitor Position of front speakers and monitor The front speakers should be as equidistant as possible to the monitor. Position of center speaker and monitor Since mostly dialogs are output from the center speaker, keeping the center speaker as close as possible to the screen makes the overall sound more natural.
VSX-33_UXJCB.book 12 90 ページ 2010年3月9日 火曜日 午前10時39分 Additional information Symptom Remedy AMP ERR blinks in the display, • The receiver may have a serious problem. Do not try switching the receiver on. Unplug the receiver then the power automatically from the wall and call a Pioneer authorized independent service company. switches off. The ADVANCED MCACC blinks and the power does not turn on. The PQLS flashes and power turns off. • There is a problem with the receiver’s power unit or fan.
VSX-33_UXJCB.book 91 ページ 2010年3月9日 火曜日 午前10時39分 Additional information Symptom Remedy No sound from one speaker. • Check the speaker connection (see Connecting the speakers on page 19). • Check the speaker level settings (see Channel Level on page 84). • Check that the speaker hasn’t been set to NO (see Speaker Setting on page 83). • The channel may not be recorded in the source.
VSX-33_UXJCB.book 12 92 ページ 2010年3月9日 火曜日 午前10時39分 Additional information Symptom Remedy Can’t select some Input • Check the Input Skip settings in the Input Setup menu. functions by the INPUT • Check the HDMI Input assignment in the Input Setup menu then try OFF. SELECTOR on the front panel or the INPUT SELECT button on the remote control.
VSX-33_UXJCB.book 93 ページ 2010年3月9日 火曜日 午前10時39分 Additional information Symptom 12 Remedy Video signals are not output • When a monitor only compatible with resolutions of 480i is connected to the component terminal from the component terminal. and another monitor is connected to the HDMI terminal, the video signals may not be output to the monitor connected to the component terminal. If this happens, do the following: – Turn off the power of the monitor connected to the HDMI terminal.
VSX-33_UXJCB.book 12 94 ページ 2010年3月9日 火曜日 午前10時39分 Additional information Symptom Remedy Lower frequency response curves do not seem to have been calibrated for SMALL speakers. • Low frequencies used in bass management (the subwoofer channel) will not change for speakers that have been specified as SMALL in the configuration, or do not output these frequencies. • Calibration is performed, but due to your speakers’ low frequency limitations, no measurable sound is output for display.
VSX-33_UXJCB.book 95 ページ 2010年3月9日 火曜日 午前10時39分 Additional information 12 Web Control Symptoms Causes Remedies Top Menu screen is not displayed on browser. This receiver’s IP address has not been entered into the browser correctly. Check the receiver’s IP address and enter it correctly in the browser (page 85). Receiver cannot be operated from browser. JavaScript is disabled on the internet browser. Enable JavaScript. The browser is not compatible with JavaScript.
VSX-33_UXJCB.book 12 96 ページ 2010年3月9日 火曜日 午前10時39分 Additional information Symptom Remedy Synchronized operation not possible using Control with HDMI function. • Check the HDMI connections. • The cable may be damaged. • Select ON for the Control with HDMI setting (see HDMI Setup on page 56). • Select ALL for the Control Mode with HDMI setting (see HDMI Setup on page 56). • Turn the TV’s power on before turning on this receiver’s power.
VSX-33_UXJCB.book 97 ページ 2010年3月9日 火曜日 午前10時39分 Additional information 12 Symptoms Causes Remedies A USB memory device is not recognized. The USB memory device does not support the mass storage class specifications. Try using a USB memory device compatible with the mass storage class specifications. Note that there are cases where even the audio files stored on a USB memory device compatible with the mass storage class specifications are not played back on this receiver (page 43).
VSX-33_UXJCB.book 12 98 ページ 2010年3月9日 火曜日 午前10時39分 Additional information Symptoms Causes The Internet radio settings This receiver’s IP address has not been entered screen cannot be displayed on into the browser correctly. the computer Internet JavaScript is disabled on the Internet browser. browser. The browser is not compatible with JavaScript. Remedies Check the receiver’s IP address and enter it correctly on the browser (page 85). Enable JavaScript.
VSX-33_UXJCB.book 99 ページ 2010年3月9日 火曜日 午前10時39分 Additional information 12 Status messages Cause Action Upgrade XM Tuner The connected XM CNP-1000 is incompatible. This receiver features advanced technology that is designed for use with the XM Mini-Tuner. Contact XM Listener Care (1-800-967-2346) and ask about upgrading your XM CNP-1000 to an XM MiniTuner.
VSX-33_UXJCB.book 12 100 ページ 2010年3月9日 火曜日 午前10時39分 Additional information Surround sound formats About THX Below is a brief description of the main surround sound formats you’ll find on BDs, DVDs, satellite, cable and terrestrial broadcasts, and video cassettes. The THX technologies are explained below. See www.thx.com for more detailed information. Dolby The Dolby technologies are explained below. See www.dolby.com for more detailed information.
VSX-33_UXJCB.book 101 ページ 2010年3月9日 火曜日 午前10時39分 Additional information • THX Surround EX THX Surround EX - Dolby Digital Surround EX is a joint development of Dolby Laboratories and the THX Ltd. In a movie theater, film soundtracks that have been encoded with Dolby Digital Surround EX technology are able to reproduce an extra channel which has been added during the mixing of the program.
12he_Additional_info.fm 12 102 ページ 2010年8月24日 火曜日 Additional information About SIRIUS and XM Important • XM Radio is only supported on the VSX-33. The VSX32 only supports SIRIUS Radio. SIRIUS, XM and all related marks and logos are trademarks of Sirius XM Radio Inc. and its subsidiaries. All other marks and logos are the property of their respective owners. All rights reserved. SIRIUS and XM subscriptions sold separately. Taxes and a one-time activation fee may apply.
VSX-33_UXJCB.book 103 ページ 2010年3月9日 火曜日 午前10時39分 Additional information 12 Auto Surround, ALC and Stream Direct with different input signal formats The following charts show what you will hear with different input signal formats, depending on the Stream Direct mode (see Using Stream Direct on page 54) you have selected.
VSX-33_UXJCB.book 12 104 ページ 2010年3月9日 火曜日 午前10時39分 Additional information Preset code list You should have no problem controlling a component if you find the manufacturer in this list, but please note that there are cases where codes for the manufacturer in the list will not work for the model that you are using. There are also cases where only certain functions may be controllable after assigning the proper preset code.
VSX-33_UXJCB.
VSX-33_UXJCB.
VSX-33_UXJCB.
VSX-33_UXJCB.book 12 108 ページ 2010年3月9日 火曜日 午前10時39分 Additional information Integrated Control Section Specifications Amplifier Section Continuous average power output of 110 watts* per channel, min., at 8 ohms, from 20 Hz to 20 000 Hz with no more than 0.08 %** total harmonic distortion. Continuous Power Output (20 Hz to 20 kHz, 8 Ω, 0.08 %) Front . . . . . . . . . . . . . . . . . . . . . . . . . . . . . . 110 W + 110 W Center . . . . . . . . . . . . . . . . . . . . . . . . . . . . . . . . . . . . .
VSX-33_UXJCB.book 109 ページ 2010年3月9日 火曜日 午前10時39分 Additional information Cleaning the unit • Use a polishing cloth or dry cloth to wipe off dust and dirt. • When the surface is dirty, wipe with a soft cloth dipped in some neutral cleanser diluted five or six times with water, and wrung out well, and then wipe again with a dry cloth. Do not use furniture wax or cleansers. • Never use thinners, benzene, insecticide sprays or other chemicals on or near this unit, since these will corrode the surface.
VSX-33_UXJCB.
VSX-33_UXJCB.
99he_Backcover.fm 112 ページ 2010年8月24日 火曜日 午後2時58分 To register your product, find the nearest authorized service location, to purchase replacement parts, operating instructions, or accessories, please go to one of following URLs : Pour enregistrer votre produit, trouver le service après-vente agréé le plus proche et pour acheter des pièces de rechange, des modes d’emploi ou des accessoires, reportez-vous aux URL suivantes : In the USA/Aux Etats-Unis http://www.pioneerelectronics.