
DJ Equipment User Manual


— When library information is present d Library browsing: The music
files are displayed in the [ARTIST], [ALBUM], [TRACK], [PLAYLIST],
[FOLDER] and [GENRE] categories.
— Without library information d Folder browsing: The folders/tracks on
the medium are displayed with a tree structure.
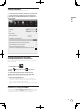
[INFO] display
This displays detailed information on the loaded tracks.
The display switches between the title, artist name and album name
each time [DISPLAY (UTILITY)] g is pressed.
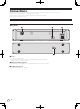
Searching for tracks quickly using
the library information
When library information created using rekordbox is recorded on the
USB device, the library information can be used to quickly search for
tracks.
1 Turn the rotary selector i and select the category.
Select the category.
— When there is library information on the USB device, select from
the [ARTIST], [ALBUM], [TRACK], [PLAYLIST], [FOLDER] and
[GENRE] categories.
— When there is no library information on the USB device, select
from the [FOLDER] category.
— For CD-DA discs, select from the [TITLE] or [TRACK] category.
2 Press the rotary selector i.
The display switches to the item selected in step 1.
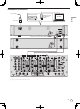
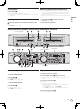
Adjusting the playing speed (tempo
control section)
N
MSF
SEARCH
MASTER TEMPO
TEMPO
BPM
%
TEMPO
0
TEMPO RANGE
PITCH BEND
BACK
MEMORY
CUE
SELECT PUSH
L
OOP
E
XIT
WIDE
±16
±10
±6
kl
m
n
Tempo control section
Control unit
MT
1 Move [TEMPO] k forward and backward.
The playing speed increases when the slider is moved to the [+] side
(towards you), decreases when the slider is moved to the [–] side (away
from you).
The percentage by which the playing speed is changed is displayed at
[TEMPO %] on the main unit display.
2 Press [PITCH BEND] n.
When pressed during playback, the pitch bend function is activated.
Press the [+] button to speed up, the [–] button to slow down.
! The rate at which the speed changes can be changed by turning the
jog dial while pressing the button.
Selecting the playing speed adjustment
range
Press [TEMPO RANGE] m.
The playing speed adjustment range switches each time the button is
pressed.
[WIDE, ±16, ±10, ±6] lights on the main unit display.
! Adjustments are possible in units of 0.05 % when set to [±6] %,
[±10] % or [±16] %, in units of 0.1 % when set to [WIDE].
! At [±16] %, adjustments are possible in units of 0.05 %, but over 10 %
adjustments are made in units of 0.1 %.
! The [WIDE] adjustment range is ±100 %. When set to –100 %, play-
back stops.
! [WIDE] can only be selected when playing music CDs (CD-DA).
Adjusting the playing speed without
changing the pitch (Master Tempo)
Press [MASTER TEMPO] l.
The [MASTER TEMPO] indicator lights. The pitch does not change even
when the playing speed is changed with the [TEMPO] slider.
! The sound is digitally processed, so the sound quality changes.
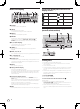
Storing cue or loop points
Use this procedure to store the cue or the loop point of the currently
selected source on USB devices.
1 Connect the USB device to this unit.
! When using a single USB device, connect it to the USB1 port.
2 Setting the cue point.
! To store the loop point, set the loop point then play the loop.
3 Press the rotary selector i for over 1 second.
[CUE CALL] is displayed.
! Press [BACK] j to return to the previous screen.
4 Turn the rotary selector i to display [CUE MEMORY].
5 Press the rotary selector i.
The cue or the loop point is stored.
[CUE MEMORY] flashes quickly while the cue point is being stored.
[LOOP MEMORY] flashes quickly while the loop point is being stored.
When storing is completed, the information display switches to a slow
flashing.
! Never disconnect the USB device while the data is being stored.
! When the source is a USB device, up to 10 points can be stored per
track.
! When the source is a disc, up to 100 points can be stored per disc.
! Press [BACK] j to return to the previous screen.
Calling out stored cue or loop points
1 Connect the USB device to this unit.
! When using a single USB device, connect it to the USB1 port.
2 Press the rotary selector i for over 1 second.
[CUE CALL] is displayed.
! Press [BACK] j to return to the previous screen.
3 Press the rotary selector i.
[POINT 01] is displayed.
! Press [BACK] j to return to the previous screen.
4 Turn the rotary selector i to display the number of
the point you want to call out.
5 Press the rotary selector i.
The stored cue or loop point is called out.
18
En