PD-D9MK2_en_CUXJ.book 1 ページ 2009年4月3日 金曜日 午後8時52分 D9 PD-D9MK2-K Super Audio CD Player PD-D9MK2-K Lecteur Super Audio CD Register your product on: http://www.pioneerelectronics.com (US) http://www.pioneerelectronics.ca (Canada) • Protect your new investment The details of your purchase will be on file for reference in the event of an insurance claim such as loss or theft.
00_cover_anki_PD-D9.fm 2 ページ 2009年4月6日 月曜日 午後5時9分 IMPORTANT CAUTION RISK OF ELECTRIC SHOCK DO NOT OPEN The lightning flash with arrowhead symbol, within an equilateral triangle, is intended to alert the user to the presence of uninsulated “dangerous voltage” within the product’s enclosure that may be of sufficient magnitude to constitute a risk of electric shock to persons. CAUTION: TO PREVENT THE RISK OF ELECTRIC SHOCK, DO NOT REMOVE COVER (OR BACK). NO USER-SERVICEABLE PARTS INSIDE.
PD-D9MK2_en_CUXJ.book 3 ページ 2009年4月3日 1) 2) 3) 4) 5) 6) 7) Read these instructions. Keep these instructions. Heed all warnings. Follow all instructions. Do not use this apparatus near water. Clean only with dry cloth. Do not block any ventilation openings. Install in accordance with the manufacturer’s instructions. 8) Do not install near any heat sources such as radiators, heat registers, stoves, or other apparatus (including amplifiers) that produce heat.
00_cover_anki_PD-D9.fm 4 ページ 2010年3月1日 月曜日 午前10時16分 We Want You Listening For A Lifetime Selecting fine audio equipment such as the unit you’ve just purchased is only the start of your musical enjoyment. Now it’s time to consider how you can maximize the fun and excitement your equipment offers. This manufacturer and the Electronic Industries Association’s Consumer Electronics Group want you to get the most out of your equipment by playing it at a safe level.
PD-D9_TOC.fm 5 ページ 2009年4月17日 金曜日 午後5時58分 Thank you for buying this Pioneer product. Please read through these operating instructions so that you will know how to operate your model properly. After you have finished reading the instructions, put them in a safe place for future reference. Contents 01 Before you start Features . . . . . . . . . . . . . . . . . . . . . . . . . . . What’s in the box . . . . . . . . . . . . . . . . . . . . Inserting the battery . . . . . . . . . . . . . . . . . .
PD-D9MK2_en_CUXJ.book 6 ページ 01 2009年4月3日 金曜日 午後8時52分 Before you start Chapter 1 Before you start Features • Quick response power supply circuit The superior power supply circuit adopted by this unit achieves vastly improved response by employing ‘no feedback’ circuitry and low impedance parallel main capacitors characteristicly used in professional audio monitoring.
01_before_start.fm 7 ページ 2009年4月14日 火曜日 午後1時9分 Before you start Inserting the battery Please confirm that the following accessories are in the box when you open it. English What’s in the box 01 • Remote control Français • AAA/IEC R03 dry cell batteries x2 • RCA audio cable (red/white plugs) • SR control cable • Power cable • Operating instructions (This document) Caution Incorrect use of batteries may result in such hazards as leakage and bursting.
01_before_start.fm 01 8 ページ 2009年4月16日 Media Compatible formats PC-created • Discs recorded using a PC may not disc be playable due to the setting of the software used to create the disc. In these instances, check the software manual or disc boxes for more on compatibility. • Discs recorded in packet write mode are not compatible. This player is compatible with a wide range of audio disc types and media formats.
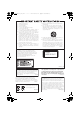
PD-D9MK2_en_CUXJ.book 9 ページ 2009年4月3日 金曜日 午後8時52分 Connecting up 02 English Chapter 2 Connecting up You can connect this player to your amplifier or receiver using the analog outputs or one of the digital outputs. 1 Connect the analog LINE OUT jacks on this player to a set of analog audio inputs on your amplifier. To digital input (optical) To audio input (analog) Many Pioneer components have SR CONTROL jacks which can be used to link components together.
PD-D9MK2_en_CUXJ.book 10 ページ 02 2009年4月3日 Connecting up 2 Connect the CONTROL OUT jack of that component to the CONTROL IN jack of another Pioneer component. Use a cable with a mono mini-plug on each end for the connection. Pioneer component Pioneer component CONTROL IN OUT CONTROL IN OUT AC IN CONTROL IN OUT This player 3 Continue the chain in the same way for as many components as you have. Plugging in Make sure to complete all connections before connecting to an AC outlet.
PD-D9MK2_en_CUXJ.book 11 ページ 2009年4月3日 金曜日 午後8時52分 Controls and displays 03 English Chapter 3 Controls and displays 1 2 3 4 5 6 Français Front panel D9 POWER Deutsch STANDBY OFF ON PURE AUDIO 8 POWER OFF ON (page 13)1 5 (page 13) 2 STANDBY indicator 6 / (page 13) 3 Display (below) 7 Remote sensor 4 Disc tray 8 PURE AUDIO indicator (page 16) 3 Scan display – Shows the scan speed. 4 SACD – Lights during SACD playback.
03_controls_displays.
PD-D9MK2_en_CUXJ.book 13 ページ 2009年4月3日 金曜日 午後8時52分 Getting started 04 English Chapter 4 Getting started After making sure that everything is connected properly and that the player is plugged in, push the POWER button into the ON position to switch the player on. POWER OFF ON 3 Load a disc. Load a disc with the label side facing up, using the disc tray guide to align the disc. Once properly seated, press to close the disc tray.
PD-D9MK2_en_CUXJ.book 14 ページ 04 2009年4月3日 金曜日 午後8時52分 Getting started Button What it does Press to start fast reverse scanning. Press (play) to resume normal playback. • During playback, press REPEAT to select a repeat play mode. Select between 1-track repeat (REPEAT lights in the display), all repeat (ALL REPEAT lights in the display), or repeat off. Press to start fast forward scanning. Press (play) to resume normal playback.
PD-D9MK2_en_CUXJ.book 15 ページ 2009年4月3日 Getting started • To add more tracks to the program list, repeat steps 1 and 2. Deutsch • When the disc is stopped, press PROGRAM then CLEAR to erase one track at a time (from the end of the list), or simply press CLEAR to erase all tracks. 04 Français • Press PROGRAM then (play) to restart program play. 午後8時52分 English 4 To play the program list, press (play).
PD-D9MK2_en_CUXJ.book 16 ページ 05 2009年4月3日 金曜日 午後8時52分 Other settings and features Chapter 5 Other settings and features Listening to Pure Audio Using Legato Link Pro This unit has been specially designed to provide you the truest possible reproduction of recorded audio. When the Pure Audio feature is selected, the front panel display is switched off and the digital outputs are disabled, leaving you with the pure sound source.
PD-D9MK2_en_CUXJ.book 17 ページ 2009年4月3日 金曜日 午後8時52分 Additional information 06 Additional information English Hints on installation Français Chapter 6 We want you to enjoy using this product for years to come, so please use the following guidelines when choosing a suitable location: • Use in a well-ventilated room. • Place on a solid, flat, level surface, such as a table, shelf or stereo rack. Hold discs by the edge or by the center hole and edge.
06_additional_info.fm 18 ページ 06 2009年4月21日 Cleaning discs Fingerprints and dust on discs can affect playback performance. Clean using a soft, dry cloth, wiping the disc lightly from the center to the outside edge as shown below. If necessary, use a cloth soaked in alcohol, or a commercially available CD/DVD cleaning kit to clean a disc more thoroughly. Never use benzine, thinner or other cleaning agents, including products designed for cleaning vinyl records.
PD-D9MK2_en_CUXJ.book 19 ページ 2009年4月3日 金曜日 午後8時52分 Additional information • The remote control is too far from the player, or the angle with the remote sensor is too wide: Use the remote within its operating range (page 12). • If you’re trying to switch on using the remote control, make sure the front panel POWER button is switched on first. • The battery is exhausted: Replace the battery (page 7). No audio, or audio is distorted.
PD-D9MK2_en_CUXJ.book 20 ページ 06 2009年4月3日 En 午後8時52分 Additional information Glossary Specifications Analog audio Direct representation of sound by an electrical signal. See also Digital audio. General Digital audio Indirect representation of sound using numbers. See also Sampling frequency and Analog audio. 20 金曜日 DRM DRM (digital rights management) copy protection is a technology designed to prevent unauthorized copying by restricting playback, etc.
PD-D9MK2_en_CUXJ.book 21 ページ 2009年4月3日 Additional information Note Published by Pioneer Corporation. Copyright © 2009 Pioneer Corporation. All rights reserved. Deutsch • Specifications and the design are subject to possible modifications without notice, due to improvements. 06 Français Remote control . . . . . . . . . . . . . . . . . . . . . . . . . . 1 AAA/IEC R03 dry cell batteries . . . . . . . . . . . . 2 RCA/phono stereo audio cable . . . . . . . . . . . . . 1 SR control cable . . . . . . . .
PD-D9MK2_Fr_CUXJ.book Page 2 Friday, April 17, 2009 5:29 PM IMPORTANT ATTENTION DANGER D´ELECTROCUTION NE PAS OUVRIR Ce symbole de l’éclair, placé dans un triangle équilatéral, a pour but d’attirer l’attention de l’utilisateur sur la présence, à l’intérieur du coffret de l’appareil, de “tensions dangereuses” non isolées d’une grandeur suffisante pour représenter un risque d’électrocution pour les êtres humains.
PD-D9MK2_Fr_CUXJ.book Page 3 Friday, April 17, 2009 ATTENTION Cet appareil est un produit laser de Classe 1, mais la diode laser qu’il renferme est supérieure à la Classe 1. Pour garantir une sécurité constante, ne retirez aucun des couvercles et n’essayez pas d’avoir accès à l’intérieur de l’appareil. Confiez toute réparation à un personnel qualifié. L’étiquette suivante se trouve sur votre appareil.
PD-D9MK2_Fr_CUXJ.book Page 4 Friday, April 17, 2009 5:29 PM Nous vous remercions d’avoir acheté ce produit Pioneer. Veuillez lire attentivement ce mode d’emploi afin d’apprendre à manipuler votre modèle correctement. Lorsque vous avez terminé, rangez-le en lieu sûr afin de pouvoir vous y référer à l’avenir. Sommaire 01 Avant de commencer Caractéristiques. . . . . . . . . . . . . . . . . . . . . Contenu de l’emballage . . . . . . . . . . . . . . . Insertion de la pile . . . . . . . . . . . . . . . . . .
PD-D9MK2_Fr_CUXJ.book Page 5 Friday, April 17, 2009 5:29 PM Avant de commencer 01 Avant de commencer Español • Legato Link Conversion Pro et Hi-Bit Le système Legato Link Conversion unique de Pioneer rétablit les pertes dynamiques de haute fréquence dans le processus d’enregistrement numérique pour reproduire complètement toutes les nuances et les détails de l’événement musical original. Cela entraîne une quantité réduite de glissements de phase sur l’ensemble du spectre audio audible.
PD-D9MK2_Fr_CUXJ.book Page 6 01 Friday, April 17, 2009 5:29 PM Avant de commencer Contenu de l’emballage Insertion de la pile Veuillez vous assurer que les accessoires suivants sont livrés avec l’appareil.
PD-D9MK2_Fr_CUXJ.book Page 7 Friday, April 17, 2009 5:29 PM Avant de commencer CD-RW Super Audio CD* Tableau de compatibilité des disques • CD-Audio, ISO 9660 CD-ROM* * Conforme à ISO 9660 Niveau 1 ou 2. Format physique des CD : Mode1, Mode2 XA Form1. Les systèmes de fichiers Romeo et Joliet sont compatibles.
PD-D9MK2_Fr_CUXJ.book Page 8 02 Friday, April 17, 2009 5:29 PM Connexions Chapitre 2 Connexions Connexion à un amplificateur Vous pouvez relier ce lecteur à un amplificateur ou récepteur en utilisant les sorties analogiques ou l’une des sorties numériques. Si vous effectuez la connexion à l’aide d’une sortie numérique, vous devez également connecter les sorties analogiques à 2 voies pour assurer la compatibilité avec tous les disques.
PD-D9MK2_Fr_CUXJ.book Page 9 Friday, April 17, 2009 Connexions 5:29 PM 02 1 Sélectionnez le capteur à distance à utiliser. Lorsque vous souhaitez commander un appareil de la chaîne, vous dirigerez la télécommande vers ce capteur à distance. English 2 Branchez la prise CONTROL OUT de cet appareil à la prise CONTROL IN d’un autre appareil Pioneer. Utilisez un câble avec une mini prise mono à chaque extrémité pour le branchement.
PD-D9MK2_Fr_CUXJ.
PD-D9MK2_Fr_CUXJ.
PD-D9MK2_Fr_CUXJ.book Page 12 Friday, April 17, 2009 04 5:29 PM Démarrage Chapitre 4 Démarrage 1 Si le lecteur n’est pas sous tension, appuyez sur POWER pour l’activer. Mise sous tension Après vous être assuré que toutes les connexions sont correctement établies et que le lecteur est branché, activez le bouton POWER en position ON pour mettre le lecteur sous tension. • Appuyez sur CD PLAYER sur la télécommande pour mettre l’appareil en veille.
PD-D9MK2_Fr_CUXJ.book Page 13 Friday, April 17, 2009 5:29 PM Démarrage Appuyez sur cette touche pour lancer le défilement rapide avant. Appuyez sur la touche (lecture) pour reprendre la lecture normale du disque. Donne accès au début de la plage en cours de lecture, puis aux plages suivantes. Donne accès à la plage suivante. Numéros Permettent d’entrer un numéro de plage. Appuyez sur la touche ENTER pour valider le choix.
PD-D9MK2_Fr_CUXJ.book Page 14 Friday, April 17, 2009 04 5:29 PM Démarrage Création d’un programme de lecture Cette fonction permet de programmer l’ordre de lecture des plages d’un disque.1 1 Lorsque le disque est arrêté, appuyez sur PROGRAM. 2 Utilisez les touches numérotées et ENTER pour sélectionner une plage pour l’étape actuelle de création du programme de lecture. Si vous entrez accidentellement une plage incorrecte, appuyez sur CLEAR pour la supprimer.
PD-D9MK2_Fr_CUXJ.book Page 15 Friday, April 17, 2009 5:29 PM Autres réglages et fonctions 05 Autres réglages et fonctions • Appuyez sur PURE AUDIO pour activer ou désactiver l’écoute en mode Pure Audio. Le voyant PURE AUDIO du panneau avant s’allume pour indiquer que l’écoute en mode Pure Audio est activée. Utilisation du SACD/CD Vous pouvez sélectionner l’un des trois réglages de luminosité de l’écran du panneau avant. • Appuyez sur DIMMER pour basculer entre les réglages de luminosité de l’écran.
PD-D9MK2_Fr_CUXJ.book Page 16 Friday, April 17, 2009 06 5:29 PM Informations complémentaires Chapitre 6 Informations complémentaires Conseils d’installation Nous souhaitons que vous puissiez utiliser ce lecteur pendant de nombreuses années ; les consignes suivantes vous aideront à choisir un emplacement adéquat : Ce que vous devez faire… • Utiliser l’appareil dans une pièce bien aérée. • Placer l’appareil sur une surface horizontale stable, telle qu’une table, une étagère ou un rack stéréo.
06_additional_info.fm 17 ページ 2009年4月21日 火曜日 午後5時30分 Informations complémentaires Si vous devez déplacer le lecteur, mettez d’abord le lecteur en veille (appuyez sur CD PLAYER sur la télécommande), puis débranchez le câble d’alimentation. Ne soulevez pas, ne déplacez pas l’appareil lorsqu’il il fonctionne — le disque tourne à vitesse élevée et risquerait d’être endommagé. Attention si l’appareil est installé dans un meuble avec une porte en verre Español Débranchez l’appareil avant de le nettoyer.
PD-D9MK2_Fr_CUXJ.book Page 18 Friday, April 17, 2009 06 5:29 PM Informations complémentaires Guide de dépannage Une erreur de commande est souvent prise pour une anomalie de fonctionnement. Si vous pensez que l’appareil ne fonctionne pas correctement, vérifiez les points suivants. Parfois, l’anomalie est causée par un autre appareil. Vérifiez les autres appareils de la chaîne ainsi que le matériel électrique utilisé.
PD-D9MK2_Fr_CUXJ.book Page 19 Friday, April 17, 2009 5:29 PM Informations complémentaires Caractéristiques techniques Audio numérique Représentation indirecte des sons au moyen de nombres. Reportez-vous également à Fréquence d’échantillonnage et Audio analogique. DRM La protection DRM (Digital Rights Management) est une technologie conçue pour empêcher les copies illégales en restreignant la lecture, etc.
back_cover.fm 24 ページ 2010年3月1日 月曜日 午前10時18分 Should this product require service in the U.S.A. and you wish to locate the nearest Pioneer Authorized Independent Service Company, or if you wish to purchase replacement parts, operating instructions, service manuals, or accessories, please call the number shown below. 1–800–421–1404 Please do not ship your product to Pioneer without first calling the Customer Support at the above listed number for assistance. Pioneer Electronics Service, Inc. P.O.