ARE1488B_6020FD_C1C4_CN_EnFrSp.pPage 1 2008/05/07 13:37:06 *Voir et Entendre n’a jamais eu autant de sens Register Your Product on http://www.pioneerelectronics.com (US) http://www.pioneerelectronics.ca (Canada) Enregistrez votre appareil sur: http://www.pioneerelectronics.com (États-Unis) http://www.pioneerelectronics.ca (Canada) C M Y CM MY CY CMY K PIONEER CORPORATION 4-1, Meguro 1-Chome, Meguro-ku, Tokyo 153-8654, Japan PIONEER ELECTRONICS (USA) INC. P.O.
PDP6020FD.book Page 2 Monday, March 17, 2008 10:51 AM IMPORTANT CAUTION RISK OF ELECTRIC SHOCK DO NOT OPEN The lightning flash with arrowhead symbol, within an equilateral triangle, is intended to alert the user to the presence of uninsulated "dangerous voltage" within the product's enclosure that may be of sufficient magnitude to constitute a risk of electric shock to persons. CAUTION: TO PREVENT THE RISK OF ELECTRIC SHOCK, DO NOT REMOVE COVER (OR BACK). NO USERSERVICEABLE PARTS INSIDE.
PDP6020FD.book Page 3 Monday, March 17, 2008 10:51 AM TABLE OF CONTENTS Congratulations on your purchase of a Pioneer KURO flat panel television. English KURO is the future of Pioneer flat-panel displays. It’s a world without boundaries. A place where the senses evolve, colors are felt and sounds can be tasted. An experience that changes not only the way you look at television, but the way you look at the world.
PDP6020FD.book Page 4 Monday, March 17, 2008 10:51 AM TABLE OF CONTENTS 3.5 Block Programs, Channels, or Content.........................................................................................................................47 3.5.1 3.5.2 3.5.3 3.5.4 Assign a Parental Control (Block) Password .......................................................................................................47 Activate Parental Control ..........................................................................
PDP6020FD.book Page 5 Monday, March 17, 2008 10:51 AM TABLE OF CONTENTS 5.5 Connect a Game Console or Camcorder ...................................................................................................................... 82 5.6 Operate the Home Media Gallery .................................................................................................................................. 83 5.7 Run the Home Media Gallery.............................................................................
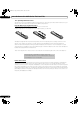
PDP6020FD.book Page 6 Monday, March 17, 2008 10:51 AM 01 Introduction to the 20FD Series Flat Panel TVs 1 Introduction to the 20FD Series Flat Panel TVs The Pioneer 20FD Series Flat Panel TV models include the 60-inch PDP-6020FD and the 50-inch PDP-5020FD (screen sizes measured diagonally). Below is a list of all accessories shipped with your panel. If an item is missing, please contact your dealer or our Service organization immediately. Service contact information is listed on the back of this manual.
PDP6020FD.
PDP6020FD.book Page 8 Monday, March 17, 2008 10:51 AM 01 Introduction to the 20FD Series Flat Panel TVs 1.2 Control Options: Get to Know Your Flat Panel TV You can operate your flat panel TV from the panel buttons or with the remote control. The following sections provide button locations/operations for the panel and the remote control. 1.2.
PDP6020FD.
PDP6020FD.book Page 10 Monday, March 17, 2008 10:51 AM 01 Introduction to the 20FD Series Flat Panel TVs 1.2.2 Operating the Remote Control The remote control for the 20FD Series panels is a powerful tool. This section provides a brief introduction to your remote control while later sections explore more advanced operations. Insert the Batteries into the Remote Control To open push and slide the battery cover in the direction of the arrows.
PDP6020FD.book Page 11 Monday, March 17, 2008 10:51 AM Introduction to the 20FD Series Flat Panel TVs 01 30º English Operating Range for the Remote Control To control the flat panel TV, point the remote towards the sensor on the panel’s bottom right corner. For easy operation, keep the distance between the remote control and the sensor less than 7m (23 feet) and at an angle of less than 30 degrees.
PDP6020FD.book Page 12 Monday, March 17, 2008 10:51 AM 01 Introduction to the 20FD Series Flat Panel TVs 1.2.3 Buttons on the Remote Control Except for a few options, commands available through the buttons on the flat panel TV are duplicated on the remote control. The remote control can be programmed to control other equipment such as a DVD Player, Surround Sound system, etc. A later section entitled “5 Use Other Equipment With Your Flat Panel TV” explains how to use the remote to control other equipment.
PDP6020FD.
PDP6020FD.book Page 14 Monday, March 17, 2008 10:51 AM 02 Install Your Flat Panel TV 2 Install Your Flat Panel TV There are several installation options for your flat panel TV. This chapter walks you through how to choose an installation site, the best mounting methods, and how to install your panel. 2.1 Choose a Location and the Mounting Method Your flat panel TV is very thin. The panel needs a solid surface and some sort of support structure (a stand, table, etc.
PDP6020FD.book Page 15 Monday, March 17, 2008 10:51 AM Install Your Flat Panel TV 02 English 2.1.1 Check the Location for Suitability When choosing the location for your panel, there are several factors you need to keep in mind. The installation site should be out of direct sunlight and have sufficient ventilation around the flat panel TV to allow cooling. The diagram below is an example of a stand-mounted panel with proper ventilation.
PDP6020FD.book Page 16 Monday, March 17, 2008 10:51 AM 02 Install Your Flat Panel TV 2.2 Install the Panel Using a Stand 2.2.1 Use or Remove the Included Stand The PDP-5020FD ships with the Pioneer table top stand (stand) attached. Attach the included stand to the panel for the PDP-6020FD. For PDP-5020FD, attach the falling prevention metal fittings after placing the panel to stand upright.
PDP6020FD.book Page 17 Monday, March 17, 2008 10:51 AM Install Your Flat Panel TV 02 7 ) After assembling the stand, attach the falling prevention metal fittings using the installation screws. English (PDP-6020FD) Installation screws (M4 x 35 mm: black) Falling prevention metal fitting 8 ) With the flat panel TV still face down, insert the stand’s supports into the bottom of the panel then tighten the screws. Line up the column supports with the bottom of the flat panel TV.
PDP6020FD.book Page 18 Monday, March 17, 2008 10:51 AM 02 Install Your Flat Panel TV Attach/Detach the Speaker The flat panel TV’s speaker delivers high-quality, clear sound. The left/right balance is enclosed in a single unit for ease of installation and compactness. Although other devices can be added or removed from the mounted panel, physically attach the speaker last. Disconnect the cables from the Speaker and REMOVE THE SPEAKER before mounting or moving the panel.
PDP6020FD.book Page 19 Monday, March 17, 2008 10:51 AM Install Your Flat Panel TV 02 2 ) Attach the center speaker bracket using the supplied screws. When fitting the screws, place screws 1 and 2 through the holes in the center bracket. (PDP-5020FD) English (PDP-6020FD) Speaker bracket for center ➁ ➁ ➀ Speaker mounting screw (M5 x 10 mm) ➀ Tighten screws in the order shown above. 3 ) Position the speaker by the brackets.
PDP6020FD.book Page 20 Tuesday, March 18, 2008 6:15 PM 02 Install Your Flat Panel TV 6 ) Attach the speaker to the side brackets using the supplied screws. . ➂ The bottom screw hole on each speaker bracket is not used when the panel remains on the stand. ➀ Speaker mounting screw (M5 x 10 mm) ➁ Note: If the speaker needs to be repositioned (horizontally or vertically) after it is attached, loosen the speaker mounting screws first. Adjust the position then retighten the screws. 2.2.
PDP6020FD.book Page 21 Tuesday, March 18, 2008 6:15 PM Install Your Flat Panel TV 02 PDP-6020FD with the speaker installed Black Gray English Black Red Speaker mounting screw (M5 x 10 mm) Speaker mounting screw (M5 x 10 mm) Speaker mounting screw (M5 x 10 mm) Speaker bracket (right) Speaker cable Speaker bracket (center) Speaker Speaker bracket (left) Cable clamp (PDP-5020FD) • Before connecting the speaker to the flat panel TV, unplug the panel from the power outlet.
PDP6020FD.book Page 22 Monday, March 17, 2008 10:51 AM 02 Install Your Flat Panel TV 2.3 Wall/Ceiling Mounting Lay the 50” panel down on a raised surface then remove the stand. Installation bolts (1) Installation bolts (2) (PDP-5020FD) A common flat panel TV mounting option is to hang the panel on a sturdy wall or from a reinforced ceiling. When mounting in this way, some preparations must be completed first. Follow the steps below to prepare the panel for mounting.
PDP6020FD.book Page 23 Monday, March 17, 2008 10:51 AM Install Your Flat Panel TV 02 It is possible to jar the brackets out of alignment while installing the panel. 2 ) Connect the loose ends of the speaker cables to the speaker. English Once your flat panel TV is mounted on the wall or suspended from the ceiling, follow the steps below to attach the speaker. 1 ) Confirm that the speaker brackets are ready to support the speaker.
PDP6020FD.book Page 24 Wednesday, April 23, 2008 11:02 AM 02 Install Your Flat Panel TV 2.4 Mount the Flat Panel TV Because your flat panel TV is slim but heavy, have at least two people mount and/or position the panel. The following sections provide instructions for the different mounting and anchoring options. Anchor the Panel When Using a Stand When using a stand, stabilize the panel to keep it from tipping over.
PDP6020FD.book Page 25 Monday, March 17, 2008 10:51 AM Install Your Flat Panel TV 02 4 mm (5/32 inch) 8 mm to 15 mm (3/8 inch to 5/8 inch) (PDP-5020FD) (PDP-6020FD) English Follow the steps below to secure your flat panel TV. 1 ) Mark locations for metal fittings and screws on the back edge of the table using the panel stand to determine placement. 20 mm (13/16 inch) min. Wood screw (commercially available, 4 mm x 20 mm (5/32 inch x 13/16 inch) min.
PDP6020FD.book Page 26 Monday, March 17, 2008 10:51 AM 02 Install Your Flat Panel TV 2.5 Connect to Broadcast TV & Other Devices (DVR, Receiver, BDR, etc.) The type of equipment attached to your flat panel TV determines which panel ports are used. The following sections explain how to connect broadcast TV and playback equipment such as a DVD player, Surround Sound system, video recorder, etc. to the panel.
PDP6020FD.book Page 27 Monday, March 17, 2008 10:51 AM Install Your Flat Panel TV 02 Connect HDMI equipment (INPUT 4 through INPUT 6): T W Left side view English T W Connect HDMI equipment (INPUT 7): Rear view Audio cable (commercially available) Make this connection when inputting analog audio signals. HDMI compliant cable (HDMI cable having the HDMI mark) HDMI compliant cable (HDMI cable having the HDMI mark) HDMI equipment INPUT 4 through INPUT 6 are HDMI terminals.
PDP6020FD.book Page 28 Monday, March 17, 2008 10:51 AM 02 Install Your Flat Panel TV Connect a VCR: T T W W Connect a game console or camcorder: Left side view Rear view AV cable S-Video cable (commercially available) (commercially available) AV cable (commercially available) VCR Camcorder/Game console Use INPUT 1 terminals when connecting a VCR or other equipment. For details, refer to the operation manual that came with the VCR.
PDP6020FD.book Page 29 Monday, March 17, 2008 10:51 AM Install Your Flat Panel TV 02 T T W W English 2.5.3 Connect the Power Cord to the Panel The final connection is the power cord. Always connect the panel’s power cord to a three-pronged outlet, verifying that the cord is properly grounded. The cord includes a noise filter that reduces electrical interference from the wall outlet. As long as the flat panel TV is plugged in to an outlet, some power is drawn through the panel.
PDP6020FD.book Page 30 Monday, March 17, 2008 10:51 AM 02 Install Your Flat Panel TV Follow the steps below to attach a cable clamp. 1 ) Thread the clamp band through the holder and bundle the cable(s) in the cable clamp. 2 ) Push and hold the levers then insert the hook into an appropriate hole on the rear of the flat panel TV. 3 ) Pull up the clamp band to lock. 1 2 Cable clamp 4 ) Confirm that the cable clamp is seated firmly in the panel.
PDP6020FD.book Page 31 Monday, March 17, 2008 10:51 AM Basic Operations For Television Viewing 03 3 Basic Operations For Television Viewing English This chapter explores day-to-day operations such as powering on your flat panel TV, using the Home Menu, and adjusting the panel for the viewing area/room. The final section in this chapter provides hints and suggestions for those new to flat panel TV features. 3.
Chapter_03.fm Page 32 Monday, March 17, 2008 11:50 AM 03 Basic Operations For Television Viewing 3.2 Program the Flat Panel TV for Television Viewing To watch TV and take advantage of some built-in features, choose the channel type or types (Analog, Digital), select a language, set your time zone, and program the channels. The sections below include how to set your channel type and how to use the Home Menu for each programming option. 3.2.
PDP6020FD.book Page 33 Monday, March 17, 2008 10:51 AM Basic Operations For Television Viewing 03 This chart provides a breakdown of the Home Menu for both AV and PC sources.
PDP6020FD.book Page 34 Monday, March 17, 2008 10:51 AM 03 Basic Operations For Television Viewing TV Screen Components Your flat panel TV has easy-to-read menus and graphic symbols that provide quick access to the desired options. Menus appearing in this manual may differ slightly from the actual menus but the functionality remains the same.
PDP6020FD.book Page 35 Monday, March 17, 2008 10:51 AM Basic Operations For Television Viewing 03 Note: If the panel’s power cord is unplugged or there is a power outage, the time must be reset. English 3.2.4 Set the Clock Set the flat panel TV’s clock to take advantage of many built-in features such as Time Zone and D.S.T. (Daylight Saving Time) activation for digital TV broadcast. Follow the steps below to set the clock. 1 ) Access the System Setup through the Setup.
PDP6020FD.book Page 36 Monday, March 17, 2008 10:51 AM 03 Basic Operations For Television Viewing 5 ) Select Start. The panel automatically begins creating your list of channels. Language : English Air/Cable : Cable Time Zone : Atlantic Start Note: To quit Auto Installation before it is complete, press RETURN to recall the Auto Installation screen then EXIT. Manual Channel Selection To add channels without using the Auto Installation option, follow the directions below.
PDP6020FD.book Page 37 Monday, March 17, 2008 10:51 AM Basic Operations For Television Viewing 03 3 ) Select Installation from the Digital Tuner Setup menu. English Installation Channel management Clock 4 ) Select Add New Channels. Channel search starts automatically. If a new channel is found, it is stored automatically in the flat panel TV. To cancel channel search before it finishes, press RETURN. Software Keyboard This on-screen keyboard allows labeling manually added TV channels.
PDP6020FD.book Page 38 Monday, March 17, 2008 10:51 AM 03 Basic Operations For Television Viewing 3.2.6 Skip or Delete Unwanted Channels The Auto Installation process adds all channels available from your TV service provider. However, there may be some channels that are unwanted or are not age-appropriate for your home. This section explains how to bypass or delete unwanted channels when moving up/down one channel at a time and what programs are available for viewing.
Chapter_03.fm Page 39 Tuesday, March 18, 2008 8:54 AM Basic Operations For Television Viewing 03 Favorites List: Display your favorite channel numbers/names up to 20 channels (analog channels, Input 1 through 7, PC), 20 digital channels, and 1 Home Media Gallery Store your most frequently viewed channels in the Favorites List. To display the Favorites List, press ENTER while showing a TV channel. For another method to access the Favorites List, follow the directions below. 1 ) Press HOME MENU.
PDP6020FD.book Page 40 Monday, March 17, 2008 10:51 AM 03 Basic Operations For Television Viewing 4 ) Select a TV channel to store. If the screen fails to fit in the window, a scroll bar appears. Pressing ENTER while watching a TV program also causes the favorite channel list to appear. If the Favorites List is empty, “No Favorites List.” appears. 5 ) Press HOME MENU to exit the menu.
Chapter_03.fm Page 41 Monday, March 17, 2008 11:51 AM Basic Operations For Television Viewing 03 3.3 Quick Start for Watching Television English Your flat panel TV has many functions and features, some of which you may simply lack the time to set when first installing the panel. To begin watching TV quickly, refer to the basic information within this section. However, when it is convenient, we strongly suggest going through the rest of this manual and learning all that your flat panel TV can do. 3.3.
PDP6020FD.book Page 42 Monday, March 17, 2008 10:51 AM 03 Basic Operations For Television Viewing The SLEEP indicator on the front of the flat panel TV lights orange when the Sleep Timer is set. To check the remaining time, press TOOLS then select Sleep. “Remain ---min” appears at the top of the menu screen. After checking the time, press EXIT to return to your program without losing the Sleep Timer setting. Note: When the sleep timer has been set, “Remain ---min” appears at the top of the menu.
PDP6020FD.book Page 43 Monday, March 17, 2008 10:51 AM Basic Operations For Television Viewing 03 English 3.4.2 General Picture (Video) Adjustment for an AV Source The directions below apply to all AV sources except OPTIMUM and DYNAMIC. If the viewing option is OPTIMUM, your flat panel TV automatically adjusts the picture to the best possible level. If the preferred viewing option is DYNAMIC, please refer to “4.1 Choose an AV Option (Video, Game, etc.).
PDP6020FD.book Page 44 Monday, March 17, 2008 10:51 AM 03 Basic Operations For Television Viewing Picture Image Position Each input source stores the picture adjustment settings for that view. Although repositioning is available in most screen views, when the screen is set to Dot-by-Dot, the Position menu is unavailable. Also, depending on the displayed video, the image position may not change after an adjustment. To adjust the picture’s horizontal and vertical position, follow the steps below.
Chapter_03.fm Page 45 Thursday, April 24, 2008 9:58 AM Basic Operations For Television Viewing 03 English • Moving/changing the AV Selection parameter/option stores the option setting in memory (button continues to work). Follow the steps below to adjust options for the preferred picture quality. 1 ) Access the Picture through the Setup. 2 ) Select an option. 3 ) Use the TOOLS button to toggle between the previous and adjusted images. 4 ) Repeat Steps 2 and 3 to continue adjusting the option as needed.
PDP6020FD.book Page 46 Monday, March 17, 2008 10:51 AM 03 Basic Operations For Television Viewing 3.4.5 Sound Control Setting the Sound Control option to On automatically adjusts to the highest sound quality possible for the selected image and viewing environment. This option is also available when OPTIMUM is selected in the AV Selection menu. To activate Sound Control, follow the procedure below. 1 ) Access the Picture through the Setup. 2 ) Select AV Selection from the Picture menu.
Chapter_03.fm Page 47 Monday, March 17, 2008 11:52 AM Basic Operations For Television Viewing 03 3.5 Block Programs, Channels, or Content English Although blocking programs, channels, or content is optional, some images may be inappropriate for all family members. Your flat panel TV supports a blocking function known as Parental Control. With Parental Control activated, certain material fails to appear on screen if it is beyond your select viewing level.
PDP6020FD.book Page 48 Monday, March 17, 2008 10:51 AM 03 Basic Operations For Television Viewing 3.5.2 Activate Parental Control The Parental Control function must be active for the panel to block content. If this option is turned Off, blocked programs appear on screen. To activate Parental Control blocking, follow the steps below. 1 ) Access the System Setup through the Setup. 2 ) Select Parental Control. The password entry screen appears. 3 ) Enter your four-digit code using the 0 through 9 buttons.
Chapter_03.
Chapter_03.fm Page 50 Monday, March 17, 2008 11:52 AM 03 Basic Operations For Television Viewing To block a program with a rating of None, follow the steps below. 1 ) Access the System Setup through the Setup. 2 ) Select Parental Control from the System Setup menu. 3 ) Select TV Parental Guidelines from the Parental Control menu. 4 ) Select TV-None from the submenu. 5 ) Select an option (View or Block ). 6 ) Press HOME MENU to exit the menu. Refer to “8.
PDP6020FD.book Page 51 Monday, March 17, 2008 10:51 AM Basic Operations For Television Viewing English Delete a New Ratings System If an added ratings system is no longer needed, delete the ratings system from your flat panel TV. It is unnecessary to remove blocks from individual channels or programs. Deleting the ratings line removes any/all blocks initiated with that system. 1 ) Access the System Setup through the Setup. 03 2 ) Select Parental Control from the System Setup menu.
PDP6020FD.book Page 52 Monday, March 17, 2008 10:51 AM 03 Basic Operations For Television Viewing 3.6 Smart Starts for New Owners Many of the flat panel TV features make it easy to use but also environmentally friendlier. This section explains how to extend the life of your panel while being energy efficient. We suggest applying all of the following functions below for the simplest usage, best quality, and longest life span. 3.6.
PDP6020FD.book Page 53 Monday, March 17, 2008 10:51 AM Basic Operations For Television Viewing 03 English 3.6.3 Turn On the Image Orbiter A built-in feature to protect against burn-in is the Orbiter function. Orbiter automatically changes the position of the picture imperceptibly while the image is on screen. To activate the Orbiter, follow the steps below. To cancel this function, select Off in Step 3. 1 ) Access the Option through the Setup. 2 ) Select Orbiter from the Option menu.
PDP6020FD.book Page 54 Monday, March 17, 2008 10:51 AM 04 Additional Picture and Sound Adjustment Options 4 Additional Picture and Sound Adjustment Options To take advantage of all that your flat panel TV offers, browse this chapter for features and functions that enhance your viewing experience. Most sections deal with adjusting the picture and arranging screen/menu items while the remaining sections provide sound and power management options. Apply as many or as few of these changes as desired. 4.
PDP6020FD.book Page 55 Wednesday, April 23, 2008 11:02 AM Additional Picture and Sound Adjustment Options English 4.1.2 Choose an AV Source through the Home Menu The other method for choosing an AV Selection uses the Home Menu. Follow the directions below to set an AV Selection for an external AV Source. The AV Selection, OPTIMUM, automatically adjusts to the highest image quality possible for the selected source and viewing environment.
PDP6020FD.book Page 56 Monday, March 17, 2008 10:51 AM 04 Additional Picture and Sound Adjustment Options 4.1.4 Set the Panel to Recognize a Game Console When adding a game console to your flat panel TV, use the Game function to establish a preference for image quality or for operability. To have the panel store your Game preference, follow the steps below. 1 ) Access the Option through the Setup. 2 ) Select Game Control Pref from the menu.
PDP6020FD.book Page 57 Monday, March 17, 2008 10:51 AM Additional Picture and Sound Adjustment Options AV Option Description Auto adds side masks or displays the image in full screen when detecting HD pictures containing side masks. See Detect Masks on page 59.
PDP6020FD.book Page 58 Monday, March 17, 2008 10:51 AM 04 Additional Picture and Sound Adjustment Options 4.2.2 Correct the Picture for an AV or PC Source Although picture adjustments are to your personal preferences, often the source causes unanticipated image changes. Your flat panel TV offers several adjustment options.
PDP6020FD.book Page 59 Monday, March 17, 2008 10:51 AM Additional Picture and Sound Adjustment Options 04 4.3 Assign Advanced Picture Functions English Your flat panel TV provides various advanced functions for optimizing the picture quality that go beyond the basic adjustments explained earlier in this manual. This section explores the value offered through Pioneer’s PureCinema High Definition (HD) support, top quality blacks, better balanced whites, and overall color improvements. 4.3.
PDP6020FD.book Page 60 Monday, March 17, 2008 10:51 AM 04 Additional Picture and Sound Adjustment Options Lighten Side Masks If content appears with bars (side masks) on each side of a picture when the screen size is 4:3 and Side Mask Detection is set to Mode 1 or Mode 2, the bars automatically change from black to gray. However, the gray is fairly dark. To change the bars to a lighter shade of gray, follow the steps below. 1 ) Access the Option through the Setup.
PDP6020FD.book Page 61 Monday, March 17, 2008 10:51 AM Additional Picture and Sound Adjustment Options 04 4.4 View in Multi-Screen 2-Screen Picture-in-Picture (P-in-P) English The flat panel TV can show multiple screens at the same time; two-screen or picture-in-picture. The pictures may be reversed (in 2-screen and P-in-P) or moved to various locations on the screen (P-in-P). 4.4.
PDP6020FD.book Page 62 Monday, March 17, 2008 10:51 AM 04 Additional Picture and Sound Adjustment Options . Press SPLIT to cycle through the different multi-screen views. Press SWAP to switch the position of the two screens. Press SHIFT to move the position of the small screen counter-clockwise. The multi-screen function is unavailable when viewing source from a single input or from two external input sources.
PDP6020FD.book Page 63 Monday, March 17, 2008 10:51 AM Additional Picture and Sound Adjustment Options 04 4.6 Use the Banner Feature English When tuning in a TV channel or an input signal changes, any available information appears on the screen if the signal carries information about the program (See InfoBanner below). Pressing DISPLAY causes the InfoBanner (additional) to appear. Press EXIT or DISPLAY again to hide the banner. InfoBanner D00001.
PDP6020FD.book Page 64 Monday, March 17, 2008 10:51 AM 04 Additional Picture and Sound Adjustment Options 4.7 Select Alternatives for/to Sound There are four sound alternatives for your flat panel TV; CC, MTS, SAP, and Sound Effect. This section defines each of these alternatives then explains how/when to use. 4.7.1 Activate Closed Captioning (CC) Your flat panel TV is equipped with an internal closed caption (CC) decoder.
PDP6020FD.book Page 65 Monday, March 17, 2008 10:51 AM Additional Picture and Sound Adjustment Options English Closed Caption for Digital Programs There are six different closed caption options for digital programming, called Service levels. The Primary Caption Service is on Service 1 and the Secondary Language Service is on Service 2. More information about these offerings is found later in this chapter. To change the digital closed caption from the default Service 1, follow the steps below.
PDP6020FD.book Page 66 Monday, March 17, 2008 10:51 AM 04 Additional Picture and Sound Adjustment Options 4.7.2 Switch Languages Using MTS Multi-channel Television Sound (MTS) allows switching the audible language if it is available for that program. Available languages differ depending on the current broadcast. When watching a digital TV program that provides multi language services, follow the steps below. 1 ) Press TOOLS on the remote control. 2 ) Select MTS from the TOOLS Menu.
Chapter_04.fm Page 67 Monday, March 17, 2008 11:57 AM Additional Picture and Sound Adjustment Options English When stereo sound is difficult to hear, manually switch to MONO for clearer sound. The panel’s sound remains in mono even if the system receives a stereo broadcast. Reselect STEREO to hear broadcasts in stereo where available. Selecting MTS while the input source is INPUT 1 to INPUT 7 or a PC does not change the type of sound. In this case, the video source determines the sound. 04 4.7.
PDP6020FD.book Page 68 Monday, March 17, 2008 10:51 AM 04 Additional Picture and Sound Adjustment Options AV Source - No Signal To save energy and extend the life of your flat panel TV, the panel can enter Standby automatically if the AV source signal fails for 15 consecutive minutes. At five minutes before and at every minute after that, a warning message appears on the screen. When the final minute elapses, the panel switches to Standby.
PDP6020FD.book Page 69 Monday, March 17, 2008 10:51 AM Use Other Equipment With Your Flat Panel TV English 5 Use Other Equipment With Your Flat Panel TV 05 Although earlier sections have mentioned other equipment for playing back video, this section provides control and operation information for specific types of equipment. 5.
PDP6020FD.book Page 70 Monday, March 17, 2008 10:51 AM 05 Use Other Equipment With Your Flat Panel TV 5.1.3 Clear Added Manufacturer Codes from the Remote Control To return all learned and preset codes to the defaults (PIONEER), follow the steps below. 1 ) Press EDIT and TV at the same time. Selection can be in any mode. 2 ) Press the Yellow button. Confirm that the selected mode indicator flashes. The remote control enters the Manufacturing Reset mode.
PDP6020FD.book Page 71 Monday, March 17, 2008 10:51 AM Use Other Equipment With Your Flat Panel TV 05 • 1 Number buttons (press to enter a channel number) English 5.1.5 Control a Cable (CBL) or Satellite (SAT) System When Mode is set to CBL/SAT, a cable converter uses the buttons 1, 6, 7, 8, and 9 while satellite tuners use the buttons 1 to 8. However, the panel only recognizes a single system (cable or satellite) at a time.
PDP6020FD.book Page 72 Monday, March 17, 2008 10:51 AM 05 Use Other Equipment With Your Flat Panel TV 5.1.6 Control a Video Cassette Recorder (VCR) When Mode is set to VCR, verify that the proper Input is selected (INPUT 1 to INPUT 7) then use 1 to 8 to control the device.
PDP6020FD.book Page 73 Monday, March 17, 2008 10:51 AM Use Other Equipment With Your Flat Panel TV 05 Note: Equipment from other manufacturers (DVD players, DVD recorders, BD players, and HD-DVD players) can also be operated using the remote control if the remote is preset for the device(s). English 5.1.7 Control a DVD Player/DVR Recorder/BD Player When Mode is set to DVD/DVR, the remote control can operate DVD players, DVD recorders or BD players connected to the flat panel TV.
PDP6020FD.book Page 74 Monday, March 17, 2008 10:51 AM 05 Use Other Equipment With Your Flat Panel TV 5.2 Use HDMI Inputs High Definition Multimedia Interface (HDMI) is a communication method commonly used by digital and/or high definition equipment. Your flat panel TV’s INPUT 4, INPUT 5, INPUT 6, INPUT 7 are HDMI terminals for incoming digital video and audio signals.
PDP6020FD.book Page 75 Monday, March 17, 2008 10:51 AM Use Other Equipment With Your Flat Panel TV 05 In Video mode, the image is over-scanned (enlarged) but the panel automatically switches to PC when receiving computer signals. In PC mode, the image displays in full size for optimum image quality. PC (under-scan) English Video (over-scan) 5.2.2 Specify a Digital HDMI Signal Type For the necessary digital video signal type, check the operating manual that came with the other equipment.
Chapter_05.fm Page 76 Monday, March 17, 2008 11:58 AM 05 Use Other Equipment With Your Flat Panel TV If there is no sound, specify another audio signal type. Depending on the type of equipment, sound output may require analog audio cables in addition to the HDMI connection(s). Note: When signals come through the HDMI terminals, no signals are output from the DIGITAL OUT terminal if they are copy guarded. 5.
PDP6020FD.book Page 77 Monday, March 17, 2008 10:51 AM Use Other Equipment With Your Flat Panel TV English The flat panel TV’s remote can control a maximum of two (2) recorders, two (2) playback devices, and one (1) AV system at a time. To select and use the various HDMI Control functions for a connected Pioneer AV system, recorder, or player, use the panel’s HDMI Control menu. 05 To access the menu, follow the steps below. 1 ) Press HOME MENU. 2 ) Select HDMI Control from the main menu.
PDP6020FD.book Page 78 Monday, March 17, 2008 10:51 AM 05 Use Other Equipment With Your Flat Panel TV To connect a device for HDMI Control, follow the steps below. 1 ) Turn on the flat panel TV and all other equipment. 2 ) Confirm that the panel’s Input Setting for HDMI Control Setting options comply with directions in the operating instructions for the other device(s). 3 ) Confirm that the other equipment is set for HDMI Control.
PDP6020FD.book Page 79 Monday, March 17, 2008 10:51 AM Use Other Equipment With Your Flat Panel TV 05 AV Systems English During playback, use the remote control’s up/down arrows (/) to cycle through the surround sound options. Use the left/right arrows (/) to change the input. To resume playback, return to the HDMI Control menu then select the function again.
PDP6020FD.book Page 80 Monday, March 17, 2008 10:51 AM 05 Use Other Equipment With Your Flat Panel TV 5.3.4 Add an AV Amp or a BD Player To add an AV amp and/or a BD Player, refer to the appropriate cabling diagram below.
PDP6020FD.book Page 81 Monday, March 17, 2008 10:51 AM Use Other Equipment With Your Flat Panel TV 05 5.4 Specific HDMI Control Commands 5.4.1 Play Source Sound Using an HDMI Command When sound is coming from a Pioneer AV System through the flat panel TV, placing the panel in Standby causes the sound to stop. To have the sound continue when the flat panel TV turns On, follow the steps below. 1 ) Access the Option through the Setup.
PDP6020FD.book Page 82 Monday, March 17, 2008 10:51 AM 05 Use Other Equipment With Your Flat Panel TV 5.4.4 Test the Power Control (On/Off) Your flat panel TV provides an HDMI control option to test equipment power when it is connected to the panel’s HDMI ports and it has been properly assigned to an Input. To confirm that the Power On/Off control function is working, follow the steps below. 1 ) Access the Option through the Setup. 2 ) Select HDMI Control Setting from the Option menu.
Chapter_05.fm Page 83 Friday, May 9, 2008 8:51 AM Use Other Equipment With Your Flat Panel TV 05 5.6 Operate the Home Media Gallery English With Home Media Gallery, you can enjoy digital content such as movies, music, and photo files on your high-end flat panel TV. Play content from files stored on one or more media servers connected by a home or local area network (LAN) or those stored on a USB flash drive.
PDP6020FD.book Page 84 Monday, March 17, 2008 10:51 AM 05 Use Other Equipment With Your Flat Panel TV Even when files have a supported file extension, some files may not play or display properly, depending on the content or media server type. Some formats may not be supported nor displayed on Home Media Gallery as formats that individual media servers support vary. Refer to the media server manufacturer’s or other relevant websites for supported formats.
PDP6020FD.book Page 85 Monday, March 17, 2008 10:51 AM Use Other Equipment With Your Flat Panel TV 05 Note: Although the Home Media Gallery supports 10BASE-T, it is better to use 100BASE-TX for improved display quality and speed. T T W W English Connect via an Ethernet Hub If already operating one or more media servers on a home or local area network (LAN), connect the flat panel TV to the Ethernet (LAN) hub using a standard (“straight-through”) Ethernet (LAN) cable. See the diagram below.
PDP6020FD.book Page 86 Monday, March 17, 2008 10:51 AM 05 Use Other Equipment With Your Flat Panel TV Confirm the IP Address After making the network connection, follow the instructions below to confirm the IP Address before accessing the network. (The setup is effective for Auto only. To perform the procedure, DHCP on your server or router must be valid. See “5.9 HMG Setup”) 1 ) Press HMG on the remote control. The Home Media Gallery menu appears on screen. 2 ) Select HMG Setup.
PDP6020FD.book Page 87 Monday, March 17, 2008 10:51 AM Use Other Equipment With Your Flat Panel TV 05 Flat Panel TV English USB flash drive Digital Camera with USB Mass Storage Class (PTP also supported) Flash media via USB adapter (Multi-card Reader ) Note: Do not use any USB devices other than those specified. Using other devices can cause a malfunction. Readable Data Format This system reads FAT16, FAT32 or NTFS.
PDP6020FD.book Page 88 Monday, March 17, 2008 10:51 AM 05 Use Other Equipment With Your Flat Panel TV 5.7 Run the Home Media Gallery 1 ) Press HMG. The Home Media Gallery menu appears on screen. 2 ) Select Media Navigator, USB, HMG Playlist or HMG Setup. Use the arrow buttons to highlight an option then press ENTER. To return to the previous screen, press RETURN. 3 ) Press EXIT or HMG to exit Home Media Gallery.
PDP6020FD.book Page 89 Monday, March 17, 2008 10:51 AM Use Other Equipment With Your Flat Panel TV 05 The Home Media Gallery menu appears on screen. English Navigate through a USB Device’s Files and Folders Like navigating through media servers, select the specific file from a device on the USB Device screen to start an appropriate player. For details, follow the steps below. 1 ) Press HMG. 2 ) Select USB. Use the arrow buttons to highlight an option then press ENTER. The USB Device screen appears.
PDP6020FD.book Page 90 Monday, March 17, 2008 10:51 AM 05 Use Other Equipment With Your Flat Panel TV Screen Components Screen display options are: • List • Thumbnail • Thumbnail List Press TOOLS then select Change view from the TOOLS Menu to choose from the screen display options. The options are available for Movie, Music and Photo menus.
PDP6020FD.book Page 91 Monday, March 17, 2008 10:51 AM Use Other Equipment With Your Flat Panel TV The Home Media Gallery menu appears on screen. English HMG Playlist Each category (Movie, Music, and Photo) has five different Playlists with up to 100 files each. The HMG Playlist can contain sound and image files selected in “Media Navigator”. To edit a Playlist, use the TOOLS Menu. 1 ) Press HMG. 05 2 ) Select HMG Playlist. Use the arrow buttons to highlight an option then press ENTER.
PDP6020FD.book Page 92 Monday, March 17, 2008 10:51 AM 05 Use Other Equipment With Your Flat Panel TV Movie Player key guide Mode Key(s) used Function Playback ENTER, (PLAY) Plays back the content. Stop (STOP), RETURN Stops the Movie Player and returns to the previous screen (List/Thumbnail/Thumbnail List) PAUSE ENTER, (PAUSE) Pauses the playback Fast Forward (FF), Fast forward while playback. Each press toggles the Fast Forward speed.
PDP6020FD.book Page 93 Monday, March 17, 2008 10:51 AM Use Other Equipment With Your Flat Panel TV 05 The USB device’s Folder/Contents List appears on screen. Refer to the operation manual that came with the individual device for connection and setting help. English Content obtained from a digital video camera that supports H.264/AVC format can be played through the USB port. To play content from this type of camera, follow the steps below.
PDP6020FD.book Page 94 Monday, March 17, 2008 10:51 AM 05 Use Other Equipment With Your Flat Panel TV Music Player key guide Mode Key(s) used Function Playback ENTER, (PLAY) Plays back the selected content. Stop (STOP), Stops the playback PAUSE ENTER, (PAUSE) Pauses the playback Fast Forward (FF) See the Movie Player key guide. Press and hold to start Fast Forward. When in Fast Forward, press to change the playback speed. To discontinue Fast Forward, press ENTER or PLAY.
PDP6020FD.
PDP6020FD.book Page 96 Monday, March 17, 2008 10:51 AM 05 Use Other Equipment With Your Flat Panel TV 5.8 Use the TOOLS Menu Pressing TOOLS on the remote control causes the TOOLS Menu to appear. Select various play and display modes from this menu. The selectable menu items differ, depending on the current menu (refer to “3.6.1 Use the TOOLS Menu”). Update Server List Use this function to update the currently selected Server List.
PDP6020FD.book Page 97 Monday, March 17, 2008 10:51 AM Use Other Equipment With Your Flat Panel TV 05 The TOOLS Menu appears on screen. English Favorites Entry Registering the Home Media Gallery in Favorites (TOOLS Menu) provides quick access to the Home Media Gallery top screen while watching TV or other programs. This option is available on the Home Media Gallery screen. 1 ) Press TOOLS. TELEVISION TOOLS Favorite Entry : Off On Delete from HMG Playlist 2 ) Select Favorites Entry.
PDP6020FD.book Page 98 Monday, March 17, 2008 10:51 AM 05 Use Other Equipment With Your Flat Panel TV • Order: Bottom-Up or Top-Down 5 ) Select Start on the Sort dialog screen. The sorting starts based on your selection and sort results are displayed. While sorting continues, content playback is available. To return to the sort screen, press RETURN any time during playback. To cancel the sort mode, press RETURN. Notes: The “Select a sorting order.
PDP6020FD.book Page 99 Monday, March 17, 2008 10:51 AM Use Other Equipment With Your Flat Panel TV English Slide Show A slideshow is simply a series of still pictures, appearing one after the other, usually in a timed procession. Select the desired photo file to display a still picture then press ENTER to start a slideshow. After a slideshow launches, pressing ENTER toggles between PLAY and PAUSE. Or press PLAY to start the slideshow immediately.
PDP6020FD.book Page 100 Monday, March 17, 2008 10:51 AM 05 Use Other Equipment With Your Flat Panel TV Add to HMG Playlist The Home Media Gallery function provides “HMG Playlist” - a self-contained play list that allows bookmarking favorite movie, music, and photo files from the network. You can store, edit, and sort up to 100 files in each Playlist List. This option is available on the Media Navigator, Folder/Contents List, Movie Player, Music Player, and Photo Player screens.
PDP6020FD.book Page 101 Monday, March 17, 2008 10:51 AM Use Other Equipment With Your Flat Panel TV 05 English Play Mode Your flat panel TV provides four repeat modes when using the Movie Player, Music Player, or Photo Player. Choose a playback mode (Repeat, Single, etc.) when playing multiple content files. To activate Play Mode, follow the steps below. 1 ) While playing content, press TOOLS. The TOOLS Menu appears on screen. 2 ) Select Play Mode from TOOLS Menu.
Chapter_05.fm Page 102 Monday, March 17, 2008 2:03 PM 05 Use Other Equipment With Your Flat Panel TV Change View Select this option to cycle between the different views: List, Thumbnail, and Thumbnail List. This option is available on the Playlist List (Movie/Music/Photo), and Folder/Contents List screens. 1 ) Press TOOLS. The TOOLS Menu appears on screen. 2 ) Select Change View from the TOOLS Menu. Select the screen option from List, Thumbnail or Thumbnail List.
PDP6020FD.book Page 103 Monday, March 17, 2008 10:51 AM Use Other Equipment With Your Flat Panel TV The TOOLS Menu appears on screen. TELEVISION TOOLS English Picture The Picture option is another way to adjust the image quality. This option is available on the Movie Player and Photo Player screens. To adjust the picture, follow the steps below. 1 ) Press TOOLS. 05 Information Picture Sound Random 2 ) Select Picture from the TOOLS Menu. A picture adjustment screen appears.
PDP6020FD.book Page 104 Monday, March 17, 2008 10:51 AM 05 Use Other Equipment With Your Flat Panel TV Audio Use this option to switch to another audio source if the currently played content has multiple audio sources (multi-language content, for example). This option is available on the Movie Player screen. To reveal multiple audio tracks, follow the steps below. 1 ) Press TOOLS. The TOOLS Menu appears on screen.
PDP6020FD.book Page 105 Monday, March 17, 2008 10:51 AM Use Other Equipment With Your Flat Panel TV 05 5 ) Press ENTER. Editing completes and Move finishes. English Delete from HMG Playlist Sometimes a file is no longer wanted. Your flat panel TV provides a method to delete content from a HMG Playlist. This option is available on the Contents List (Playlist) screen. To delete content from a Playlist, follow the steps below. 1 ) Move the cursor to the content to be deleted from the HMG Playlist.
PDP6020FD.book Page 106 Monday, March 17, 2008 10:51 AM 05 Use Other Equipment With Your Flat Panel TV Random Use this option to shuffle the order in the content list, playing the content at random. This option is available on the Movie Player, Music Player and Photo Player screens. To shuffle the playlist, follow the steps below. 1 ) While playing content, press TOOLS. The TOOLS Menu appears on screen. TELEVISION TOOLS Change Name Random : Off On 2 ) Select Random from the TOOLS Menu. 3 ) Select On.
PDP6020FD.book Page 107 Monday, March 17, 2008 10:51 AM Use Other Equipment With Your Flat Panel TV 05 The TOOLS Menu appears on screen. TELEVISION TOOLS English Zoom Use the Zoom option to enlarge the photo content displayed. This option is available on the Photo Player screen. To enlarge content, follow the steps below. 1 ) While photo content appears, press TOOLS. Music Player Add to HMG Playlist Zoom : Off On 2 ) Select Zoom from the TOOLS Menu. 3 ) Press / to select On or Off.
PDP6020FD.book Page 108 Monday, March 17, 2008 10:51 AM 05 Use Other Equipment With Your Flat Panel TV 5.9 HMG Setup Use the HMG Setup option for Network Setup, Auto Connection Setup and Default Settings. For more information about each option, refer to the following sections. Network Setup Auto Connection On Default Settings Network Setup Select whether to acquire the IP Address automatically or manually or, when acquiring manually, set the IP Address and Subnet mask.
PDP6020FD.book Page 109 Monday, March 17, 2008 10:51 AM Use Other Equipment With Your Flat Panel TV 2 ) Use or to change the setting. English Auto Connection Set Auto Connection to automatically connect to the last accessed server. For selection, follow the steps below. 1 ) Access the Auto Connection through the HMG Setup. 05 Selecting ON causes the display to access the last server. If the server is in Standby, a WOL (“Wake On LAN”) is sent to turn the last accessed server On.
PDP6020FD.book Page 110 Wednesday, April 23, 2008 11:02 AM 05 Use Other Equipment With Your Flat Panel TV Dialog Screen Message No. Message Problem 001 Content cannot be played. (001) No details are available for the error, please check content 100 A communication error occurred. (100) 101 No response from server. (101) Flat Panel TV timed out due to delayed server response 102 Disconnected from the network.
PDP6020FD.book Page 111 Monday, March 17, 2008 10:51 AM Use Other Equipment With Your Flat Panel TV 05 5.11 Add Other Audio Equipment T T W W English The flat panel TV’s digital audio output terminal (optical) can output Dolby Digital signals. Using an optical digital cable, connect an AV receiver to the digital audio output terminal (optical) on the rear of the flat panel TV. This connection allows audio such as from digital TV broadcasts to play back in high quality.
PDP6020FD.book Page 112 Monday, March 17, 2008 10:51 AM 05 Use Other Equipment With Your Flat Panel TV 5.12 Add a Computer (PC) Use the panel’s PC terminals to connect a personal computer. The PC input terminals are DDC2B-compatible; however, the Plug & Play function may not operate properly. When connected to a PC, the panel automatically identifies the input signal type. If the panel fails to see the PC or the picture is unclear, activate the Auto Setup function. 5.12.
PDP6020FD.book Page 113 Monday, March 17, 2008 10:51 AM Helpful Information 06 6 Helpful Information English This chapter includes answers to some common questions and provides information about software/hardware used in your flat panel TV, cleaning methods, and troubleshooting/service information. If you need further assistance, please contact us and give us the chance to correct any issues you are experiencing. Thank you again for buying Pioneer! 6.
Chapter_06.fm Page 114 Tuesday, March 18, 2008 9:01 AM 06 Helpful Information Why is the picture cropped when I feed a PC signal through the PDP-6020FD/5020FD’s HDMI input? If you select Video for Signal Type in the HDMI Input menu, the image is over-scanned (enlarged) but the panel automatically switches to PC when receiving computer signals. Refer to “5.2.1 Specify the HDMI Input Type.” Why won’t my Pioneer flat panel TV turn on? It may be that your remote has failing batteries or has been damaged.
PDP6020FD.book Page 115 Monday, March 17, 2008 10:51 AM Helpful Information 06 6.4 Troubleshooting & Service Information Issue No power Possible Solutions English General • Check the connection seating at the wall and panel. • See if the panel’s Power On button is turned ON. • Confirm that the remote is set to TV. If the panel indicator lights red, press (a) on the remote control or STANDBY/ON on the flat panel TV.
PDP6020FD.book Page 116 Monday, March 17, 2008 10:51 AM 06 Helpful Information Picture/Sound Issue Picture but no sound Possible Solutions • Confirm that the sound is not muted or that the volume is turned down. • When using a video or PC input source, check that the audio terminals are connected. Sound but no picture • Check if Picture Off is selected from the TOOLS Menu. With this option selected, the screen is deactivated; only audio is output.
PDP6020FD.book Page 117 Monday, March 17, 2008 10:51 AM Helpful Information 06 Home Media Gallery/NETWORK No servers are found. No previously connected server(s) found (items in Select Servers are dimmed). “Failed to acquire a list.” appears on the Server List screen. Possible Solutions • Confirm that the PC is On and not in Standby or Sleep. (nothing is chosen in Select Servers).
PDP6020FD.book Page 118 Monday, March 17, 2008 10:51 AM 06 Helpful Information Home Media Gallery/PLAYBACK Issue Image or sound is interrupted or distorted (Block noise appears). Possible Solutions • Check the physical connections (hub, router, cable quality). Please use 100BASE-TX for best quality playback and display speed. • Check if the PC is operating properly. Reboot the PC after confirming specifications and setup values.
PDP6020FD.book Page 119 Monday, March 17, 2008 10:51 AM Helpful Information 06 Home Media Gallery/USB Image or sound is interrupted or distorted (Block noise appears). Possible Solutions • Verify that the file complies with the supported format, bit rate and/or profile. Also check the file for damage. English Issue • Some files that comply with the supported format may not play back or display properly. • Check if the device is Mass Storage Class compliant.
PDP6020FD.book Page 120 Monday, March 17, 2008 10:51 AM 06 Helpful Information If the information above fails to solve the issue, please contact a Pioneer-authorized service representative. Do not attempt to service the panel yourself. Opening or removing covers exposes you to possible electrical shock and other dangers as well as possibly voiding your warranty. Request a qualified service professional to check you flat panel TV.
PDP6020FD.book Page 121 Monday, March 17, 2008 10:51 AM Cautions and Warnings 07 7 Cautions and Warnings English Your flat panel TV is designed for a long and productive life. To keep your panel at peak performance, there are a few things that can help. This section provides general information and specific warnings to help you maintain the flat panel TV at top quality throughout its lifetime.
PDP6020FD.book Page 122 Monday, March 17, 2008 10:51 AM 07 Cautions and Warnings • View full-motion, high-action video in WIDE or FULL screen after playing a game or showing a still/PC image. The recommended duration for showing the action video is three times as long as the game or PC image was on the screen. • View full-motion video in WIDE or FULL screen after playing content with side, top, or bottom masking (black bars).
Chapter_07.fm Page 123 Tuesday, March 18, 2008 9:02 AM Cautions and Warnings English In rare cases, some pixels can be permanently switched off, or on, resulting in either a black or colored pixel permanently fixed on the screen. This effect is common to all plasma displays because it is a consequence of the technology. If the defective pixels are visible at the standard viewing distance of between 2.5 and 3.5 meters (8.2 feet and 11.5 feet) while viewing a normal broadcast (i.e.
PDP6020FD.book Page 124 Monday, March 17, 2008 10:51 AM 07 Cautions and Warnings 7.7 Safety Precautions Your flat panel TV is engineered and manufactured with one of the highest priorities being safety. However, improper use can result in electric shock and/or fire. To avoid danger please follow the instructions below when installing, operating, and cleaning your flat panel TV. • Read & Retain Instructions - Read all operating and user information provided with your flat panel TV.
PDP6020FD.book Page 125 Monday, March 17, 2008 10:51 AM Cautions and Warnings 07 D3-4-2-2-2a_A_En English CAUTION: The switch on this unit will not completely shut off all power from the AC outlet. Since the power cord serves as the main disconnect device for the unit, you will need to unplug it from the AC outlet to shut down all power. Therefore, make sure the unit has been installed so that the power cord can be easily unplugged from the AC outlet in case of an accident.
PDP6020FD.book Page 126 Monday, March 17, 2008 10:51 AM 08 Appendix 8 Appendix 8.1 Ratings Charts (for Various Audience Classifications) The charts below list the various rating systems recognized by your flat panel TV. 8.1.1 TV Ratings (age-based) Rating Description TV-Y All children TV-Y7 Children seven and above TV-G General audiences TV-PG Parental guidance suggested TV-14 Parents strongly cautioned TV-MA Mature audiences only 8.1.2 U.S.
PDP6020FD.book Page 127 Monday, March 17, 2008 10:51 AM Appendix 08 8.1.
PDP6020FD.book Page 128 Monday, March 17, 2008 10:51 AM 08 Appendix 8.2 Manufacturer Codes to Program into the Remote Control 8.2.
PDP6020FD.book Page 129 Monday, March 17, 2008 10:51 AM Appendix 08 8.2.
PDP6020FD.book Page 130 Monday, March 17, 2008 10:51 AM 08 Appendix 8.2.
PDP6020FD.book Page 131 Monday, March 17, 2008 10:51 AM Appendix 08 8.2.
PDP6020FD.book Page 132 Monday, March 17, 2008 10:51 AM 08 Appendix 8.2.
PDP6020FD.book Page 133 Monday, March 17, 2008 10:51 AM Appendix 08 8.2.
PDP6020FD.book Page 134 Monday, March 17, 2008 10:51 AM 08 Appendix 8.2.
Chapter_08_1.fm Page 135 Monday, March 17, 2008 12:11 PM Appendix 08 8.3 Specifications PDP-6020FD (60”) PDP-5020FD (50”) Number of pixels 1920 × 1080 pixels 1920 × 1080 pixels Audio Amplifier 18 W + 18 W (1 kHz, 10 %, 6 Ω) 18 W + 18 W (1 kHz, 10 %, 6 Ω) Speaker Woofer: 4.8 cm x 13 cm cone type Tweeter: 2.5 cm semidome type Woofer: 4.8 cm x 13 cm cone type Tweeter: 2.
PDP6020FD.book Page 136 Monday, March 17, 2008 10:51 AM Appendix 08 Terminals - Rear ANT 75 Ω UNBAL, F Type for DTV/VHF/UHF/CATV in INPUT 1 S-VIDEO in, VIDEO in, AUDIO in INPUT 2 COMPONENT VIDEO in, VIDEO in, AUDIO in INPUT 4 HDMI in*, AUDIO in PC INPUT Analog RGB in, AUDIO in INPUT 5 HDMI in*, AUDIO in INPUT 6 HDMI in* AUDIO OUT AUDIO out (Fixed) DIGITAL OUT Optical ETHERNET 1 CONTROL OUT 1 SPEAKERS 6 Ω to 16 Ω SUB WOOFER OUT Variable * conforms to HDMI1.
PDP6020FD.book Page 137 Monday, March 17, 2008 10:51 AM Appendix 08 License English [MPEG4IP] This software is based in part on Mozilla Public License 1.1 see http://www.mozilla.org/MPL/ for information. [OpenSSL] OpenSSL License Copyright © 1998-2007 The OpenSSL Project. All rights reserved. Redistribution and use in source and binary forms, with or without modification, are permitted provided that the following conditions are met: 1.
PDP6020FD.book Page 138 Monday, March 17, 2008 10:51 AM 08 Appendix 1. Redistributions of source code must retain the copyright notice, this list of conditions and the following disclaimer. 2. Redistributions in binary form must reproduce the above copyright notice, this list of conditions and the following disclaimer in the documentation and/or other materials provided with the distribution. 3.
PDP6020FD.book Page 139 Monday, March 17, 2008 10:51 AM Appendix English * Redistributions of source code must retain the above copyright notice, this list of conditions and the following disclaimer. * Redistributions in binary form must reproduce the above copyright notice, this list of conditions and the following disclaimer in the documentation and/or other materials provided with the distribution.
PDP6020FD.book Page 140 Monday, March 17, 2008 10:51 AM 08 Appendix libpng versions 0.5, May 1995, through 0.88, January 1996, are Copyright © 1995, 1996 Guy Eric Schalnat, Group 42, Inc. For the purposes of this copyright and license, “Contributing Authors” is defined as the following set of individuals: Andreas Dilger Dave Martindale Guy Eric Schalnat Paul Schmidt Tim Wegner The PNG Reference Library is supplied “AS IS”. The Contributing Authors and Group 42, Inc.
PDP6020FD.book Page 141 Monday, March 17, 2008 10:51 AM Appendix 08 [TinyLogin] This software is Copyright 1988 - 1994, Julianne Frances Haugh. All rights reserved. English [portmap] Copyright © Sun Microsystems, Inc. Sun RPC is a product of Sun Microsystems, Inc. and is provided for unrestricted use provided that this legend is included on all tape media and as a part of the software program in whole or part.
PDP6020FD.book Page 142 Monday, March 17, 2008 10:51 AM 08 Appendix HEREUNDER IS ON AN “AS IS” BASIS, AND THE AUTHOR HAS NO BLIGATION TO PROVIDE MAINTENANCE, SUPPORT, UPDATES, ENHANCEMENTS, OR MODIFICATIONS. [GNU GENERAL PUBLIC LICENSE] Version 2, June 1991 Copyright © 1989, 1991 Free Software Foundation, Inc., 51 Franklin Street, Fifth Floor, Boston, MA 02110-1301 USA Everyone is permitted to copy and distribute verbatim copies of this license document, but changing it is not allowed.
PDP6020FD.book Page 143 Monday, March 17, 2008 10:51 AM Appendix 3. 4. 5. English 2. fee for the physical act of transferring a copy, and you may at your option offer warranty protection in exchange for a fee.
PDP6020FD.book Page 144 Monday, March 17, 2008 10:51 AM 08 Appendix Program), you indicate your acceptance of this License to do so, and all its terms and conditions for copying, distributing or modifying the Program or works based on it. 6. Each time you redistribute the Program (or any work based on the Program), the recipient automatically receives a license from the original licensor to copy, distribute or modify the Program subject to these terms and conditions.
PDP6020FD.book Page 145 Monday, March 17, 2008 10:51 AM Appendix English SUSTAINED BY YOU OR THIRD PARTIES OR A FAILURE OF THE PROGRAM TO OPERATE WITH ANY OTHER PROGRAMS), EVEN IF SUCH HOLDER OR OTHER PARTY HAS BEEN ADVISED OF THE POSSIBILITY OF SUCH DAMAGES.
PDP6020FD.book Page 146 Monday, March 17, 2008 10:51 AM 08 Appendix Preamble The licenses for most software are designed to take away your freedom to share and change it. By contrast, the GNU General Public Licenses are intended to guarantee your freedom to share and change free software - to make sure the software is free for all its users.
PDP6020FD.book Page 147 Monday, March 17, 2008 10:51 AM Appendix English GNU LESSER GENERAL PUBLIC LICENSE TERMS AND CONDITIONS FOR COPYING, DISTRIBUTION AND MODIFICATION 0. This License Agreement applies to any software library or other program which contains a notice placed by the copyright holder or other authorized party saying it may be distributed under the terms of this Lesser General Public License (also called “this License”). Each licensee is addressed as “you”.
PDP6020FD.book Page 148 Monday, March 17, 2008 10:51 AM 08 148 En Appendix ordinary GNU General Public License, version 2, instead of to this License. (If a newer version than version 2 of the ordinary GNU General Public License has appeared, then you can specify that version instead if you wish.) Do not make any other change in these notices.
PDP6020FD.book Page 149 Monday, March 17, 2008 10:51 AM Appendix English For an executable, the required form of the “work that uses the Library” must include any data and utility programs needed for reproducing the executable from it.
PDP6020FD.book Page 150 Monday, March 17, 2008 10:51 AM 08 Appendix Each version is given a distinguishing version number. If the Library specifies a version number of this License which applies to it and “any later version”, you have the option of following the terms and conditions either of that version or of any later version published by the Free Software Foundation. If the Library does not specify a license version number, you may choose any version ever published by the Free Software Foundation. 14.
PDP6020FD.book Page 151 Monday, March 17, 2008 10:51 AM Appendix English [Linux Source Notice] The software programs used on this product include the Linux operating system. The Linux contains software licensed for use based on the terms of a GNU General Public License. The machine readable copy of the corresponding source code is available for the cost of distribution. For more information or to obtain a copy, contact your local Pioneer Customer Service center.
PDP6020FD.book Page 152 Monday, March 17, 2008 10:51 AM 08 Appendix 8.4 Glossary HDMI The High-Definition Multimedia Interface (HDMI) is a digital data transmission standard for consumer electronics/home appliances. HDMI connects digital audio/video sources to a compatible digital audio and/or video device, such as a flat panel TV. HDMI also allows digitally transmitted audio and control signals on a single cable for multi-channel digital audio sources.
PDP6020FD.book Page 153 Monday, March 17, 2008 10:51 AM Appendix LAN Cable A cable that has an eight-pin modular plug on each end and is different from a telephone plug which has four pins. A straight cable is used when connecting the flat panel TV to a home network via a hub. A cross-over cable is used when connecting directly to a PC. Use category 5 (CAT-5) LAN cables.
PDP6020FD.book Page 154 Monday, March 17, 2008 10:51 AM 08 Appendix 8.5 Index Numerics 100BASE-TX .......................................................................... 85, 152 10BASE-T ......................................................................................85 2-screen ...................................................................... 12, 13, 61, 62 A Air/Cable .......................................................................................35 Analog ...........................
PDP6020FD.book Page 155 Wednesday, April 23, 2008 11:02 AM Appendix 08 8.6 Trademarks, Licenses, & Patent Information English Trademarks is a trademark of SRS Labs, Inc. WOW HD technology is incorporated under license from SRS Labs, Inc. Manufactured under license from Dolby Laboratories. Dolby and the double-D symbol are trademarks of Dolby Laboratories. HDMI, the HDMI Logo and High-Definition Multimedia Interface are trademarks or registered trademarks of HDMI Licensing LLC.