PLASMA DISPLAY SYSTEM SYSTEME D’ÉCRAN PLASMA PLASMA DISPLAY-SYSTEM PDP-505XDE PDP-435XDE PDP-505HDE PDP-435HDE PDP-505XDE/435XDE Operating Instructions Mode d’emploi Bedienungsanleitung PDP-505XDE-Eng (Coverpage) 1 04.6.
This equipment complies with the requirements of Directives 89/336/EEC and 73/23/EEC as amended by 93/68/ EEC. Dieses Gerät entspricht den Anforderungen der EG-Richtlinien 89/336/EWG und 73/23/EWG mit Änderung 93/ 68/EWG. Ce matériel répond aux exigences contenues dans les directives 89/336/CEE et 73/23/CEE modifiées par la directive 93/68/CEE. Dit apparaat voldoet aan de eisen van de richtlijnen 89/336/EEG en 73/23/EEG, gewijzigd door 93/68/EEG. Dette udstyr overholder kravene i direktiv nr.
English CAUTION: THE POWER SWITCH DOES NOT COMPLETELY SEPARATE THE UNIT FROM THE MAINS IN OFF POSITION. THEREFORE INSTALL THE UNIT SUITABLE PLACES EASY TO DISCONNECT THE MAINS PLUG IN CASE OF THE ACCIDENT. THE The following symbols are found on labels attached to the product. They alert the operators and service personnel of this equipment to any potentially dangerous conditions. MAINS PLUG OF UNIT SHOULD BE UNPLUGGED FROM THE WALL SOCKET WHEN LEFT UNUSED FOR A LONG PERIOD OF TIME.
Contents Thank you for buying this Pioneer product. Please read through these operating instructions so you will know how to operate your model properly. After you have finished reading the instructions, put them away in a safe place for future reference. In some countries or regions, the shape of the power plug and power outlet may sometimes differ from that shown in the explanatory drawings. However the method of connecting and operating the unit is the same.
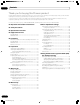
Contents 11 Useful Adjustment Settings 12 Enjoying through External Equipment Watching a decoder image ................................................ 44 Connecting a decoder .................................................. 44 Displaying a decoder image ........................................ 44 Watching a VCR image ...................................................... 44 Connecting a VCR ........................................................ 44 Displaying a VCR image ...............................
01 Important User Guidance Information In order to obtain maximum enjoyment from this Pioneer PureVision PDP-505XDE/435XDE, PDP-505HDE/435HDE Plasma Display System, please first read this information carefully. With the Pioneer PureVision PDP-505XDE/435XDE, PDP505HDE/435HDE, you can be assured of a high quality Plasma Display System with long-life and high reliability.
Important User Guidance Information 01 English Panel sticking and after-image lag • Displaying the same images such as still images for a long time may cause after-image lagging. This may occur in the following two cases. 1. After-image lagging due to remaining electrical load When image patterns with very high peak luminance are displayed for more than 1 minute, after-image lagging may occur due to the remaining electric load.
02 Safety Precautions Electricity is used to perform many useful functions, but it can also cause personal injuries and property damage if improperly handled. This product has been engineered and manufactured with the highest priority on safety. However, improper use can result in electric shock and/or fire. In order to prevent potential danger, please observe the following instructions when installing, operating and cleaning the product.
Safety Precautions 02 Installation Precautions Observe the following precautions when installing with any items such as the optional stand. English When using the optional stand, brackets, or equivalent items • Ask your dealer to perform the installation. • Be sure to use the supplied bolts. • For details, see the instruction manual that comes with the optional stand (or equivalent items). When using other items • Consult your dealer.
03 Operational Precautions PIONEER bears no responsibility for any damage arising from incorrect use of the product by you or other people, malfunctions when in use, other product related problems, and use of the product except in cases where the company must be liable. Plasma Display protection function When still images (such as photos and computer images) stay on the screen for an extended period of time, the screen will be slightly dimmed.
Supplied Accessories 04 Plasma Display English Power cord (2 m) (For Europe, except U.K. and Eire) Cleaning cloth (For U.K. and Eire) Only the power cord that is appropriate in your country or region is supplied. Speed clamp x 3 Bead band x 3 Warranty card Speaker cushion x 3 (Use when installing the optional speakers at the bottom of the Plasma Display.) Media Receiver Power cord (2 m) (For Europe, except U.K. and Eire) Remote control unit (For U.K.
05 Part Names About the illustrations in these operating instructions These instructions are provided for both the PDP-505XDE/435XDE and PDP-505HDE/435HDE, whose Media Receiver and remote control units’ appearances differ slightly. Please note that throughout these instructions, the PDP-505XDE/435XDE series’ illustrations are used for explanatory purposes.
Part Names 05 Media Receiver (PDP-505XDE/435XDE) 1 2 3 1 2 3 4 Pull this section to open the door.
05 Part Names 9 Colour (RED/GREEN/YELLOW/BLUE) Remote control unit (PDP-505XDE/435XDE) TELETEXT mode: Selects a page. 10 [ TV/External input mode: Jumps to the teletext subtitle page. DTV input mode: Turns subtitle on and off. 1 11 k 2 TELETEXT mode: Displays hidden characters. 12 3 RETURN Restores the previous menu screen. 13 / / / Selects a desired item on the setting screen. 15 16 4 5 6 ENTER Executes a command.
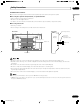
Preparation 06 Installing the Plasma Display Installing the Media Receiver Media Receiver (vertical installation) Over 50 cm English Plasma Display (horizontal installation) Over 10 cm System cable (approx. 3 metres) • Do not place a VCR or any other device on top of the Media Receiver. Location • Avoid direct sunlight. Maintain adequate ventilation. • When installing, allow enough space on the sides and above the Media Receiver.
06 Preparation Installing the Media Receiver vertically 3. Remove the shock absorbing pads. You can use the supplied stand to install the Media Receiver vertically. 1. Insert the stand into the side of the Media Receiver. Shock absorbing pad Right side Keep the shock absorbing pads and screws. They are required when you place the Media Receiver in the horizontal position. 4. Plug the screw holes using the supplied caps. 2. Secure the stand with the supplied screws.
Preparation 06 Setting the system English Connecting the system cable to the Plasma Display Plasma Display (rear view) For details on optional PIONEER speaker installation, refer to the instruction manual that came with the speaker.
06 Preparation Routing cables Speed clamps and bead bands are supplied for bunching cables. Once properly bunched, follow the steps below to route the cables. (rear view) When the speakers are installed on the sides Speaker cable Cable binders (supplied with the stand)* Speed clamps Speaker cable Attaching speed clamps to the main unit Attaching and removing speed clamps Attach the speed clamps using the 4 holes marked with below, depending on your routing system.
Preparation 06 Preparing the remote control unit Operate the remote control unit while pointing it toward the remote control sensor (t) located at the bottom right of the front panel of the Plasma Display. The distance from the remote control sensor must be within 7 m and the angle relative to the sensor must be within 30 degrees in the right, left, upward, or downward direction. English Inserting batteries 1 Open the battery cover.
06 Preparation Basic connections Connecting to an antenna To enjoy a clearer picture, use an outdoor antenna. The following is a brief explanation of the types of connections that are used for a coaxial cable. PDP-505XDE/435XDE ONLY • For viewing both analogue and digital broadcasts, connect the antenna cable to the ANT OUT terminal (analogue input) (antenna through out) and ANT terminal. • If “Aerial Power” setting is enabled, use an indoor antenna with signal amplifier, 5V 30mA.
Watching TV Plasma Display English Unless you set up TV channels that you can watch under the current conditions, you cannot tune in those channels. For the procedure, see “Setting up TV channels automatically” on page 28. 07 Turning on the power 1 Press POWER on the Plasma Display. 2 3 • The STANDBY indicator on the Plasma Display flashes red. Press POWER on the Media Receiver. • The system is turned on or placed into the standby mode.
07 Watching TV Plasma Display/Media Receiver status indicators Indicator Status Plasma Display Media Receiver POWER ON STANDBY POWER ON System Status STANDBY Power to the Plasma Display and Media Receiver is off. Or the power cords have been disconnected. Power to the system is on. The system is in the standby mode. Power to the Media Receiver is off. Or the power cord has been disconnected from the Media Receiver. Flashing Flashing Power to the Plasma Display is off.
Watching TV 07 Changing the volume and sound You can register up to 16 analogue TV channels in total, then quickly select from your favourite channels only. Using i +/i – on the remote control unit 1 While watching analogue broadcasts, press ENTER to • To increase the volume, press i +. call up the Favourite Channel List. • To decrease the volume, press i –.
07 Watching TV Each time you press g, MTS toggles as shown below.
Watching TV Using the multiscreen functions 07 • In picture-in-picture mode, press to move the position of the small screen anti-clockwise. English Splitting the screen Use the following procedure to select the 2-screen or picturein-picture mode. 2-screen Picture-in-picture 2 To select the desired input source, press the appropriate input source button. • If watching TV programmes, press P+/P– to change the channel.
07 Watching TV Freezing images Use the following procedure to capture and freeze one frame from a moving image that you are watching. 1 Press d. • A still image appears on the right screen while a moving image is shown on the left screen. 2 Press d again to cancel the function. Normal image Still image • With the screen split, any image cannot be frozen. • When this function is not available, a warning message appears. 26 En PDP-505XDE-Eng (21-26) 26 04.6.
Menu Setup 08 PC mode menus Using the menu Home Menu Picture Sound Power Control Item AV Selection Option Setup Page 31 Contrast 32 Brightness 32 Colour 32 Tint 32 Sharpness 32 Pro Adjust 32 Reset 32 Treble 34 Bass 34 Balance 34 Reset 34 FOCUS 34 Front Surround 34 Energy Save 35 No Signal off 35 No Operation off 35 Sleep Timer Item AV Selection 42 Sound Power Control Page 31 Contrast 32 Brightness 32 Red 32 Green 32 Blue 32 Reset 32 Treble 34 Bas
09 Basic Adjustment Settings Setting up TV channels automatically This section describes how to automatically search for and set up TV channels. For functions pertaining only to PDP-505XDE/435XDE, see DTV operating instructions provided separately. • You can start Auto Installation from the Home menu after moving to another country, for example. Perform the following steps 1 to 3 before starting Auto Installation. 1 Press HOME MENU. 2 Select “Setup” ( / then ENTER).
Basic Adjustment Settings 9 Select “System” ( / ). 10 Select a sound system ( / ). 09 Labelling TV channels You can name TV channels that you have set up, using up to five characters. This may help you easily identify the channels during selections. 1 Repeat steps 1 to 4 provided for Using Manual Adjust. Manual Adjust Programme Entry After selecting a channel for label entry (using Programme Entry), perform the following steps. 1 Search 42.
09 Basic Adjustment Settings Setting Child Lock Sorting preset TV channels Child Lock inhibits selected TV channels from being tuned and watched. Use the following procedure to change the sequence of the preset TV programmes. 1 Repeat steps 1 to 4 provided for Using Manual Adjust. 1 Press HOME MENU. 2 Select “Setup” ( / then ENTER). 3 Select “Analogue TV Setup” ( / then ENTER). After selecting a channel for label entry (using Programme Entry), perform the following steps.
Basic Adjustment Settings 09 AV Selection You can select the language to be used for on-screen display such as menus and instructions, from among 12 languages; English, German, French, Italian, Spanish, Dutch, Swedish, Portuguese, Greek, Finnish, Russian and Turkish. For the language to be used in the TELETEXT mode, you can also select from among West Europe, East Europe, Greece/ Turkey, Russia, and Arabia . Select from the five viewing options, depending on the current environment (e.g.
09 Basic Adjustment Settings For PC source Picture adjustments Adjust the picture to your preference for the chosen AV Selection option (except DYNAMIC). 1 Press HOME MENU. 2 Select “Picture” ( / then ENTER). 3 Select an item to be adjusted ( / then ENTER).
Basic Adjustment Settings 09 Selections High White with bluish tone Mid-High Intermediate tone between High and Mid Mid Natural tone Mid-Low Intermediate tone between Mid and Low Low White with reddish tone Manual Colour temperature adjusted to your preference CTI Provides images with clearer colour contours. The CTI stands for Colour Transient Improvement. Selections 2 Press / to select an item to be adjusted, and then press ENTER. 3 Press / ENTER.
09 Basic Adjustment Settings Sound adjustments You can adjust the sound quality to your preference with the following settings. Adjust the sound to your preference for the chosen AV Selection option. See page 31. 1 2 3 4 On Activates the FOCUS. then ENTER). Select an item to be adjusted ( / ). • The effect of this function differs depending on signals. • You cannot set up the sound field for listening with phones.
Basic Adjustment Settings No Operation off (AV mode only) Power Control Energy Save Power consumption is saved by decreasing picture brightness. 1 2 3 4 Press HOME MENU. Select “Power Control” ( / Select “Energy Save” ( / then ENTER). Select “Save” or “Picture Off” ( / Decreases picture brightness to save power. Picture Off Deactivates the screen to save power. To restore the screen display, press any button other than i +/i – and e. This setting is not memorised by the system.
10 Using the Electronic Programme Guide (EPG) (for Analogue TV only) Use the Electronic Programme Guide (EPG) to search desired TV programmes or view information about them. Using the timer, it also allows you to preset desired programmes for recording with a VCR. Item Description Off Displays all broadcasting stations’ EPG (factory default) information processed by the specified EPG information provider.
Using the Electronic Programme Guide (EPG) (for Analogue TV only) Viewing programme information Programme Information Fri.02.07.04 12:46 5 Select “SP” (standard) or “LP” (extended) ( / ). Programme Information Fri.02.07.04 12:46 22:00-23:30 ***** ******************* English 1 Press EPG. 2 Select the desired programme ( / then ENTER ).
11 Useful Adjustment Settings Adjusting image positions (AV mode only) Adjusting image positions and clock manually (PC mode only) Adjust the horizontal and vertical positions of images on the Plasma Display. Usually you can easily adjust the positions and clock of images using Auto Setup. Use Manual Setup to optimise the positions and clock of images when necessary. 1 2 3 4 Press HOME MENU. Select “Option” ( / then ENTER). Select “Position” ( / then ENTER).
Useful Adjustment Settings 11 Colour system setting (AV mode only) After connecting to the INPUT 1, INPUT 2, or INPUT 3 terminal, specify the type of video signals to be received from the connected equipment. For the type of the signals, see the operation manual that came with the connected equipment. Before starting the menu, press INPUT 1, INPUT 2, or INPUT 3 on the remote control unit or press INPUT on the Plasma Display to select an input source.
11 Useful Adjustment Settings Selecting a screen size AV mode Manual Selection 4:3 Press f to switch among the screen size options selectable for the type of video signals currently received. • Each time you press f, the selection is switched. • The selectable screen sizes differ depending on the types of input signals. CINEMA FULL 14:9 ZOOM CINEMA14:9 FULL WIDE AV mode Item 4:3 Description For 4:3 “standard” pictures. A side mask appears on each side. FULL 14:9 For 14:9 squeeze pictures.
Useful Adjustment Settings 11 Item 4:3 Auto Selection WIDE Wide image without side masks. (factory default) Wide screen signalling (WSS) (AV mode only) 4:3 English If you set “WSS” and “4:3 Mode” in the Option menu, the optimum screen mode is automatically chosen for every video signal containing the WSS information. Description Keeps the 4:3 aspect ratio and presents side masks. WIDE WSS allows the system to switch automatically among the different screen formats. 1 2 3 4 Press HOME MENU.
11 Useful Adjustment Settings Changing the password Sleep Timer When the selected time elapses, the Sleep Timer automatically places the system into the standby mode. 1 Press HOME MENU. 2 Select “Sleep Timer” ( / then ENTER). 3 Select the desired time ( / then ENTER). 4 • You can select from among “Off” (cancel), “30 min”, “60 min”, “90 min”, and “120 min”. Press HOME MENU to exit the menu. Use the following procedure to change the password. 1 Press HOME MENU. 2 Select “Setup” ( / then ENTER).
Useful Adjustment Settings • The password entry screen appears. Enter your 4-digit password using buttons 0 – 9. 4 Select “Reset” ( / then ENTER). 5 Select “Yes” ( / then ENTER). 6 Press HOME MENU to exit the menu. Disabling the password 1 Press HOME MENU. 2 Select “Setup” ( / then ENTER). 3 Select “Password” ( / then ENTER). • The password entry screen appears. Enter your 4-digit password using buttons 0 – 9. English Resetting the password 1 Press HOME MENU. 2 Select “Setup” ( / then ENTER).
12 Enjoying through External Equipment You can connect many types of external equipment to your Plasma Display System, like a decoder, VCR, DVD player, personal computer, game console, and camcorder. To view images coming from external equipment, select the input source using the INPUT buttons on the remote control (page 14) or the INPUT button on the Plasma Display.
Enjoying through External Equipment 12 To specify the type of digital video signals: Using HDMI Input Input signal correlation table 1920∗1080i@50Hz 720∗576p@50Hz 1 Repeat steps 1 to 3 provided To activate the HDMI terminal. 2 Select “Video” ( / then ENTER). 3 Select the type of digital video signals ( / then ENTER). • If you select “Auto”, an attempt will be made to identify the type of digital video signals when digital video signals are received.
12 Enjoying through External Equipment Media Receiver (rear view) Using i/o Link.A DIGITAL OUT OPTICAL ANT (DIGITAL) This system incorporates three typical i/o Link.A functions for smooth connections between Media Receiver and other audiovisual equipment. SERVICE ONLY OUT CONTROL IN OUT IN COMMON INTERFACE SUB WOOFER OUTPUT INPUT 1 INPUT 2 COMPONENT VIDEO Y PB PR i / o link.
Enjoying through External Equipment 12 Enjoying through audio equipment in connection Connecting a game console or camcorder Connecting audio equipment Use the INPUT 4 terminals to connect a game console, camcorder and other audiovisual equipment. You can enjoy more powerful sound by connecting such audio equipment as an AV receiver or subwoofer.
12 Enjoying through External Equipment Connecting control cords Connect control cords between the Media Receiver and other logo. You can then PIONEER equipment having the operate the connected equipment by sending commands from its remote control unit to the remote control sensor on the Media Receiver. After the CONTROL IN terminals have been connected, the remote control sensors on the connected equipment do not accept commands from the remote control units.
Enjoying through External Equipment 12 Computer compatibility chart Frequency 70 Hz 640 × 480 60 Hz 65 Hz Remarks Macintosh 13" (67 Hz) 72 Hz Inserting a memory card 1 Open the front door on the Media Receiver. 2 Hold the memory card with its top side facing upward, 75 Hz 800 × 600 56 Hz and then insert it into the PC CARD slot. • Insert the memory card as far as it goes. • When you insert the memory card while the system is on, the initial Home Gallery screen appears.
12 Enjoying through External Equipment Starting the initial Home Gallery screen Starting a thumbnail screen When you insert a memory card while the system is on, the following initial screen appears automatically. When a folder is selected on the initial Home Gallery screen, images in the folder are displayed in thumbnail format. 2 Home Gallery 1 3 Thumbnail 4 1/25 Picture information 011.JPG 011. JPG 018. JPG 048. JPG 059. JPG 084. JPG DSC00086. JPG DSC00087. JPG DSC00088. JPG DSC00089.
Enjoying through External Equipment 12 Starting the Slide Show Setup screen When the thumbnail screen is in display, press / and / to highlight a desired image, and then press ENTER. The thumbnail screen is quitted and only the selected image is displayed. When the thumbnail screen is in display, press GREEN to start the screen for setting up for Slide Show that sequentially changes images. Home Gallery 1 Select “Display Mode” ( / ). 2 Select “Normal” or “Full” ( / ).
12 Enjoying through External Equipment Starting the Slide Show screen After setting up for Slide Show, you can start Slide Show to sequentially change images. 1 To start the Slide Show screen, press the red button when the Slide Show Setup screen or a thumbnail screen is in display. • With “Auto” selected for “Playback Mode”, images are automatically changed at the specified intervals. • With “Manual” selected for “Playback Mode”, press P+/P– to change images.
Using the Teletext Functions 13 Operating the Teletext basics Teletext broadcasts pages of information and entertainment to specially equipped television sets. Your Plasma Display System receives Teletext signals broadcast by TV networks, and decodes them into graphical format for viewing. News, weather and sports information, stock exchange prices and programme previews are among many services available.
13 Using the Teletext Functions Displaying subpages Displaying subtitle pages You can display several subpages as they are transmitted. You can display several subtitles as they are transmitted. Subpage screen 1 Press [ to display the subtitle. 203 TEXT 203 01:44:37 2 P- P+ 01 Life 02 03 • Subtitle is updated by the information sent by the broadcasting station. Press [ again to access next available subtitle screen. Promis 04 1 Press m to display Teletext.
Appendix 14 Troubleshooting Possible Solution • Make sure that the Plasma Display and the Media Receiver are connected correctly. (See page 17.) • Is the power cord disconnected? (See page 20.) • Has the main power been turned on? (See page 21.) • Check if you pressed buttons 0 – 9 on the remote control unit. (See page 21.) • If the indicator on the system lights up red, press 0 – 9. English Problem • No power. •The system cannot be switched on.
14 Appendix Code SD04 Message Powering off. Internal temperature too high. Check temperature around PDP. Check Check if the ambient temperature of the Plasma Display is high. SD05 Powering off. Internal protection circuits activated, Is there a short in speaker cable? Check the speaker cable connections between the Plasma Display and the speakers. SD11 Powering off. Internal temperature too high. Check the temperature around media receiver.
Appendix 14 Connecting pin assignments for SCART English Various audio and video devices may be connected via the SCART terminals. 1 3 5 7 9 111315171921 2 4 6 8 101214161820 SCART (INPUT 1) 1. 2. 3. 4. 5. 6. 7. Audio right output Audio right input Audio left output Common earth for audio Earth for blue Audio left input Blue input 8. Audio-video control 9. Earth for green 10. Not used 11. Green input 12. Not used 13. Earth for red 14. Not used 15. Red input 16. Red/Green/Blue control 17.
14 Appendix Specifications Item Number of Pixels 50"Plasma Display, Model: PDP-505PE 1280 × 768 pixels 43" Plasma Display, Model: PDP-435PE 1024 × 768 pixels Audio Amplifier 13 W + 13 W (1 kHz, 10 %, 8 Ω) 13 W + 13 W (1 kHz, 10 %, 8 Ω) Surround System SRS/FOCUS/TruBass SRS/FOCUS/TruBass Power Requirement 220–240 V AC, 50/60 Hz, 352 W (0.4 W Standby) 220–240 V AC, 50/60 Hz, 295 W (0.4 W Standby) Dimensions 1270 (W) × 737 (H) × 93 (D) mm 1120 (W) × 652 (H) × 93 (D) mm Weight 32.8 kg (72.
Appendix 14 Trademarks • FOCUS, WOW, SRS and h® symbol are trademarks of SRS Labs, Inc. • This product includes FontAvenue® fonts licensed by NEC Corporation. FontAvenue is a registered trademark of NEC Corporation. • DDC is a registered trademark of Video Electronics Standards Association. English FOCUS and SRS technologies are incorporated under license from SRS Labs, Inc. • HDMI, the HDMI logo and High-Definition Multimedia Interface are trademarks or registered trademarks of HDMI Licensing LLC.
PDP-505XDE-Fre (02-03) 2 04.6.
PRÉCAUTION: Les symboles suivants figurent sur les étiquettes apposées sur l’appareil. Ils appellent l’attention des utilisateurs et du personnel d’entretien sur des dangers potentiels. AVERTISSEMENT Ce symbole signale une pratique dangereuse ou contraire à la sécurité qui peut entraîner une blessure ou des dégâts matériels.
Table des matières Nous vous remercions d’avoir acquis cet appareil Pioneer. Veuillez lire attentivement ce mode d’emploi pour être en mesure d’utiliser l’appareil convenablement. La lecture de ce mode d’emploi terminée, conservez-le dans un endroit sûr pour référence. Dans certains pays ou régions, la forme de la prise secteur et celle de la fiche du cordon d’alimentation peuvent différer des illustrations de ce document. Toutefois, la manière de brancher le cordon et d’utiliser l’appareil est la même.
Table des matières 11 Réglages utiles 12 Emploi d’un appareil extérieur Affichage des images d’un décodeur ............................... 44 Raccordement d’un décodeur ..................................... 44 Affichage des images provenant d’un décodeur ....... 44 Affichage des images d’un magnétoscope ...................... 44 Raccordement d’un magnétoscope ........................... 44 Affichage des images provenant d’un magnétoscope ..............................................................
01 Informations importantes pour l’utilisateur Veuillez lire attentivement ces informations de manière à profiter au mieux du système d’écran à plasma Pioneer PureVision PDP-505XDE/435XDE, PDP-505HDE/435HDE. Avec le système d’écran à plasma Pioneer PureVision PDP505XDE/435XDE, PDP-505HDE/435HDE, vous disposez d’un ensemble de qualité qui assurera un service fiable et de longue durée.
Informations importantes pour l’utilisateur 01 Rémanence d’image sur le panneau • L’affichage de la même image pendant une longue période peut provoquer une rémanence de cette image. Cela peut spécialement se produire dans les circonstances suivantes. Français 1. Image rémanente due à la charge électrique Si une image présentant des zones très lumineuses est affichée pendant plus d’une minute, une image rémanente produite par la charge électrique importante peut en résulter.
02 Précautions de sécurité L’électricité permet de disposer d’un grand nombre de fonctions utiles mais elle peut être la source de blessures et de dommages matériels si certaines précautions ne sont pas respectées. Cet appareil a été conçu et fabriqué en tenant le plus grand compte de la sécurité. Toutefois, son utilisation incorrecte peut conduire à ressentir une secousse électrique, ou à provoquer un incendie.
Précautions de sécurité 02 Précautions d’installation Observez les précautions suivantes si vous effectuez une installation mettant en oeuvre des accessoires tels que le support en option. Si vous utilisez le support, les équerres ou les accessoires en option • Demandez au revendeur d’effectuer l’installation. • Servez-vous des boulons fournis. • Pour de plus amples détails concernant cette question, reportez-vous au mode d’emploi qui accompagne le support en option (ou les accessoires équivalents).
03 Précautions d’emploi PIONEER ne saurait être tenue responsable des dommages survenant à la suite d’un usage incorrect de l’appareil, par vous-même ou d’autres personnes, des anomalies de fonctionnement, des perturbations que l’appareil peut causer à d’autres équipements à moins que sa responsabilité soit clairement engagée.
Accessoires fournis 04 Écran plasma Cordon d’alimentation (2 m) Chiffon de nettoyage (Pour l’Eire et le Royaume-Uni) Seul le cordon d’alimentation convenant pour le pays ou la région de distribution, est fourni. Français (Pour l’Europe à l’exception de l’Eire et du Royaume-Uni) Garniture pour enceinte x 3 Collier rapide x 3 Collier à œil x 3 Carte de garantie (À utiliser si les enceintes en option sont montées à la partie inférieure de l’écran plasma.
05 Nomenclature À propos des illustrations dans ce mode d’emploi Ces instructions sont fournies à la fois pour le PDP-505XDE/435XDE et le PDP-505HDE/435HDE, dont l'aspect du récepteur Média et du boîtier de télécommande diffère légèrement. Veuillez prendre note que tout au long de ces instructions, les illustrations de la série PDP-505XDE/435XDE sont utilisées à titre explicatif.
Nomenclature 05 Récepteur Média (PDP-505XDE/435XDE) Vue de face 1 2 3 Tirez ici pour ouvrir ce volet.
05 Nomenclature 9 Touches de couleur (ROUGE, VERT, JAUNE, BLEU) Boîtier de télécommande (PDP-505XDE/435XDE) En mode TELETEXT: elles sélectionnent une page. 10 [ En mode téléviseur/entrée extérieure : permet de sauter à la page de sous-titres télétexte. En mode d’entrée DTV : permet d’activer ou désactiver les sous-titres. 1 2 11 k En mode TELETEXT: elle affiche les caractères masqués. RETURN 12 3 Cette touche rétablit la page de menu précédente.
Préparation 06 Installation de l’écran plasma Installation du récepteur Média Écran plasma Récepteur Média (montage vertical) Plus de 50 cm Français (montage horizontal) Plus de 10 cm Câble système (environ 3 mètres) • Ne posez aucun appareil, pas même un magnétoscope, sur le dessus du récepteur Média. Emplacement • Ménagez suffisamment d’espace sur les côtés et audessus du récepteur Média. • Évitez que l’écran ne soit exposé à la lumière directe du soleil.
06 Préparation Montage vertical du récepteur Média 3. Retirez les garnitures antichoc. Vous pouvez vous servir du support fourni pour monter le récepteur Média verticalement. 1. Engagez le support sur le côté du récepteur Média. Garniture antichoc Côté droit Conservez les garnitures antichoc et les vis. Vous en aurez besoin si vous décidez de monter le récepteur Média dans la position horizontale. 4. Bouchez les perçages de vis au moyen des capuchons fournis. 2.
Préparation 06 Réglage du système Raccordement du câble système à l’écran plasma Écran plasma (vue de dos) Français Pour de plus amples détails concernant l’installation des enceintes PIONEER en option, reportez-vous au mode d’emploi qui accompagne les enceintes.
06 Préparation Cheminement des câbles Des colliers rapides et des colliers à œil sont fournis avec le système pour permettre la mise en faisceau des câbles. Après avoir constitué les faisceaux de câbles, procédez comme il est dit ci-dessous pour les faire cheminer.
Préparation 06 Préparation du boîtier de télécommande Mise en place des piles 1 Ouvrez le couvercle du logement des piles. Portée du boîtier de télécommande Agissez sur le boîtier de télécommande en le dirigeant vers le capteur (t) qui est placé à la partie inférieure droite de l’écran à plasma. La distance du boîtier au capteur doit être inférieure à 7 mètres et l’angle du faisceau avec la face de l’écran doit être à 30 degrés, quelle que soit la position du boîtier dans l’espace.
06 Préparation Raccordements de base Raccordement à l’antenne Pour bénéficier d’une image de meilleure qualité, utilisez une antenne extérieure. Voici de brèves explications sur le raccordement d’un câble coaxial. PDP-505XDE/435XDE uniquement • Pour regarder à la fois des émissions analogues et numériques, raccordez le câble d’antenne à la prise ANT OUT (sortie directe d’antenne) et à la prise ANT (entrée analogue).
Pour regarder la télévision Vous ne pouvez effectuer la syntonisation sur un canal que si vous avez préalablement réglé le téléviseur sur ce canal. La manière de procéder pour cela est donnée au paragraphe “Réglage automatique des canaux de télévision”, page 28. 07 Écran plasma Mise en service 1 Appuyez sur POWER sur l’écran plasma. 3 Témoin STANDBY Témoin POWER ON Touche POWER Français 2 • Le témoin STANDBY de l’écran plasma clignote (couleur rouge). Appuyez sur POWER sur le récepteur Média.
07 Pour regarder la télévision Témoins d’état de l’écran plasma et du récepteur Média État des témoins Écran plasma Récepteur Média EN SERVICE EN VEILLE EN SERVICE État du système EN VEILLE L’écran plasma et le récepteur Média sont hors tension. Ou bien la fiche du cordon d’alimentation de chaque appareil a été débranchée. Le système est en service. Le système est en veille. Le récepteur Média est hors tension. Ou bien la fiche du cordon d’alimentation du récepteur Média a été débranchée.
Pour regarder la télévision Réglage des canaux analogues favoris Vous pouvez enregistrer en tout un maximum de 16 canaux de télévision favoris, puis les sélectionner rapidement parmi vos canaux favoris. 1 Tout en regardant une émission analogue, appuyez sur ENTER pour appeler la liste de canaux favoris. 07 Modification du niveau sonore Utilisation des touches i +/i – du boîtier de télécommande • Pour augmenter le niveau sonore, appuyez sur i +. • Pour diminuer le niveau sonore, appuyez sur i –.
07 Pour regarder la télévision Chaque pression sur la touche g, provoque l’adoption d’un type de sons donné.
Pour regarder la télévision Utilisation des fonctions d’affichage 07 • En mode une image dans l’image, appuyez sur pour déplacer la petite image dans le sens anti-horaire. Partage d’écran Utilisez la méthode qui suit pour obtenir 2 images égales ou une image dans l’image. 2 images Français Image dans l’image 2 Pour sélectionner une source, appuyez sur la touche d’entrée qui lui correspond. • Si vous regardez une émission télévisée, les touches P+/P– vous donnent le moyen de changer de canal.
07 Pour regarder la télévision Gel d’une image Utilisez la méthode suivante pour saisir et geler une image parmi les images animées que vous regardez. 1 Appuyez sur d. • Une image fixe apparaît sur la partie droite de l’écran tandis qu’une image animée occupe la partie gauche. 2 Appuyez une nouvelle fois sur d pour annuler. Image normale Image fixe • Avec le partage d’écran, toutes les images ne peuvent pas être gelées. • Lorsque le gel n’est pas possible un message d’avertissement apparaît.
Configuration du menu 08 Menus des modes PC Utilisation du menu Menus des modes AV Paramètre Image Sélection AV Page 31 Contraste 32 Luminos. 32 Couleur 32 Teinte 32 Netteté 32 Réglage pro. 32 Son Réinitial. 32 Aigus 34 Graves 34 Balance 34 Réinitial. 34 FOCUS 34 Surround avant 34 Commande alimentation Économie d’énergie Pas de signal arrêt 35 Pas d’opération arrêt 35 42 Minut.
09 Réglages de base Réglage automatique des canaux de télévision Cette section traite de la manière de détecter automatiquement les canaux de télévision puis d’effectuer leur réglage. Pour les fonctions propres au PDP-505XDE/435XDE, reportezvous au mode d’emploi du DTV fourni séparément. Utilisation d’Autoinstallation • Vous pouvez démarrer l’auto-installation à partir du menu Home, par exemple après avoir choisi un autre pays.
Réglages de base 09 9 Sélectionnez “Système” ( / ). 10 Sélectionnez un système sonore ( / ). • Vous pouvez choisir parmi les systèmes suivants “B/G”, “D/K”, “I”, “L” et “L’”. Réglage manuel Entrer programme Étiquetage des canaux de télévision Vous avez la possibilité d’attribuer un nom ne comportant pas plus de 5 caractères à chaque canal réglé. Cette façon de procéder facilite l’identification des canaux au cours de leur sélection. 1 Procédez aux opérations 1 à 4 de Utilisation de Recherche 42.
09 Réglages de base Définition de Verrouillage enfants Classement des canaux de télévision préréglés Verrouil. Enfants interdit l’accord sur les canaux de télévision qui ont été spécifiquement marqués pour cela. Utilisez la méthode suivante pour classer les canaux de télévision préréglés dans l’ordre désiré. 1 Procédez aux opérations 1 à 4 de Utilisation de 1 Appuyez sur HOME MENU. 2 Sélectionnez “Installation” ( / puis ENTER). 3 Sélectionnez “Install. TV analogue” ( / puis ENTER). Réglage manuel.
Réglages de base 09 Choix de la langue Sélection AV Vous avez la possibilité de choisir, parmi les 12 suivantes, la langue employée pour l’affichage sur l’écran des menus et instructions: Allemand, Anglais, Espagnol, Finnois, Français, Grec, Italien, Néerlandais, Portugais, Russe, Suédois et Turc. En mode Télétexte, vous avez le choix entre Europe occidentale, Europe orientale, Greece/Turkey, Russia et Arabe. Vous avez le choix entre 5 options de visionnement, en fonction de l’environnement actuel (ex.
09 Réglages de base Dans le cas d’un ordinateur personnel Réglages de l’image Réglez l’image selon vos préférences et en fonction de l’option Sélection AV (sauf DYNAMIQUE) retenue. 1 Appuyez sur HOME MENU. 2 Sélectionnez “Image” ( / puis ENTER). 3 Sélectionnez le paramètre à définir ( / puis ENTER). Image Sélection AV STANDARD Contraste 40 Luminos. 0 Couleur 0 Teinte 0 Netteté 0 Réglage pro. Réinitial.
Réglages de base 09 Température de couleur Ce paramètre règle la température de couleur procurant ainsi une meilleure balance des blancs. Sélections Haut Le blanc a une tonalité bleutée. Moyen-Haut La tonalité est intermédiaire entre Haut et Moyen. La tonalité est naturelle. Moyen-Bas La tonalité est intermédiaire entre Moyen et Bas. Bas Le blanc a une tonalité rosée. Manuel La température de couleur peut être réglée à votre guise.
09 Réglages de base Réglages du son Grâce aux paramètres qui suivent, vous pouvez régler les caractéristiques des sons selon vos préférences. Réglez le son selon vos préférences et en fonction de l’option Sélection AV retenue. Reportez-vous à la page 31. 1 2 3 4 Sélectionnez la valeur désirée ( / ). Son STANDARD Aigus 2 Graves 0 Balance 0 Réinitial. FOCUS est actif. • L’effet de cette fonction dépend du signal. • Vous ne pouvez pas régler le champ sonore pour les signaux appliqués sur le casque.
Réglages de base 09 Gestion de l’alimentation Mise hors service en l’absence d’opération (mode AV uniquement) La gestion de l’alimentation offre différents moyens d’économiser l’énergie. Ce paramètre place le système en veille si aucune opération n’est exécutée pendant 3 heures. Économie d’énergie 1 Appuyez sur HOME MENU. 2 Sélectionnez “Commande alimentation” ( / puis La consommation d’énergie est réduite par diminution de la luminosité de l’image. ENTER).
10 Utilisation du guide électronique de programme (EPG) (pour la TV analogique uniquement) Utilisez le guide électronique de programmation (EPG) pour rechercher les émissions que vous souhaitez regarder, ou obtenir des informations les concernant. Associée au fonctionnement du programmateur d’un magnétoscope, cette manière de procéder permet d’enregistrer en temps voulu une émission. Pour les fonctions propres au PDP-505XDE/435XDE, reportez-vous au mode d’emploi du DTV fourni séparément.
Utilisation du guide électronique de programme (EPG) (pour la TV analogique uniquement) Affichage des informations concernant une émission 5 Sélectionnez “SP” (standard) ou “LP” (longue durée) ( / ). Information de programmes 1 Appuyez sur EPG. 2 Sélectionnez l’émission désirée ( / puis ENTER ). Information de programmes ******************* VEN.02.07.04 12:46 Vitesse d'enregistrement PDC/VPS Enregistrer? Sortie • Les informations concernant cette émission s’affichent. 3 Faites défiler la page ( / ).
11 Réglages utiles Réglage de la position de l’image (mode AV uniquement) Réglez la position horizontale et la position verticale de l’image sur l’écran plasma. 1 2 3 4 Appuyez sur HOME MENU. Sélectionnez “Options” ( / puis ENTER). Sélectionnez “Position” ( / puis ENTER). Sélectionnez “Réglage de la position H/V” ( / puis ENTER).
Réglages utiles 11 Choix du type de signal d’entrée Après avoir raccordé les prises INPUT 1, INPUT 2 ou INPUT 3, indiquez le type de signal d’entrée qui sera fourni par l’appareil relié. Pour de plus amples détails concernant les types de signal, reportez-vous au mode d’emploi qui accompagne l’appareil relié. Avant d’ouvrir le menu, appuyez sur INPUT 1, INPUT 2 ou INPUT 3, sur le boîtier de télécommande, ou bien appuyez sur INPUT, sur l’écran plasma, pour sélectionner la source. Appuyez sur HOME MENU.
11 Réglages utiles Sélection d’un format d’image Mode AV Sélection manuelle 4:3 Appuyez sur f pour passer d’un format d’écran disponible, compte tenu de la nature des signaux vidéo reçus, à l’autre. • Chaque pression sur la touche f provoque la sélection d’un autre format. • Les formats disponibles dépendent de la nature des signaux appliqués à l’entrée. CINÉMA PLEIN 14:9 ZOOM CINÉMA14:9 PLEIN LARGE Mode AV Paramètre 4:3 Description Pour afficher des images “standard” 4:3.
Réglages utiles 11 Sélection automatique Si vous avez choisi les valeurs “WSS” et “Mode 4:3” sur le menu Option, le format optimum est automatiquement sélectionné pour chaque signal vidéo contenant une balise d’écran large (WSS). Paramètre 4:3 Description Le format 4:3 est conservé et le cache latéral visible. LARGE (valeur par défaut) L’image occupe tout l’écran et aucun cache latéral n’est utilisé.
11 Réglages utiles Minuterie de mise en veille Changement de mot de passe À l’expiration d’un certain temps, le système est automatiquement mis en veille par cette minuterie. Procédez de la manière suivante pour changer le mot de passe. 1 Appuyez sur HOME MENU. 2 Sélectionnez “Minut. Extinction” ( / puis ENTER). 3 Sélectionnez la durée désirée ( / puis ENTER). 1 Appuyez sur HOME MENU. 2 Sélectionnez “Installation” ( / puis ENTER). 3 Sélectionnez “Mot de passe” ( / puis ENTER).
Réglages utiles Effacement du mot de passe 1 Appuyez sur HOME MENU. 2 Sélectionnez “Installation” ( / puis ENTER). 3 Sélectionnez “Mot de passe” ( / puis ENTER). • La page de saisie du mot de passe s’affiche. Tapez un mot de passe à 4 chiffres en vous servant des touches 0 à 9. Désactivation du mot de passe 1 Appuyez sur HOME MENU. 2 Sélectionnez “Installation” ( / puis ENTER). 3 Sélectionnez “Mot de passe” ( / puis ENTER). • La page de saisie du mot de passe s’affiche.
12 Emploi d’un appareil extérieur Vous avez la possibilité de relier divers types d’appareil au système d’écran plasma, par exemple un décodeur, un magnétoscope, un lecteur de DVD, un ordinateur personnel, une console de jeu ou un caméscope. Pour regarder les images provenant d’un appareil extérieur, sélectionnez la source correspondante au moyen des touches INPUT du boîtier de télécommande (page 14), ou de la touche INPUT de l’écran plasma.
Emploi d’un appareil extérieur 12 Pour préciser le type des signaux vidéo numériques: Utilisation de l’entrée HDMI Tableau de corrélation des signaux d’entrée 1920∗1080i@50Hz 1 Répétez les opérations 1 à 3 de Pour mettre en service la prise HDMI. 2 Sélectionnez “Vidéo” ( / puis ENTER). 3 Sélectionnez le type de signaux vidéo numériques ( / puis ENTER). • Si vous sélectionnez “Auto”, l’appareil tente d’identifier les signaux vidéo numériques lorsqu’ils sont reçus.
12 Emploi d’un appareil extérieur Récepteur Média (vue de dos) Utilisation de l’entrée/sortie Link.A DIGITAL OUT OPTICAL ANT (DIGITAL) Ce système possède 3 fonctions typiques d’entrée/sortie Link.A facilitant les raccordements entre le récepteur Média et d’autres appareils audiovisuels. SERVICE ONLY IN OUT CONTROL OUT IN COMMON INTERFACE INPUT 2 COMPONENT VIDEO Y PB PR SUB WOOFER OUTPUT INPUT 1 i / o link.
Emploi d’un appareil extérieur Utilisation d’une console de jeu et visionnement des images d’un caméscope 12 Utilisation des appareils audio reliés Raccordement d’un appareil audio Raccordement d’une console de jeu ou d’un caméscope Vous pouvez bénéficier de sonorités plus puissantes si vous reliez les appareils audio qui conviennent, par exemple un récepteur audiovisuel ou un caisson de graves. Utilisez la prise INPUT 4 pour raccorder une console de jeu, un caméscope ou un autre appareil audiovisuel.
12 Emploi d’un appareil extérieur Raccordement des câbles de commande Reliez les câbles de commande au récepteur Média et aux . Vous pouvez autres appareils PIONEER portant le logo alors agir sur l’appareil relié en envoyant les ordres émis par son boîtier de télécommande vers le capteur de télécommande du récepteur Média.
Emploi d’un appareil extérieur 12 Tableau de compatibilité ordinateur Résolution 720 × 400 Fréquence 70 Hz 640 × 480 60 Hz 65 Hz Remarques Macintosh 13” (67 Hz) 72 Hz 75 Hz Mise en place d’une carte de mémoire 1 Ouvrez le volet de la face avant du récepteur Média.
12 Emploi d’un appareil extérieur Lancement de la page initiale Home Gallery Lancement d’une page de vignettes Si vous introduisez la carte de mémoire alors que le système est en service, la page initiale suivante apparaît. Après avoir sélectionné un dossier de la page initiale Home Gallery, les images de ce dossier sont affichées sous forme de vignettes. 2 Home Gallery 1 3 Miniature 4 1/25 Information image 011.JPG 011. JPG 018. JPG 048. JPG 059. JPG 084. JPG DSC00086. JPG DSC00087.
Emploi d’un appareil extérieur 12 Lancement d’une page standard à une image Configuration de lancement de diaporama Une page de vignettes étant affichée, utilisez / et / pour mettre en valeur une image puis appuyez sur ENTER. La page de vignettes se ferme et seule l’image sélectionnée est maintenant affichée. Une page de vignettes étant affichée, appuyez sur VERT pour ouvrir la page de définition du diaporama, c’est-à-dire de la fonction qui affiche les images l’une après l’autre.
12 Emploi d’un appareil extérieur Lancement du diaporama Après avoir défini les paramètres du diaporama, vous pouvez le lancer et obtenir l’affichage des images, l’une après l’autre. 1 Pour lancer le diaporama, appuyez sur la touche rouge tandis que la page de configuration du diaporama, ou la page des vignettes, est affichée. • Si vous avez sélectionné “Auto” pour “Mode de lecture”, les images sont changées à intervalle régulier et automatiquement.
Utilisation des fonctions télétexte Qu’est-ce que télétexte ? Le télétexte consiste à diffuser des pages d’information et de divertissement qui peuvent être affichées sur les téléviseurs spécialement conçus pour cela. Ce système d’écran plasma peut recevoir les signaux télétexte diffusés par les réseaux de télévision et en crée des images graphiques qui sont affichées sur l’écran.
13 Utilisation des fonctions télétexte Affichage d’une page secondaire Affichage des pages de sous-titres Vous pouvez afficher les pages secondaires au fur et à mesure de leur transmission. Vous pouvez afficher plusieurs sous-titres à mesure qu’ils sont transmis. Page secondaire 1 Appuyez sur [ pour afficher les sous-titres. 203 TEXT 203 01:44:37 2 P- P+ 01 Life 02 03 • Les sous-titres sont mis à jour par les informations envoyées de la station de télévision.
Annexe 14 Guide de dépannage Action corrective possible • Absence d’alimentation. • Le système ne peut pas être mis sous tension. • Assurez-vous que l’écran plasma et le récepteur Média sont convenablement reliés. (Reportez-vous à la page 17.) • La fiche du cordon d’alimentation est-elle débranchée? (Reportez-vous à la page 20.) • Le système est-il sous tension? (Reportez-vous à la page 21.) • Appuyez sur les touches 0 à 9 du boîtier de télécommande pour contrôler le fonctionnement.
14 Annexe Code SD04 Message S’éteint. Température interne trop élevée. Vérifier la température dans PDP. Vérification Assurez-vous que la température de l’écran plasma n’est pas trop élevée. SD05 S’éteint. Protection interne des circuits activée, Y-a-t-il un court-circuit dans le câble de l’enceinte? Contrôlez les liaisons entre l’écran plasma et les enceintes. SD11 S’éteint. Température interne trop élevée. Vérifier la température dans le récepteur du média.
Annexe 14 Bornage de la prise péritel Divers appareils audio et vidéo peuvent être interconnectés grâce aux prises péritel. 1 3 5 7 9 111315171921 Français 2 4 6 8 101214161820 Prise péritel (INPUT 1) 1. 2. 3. 4. 5. 6. 7. Sortie audio droite Entrée audio droite Sortie audio gauche Masse commune pour audio Masse pour le bleu Entrée audio gauche Entrée pour le bleu 8. Commande audio-vidéo 9. Masse pour le vert 10. Non utilisée 11. Entrée pour le vert 12. Non utilisée 13. Masse pour le rouge 14.
14 Annexe Caractéristiques techniques Paramètre Nombre de pixels Écran à plasma 50 po., modèle: PDP-505PE 1280 × 768 pixels Écran à plasma 43 po.
Annexe 14 Marques de commerce • FOCUS, WOW, SRS et le symbole h® sont des marques de commerce de SRS Labs. Inc. Les technologies FOCUS et SRS sont incorporées sous licence de SRS Labs, Inc. • Cet appareil est doté des polices FontAvenue® sous licence NEC Corporation. FontAvenue est une marque déposée par NEC Corporation. • DDC est une marque déposée par Video Electronics Standards Association.
PDP-505XDE-Fre (55-60) 60 04.6.
VORSICHT: DER NETZSCHALTER TRENNT DAS GERÄT IN SEINER AUSSCHALTSTELLUNG NICHT VOLLSTÄNDIG VON DER NETZSTROMVERSORGUNG AB. INSTALLIEREN SIE DESHALB DAS GERÄT AN EINER GEEIGNETEN STELLE SO, DASS DER Die nachstehenden Symbole befinden sich auf am Gerät angebrachten Aufklebern. Sie machen den Benutzer und das Wartungspersonal auf mögliche Gefahren aufmerksam. NETZSTECKER IM NOTFALL SCHNELL ABGEZOGEN WERDEN KANN.
Inhalt Vielen Dank, dass Sie sich für dieses Pioneer-Produkt entschieden haben. Lesen Sie diese Bedienungsanleitung bitte aufmerksam durch, sodass Sie mit der richtigen Bedienungsweise Ihres Modells vertraut werden. Nachdem Sie die Bedienungsanleitung gelesen haben, sollten Sie sie an einer sicheren Stelle griffbereit aufbewahren. In manchen Ländern oder Verkaufsgebieten weichen die Ausführungen von Netzstecker oder Netzsteckdose unter Umständen von den in den Abbildungen gezeigten ab.
Inhalt 11 Praktische Einstellmöglichkeiten 12 Einsatz externer Geräte Wiedergabe von einem Decoder ....................................... 44 Anschließen eines Decoders ....................................... 44 Anzeigen eines Decoder-Bilds .................................... 44 Wiedergabe von einem Videorecorder .............................. 44 Anschließen eines Videorecorders ............................. 44 Anzeigen eines Videorecorderbilds .............................
01 Wichtige Grundregeln Damit Sie das Plasma Display-System Pioneer PureVision PDP-505XDE/435XDE, PDP-505HDE/435HDE auch voll genießen können, sollten Sie zunächst diese Informationen aufmerksam lesen. Das Pioneer PureVision PDP-505XDE/435XDE, PDP-505HDE/ 435HDE ist ein hochwertiges Plasma Display, das sich durch eine lange Lebensdauer und hohe Qualität auszeichnet.
Wichtige Grundregeln 01 Einbrenner und Nachbilder • Wenn dasselbe Bild, zum Beispiel ein Standbild, über längere Zeit angezeigt wird, können Nachbilder entstehen. Dies kann in den folgenden beiden Fällen auftreten. 1. Nachbild wegen elektrischer Restladung Wenn Bildmuster mit sehr hoher Spitzenluminanz länger als 1 Minute angezeigt werden, können Nachbilder wegen elektrischer Restladung verursacht werden. Die Nachbilder lösen sich auf, wenn bewegte Bilder wiedergegeben werden.
02 Wichtige Sicherheitshinweise Elektrizität erfüllt viele nützliche Aufgaben, kann aber auch Personenverletzungen und Sachschäden verursachen, wenn sie unsachgemäß gehandhabt wird. Dieses Produkt wurde mit Sicherheit als oberster Priorität konstruiert und hergestellt. Dennoch besteht bei unsachgemäßer Handhabung u.U. Stromschlag- und Brandgefahr. Um mögliche Gefahren abzuwenden, befolgen Sie beim Aufstellen, Betreiben und Reinigen des Produkts bitte die nachstehenden Anleitungen.
Wichtige Sicherheitshinweise 02 Beim Installieren zu beachten Beachten Sie beim Installieren jedes Artikels, wie z.B. des optionalen Fußes, bitte die folgenden Punkte. Bei Gebrauch des optionalen Fußes, von Halterungen oder ähnlichen Gegenständen • Lassen Sie die Installation von Ihrem Händler durchführen. • Achten Sie darauf, dass zur Installation die mitgelieferten Schrauben verwendet werden.
03 Bei der Handhabung zu beachten PIONEER übernimmt keine Verantwortung für jedwede Schäden aufgrund falschen Gebrauchs des Produkts durch den Eigentümer oder andere Personen, Funktionsstörungen bei Gebrauch, andere produktbezogene Probleme und Gebrauch des Produkts außer in Fällen, in denen die Firma haftpflichtig ist. Plasma Display-Schutzfunktion Wenn Standbilder (wie z.B. Fotos oder ComputerBilder) längere Zeit am Bildschirm angezeigt bleiben, wird dieser etwas abgedunkelt.
Mitgeliefertes Zubehör 04 Plasma Display Netzkabel (2 m) (Für Europa außer UK und Irland) Reinigungstuch (Für UK und Irland) Nur das für Ihr Land bzw. Gebiet geeignete Netzkabel ist mitgeliefert. Kugelband x 3 Garantiekarte Deutsch Schnellverschlussklemme x 3 Lautsprecherkissen x 3 (Bei Installation der optionalen Lautsprecher an der Unterseite des Plasma Displays zu verwenden.
05 Teilebezeichnungen Über die Illustrationen in den Bedienungsanleitungen Diese Bedienungsanleitung dient gleichzeitig für die beiden Serien PDP-505XDE/435XDE und PDP-505HDE/435HDE, zwischen denen sich die Gestaltung von Media-Receiver und Fernbedienung geringfügig unterscheidet. Bitte beachten Sie, dass sich die zur Erläuterung verwendeten Illustrationen auf die Serie PDP-505XDE/435XDE beziehen.
Teilebezeichnungen 05 Media-Receiver (PDP-505XDE/435XDE) Vorderseite 1 2 3 4 Ziehen Sie an diesem Abschnitt, um die Klappe zu öffnen.
05 Teilebezeichnungen 9 Farbentasten (Rot/Grün/Gelb/Blau) Fernbedienung (PDP-505XDE/435XDE) VIDEOTEXT-Modus: Wählt eine Seite. 10 [ TV/Extern-Eingangsmodus: Zum Springen zur Videotext-Untertitelseite DTV-Eingangsmodus: Schaltet die Untertitel ein und aus. 1 2 11 k VIDEOTEXT-Modus: Zeigt verdeckte Zeichen an. RETURN 12 3 Zum Zurückkehren zum vorherigen Menü. 4 5 6 15 16 7 18 8 9 19 13 / / / Zum Wählen des gewünschten Punkts im Einstellmenü.
Vorbereitungen Installieren des Plasma Displays 06 Installieren des Media-Receivers Plasma Display Media-Receiver (vertikale Installation) Über 50 cm (horizontale Installation) Über 10 cm • Stellen Sie kein Gerät, wie z.B. einen Videorecorder, auf den Media-Receiver. Positionierung • Vermeiden Sie direkte Sonnenbestrahlung. Achten Sie auf ausreichende Belüftung. • Die Länge des Systemkabels zur Verbindung von Plasma Display und Media-Receiver beträgt ca. 3 m. Deutsch Systemkabel (ca.
06 Vorbereitungen Vertikale Installation des Media-Receivers 3. Die Stoßdämpfer entfernen. Mithilfe des mitgelieferten Fußes kann der Media-Receiver vertikal installiert werden. 1. Den Fuß in die Seite des Media-Receivers einsetzen. Stoßdämpfer Rechte Seite Bewahren Sie die Stoßdämpfer und Schrauben auf. Sie werden für horizontale Installation des Media-Receivers benötigt. 4. Verschließen Sie die Schraubenöffnungen mit den mitgelieferten Kappen. 2. Den Fuß mit den mitgelieferten Schrauben sichern.
Vorbereitungen 06 Aufbau des Systems Anschluss des Systemkabels an das Plasma Display Plasma Display (Rückseite) Deutsch Näheres zur Installation optionaler PIONEER Lautsprecher finden Sie in der den Lautsprechern beiliegenden Anleitung.
06 Vorbereitungen Verlegen von Kabeln Diesem System liegen Schnellverschlussklemmen und Kugelbänder zum Bündeln der Kabel bei. Nachdem Sie die Kabel richtig gebündelt haben, verlegen Sie sie wie nachfolgend beschrieben.
Vorbereitungen Vorbereiten der Fernbedienung Einlegen der Batterien 1 Öffnen Sie den Batteriefachdeckel. 06 Wirkungsbereich der Fernbedienung Zur Benutzung der Fernbedienung ist diese auf den Fernbedienungssensor (t) unten rechts an der Vorderseite des Plasma Displays zu richten. Der Abstand der Fernbedienungseinheit vom Fernbedienungssensor sollte 7 m nicht überschreiten, und ihr Winkel zum Sensor sollte nach rechts, links, oben und unten innerhalb von 30 Grad liegen.
06 Vorbereitungen Basisanschlüsse Anschließen einer Antenne Um ein sauberes Bild zu erhalten, empfiehlt sich der Anschluss einer Außenantenne. Nachstehend finden Sie eine kurze Beschreibung der bei Verwendung eines Koaxialkabels vorzunehmenden Anschlüsse. Nur PDP-505XDE/435XDE • Zum Wiedergeben von sowohl analogen als auch digitalen Programmen bitte die ANT OUT-Buchse (Durchschleifsignal) über das Antennenkabel mit der ANT -Buchse (Analogeingang) verbinden.
Fernsehempfang Empfangbare Fernsehkanäle müssen eingerichtet werden, da sie sonst nicht abgestimmt werden können. Näheres hierzu finden Sie auf Seite 28 unter „Automatisches Programmieren von Fernsehkanälen“. 07 Plasma Display Einschalten 1 Drücken Sie POWER am Plasma Display. 2 3 Anzeige STANDBY Anzeige POWER ON Taste POWER (Rechte Seite) Taste STANDBY/ON Deutsch • Die Anzeige STANDBY am Plasma Display blinkt rot. Drücken Sie POWER am Media-Receiver.
07 Fernsehempfang Plasma Display/Media-Receiver Statusanzeigen Anzeigestatus Plasma Display POWER ON System-Status Media-Receiver STANDBY POWER ON STANDBY Die Stromversorgung zum Plasma Display und Media-Receiver ist unterbrochen. Es könnten auch die Netzkabel abgetrennt worden sein. Die Stromversorgung zum System ist hergestellt. Das System befindet sich im Bereitschaftsmodus. Die Stromversorgung zum Media-Receiver ist unterbrochen.
Fernsehempfang Einstellen analoger Kanäle als Favoriten Sie können max. 16 analoge Fernsehkanäle als Favoriten registrieren und die Programmwahl im Interesse schnellen Zugriffs auf diese Kanäle begrenzen. 07 Lautstärke- und Toneinstellungen Mit i +/i – an der Fernbedienung • Drücken Sie i + zum Erhöhen der Lautstärke. • Drücken Sie i – zum Vermindern der Lautstärke. 1 Während des Betrachtens eines analogen Programms mit ENTER die Liste der Favoriten aufrufen.
07 Fernsehempfang Mit jedem Druck auf g wird MTS wie unten gezeigt umgeschaltet.
Fernsehempfang Gebrauch der Multiscreen-Funktionen 07 • Im Bild-in-Bild-Modus kann die Position des Minibilds im Gegenuhrzeigersinn weitergeschaltet mit werden. Bildschirmteilung Sie können Doppelbildschirm oder Bild-in-Bild wählen. Gehen Sie hierzu wie nachfolgend beschrieben vor. Doppelbildschirm 2 Zur Wahl der Eingangsquelle drücken Sie die entsprechende Eingangsquellentaste. • Bei Fernsehempfang drücken Sie P+/P– , um den Kanal zu wechseln.
07 Fernsehempfang Standbild Sie können ein Vollbild der momentanen, laufenden Szene einfangen und als Standbild wiedergeben. Gehen Sie hierzu wie nachfolgend beschrieben vor. 1 Drücken Sie d. • Ein Standbild erscheint auf dem rechten Screen, während der linke Screen ein bewegtes Bild zeigt. 2 Drücken Sie d erneut, um die Funktion wieder aufzuheben. Normales Bild Standbild • Bei Bildschirmteilung ist Wiedergabe eines eingefangenen, bewegten Vollbilds als Standbild nicht möglich.
Menü-Steuerung 08 PC-Modus-Menüs Menü-Übersicht Home Menu Bild AV-Modus-Menüs Home Menu Bild Energiesparmodi Kontrast 32 Helligkeit 32 Farbsättigung 32 Tint 32 Schärfe 32 Profi-Einstellungen 32 Rückstellen 32 Höhen 34 Bass 34 Balance 34 Rückstellen 34 FOCUS 34 Front Surround 34 Energiesparmodus 35 Kein Signal -aus- 35 Keine Bedienung -aus- 35 Timer Weiterführende Einstellungen Grundeinstellungen Seite 31 42 Ton Energiesparmodi Seite 31 Kontrast 32 Helligkeit
09 Grundeinstellungen Automatisches Programmieren von Fernsehkanälen In diesem Abschnitt wird beschrieben, wie Fernsehkanäle automatisch gesucht und programmiert werden können. Zu den Funktionen, mit denen nur die Ausführungen PDP505XDE/435XDE ausgestattet sind, siehe getrennte DTVBedienungsanleitung. 1 Drücken Sie HOME MENU. 2 „Grundeinstellungen“ wählen ( / , dann ENTER). 3 „Autoinstallation“ wählen ( / , dann ENTER). • Die Passwort-Eingabeanzeige erscheint.
Grundeinstellungen 09 9 „System“ wählen ( / ). 10 Das Tonsystem wählen ( / ). Eingeben von Fernsehkanalnamen • Wählen Sie unter „B/G“, „D/K“, „I“, „L“ und „L’“. Manuelle Einstellung Programmplatz-Eingabe Sie können gespeicherten Fernsehkanälen einen aus bis zu fünf Zeichen bestehenden Namen zuweisen. Dies kann später die Programmwahl erleichtern. 1 Führen Sie die Schritte 1 bis 4 unter Manuelle 1 Suche 42.75MHz System B/G Einstellung durch.
09 Grundeinstellungen Einstellen der Kindersicherung Sortieren programmierter Fernsehkanäle Fernsehkanäle, die durch die Kindersicherung geschützt sind, können weder abgestimmt noch betrachtet werden. Gehen Sie wie nachfolgend beschrieben vor, um die Reihenfolge programmierter Fernsehkanäle zu ändern. 1 Führen Sie die Schritte 1 bis 4 unter Manuelle 1 Drücken Sie HOME MENU. 2 „Grundeinstellungen“ wählen ( / , dann ENTER). 3 „Analog-TV-Konfig.“ wählen ( / , dann ENTER). Einstellung durch.
Grundeinstellungen 09 Einstellen der Sprache AV-Wahl Wählen Sie unter 12 Sprachen für On-Screen-Anzeigen, wie z.B. Menüs und Anweisungen: Englisch, Deutsch, Französisch, Italienisch, Spanisch, Niederländisch, Schwedisch, Portugiesisch, Griechisch, Finnisch, Russisch und Türkisch. Für die im VIDEOTEXT-Modus zu verwendende Sprache können Sie unter Westeuropa, Osteuropa, Griechenland/ Türkei, Russland und Arabien wählen. Wählen Sie die Einstellung, die für die jeweiligen Betrachtungsbedingungen (z.B.
09 Grundeinstellungen Für PC-Programmquelle Bildeinstellungen Gegenstand Taste Taste Kontrast Zum Vermindern des Kontrastes Zum Erhöhen des Kontrastes Stellen Sie das Bild wunschgemäß für die gewählte AVWahloption (außer DYNAMISCH) ein. 1 Drücken Sie HOME MENU. 2 „Bild“ wählen ( / , dann ENTER). 3 Wählen Sie den einzustellenden Menüpunkt. ( / , dann ENTER).
Grundeinstellungen 09 Farb-Temp. Ermöglicht das Anpassen der Farbtemperatur für einen günstigeren Weißabgleich. Wählbare Punkte Hoch Weiß mit bläulichem Ton Mittelhoch CTI Sorgt für Bilder mit klareren Farbkonturen. CTI steht für „Colour Transient Improvement“ (verbesserte Farbkantenschärfe).
09 Grundeinstellungen Toneinstellungen Mit den folgenden Einstellungen können Sie die Klangqualität Ihren Wünschen anpassen. Stellen Sie den Ton wunschgemäß für die gewählte AVWahloption ein. Siehe Seite 31. 1 2 3 4 Gegenstand Aus (Werksvorgabe) Beschreibung Deaktiviert FOCUS. Ein Aktiviert FOCUS. 5 Drücken Sie HOME MENU, um das Menü zu verlassen. Drücken Sie HOME MENU. „Ton“ wählen ( / , dann ENTER). Wählen Sie den einzustellenden Menüpunkt ( / ).
Grundeinstellungen Energiesparmodi Mit den Energiesparmodi können Sie auf praktische Weise Strom sparen. Energiesparmodus Spart Strom durch Absenken der Bildhelligkeit. 1 2 3 4 Drücken Sie HOME MENU. „Energiesparmodi“ wählen ( / , dann ENTER). 09 Keine Bedienung -aus- (nur AV-Modus) Schaltet das System automatisch auf den Bereitschaftsmodus, wenn drei Stunden lang keine Bedienung vorgenommen wird. 1 2 3 4 „Energiesparmodus“ wählen ( / , dann ENTER).
10 Verwendung der Elektronischen Programmführung (EPG) (nur für Analog-TV) Mit der Elektronischen Programmführung (EPG) können Sie nach gewünschten Fernsehprogrammen suchen bzw. Informationen über solche Programme abrufen. In Kombination mit dem Timer können Sie auch gewünschte Programme für Aufnahme mit einem Videorecorder voreinstellen. Zu den Funktionen, mit denen nur die Ausführungen PDP505XDE/435XDE ausgestattet sind, siehe getrennte DTVBedienungsanleitung.
Verwendung der Elektronischen Programmführung (EPG) (nur für Analog-TV) Anzeigen von Programminformation 10 5 „SP“ (Standard) oder „LP“ (Erweitert) wählen ( / ). 1 Drücken Sie EPG. 2 Das gewünschte Programm wählen ( / , dann Programminformation Fr.02.07.04 12:46 22:00-23:30 ***** ENTER ). ******************* Programminformation Fr.02.07.
11 Praktische Einstellmöglichkeiten Bildlage (Nur AV-Modus) Zum Verschieben der horizontalen und vertikalen Lage des Bilds auf dem Bildschirm des Plasma Displays. 1 Drücken Sie HOME MENU. 2 „Weiterführende Einstellungen“ wählen ( / , dann ENTER). • Automatische Einstellung kann bei einem PC-Bild, das sich aus verschiedenen ähnlichen Mustern zusammensetzt, bzw. bei einem monochromen PC-Bild fehlschlagen. Wenn die Einstellung nicht erfolgreich war, versuchen Sie es mit einem anderen PC-Bild.
Praktische Einstellmöglichkeiten Wählen eines Eingangssignaltyps Nachdem an INPUT 1, INPUT 2 oder INPUT 3 Anschlüsse vorgenommen worden sind, geben Sie den Typ der Videosignale an, die von den angeschlossenen Geräten zu erwarten sind. Bezüglich Signaltypen siehe Bedienungsanleitung für das entsprechende angeschlossene Gerät. Bevor Sie das Menü abrufen, drücken Sie INPUT 1, INPUT 2 oder INPUT 3 an der Fernbedienung oder INPUT am Plasma Display, um eine Eingangsquelle zu wählen. 1 Drücken Sie HOME MENU.
11 Praktische Einstellmöglichkeiten Wählen einer Bildschirmgröße AV-Modus Manuelle Wahl Drücken Sie f, um zwischen den Bildschirmgrößenoptionen für den Typ der momentan empfangenen Videosignale umzuschalten. • Mit jedem Druck auf f wird die Einstellung umgeschaltet. • Die verfügbaren Bildschirmgrößen hängen vom Eingangssignaltyp ab. 4:3 KINO VOLL 14:9 ZOOM KINO 14:9 VOLL BREITBILD AV-Modus Gegenstand Beschreibung 4:3 Für 4:3 „Standard“-Bild. An jeder Seite erscheint eine Maske.
Praktische Einstellmöglichkeiten Automatische Wahl Wenn Sie im Menü „Weiterführende Einstellungen“ „WSS“ und „4:3 Modus“ gewählt haben, wird der optimale Bildschirm-Modus für jedes Videosignal mit WSS-Information automatisch gewählt. 11 Gegenstand 4:3 Beschreibung Behält das 4:3-Bildseitenverhältnis bei und liefert Seitenmasken. BREITBILD Breitbild ohne Seitenmasken.
11 Praktische Einstellmöglichkeiten Ändern des Passworts Timer Bei Ablauf der vorgewählten Zeit schaltet der Timer das System automatisch auf den Bereitschaftsmodus. Um das Passwort zu ändern, gehen Sie wie nachfolgend beschrieben vor. 1 Drücken Sie HOME MENU. 2 „Timer“ wählen ( / , dann ENTER). 3 Die gewünschte Zeit einstellen ( / , dann ENTER). 1 Drücken Sie HOME MENU. 2 „Grundeinstellungen“ wählen ( / , dann ENTER). 3 „Passwort“ wählen ( / , dann ENTER).
Praktische Einstellmöglichkeiten Rückstellen des Passworts 1 Drücken Sie HOME MENU. 2 „Grundeinstellungen“ wählen ( / , dann ENTER). 3 „Passwort“ wählen ( / , dann ENTER). 11 Deaktivieren des Passworts 1 Drücken Sie HOME MENU. 2 „Grundeinstellungen“ wählen ( / , dann ENTER). 3 „Passwort“ wählen ( / , dann ENTER). • Die Passwort-Eingabeanzeige erscheint. Geben Sie Ihr vierstelliges Passwort mit den Tasten 0 – 9 ein. • Die Passwort-Eingabeanzeige erscheint.
12 Einsatz externer Geräte Das Plasma Display-System bietet Eignung für den Anschluss einer breiten Palette an externen Geräten wie Decoder, Videorecorder, DVD-Spieler, Computer, Spielekonsolen und Camcorder. Zum Betrachten des Bilds einer externen Signalquelle wählen Sie mit den INPUTTasten an der Fernbedienung (Seite 14) oder der INPUT-Taste am Plasma Display den entsprechenden Eingang.
Einsatz externer Geräte 12 Verwendung des HDMI-Eingangs INPUT 3 umfasst HDMI-Kontakte, denen digitale Audio- und Videosignale zugeführt werden können. Zur Verwendung aktivieren Sie den HDMI-Anschluss und geben die Typen der Audio- und Videosignale an, die von der angeschlossenen Ausrüstung zu erwarten sind. Bezüglich Signaltypen siehe Bedienungsanleitung für das entsprechende angeschlossene Gerät.
12 Einsatz externer Geräte Media-Receiver (Rückseite) Gebrauch von i/o Link.A DIGITAL OUT OPTICAL ANT (DIGITAL) Dieses System ist mit drei charakteristischen i/o Link.AFunktionen zur Verknüpfung des Media-Receivers mit anderen Audio/Video-Signalquellen ausgestattet. SERVICE ONLY OUT CONTROL IN OUT IN COMMON INTERFACE SUB WOOFER OUTPUT INPUT 1 INPUT 2 COMPONENT VIDEO Y PB PR i / o link.
Einsatz externer Geräte 12 Wiedergabe von Spielekonsole oder Camcorder Wiedergabe über angeschlossene Audio-Geräte Anschließen einer Spielekonsole oder eines Camcorders Anschließen von Audio-Geräten Zum Anschluss einer Spielekonsole, eines Camcorders oder eines anderen Audio/Video-Geräts verwenden Sie INPUT 4. Durch den Anschluss von Audio-Geräten wie eines AVReceivers oder eines Subwoofers können Sie die Klangwiedergabe in neue Dimensionen führen.
12 Einsatz externer Geräte Anschließen von Steuerkabeln Verbinden Sie den Media-Receiver und andere PIONEER-Geräte mit dem Logo mit Steuerkabeln. Derartig angeschlossene Geräte können dann über Steuersignale von deren Fernbedienungen zum Fernbedienungssensor am MediaReceiver bedient werden. Nach Belegung der CONTROL IN-Anschlüsse nehmen die Fernbedienungssensoren der angeschlossenen Geräte keine Steuersignale von ihren Fernbedienungen mehr auf.
Einsatz externer Geräte 12 Computer-Kompatibilitätstabelle Auflösung 720 × 400 Frequenz 70 Hz 640 × 480 60 Hz 65 Hz Anmerkung Macintosh 13" (67 Hz) • Je nach Typ Ihres PC CARD-Adapters oder der verwendeten Speicherkarte können Bilder unter Umständen nicht angezeigt werden. • Mit einem Personal Computer oder anderer Ausrüstung modifizierte oder bearbeitete Bilder können unter Umständen nicht angezeigt werden. 72 Hz Einsetzen einer Speicherkarte 1 Öffnen Sie die Frontklappe am Media-Receiver.
12 Einsatz externer Geräte Home Gallery-Startanzeige Abrufen einer Miniaturansichtanzeige Wenn Sie eine Speicherkarte einsetzen, während das System eingeschaltet ist, erscheint die folgende Home GalleryStartanzeige automatisch. Wenn ein Ordner in der Home Gallery-Startanzeige gewählt wird, werden die Bilder im Ordner in Miniaturansicht angezeigt. 2 Home Gallery 1 3 Miniatur 4 1/25 Bildinformation 011.JPG 011. JPG 018. JPG 048. JPG 059. JPG 084. JPG DSC00086. JPG DSC00087. JPG DSC00088.
Einsatz externer Geräte 12 Starten einer Standard-Einzelbildanzeige Einstellungen der Dia-Show Bei Miniaturansichtanzeige heben Sie das gewünschte Bild mit / und / hervor und drücken dann ENTER. Die Miniaturansichtanzeige wird verlassen, und nur das gewählte Bild wird angezeigt. Drücken Sie bei Miniatursichtanzeige Grün, um die DiaShow-Einstellanzeige abzurufen. 1 „Anzeigemodus“ wählen ( / ). 2 „Normal“ oder „Voll“ wählen ( / ).
12 Einsatz externer Geräte Starten der Dia-Show Starten Sie Ihre Dia-Show, nachdem Sie diese entsprechend vorbereitet haben. 1 Zum Starten der Dia-Show drücken Sie die rote Taste 2 bei Dia-Show-Einstellanzeige oder bei einer Miniaturansichtanzeige. • Wenn Sie „Auto“ für „Wiedergabe-Modus“ gewählt haben, werden die Bilder automatisch zum vorgegebenen Intervall gewechselt. • Wenn Sie „Manuell“ für „Wiedergabe-Modus“ gewählt haben, drücken Sie P+/P–, um Bilder zu wechseln.
Videotext-Funktionen Was ist Videotext? 13 Grundlegender Videotext-Betrieb Videotext bezeichnet von den Sendeanstalten zur Information und Unterhaltung ausgestrahlte Textdaten, die mit entsprechend ausgestatteten Fernsehgeräten empfangbar sind. Das Plasma Display-System empfängt Videotext von Fernseh-Sendern und decodiert die Daten für die Betrachtung in Form grafischer Seiten. Zum VideotextAngebot zählen u.a. Nachrichten, Wetterberichte, Sport- und Börsennachrichten sowie Programmvorschauen.
13 Videotext-Funktionen Anzeigen von Unterseiten Anzeigen von Untertitelseiten Sie können mehrere Unterseiten wie empfangen anzeigen. Sie können mehrere Untertitel wie empfangen anzeigen. 1 [ drücken, um den Untertitel anzuzeigen. Unterseiten-Bildschirm 203 TEXT P- P+ 01 203 Life 02 03 01:44:37 2 • Die Untertitel werden mit den vom Sender empfangenen Daten aktualisiert. Erneut [ drücken, um die nächste verfügbare Untertitelseite aufzurufen.
Anhang 14 Fehlerdiagnose Lösungsansätze • Vergewissern Sie sich, dass Plasma Display und Media-Receiver korrekt angeschlossen sind. (Siehe Seite 17.) • Ist das Netzkabel abgetrennt? (Siehe Seite 20.) • Ist der Hauptnetzschalter eingeschaltet? (Siehe Seite 21.) • Prüfen Sie, ob Sie Tasten 0 – 9 an der Fernbedienung betätigt haben. (Siehe Seite 21.) • Falls die Anzeige am System rot aufleuchtet, drücken Sie 0 – 9. • Grüne und rote Rechtecke erscheinen abwechselnd auf dem Bildschirm.
14 Anhang Code SD04 Meldung Es wird ausgeschaltet. Interne Temperatur ist zu hoch. Temperatur rund um PDP überprüfen. Prüfen Prüfen Sie auf hohe Temperatur um das Plasma Display. SD05 Es wird ausgeschaltet. Interne Schutzschaltungen sind Prüfen Sie die Lautsprecherkabel-Verbindungen zwischen Plasma aktiviert. Gibt es einen Kurzschluss im Lautsprecherkabel? Display und den Lautsprechern. SD11 Es wird ausgeschaltet. Interne Temperatur ist zu hoch. Temperatur um den Media-Receiver kontrollieren.
Anhang 14 SCART-Anschlussbelegung Verschiedene Audio- und Video-Geräte können über die SCART-Anschlüsse mit dem System verbunden werden. 1 3 5 7 9 111315171921 2 4 6 8 101214161820 SCART (INPUT 1) Ausgang Audio, rechts Eingang Audio, rechts Ausgang Audio, links Gemeinsame Erde für Audio Erde für Blau Eingang Audio, links Eingang Blau 8. Audio-Video-Steuerung 9. Erde für Grün 10. Nicht belegt 11. Eingang Grün 12. Nicht belegt 13. Erde für Rot 14. Nicht belegt 15. Eingang Rot 16.
14 Anhang Technische Daten Gegenstand Anzahl Pixel 50”-Plasma Display, Modell: PDP-505PE 1280 × 768 Pixel 43”-Plasma Display, Modell: PDP-435PE 1024 × 768 Pixel Audio-Verstärker 13 W + 13 W (1 kHz, 10 %, 8 Ω) 13 W + 13 W (1 kHz, 10 %, 8 Ω) Surround System SRS/FOCUS/TruBass SRS/FOCUS/TruBass Stromversorgung 220–240 V Wechselstrom, 50/60 Hz, 352 W (Bereitschaft 0,4 W) 220–240 V Wechselstrom, 50/60 Hz, 295 W (Bereitschaft 0,4 W) Abmessungen 1270 (B) × 737 (H) × 93 (T) mm 1120 (B) × 652 (H) × 93
Anhang 14 Warenzeichen • FOCUS, WOW, SRS und das h® Symbol sind Warenzeichen von SRS Labs, Inc. Verwendung der FOCUS- und SRS-Technologie unter Lizenz von SRS Labs, Inc. • Bei diesem Produkt sind FontAvenue®-Fonts unter Lizenz von NEC Corporation integriert. FontAvenue ist ein eingetragenes Warenzeichen der NEC Corporation. • DDC ist ein eingetragenes Warenzeichen der Video Electronics Standards Association.
Printed on recycled paper. Imprimé sur du papier recyclé. Gedruckt auf Recyclingpapier. Published by Pioneer Corporation. Copyright © 2004 Pioneer Corporation. All rights reserved. PIONEER CORPORATION 4-1, Meguro 1-Chome, Meguro-ku, Tokyo 153-8654, Japan PIONEER ELECTRONICS (USA) INC. P.O. BOX 1540, Long Beach, California 90810-1540, U.S.A. TEL: (800) 421-1404 PIONEER ELECTRONICS OF CANADA, INC.