SBX-N700 SBX-N500 Network AV Speaker Bar System SBX-N700SB Network AV Speaker Bar SBX-N700SW Wireless Subwoofer For customers in Europe: Discover the benefits of registering your product online at http://www.pioneer.co.uk (or http://www.pioneer.eu) Download an electronic version of this manual from our website. Operating Instructions 72-MCS838-EU0B2_En.
Safety Information Thank you for buying this Pioneer product. Please read through these operating instructions so you will know how to operate your model properly. After you have finished reading the instructions, put them away in a safe place for future reference. CAUTION TO PREVENT THE RISK OF ELECTRIC SHOCK, DO NOT REMOVE COVER (OR BACK). NO USER-SERVICEABLE PARTS INSIDE. REFER SERVICING TO QUALIFIED SERVICE PERSONNEL. D3-4-2-1-1_B1_En WARNING This equipment is not waterproof.
Notice to users in Singapore This product complies with IDA standards. Complies with IDA Standards DB03074 [European model only] Information for users on collection and disposal of old equipment and used batteries Symbol for equipment These symbols on the products, packaging, and/or accompanying documents mean that used electrical and electronic products and batteries should not be mixed with general household waste.
For Wireless product European Union Notice PIONEER hereby declares that this/ these product(s) is/are in compliance with the essential requirements and other relevant provisions of Directive 1999/5/ EC, 2004/108/EC, 2006/95/EC and 2009/125/EC. RF Radiation Exposure Statement This equipment should be installed and operated with minimum distance 20 cm between the radiator and your body.
Table of Contents 1 Before you start 6 6 7 7 7 8 11 13 14 15 15 Introduction – Supplied accessories – Putting the batteries in the remote control – Software update – About operation of this unit from a mobile device – Playable files – Trademarks and licenses Remote control Front panel Rear panel Wireless Subwoofer (SBX-N700 only) 2 Connecting 16 16 18 19 20 20 20 21 21 22 22 24 26 26 26 Installing the AV Speaker Bar – Mounting the AV Speaker Bar to a Wall – Installing the Wireless Subwoofer (SBX-N700
En Before you start Chapter 1 Before you start 1 Before you start Introduction Power cord for wireless subwoofer (SBX-N700 only) • Warranty Supplied accessories • Easy Setup Guide • Software License Notice • Operating Instructions (this manual) WARNING Height adjustment foot x2 (L, R) Store small parts out of the reach of children and infants. If accidentally swallowed, contact a doctor immediately.
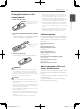
Before you start Putting the batteries in the remote control 1. Open the rear cover. 2. Insert the supplied dry batteries (AAA x 2). Insert the batteries as indicated by the +* marks in the battery compartment. Insert the negative end (*) first. 3. Close the rear cover. Close securely (a click should be heard). WARNING • Do not use or store batteries in direct sunlight or other excessively hot place, such as inside a car or near a heater.
En Before you start Playable files 1 Note You can play video, image, and audio files on USB devices or the devices on the network to which the unit is connected via LAN. Before you start Supported video file formats • Real RMVB (Only for ASEAN model) Real RMVB logo is a trademark or a registered trademark of RealNetworks, Inc. • DivX Plus HD DivX Certified® to play DivX® and DivX PlusTM HD (H.264/MKV) video up to 1080p HD including premium content.
Before you start 9 En Table of Playable Files Playable media Playable files (Extensions) USB devices1 Network File specifications 1 1 Sampling frequencies: Up to 48 kHz Bit rate: Up to 320 kbps Audio type: MPEG-1 Audio Layer 3 WMA*2 (.wma) 1 1 Sampling frequencies: Up to 48 kHz Bit rate: Up to 192 kbps Audio type: WMA version 9 AAC*3 (.m4a) 1 1 Sampling frequencies: Up to 96 kHz Bit rate: Up to 192 kbps Audio type: MPEG4-AAC WAV (.
En Before you start Playable media Playable files (Extensions) USB devices1 Network 1 Before you start RMVB*4 (.rm/.rmvb) 1 File specifications Maximum resolution: Up to 1280 x 720 Video: RealVideo® Audio: RealAudio®, AAC 1. This unit supports FAT16, FAT32 and NTFS file systems. 2. WMA Pro, WMA Losless and WMA Voice are not supported. 3. Apple lossless encoding is not supported. 4. Only for ASEAN model.
Before you start 11 En Trademarks and licenses 1 The terms HDMI and HDMI High-Definition Multimedia Interface, and the HDMI Logo are trademarks or registered trademarks of HDMI Licensing, LLC in the United States and other countries. Manufactured under license from Dolby Laboratories. Dolby and the double-D symbol are trademarks of Dolby Laboratories. Wi-Fi, Wi-Fi Protected Setup, Wi-Fi Direct, Miracast, WPA, WPA2 are marks of the Wi-Fi Alliance.
En Before you start 1 Before you start The Bluetooth® word mark and logos are registered trademarks owned by Bluetooth SIG, Inc. and any use of such marks by PIONEER CORPORATION is under license. Other trademarks and trade names are those of their respective owners. DivX®, DivX Certified®, DivX Plus™ HD and associated logos are trademarks of Rovi Corporation or its subsidiaries and are used under license. Real RMVB logo is a trademark or a registered trademark of RealNetworks, Inc.
Before you start Remote control 2 8 /b/c/d Used to select items and change settings. Also moves the cursor. 9 ENTER Used to execute the selected item, confirm a changed setting, etc. 10 SETUP Displays/closes the settings screen. 3 4 5 6 15 7 8, 9 16 10 11 Operation Buttons (page 27) d PLAY g STOP m REV e PAUSE n FWD o q/s p t/r 1 12 SOUND MENU (page 40) Switches to the sound settings. 13 DIMMER Each press changes the brightness of the unit’s display window and each indicator.
En Before you start Front panel 1 2 3 STANDBY/ON INPUT SELECT VOLUME 1 Before you start 4 5 6 DIALOG NIGHT PORTABLE IN 7 SURROUND 8 9 a b c d Wi-Fi Direct / Miracast BT TRANSMITTER 5V BT AUDIO 0.5A 1 u STANDBY/ON Turns the power of the unit on/off (standby mode). If the power does not turn off, operation will become possible if you press the u STANDBY/ON button for more than 5 seconds to reboot the unit.
En Connecting Chapter 2 Connecting 2 Connecting Before connecting the unit or changing the connections, be sure to turn off the power and disconnect the power cord from the outlet. Also, make sure you have finished connecting all of the power cords before connecting to the wall outlet. Installing the AV Speaker Bar Attaching the Height Adjustment Feet If you wish to adjust the height of the AV Speaker Bar attach the supplied height adjustment feet.
En Connecting Installing the Wireless Subwoofer (SBX-N700 Only) 2 CONNECT • The AV Speaker Bar and wireless subwoofer can be used at a distance of up to approximately 10 m from each other. This distance differs depending on the operating environment and operation at the distance of 10 m is not guaranteed. STANDBY • The reception state may become unstable if the AV Speaker Bar and wireless subwoofer are too close to each other.
En 2 Connecting Wireless network connection Wireless network setup Another connection option is to use an Access Point or a wireless router. The network configuration and connection method may vary depending on the equipment in use and the network environment. For the wireless network connection, the unit needs to be set up for network communication. This adjustment can be done from the [Initial Setup] menu. Adjust the [NETWORK] setting as follow.
Connecting 23 En How to enter the security code 1 Select the security code section using a/b/c/d and press ENTER to start the software keyboard. 2 Use a/b/c/d to select characters and items, and then press ENTER to input. 3 Select [abc], [ABC], or [!@#$] using a/b/ c/d to switch to lower case characters, upper case characters, or symbols. 2 Connecting 4 Finish entering the security code by selecting [Enter] using a/b/c/d and pressing ENTER. 7. Select [Next] using a/b/c/d and press ENTER.
En 2 Connecting WPS setup (Wi-Fi Protected Setup) When performing wireless settings set [Initial Setup] [Network] [Interface] to [Wireless]. WPS connection setting 1. Press SETUP. The Initial Setup screen is displayed. WPS is abbreviation of Wi-Fi Protected Setup. A standard established by the Wi-Fi Alliance industry group for a function allowing settings related to interconnection of WPS compatible wireless LAN devices and encryption to be made with simple operations.
Connecting Notes on Network Connection: • Many network connection problems during set up can often be fixed by re-setting the router or modem. After connecting the unit to the home network, quickly power off and/or disconnect the power cord of the home network router or cable modem. Then power on and/or connect the power cord again.
En Connecting USB device connection You can play movies, music, and photos stored on a USB device connected to this unit. About USB devices 2 The USB devices that can be connected to the unit are as shown below. Connecting • USB 2.0-compatible USB flash drive (capacity of 1 GB or greater, 2 GB or greater recommended) or HDD (capacity 2 TB or less) • File system: FAT16, FAT32 or NTFS Note • Devices formatted with a file system other than the above cannot be used.
Basic operations Chapter 3 Basic operations Outputting the TV Sound from the Unit The following describes the procedure up until listening to the sound of a TV connected to the unit. Caution • When a TV that is not compatible with ARC is connected to the optical digital audio input 1 terminal of the unit with an optical digital audio cable (supplied), press SETUP to display [Initial Setup] and then set [HDMI] d [TV Input] to [Optical IN-1].
En Basic operations About Files on the Network DLNA The input sources that can be played from Media Server are as shown below. • Files on the network servers (on the computers or components connected to the unit via LAN interface.) Note DLNA CERTIFIED® Audio Player • The Media Server allows you to play files on media servers connected to the same Local Area Network (LAN) as the unit.
Basic operations Content playable over a network • Even when encoded in a compatible format, some files may not play correctly. • Some functions may not be supported depending on the server type or version used. • Supported file formats vary by server. As such, files not supported by your server are not displayed on this unit. For more information check with the manufacturer of your server.
En Basic operations Playing Files on a USB Device or Media Server Forward and reverse scanning During playback, press mREV or nFWD. yy The scanning speed switches each time the button is pressed. The speed steps depend on the file (the speed is displayed on the TV screen). 3 To resume normal playback Basic operations Press d PLAY. Skipping content During playback, press o or p. yy When p is pressed, the playback skips ahead to the beginning of the next chapter/file.
Basic operations Using the TOOLS menu Various functions can be called out according to the unit’s operating status. 1. Display the TOOLS menu. Press TOOL during playback. 2. Select and set the item. Use a/b to select, then press ENTER. 31 En Playing repeatedly (Repeat Play) Use this procedure to play the currently playing chapter or file repeatedly. 1. To switch to this mode, select [Repeat] from the TOOLS menu during playback. Select either [Repeat One] or [Repeat All].
En Basic operations Playing specified range of chapter (file) in random order You can select from 2 types of random playback. 1. Select [Mode]. Use a/b to select, then press ENTER. 2. Select the playing mode. Use a/b to select, then press ENTER. Random play 3 The specified range of chapter (file) is played in random order. The same item may be played consecutively. Basic operations Shuffle play The specified range of chapter (file) is played in random order. Each item is played once.
Basic operations • The maximum number of files that can be displayed is 1000 files. • The file list may take some time to be displayed when it includes a large number of files. 33 En Use the unit’s Wi-Fi Direct™/Miracast™ functions Wi-Fi Direct and Miracast are functions for connecting your mobile devices to the unit without using a wireless LAN router. Miracast is a function that allows you to display the videos on a mobile device as is on a large screen TV.
En Basic operations Connect using mobile device’s Wi-Fi Direct function You can connect using a Wi-Fi Direct function, if your mobile device has one. Press Wi-Fi Direct to display the Wi-Fi Direct/ Miracast mode screen. 1. Turn on the Wi-Fi Direct setting on your mobile device. 3 Basic operations 2. Select the device name “DIRECT-xxSB” for the unit appearing on the TV screen from the list displayed on your mobile device. The “xx” indicates the identification character for the device.
Basic operations Connect to device not compatible with Wi-Fi Direct/ Miracast Press Wi-Fi Direct to display the Wi-Fi Direct/ Miracast mode screen, and select [Next]. 1. Under the “Wi-Fi Network Settings” on your mobile device, select the device name “DIRECT-xxSB” for this unit as displayed on the TV screen. The “xx” shown here stands for the unit’s identification code. Caution 2. Enter the password for the unit as shown on the TV screen into your mobile device. The connection is then complete.
En Basic operations Change SSID and password Change the SSID and password used to connect the unit and a mobile device. 3 Enjoying YouTube 1. Press STANDBY/ON and the power to the unit will come on. About YouTube • This unit supports the YouTube Leanback service. The YouTube Leanback service is only available in English for now. 2. Press Wi-Fi Direct to display the Wi-Fi Direct/Miracast mode screen. • Some YouTube videos cannot be played. Basic operations 3.
Basic operations Enjoying music on Bluetooth® devices Enjoy listening to music wirelessly from a Bluetooth device • Bluetooth devices: Mobile phone Note 4. Play music using your Bluetooth device For details on the playback procedure, see the operating instructions for your Bluetooth device. The following operations can be performed using the remote control of the unit. 1. Press BT AUDIO. First, “BT AUDIO” appears in the display window of the unit and then “READY” is displayed. 2.
En Basic operations Powering on the unit with the Bluetooth device 2. Set [Bluetooth] [BT Transmitter] to [On]. BT TRANSMITTER Indicator flashes. If you set Bluetooth Standby Mode to On, you can connect from a paired Bluetooth device when the unit is in standby mode. 4. Set the Bluetooth device to pairing mode. For how to set pairing mode, see the operating instructions for your Bluetooth device.
Basic operations Listening to the audio of the unit with a Bluetooth receiver 1. Switch a paired Bluetooth receiver to the connection standby state. For how to switch to the connection standby state, see the operating instructions for your Bluetooth device. 39 En the unit will result in poorer sound quality, and the connection will be cut off if the distance between the Bluetooth device and the unit exceeds the operating range.
En Basic operations Sound Press SOUND MENU on the remote control to display the sound select menu on the TV screen. Use a/b/c/d to make a selection, then press ENTER. Press SOUND MENU to exit the Sound Menu. Note • When YouTube is selected, the Sound menu cannot be displayed. Switch to other input source and then switch SOUND. • When file is stopped, the Sound menu cannot be displayed. Switch SOUND when file is being played. • In Options, the factory default settings are indicated in bold.
Basic operations PHASE CONTROL technology 41 En Note The unit uses PHASE CONTROL technology. • The PHASE CONTROL technology is always activated. PHASE CONTROL technology is a trademark assigned to products that provide matching of the phase characteristics from recording to playback based on the PHASE CONTROL technology concept developed by Pioneer. The phase indicates the time relationship between two sound waves.
Basic operations 43 En Note • For details about the location of the TV remote control sensor, see the operating instructions for your TV. • Select an installation location that best matches your usage environment. • Carefully wipe off any dust or objects at the affixing location. • This may not work for certain types of TVs. In this case, try changing the installation position of the unit. 3 Basic operations 72-MCS838-EU0B2_En.
En Control with HDMI function Chapter 4 Control with HDMI function Linked operation is possible by connecting the unit to a TV that supports the Control with HDMI function. The following linked operations are possible by connecting the unit using an HDMI cable to a TV that supports the Control with HDMI function.
Control with HDMI function 3. Use a/b to select [Control], and press ENTER. yy On This enables the Control with HDMI function. (Default setting) yy Off This disables the Control with HDMI function and disables linked operation. 4. Use a/b to select [HDMI Standby Mode], and press ENTER. yy On The Control with HDMI function can be used even when the unit is in standby mode. yy Off The Control with HDMI function cannot be used when the unit is in standby mode. (Default setting) 6. Press RETURN to exit.
En Advanced settings Advanced settings Operating the initial setup screen Changing the settings 1. When playback is stopped, display the Initial Setup screen. Press SETUP. Chapter 5 2. Select the item and change the setting. Use a/b/c/d to select, then press ENTER. Closing the Initial Setup screen Press SETUP or RETURN. 5 Advanced settings Note • The items that can be selected depend on the unit’s status. • In Options, the factory default settings are indicated in bold.
Advanced settings 47 Audio Output Setting Options Explanation DRC (Dynamic Range Control) Off Select this to output audio signals without using the DRC function. On Select this to adjust the range between the loudest and softest sounds (dynamic range) for playback at average volume. Use this when it is hard to hear dialog or when watching movies at midnight. En • This affects such audio signals as Dolby Digital. • Depending on the file, the effect may be weak.
En Advanced settings HDMI Setting Options Explanation TV Input TV(ARC) Select this to input the audio of a TV compatible with HDMI audio return channel (ARC) via HDMI. Also set [Control] to [On]. This also enables the input to be switched to [TV(ARC)] when TV on the remote control is pressed. Optical IN-1 Select this to input the audio of a TV to the OPT IN 1 terminal with an optical digital audio cable.
Advanced settings Options Setting Options Explanation Screen Saver Off The screen saver is not activated. 1 min The screen saver will be activated if no operation has been performed for more than one minute/two minutes/three minutes. Operating the remote control can deactivate the screen saver. 2 min 3 min Auto Power Off 49 En Off Select this if you do not want the power to turn off automatically. This is the default setting for ASEAN model only.
En 5 Advanced settings Adjusting the video Setting the IP address 1. Select and set [Display Setting] d [Video Adjust] d [Custom]. Use a/b to select, then press ENTER. 1. Select and set [Network] d [IP Address Setting] d [Next Screen]. Use a/b to select, then press ENTER. 2. Select the item and change the setting. Use a/b to select the item, then use c/d to change the setting. Once the setting is RETURN to close the completed, press settings screen. 2. Set IP address.
Advanced settings Setting the proxy server Only set the proxy server if so instructed by your Internet service provider. 1. Select and set [Network] d [Proxy Server] d [Next Screen]. Use a/b to select, then press ENTER. 2. Select and set [Use] or [Not use] at [Proxy Server]. Use c/d to change, then press b. yy Use – Select this when using a proxy server. yy Not use – Select this when not using a proxy server. If you have selected [Use], proceed to step 3. 3. Select and set Server Select Method.
En Advanced settings 3. Re-input the password. Press ENTER to launch the software keyboard, use a/b/c/d to select a four digit number, and press ENTER to input the selection. Select [OK] and press ENTER to confirm the password. yy To change the password, input the previously registered password, then input the new password. Note yy We recommend making a note of the password. yy If you have forgotten the password, reset the unit to the factory default setting, then register the password again (page 53).
Advanced settings Press SETUP. 3. Select and set [Options] d [Update] d [Network] d Start. Use a/b/c/d to select, then press ENTER. 4. Updating starts. Press ENTER. yy Software updating may take a certain period of time. yy When updating is completed, the unit restarts automatically. Updating using a USB flash drive Note En Restoring all the settings to the factory default settings 1. Check that the unit’s power is turned on. 2. When playback is stopped, display the Initial Setup screen. Press SETUP.
En Troubleshooting Chapter 6 Troubleshooting Incorrect operation is often mistaken for trouble or malfunction. If you think that there is something wrong with this component, check the points below. Sometimes the trouble may lie in another component. Inspect the other components and electrical appliances being used. If the trouble cannot be rectified even after checking the points below, ask your nearest Pioneer authorized service center or your dealer to carry out repair work.
Troubleshooting Problem No sound is output from the wireless subwoofer. (SBX-N700 only) The audio from the AV Speaker Bar and the audio from the wireless subwoofer sound out of sync. (SBX-N700 only) 55 En Check Remedy Is the CONNECT indicator of yyWhen the audio signal being played has no bass component, no the wireless subwoofer lit blue? sound will come from the subwoofer. yyAdjust the settings to match your environment from [Speaker Setup] of [Audio Output].
En Troubleshooting Problem Check Is [Control] set to [On] on the connected device? Sound of the TV connected via HDMI cannot be heard with the unit. Remedy Set [Control] to [On] on the connected device. The Control with HDMI function operates when [Control] is set to [On] for all devices connected to the HDMI OUT terminal. Once connections and settings of all the devices are finished, be sure to check that the unit’s picture is output to the TV.
Troubleshooting Problem En Remedy The automatic configuration process takes time. Please wait. Install Windows Media Player 11, Windows Media Player 12, or DLNAcompatible digital media servers on your computer. Play back audio files recorded in MP3, WAV (LPCM only), MPEG-4 AAC, or WMA. Note that some audio files recorded in these formats may not be played back on this unit. Audio files recorded in MPEG-4 AAC cannot be played back on Windows Media Player 11. Try using another server.
En Troubleshooting Problem Check Are multiple wireless devices connected to the wireless LAN router? Are the connection settings between the unit and the wireless LAN router etc. set up correctly? Do the IP address settings for the unit and the wireless LAN router etc. (including DHCP settings) match? Is the access point set to conceal the SSID? Cannot connect with the Wi-Fi Direct/Miracast function.
Troubleshooting 59 En Bluetooth Problem The Bluetooth wireless technology device cannnot be connected. Check Are objects that emit electromagnetic waves in the 2.
En Troubleshooting Problem Check Settings I have made have yyHave you disconnected the been cleared. power cord while the unit’s power was on? yyHas there been a power failure? USB (external storage) Is the USB device properly device does not work with connected? this unit properly.
Appendix 61 En Chapter 7 Appendix Specifications General Power requirements AC 110 V to 240 V, 50 Hz/60 Hz (ASEAN model) AC 220 V to 240 V, 50 Hz/60 Hz (Other models) AV Speaker Bar (same for SBX-N700/SBX-N500) 45 W Power consumption (In Standby mode: Less than 0.5 W) Wireless subwoofer (SBX-N700 only) 32 W (In Standby mode: Less than 0.
En Appendix System Signal system Standard PAL(50 fps)/NTSC(60 fps) color TV system LAN port Ethernet jack×1, 10BASE-T/100BASE-TX IR repeater output 3.5 mm stereo jack Wireless LAN Compliant standards IEEE 802.11a/b/g/n Security WEP, WPA, WPA2 2,412 GHz to 2,472 GHz, 5,180 GHz to 5,320 GHz (ASEAN model) Frequency 2,412 GHz to 2,472 GHz, 5,745 GHz to 5,825 GHz (Other models) Channel 1 to 13, 149 to 165 (ASEAN model) Channels Channel 1 to 13, 36 to 64 (Other models) Data rate* 802.11n: Max.
Appendix Maintenance Handling the unit When shipping the unit Please save the original shipping carton and packing materials. If you need to ship the unit, for maximum protection, re-pack the unit as it was originally packed at the factory. Keeping the exterior surfaces clean • Do not use volatile liquids such as insecticide spray near the unit. • Wiping with strong pressure may damage the surface. • Do not leave rubber or plastic products in contact with the unit for a long period of time.
En Appendix 7 Appendix 72-MCS838-EU0B2_En.
Appendix 65 En 7 Appendix 72-MCS838-EU0B2_En.
En Appendix Declaration of Conformity with regard to the R&TTE Directive 1999/5/EC Manufacturer: PIONEER CORPORATION 1-1, Shin-ogura, Saiwai-ku, Kawasaki-shi, Kanagawa 212-0031, Japan EU Representative’s: Pioneer Europe NV Haven 1087, Keetberglaan 1, 9120 Melsele, Belgium http://www.pioneer.eu Indoor use only [*] SBX-N700, SBX-N500 English: Dansk: Hereby, Pioneer, declares that this [*] is in compliance with the essential requirements and other relevant provisions of Directive 1999/5/EC.
Appendix 67 En Português: Pioneer declara que este [*] está conforme com os requisitos essenciais e outras disposições da Directiva 1999/5/CE. Pioneer izjavlja, da je ta [*] v skladu z bistvenimi zahtevami in ostalimi relevantnimi določili direktive 1999/5/ES.