PD370/PD420/PD470/PD520 Home Theater-Spezialmonitor Benutzerhandbuch www.PlanarHomeTheater.
Planar Systems, Inc. Corporate Headquarters 1195 NW Compton Drive Beaverton, OR 97006-1992 Planar Customer Support Telefon: USA: 1-866-PLANAR1 (866) 752-6271 Außerhalb USA: (503) 748-5799 E-Mail: PlanarSupport@planar.com Technische Online-Bibliothek: http://www.planar.
Vorwort Über dieses Benutzerhandbuch Dieses Benutzerhandbuch betrifft das PD370/PD420/PD470/PD520 Home Theater. Die Angaben in diesem Handbuch wurden sorgfältig überprüft, dennoch kann keine Gewähr für ihre inhaltliche Richtigkeit übernommen werden. Wir behalten uns das Recht vor, die Angaben in den vorliegenden Unterlagen ohne vorherige Mitteilung zu ändern. Urheberrecht Copyright 2007 Die vorliegenden Unterlagen enthalten urheberrechtlich geschützte Informationen. Alle Rechte vorbehalten.
Wichtige Recyclinghinweise Die Lampe/n (im Gerät) enthalten Quecksilber. Das Produkt kann sonstigen Elektronikabfall enthalten, der bei nicht fachgerechter Entsorgung gefährlich sein kann. Recycling oder Entsorgung ausschließlich gemäß den kommunalen, landesoder bundesrechtlichen Vorschriften. Weitere Informationen erhalten Sie beim Elektronikfachverband unter WWW.EIAE.ORG Zur Entsorgung der Lampen siehe WWW.LAMPRECYCLE.ORG Symbolverzeichnis Entsorgung: Elektronikabfall nicht in den Haushaltmüll geben.
Inhaltsverzeichnis Wichtige Sicherheitshinweise .................................................................................................................... 5 Übersicht .................................................................................................................................................... 7 Merkmale ........................................................................................................................................... 7 Packungsinhalt ..................
Wichtige Sicherheitshinweise Dieses Produkt ist für den Betrieb innerhalb bestimmter Spezifikationsvorgaben und Grenzwerte ausgelegt. Bei Missachtung droht Stromschlag oder Brandgefahr. Um eine Beschädigung des Produktes zu vermeiden, sollten Sie die nachfolgenden Regeln beherzigen, wann immer Sie das Produkt installieren, benutzen oder warten. Lesen Sie die folgenden Sicherheitshinweise durch, ehe Sie den Monitor benutzen.
gebrauchen wollen vom Netz. Dies schützt den Monitor vor Beschädigung durch Spannungsspitzen. Versuchen Sie niemals, das Produkt selbst zu reparieren oder zu warten. Wenn das Gerät geöffnet bzw. die Rückplatte entfernt wird, werden Teile, die unter gefährlich hoher Spannung stehen, freigelegt und es bestehen Stromschlag- und andere Verletzungsgefahren.
Übersicht PD370/PD420/PD470/PD520 sind native 1920 x 1080 HDTV-Monitore mit einer Anzeigeleistung von echt 16,7 M Farben (8-Bit/Farbe). . Merkmale - Hohe Helligkeit - Dynamisches Kontrastverhältnis (nicht PD370) - Schnelle Reaktionszeit - Hohe Farbsättigung - Max.
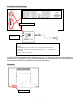
Bezeichnung der Bedienelemente und Anschlüsse Vorderseite LED-Lampe und IR-Sensor vorne Bedienfeld Anschlüsse Um 90 Grad gedreht 8
Anschlüsse (Fortsetzung) Um 90 Grad gedreht │ - Netz ein ○ - Netz aus Netzschalter – Schalter und Netzanschluss Netzkabel Netzkabel Das Netzkabel dient dazu, den Monitor an einer normalen Haushaltssteckdose anzuschließen. Stecken Sie das Kabel am Netzanschluss an. „“│“ - eingeschaltet, „“○“ ausgeschaltet. Eingang: 100-240 V~ 3A 50/60 Hz Hinweis: PD520-Signalanschlüsse befinden sich nur auf der linken Seite (von der Rückseite des Monitors aus gesehen, siehe nächste Abbildung).
Installation Aufbau Hinweise • Den Monitor und eventuell angeschlossene Geräte müssen abgeschaltet sein, ehe der Monitor angeschlossen wird. Nach Herstellung aller Verbindungen schalten Sie zuerst den Monitor an, ehe Sie die angeschlossenen Geräte einschalten. Bei Anschluss eines Computers darf der Computer erst als letztes Gerät angeschaltet werden, wenn alle Verbindungen hergestellt sind. • Lesen Sie die Bedienungsanleitung Ihrer Videoquellgeräte, ehe Sie die Verbindungen herstellen.
Grundlegende Bedienung Die benötigten externen Geräte an den Monitor anschließen, ehe Sie die folgenden Schritte durchführen. Info Englisch ist als Bildschirmsprache voreingestellt. Um die OSD-Sprache zu ändern, siehe Abschnitt E der OSD-Menüfunktion auf Seite 19. A. Anschluss des Netzkabels Das Netzkabel wird in die Netzkabelbuchse an der Rückseite des Monitors gesteckt. Stecken Sie den Netzstecker in die Netzsteckdose und schalten Sie den Netzschalter auf “│”, um den Monitor einzuschalten bzw.
Fernbedienung BEZEICHNUNG On OFF c e f d ENTER MENU MUTE Volume + Volume – EXIT MODE AUTO INFO PIP SWAP 16:9 4:3 Letterbox S-Video AV1 AV2 Video 1 Video 2 HDMI 1 HDMI 2 PC Freeze FUNKTION Monitor einschalten Monitor ausschalten Nach oben Nach links Nach rechts Nach unten Eingabe OSD-Menü öffnen Stummschaltung Lautstärke aufdrehen Lautstärke reduzieren Beenden Auswahl des Anzeigemodus (Sport, Kino, Spiel, Lebendig, Benutzer) Nächsten aktiven Port suchen Status anzeigen Auswahl der PIP/PBP-Funktion Wechseln
Bildschirm (OSD)-Menü Video-Modus Hauptmenü Untermenü Untergeordnetes Untermenü Beschreibung Schema Auswahl des Anzeigemodus Benutzer, Sport, Spiel, Kino, Lebendig Helligkeit Einstellung der Bildschirmhelligkeit 0~100 Kontrast Einstellung des Bildschirmkontrastes 0~100 Sättigung Einstellung der Bildsättigung 0~100 Farbton Einstellung des Bildfarbtons 0~100 Schärfe Einstellung der Bildschirmschärfe 0~24 Reset Rücksetzen auf Standardwerte Ja, Nein Einstellung der Gammastufe , 1.8, 2.
PIP-Modus Auswahl der PIP-Modus Aus, Großes PIP, Kleines PIP, Seite-an-Seite PIP-Position Einstellung der PIP-Position Unten rechts, Oben links, Oben rechts, Unten links, Benutzer PIP-Anzeigeformat Menüeinstellungen Uhrzeit/Timer 16:9, 4:3, Letterbox Leerbildschirm Einstellung der Hintergrundfarbe Schwarz, blau Front-LED Auswahl der Funktion der Front-LED Ein, Aus Werkseinstellung Rücksetzen auf die Werkseinstellungen Ja, Nein Menü-Zoom Einstellung der Menügröße Ein, Aus Transparenz E
Audioeinstellungen Takt Einstellung der Taktposition Takte/Leitung Einstellung der Takte/Leitung Stereo/SAP Auswahl des Audiomodus Stereo, Mono, SAP Bass Regulierung der Basslautstärke -10~10 Höhen Regulierung der Höhenlautstärke -10~10 Balance Einstellung der Bildschirmbalance -10~10 Reset Rücksetzen auf Standardwerte Autom.
Bedienung des OSD Hierarchie des OSD-Menüs (PC-Modus) A. Bildeinstellung Seitlich am Controller: 1. 2. 3. 4. 5. 6. „MENU/EXIT“ drücken, um die Option „Bildeinstellung“ zu öffnen. „Z“ öffnet das Unterpunkt-Menü (Helligkeit, Kontrast….). Mit „ “ oder „ “ das gewünschte Objekt anwählen. „Z“ öffnet den Unterpunkt, den Sie einstellen möchten. Den gewünschten Wert mit „Z“ oder „Y“ einstellen. „MENU/EXIT“ beendet die Einstellung und speichert Ihre Änderungen. An der Fernbedienung: 1. 2. 3. 4. 5. 6.
C. Audioeinstellung Seitlich am Controller: 1. 2. 3. 4. 5. 6. „MENU/EXIT“ drücken, um die Option „Audioeinstellungen“ zu öffnen. „ Z“ öffnet das Unterpunkt-Menü. Mit „ “ oder „ “ das gewünschte Objekt anwählen. „Z“ öffnet den Unterpunkt, den Sie einstellen möchten. Den gewünschten Wert mit „Z“ oder „Y“ einstellen. „MENU/EXIT“ beendet die Einstellung und speichert Ihre Änderungen. An der Fernbedienung: 1. 2. 3. 4. 5. 6. „MENU“ drücken, um die Option „Audioeinstellungen“ zu öffnen.
6. „EXIT“ beendet die Einstellung und speichert Ihre Änderungen. F. Uhrzeit/Timer-Einstellung Seitlich am Controller: 1. 2. 3. 4. 5. 6. „MENU/EXIT“ drücken, um die Option „Uhrzeit/Timer“ zu öffnen. „Z“ öffnet das Unterpunkt-Menü. Mit „ “ oder „ “ das gewünschte Objekt anwählen. „Z“ öffnet den Unterpunkt, den Sie einstellen möchten. Den gewünschten Wert mit „Z“ oder „Y“ einstellen. „MENU/EXIT“ beendet die Einstellung und speichert Ihre Änderungen. An der Fernbedienung: 1. 2. 3. 4. 5. 6.
B. Anzeigeeinstellung Seitlich am Controller: 1. 2. 3. 4. 5. 6. „MENU/EXIT“ drücken, um die Option „Anzeigeeinstellungen“ zu öffnen. „Z“ öffnet das Unterpunkt-Menü. Mit „ “ oder „ “ das gewünschte Objekt anwählen. „Z“ öffnet den Unterpunkt, den Sie einstellen möchten. Den gewünschten Wert mit „Z“ oder „Y“ einstellen. „MENU/EXIT“ beendet die Einstellung und speichert Ihre Änderungen. An der Fernbedienung: 1. 2. 3. 4. 5. 6. „MENU“ drücken, um die Option „Anzeigeeinstellungen“ zu öffnen.
6. „EXIT“ beendet die Einstellung und speichert Ihre Änderungen. E. Menüeinstellung Seitlich am Controller: 1. 2. 3. 4. 5. 6. „MENU/EXIT“ drücken, um die Option „Menüeinstellungen“ zu öffnen. „Z“ öffnet das Unterpunkt-Menü. Mit „ “ oder „ “ das gewünschte Objekt anwählen. „Z“ öffnet den Unterpunkt, den Sie einstellen möchten. Den gewünschten Wert mit „Z“ oder „Y“ einstellen. „MENU/EXIT“ beendet die Einstellung und speichert Ihre Änderungen. An der Fernbedienung: 1. 2. 3. 4. 5. 6.
Fehlerbehebung Prüfen Sie, ob sich der aufgetretene Fehler anhand der nachstehenden Tabelle beseitigen lässt, ehe Sie den Kundendienst rufen: Kein Bild Ist das Netzkabel des Monitors angeschlossen? Leuchtet die Netzanzeige gelb? Ungewöhnliche Bildschirmfarbe Ist Bildschirm einfarbig oder wechselt die Farbe? Sind auf dem Bildschirm schwarze Punkte zu sehen? Gibt es auf dem Bildschirm unscharfe Bereiche? Sonstiges Der Bildschirm flimmert. Das Bild ist dunkel.
Technische Daten Bezeichnung Modell-Nr. Auflösung Helligkeit LCD-Panel Kontrastverhältnis Dynamisches Kontrastverhältnis Reaktionszeit Anzeigeformat Lebensdauer Hintergrundbeleuchtung Technische Daten PD370 PD420 1920 x 1080 1920 x 1080 Grafik Eingangsanschluss Abtastrate Horizontal Energieverwaltung Bildschirmsprache Spannungseingang Stromversorgu Minimum-Maximum ng Modell-Nr.
DCC Funktion Plug & Play DDC 2B kompatibel - OSD-Tasten 7 Tasten Taste mm Zoll - Wandbefestigung VESA-Standard 200 x 200 Wandbefestigung RS232 7,87*7,87 2-Wege-Steuerung, Datenaustausch, Firmware-Upgrade Hinweis 1: 2 HDMI-Eingänge nicht gleichzeitig mit PIP/PBP. Hinweis 2: Video1 + AV1 = SCART (SCART ist in Europa üblich.
Konformitätserklärung Der Hersteller: Planar Systems, Inc.
Planar Systems, Inc. Corporate Headquarters 1195 NW Compton Drive Beaverton, OR 97006-1992 Planar Customer Support Telefon: USA: 1-866-PLANAR1 (866) 752-6271 Außerhalb USA: (503) 748-5799 E-Mail: PlanarSupport@planar.com Technische Online-Bibliothek: http://www.planar.com/support Geschäftszeiten: M-F, 8 – 20 Uhr ET, 12 – 24 Uhr GMT © 2007 Planar Systems, Inc. Planar ist ein eingetragenes Markenzeichen der Planar System, Inc.