
User's Manual


6
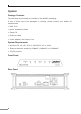
System Installation
Boot up
1. Connect the network cable to LAN port on the rear of NAS-7100. Connect the
others end to your hub or switch.
2. Connect the supplied power adapter to a power outlet and plug the power cord
into NAS-7100’s power input on the rear panel.
3. Power on.
Locate the NAS-7100’s power switch on the NAS-7100 real panel. Press it once
to power on the NAS
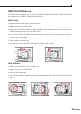
4. The NAS-7100 self-test.
The NAS-7100 will run a brief self-test. During the self-test, all of NAS-7100’s
LED will be illuminated or ashing.
5. Booting up.
When the self-test is complete, boot up will start. The Ready LED will blink con
-
tinuously, and the LAN LED will blink occasionally. Boot up should take approxi-
mately 1-3 minutes.
6. Boot up completed.
When the Ready LED stops blinking, and remains on, boot up is complete. If the
Status (Orange) LED stays on, or if the NAS-7100 repeatedly beeps, there is
a hardware problem. Consult the Troubleshooting section of the User Guide for
possible solutions.
Shutdown
To shutdown the NAS-7100, press the power switch to start the shutdown
sequence. Wait for all LEDs to turn off.
Removing a USB device
1. Press the USB eject button (for USB 1 or 2) on the rear panel.
2. Wait for the "USB" LED turn off.
3. Remove the USB device.
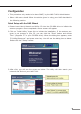
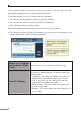
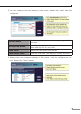
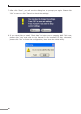
You can also use the Windows utility installed from the CD-ROM:
1. Select “Safely Remove USB Device"
2. Select the desired NAS and USB device, and click the "Eject" button.
3. Wait for the message telling you it is safe to remove the USB device.
Note
If the USB device is not removed, it will not be re-connected. You
must remove and re-insert the USB device to have it re-connected.