
User's Manual
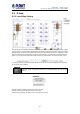
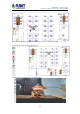
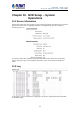
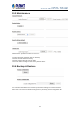
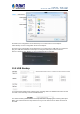

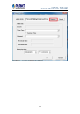
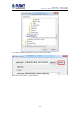
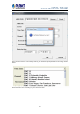
Table Of Contents
- Chapter 1. Product Introduction
- Chapter 2. Hardware Interface
- Chapter 3. Connecting to the NVR
- Chapter 4. Web-based Management
- Chapter 5. Playback Viewing
- Chapter 6. Event Viewing
- Chapter 7. NVR Setup – Device Configuration
- Chapter 8. NVR Setup -- Channel Configuration
- Chapter 9. NVR Setup -- Event Configuration
- Chapter 10. NVR Setup -- System Operations
- Chapter 11. NVR Local Interface
- 11.1 System Configuration
- 11.1.1 Service
- 11.1.2 Display
- 11.1.3 Network
- 11.1.4 User Account -- User setting
- 11.1.5 User Account -- User Group Setting
- 11.1.6 Disk
- 11.1.7 Channel Configurations -- Adding a Camera (Automatic Search)
- 11.1.8 Channel Configurations -- Adding a Camera (Add manually)
- 11.1.9 E-map
- 11.1.10 Recording
- 11.1.11 Event Setting
- 11.1.12 System Log
- 11.1.13 Maintenance
- 11.1.14 USB Backup
- 11.1 System Configuration
- Appendix A: Ping IP Address
- Appendix B: Planet DDNS Application
- Appendix C: Configuring Port Forwarding Manually

NVR-820 / NVR-1620
Network Video Recorder with HDMI
61
9.3 E-map
9.3.1 Local Map Setting
E-map monitor is a function that alerts users whenever there is an event triggered (e.g. motion
detected) from a camera with a geographical perspective. With this function, users can quickly
identify which camera has detected an unusual event and where this event is happening. This
function works by incorporating the event detection function as well as the recording function,
which, as a result, helps users take all the necessary actions when an unusual event occurs.
To replace the map, click the “Browse” button to locate the new map image file from the local
PC and then click “Upload”.
Only JPG, PNG, and GIF file formats are supported with file size under
500KB.
Add all channels: display all camera icons on E-map
Reset E-map: remove all camera icons on E-map
Click CH ID to display camera icon of this camera on E-map