User’s Manual 802.11a/n Wireless Outdoor AP WNAP-7206 www.PLANET.com.
Copyright Copyright 2013 by PLANET Technology Corp. All rights reserved. No part of this publication may be reproduced, transmitted, transcribed, stored in a retrieval system, or translated into any language or computer language, in any form or by any means, electronic, mechanical, magnetic, optical, chemical, manual or otherwise, without the prior written permission of PLANET.
CE Mark Warning This is a Class B product. In a domestic environment, this product may cause radio interference, in which case the user may be required to take adequate measures. Note: Limited by local law regulations, version for North America does not have region selection option. Only channel 149~165 is available for American users. it is fixed at our factory before the device is shipped. Channel - This field determines which operating frequency will be used.
Safety This equipment is designed with the utmost care for the safety of those who install and use it. However, special attention must be paid to the dangers of electric shock and static electricity when working with electrical equipment. All guidelines of this and of the computer manufacture must therefore be allowed at all times to ensure the safe use of the equipment.
CONTENTS Chapter 1.Product Introduction........................................................................................................... 1 1.1 Package Contents ............................................................................................................... 1 1.2 Product Description............................................................................................................ 2 1.3 Product Features.....................................................................
5.5.3 5.6 Wireless..............................................................................................................................53 5.6.1 5.8 5.9 Wireless Settings ....................................................................................................53 5.6.1.1. Access Point Mode ........................................................................................................ 53 5.6.1.2. Multi-SSID Mode...............................................................
5.11.1 Rule....................................................................................................................... 119 5.11.2 Host.......................................................................................................................121 5.11.3 Target ....................................................................................................................122 5.11.4 Schedule..............................................................................................
A.16 What is WPA2?.................................................................................................................151 A.17 What is 802.1x Authentication?......................................................................................151 A.18 What is Temporal Key Integrity Protocol (TKIP)?.........................................................151 A.19 What is Advanced Encryption Standard (AES)?...........................................................151 A.
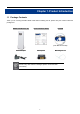
User Manual of WNAP-7206 Chapter 1. Product Introduction 1.1 Package Contents Thank you for choosing PLANET WNAP-7206. Before installing the AP, please verify the contents inside the package box. WNAP-7206 Wireless AP Quick Installation Guide CD-ROM (User Manual included) Power Adapter PoE Injector Mounting Tie x 2 If there is any item missed or damaged, please contact the seller immediately.
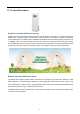
User Manual of WNAP-7206 1.2 Product Description High Power Outdoor Wireless Coverage PLANET Technology introduces the latest high power outdoor wireless LAN solution - the outdoor wireless AP, WNAP-7206. It provides higher transmit power, better performance, and widely coverage than standard outdoor wireless AP. The WNAP-7206 is compatible with IEEE 802.11a/n standard supporting the data rate up to 150Mbps in 802.11n mode.
User Manual of WNAP-7206 Advanced Security and Management In aspect of security, besides 64/128/152-bit WEP encryption, the WNAP-7206 integrates WPA / WPA2, WPA-PSK / WPA2-PSK to secure and protect your wireless LAN. The wireless MAC filtering and SSID broadcast control consolidate the wireless network security and prevent unauthorized wireless connection. To fulfill enterprise and various applications demand, the WNAP-7206 enhances security and management features such as multiple SSID support.
User Manual of WNAP-7206 1.3 Product Features Industrial Compliant Wireless LAN & LAN Compliant with IEEE 802.11n wireless technology capable of up to 150Mbps data rate Backward compatible with 802.
User Manual of WNAP-7206 1.4 Product Specification Product WNAP-7206 150Mbps 802.11a/n Wireless Outdoor Access Point Hardware IEEE 802.11a/n Standard compliance IEEE 802.3 IEEE 802.3u IEEE 802.3x Memory 32 Mbytes DDR SDRAM 4 Mbytes Flash Button Reset Button x 1 LED Provides 4-Level signal LED indicator PoE Passive PoE (Up to 60 meters) Wireless IEEE 802.
User Manual of WNAP-7206 RF Output Power Receiver Sensitivity 802.11a: 27 ± 1dBm 802.11n: 24 ± 1dBm 802.11a: 802.11n: 54M: -77dBm 150M: -73dBm 48M: -79dBm 121.5M: -76dBm 36M: -83dBm 108M: -77dBm 24M: -86dBm 81M: -81dBm 18M: -91dBm 54M: -84dBm 12M: -92dBm 40.5M: -88dBm 9M: -93dBm 27M: -91dBm 6M: -94dBm 13.
User Manual of WNAP-7206 NAT firewall with SPI (Stateful Packet Inspection) NAT with ALG (Application Layer Gateway) Firewall Built-in NAT server supporting Port Triggering, Virtual Server, and DMZ Built-in firewall with IP address / MAC / DNS filtering Supports ICMP-FLOOD, UDP-FLOOD, TCP-SYN-FLOOD filter, DoS protection AP Client WDS PTP Wireless Mode WDS PTMP WDS Repeater (AP+WDS) Universal Repeater (AP+Client) Channel Width 20MHz / 40MHz Wireless Isolation Enable to isolate each connec
User Manual of WNAP-7206 Chapter 2. Hardware Installation Please follow the instructions below to connect WNAP-7206 to the existing network devices and your computers. 2.1 Hardware Description Dimension: 250 x 85 x 60.5 mm (W x D x H) Figure 2-1 Three-way View 2.1.
User Manual of WNAP-7206 LED definition LED Power Signal Indicator State Meaning On System On Off System Off On Indicates the wireless signal strength of remote AP (Client/Repeater Mode) Off WAN LAN No remote wireless signal On Port linked. Off No link. Blinking Data is transmitting or receiving on the WAN interface. On Port linked. Off No link. Blinking Data is transmitting or receiving on the LAN interface. 2.1.
User Manual of WNAP-7206 Figure 2-4 Warning label Interface Function RP-SMA Connector For external antenna. You can use the RP-SMA connector to connect with 5GHz external antenna. The RJ-45 sockets allow LAN connection through Category 5 cables. LAN Support auto-sensing on 10/100M speed and half/ full duplex; comply with IEEE 802.3/ 802.3u respectively.
User Manual of WNAP-7206 2.1.
User Manual of WNAP-7206 Chapter 3. Connecting to the AP 3.1 Preparation before Installation 3.1.1 Professional Installation Required Please seek assistance from a professional installer who is well trained in the RF installation and knowledgeable in the local regulations. 3.1.2 Safety Precautions 1. To keep you safe and install the hardware properly, please read and follow these safety precautions. 2.
User Manual of WNAP-7206 OUTDOOR INSTALLATION WARNING ! IMPORTANT SAFETY PRECAUTIONS: LIVES MAY BE AT RISK! Carefully observe these instructions and any special instructions that are included with the equipment you are installing. CONTACTING POWER LINES CAN BE LETHAL. Make sure no power lines are anywhere where possible contact can be made. Antennas, masts, towers, guy wires or cables may lean or fall and contact these limes.
User Manual of WNAP-7206 medical aid has been requested. 3.3 Hardware Installation Please install the AP according to the following steps. Don't forget to pull out the power plug and keep your hands dry. Step 1. Push the latch in the bottom of WNAP-7206 to remove the sliding cover. Figure 3-1 Step 2. Plug the RJ-45 Ethernet cable into the LAN Port of WNAP-7206. Figure 3-2 RJ-45 8P8C Ethernet cable is required. Step 3. Slide the cover back to seal the bottom of the WNAP-7206. Figure 3-3 Step 4.
User Manual of WNAP-7206 Figure 3-4 DC: Insert adapter POE: This hole is linked to LAN port of the WNAP-7206 with RJ-45 Ethernet cable. LAN: This hole is linked to LAN port of PC/Hub or Router/xDSL modem device with RJ-45 Ethernet cable. Step 5. Successful installation.
User Manual of WNAP-7206 3.4 Pole Mounting Step 1. Turn the WNAP-7206 over. Put the pole mounting tie through the middle hole of it. Step 2. Mount WNAP-7206 steadily to the pole by fastening the mounting tie tightly. Step 3. Now you have completed the hardware installation of WNAP-7206 as figure below. Figure 3-6 Pole Mounting 3.4.
User Manual of WNAP-7206 Chapter 4. Quick Installation Guide This chapter will show you how to configure the basic functions of your Wireless AP using Quick Setup within minutes. A computer with wired Ethernet connection to the Wireless AP is required for the first-time configuration. 4.1 Manual Network Setup - TCP/IP Configuration The default IP address of the WNAP-7206 is 192.168.1.1. And the default Subnet Mask is 255.255.255.0. These values can be changed as you desire.
User Manual of WNAP-7206 Figure 4-1 Now click OK to save your settings. Now, you can run the Ping command in the command prompt to verify the network connection between your PC and the AP. The following example is in Windows XP OS. Please follow the steps below: 1. Click on Start > Run.
User Manual of WNAP-7206 Figure 4-2 2. In the run box type “cmd” and click OK. (Windows Vista users type “cmd” in the Start .Search box.)At the prompt. Figure 4-3 Open a command prompt, and type ping 192.168.1.1, and then press Enter. If the result displayed is similar to Figure 4-4, it means the connection between your PC and the AP has been established well.
User Manual of WNAP-7206 Figure 4-4 Success result of Ping command If the result displayed is similar to Figure 4-5, it means the connection between your PC and the AP has failed. Figure 4-5 Failure result of Ping command If the address is 0.0.0.0, check your adapter installation, security settings, and the settings on your AP. Some firewall software programs may block a DHCP request on newly installed adapters.
User Manual of WNAP-7206 4.2 Starting Setup in the Web UI It is easy to configure and manage the WNAP-7206 with the web browser. Step 1. To access the configuration page, open a web-browser and enter the default IP address http://192.168.1.1 in the web address field of the browser. Figure 4-6 Login the AP After a moment, a login window will appear. Enter admin for the User Name and Password, both in lower case letters. Then click the OK button or press the Enter key.
User Manual of WNAP-7206 Figure 4-8 WNAP-7206 Login Welcome Screen Step 2. The Quick Setup page appears as Figure 4-9. Figure 4-9 WNAP-7206 Web UI Screenshot Step 3. Click Next to choose an Operation Mode. The default is “Standard AP” Mode. Please refer to the instructions in the next chapter for configuring the other Operation Modes.
User Manual of WNAP-7206 Figure 4-10 Choose Operation Mode Step 4. Please enter the SSID, configure your Encryption Settings, Pre-Shared Key and etc. Then click Next button to make the configuration take effect immediately.
User Manual of WNAP-7206 Step 5. Click Finish button to complete the configuration, or click Back to re-configure the setting.
User Manual of WNAP-7206 Chapter 5. Configuring the AP This chapter delivers a detailed presentation of AP’s functionalities and features allowing you to manage the AP with ease. 5.1 Status In this page, you can view information about the current running status of WNAP-7206, including WAN interface, LAN interface, Wireless interface, and firmware version information.
User Manual of WNAP-7206 Figure 5-1-2 Status This section allows you to view the AP’s System info listed below: Object Description Firmware Version The current firmware version of the AP. Hardware Version The current hardware version of the AP. LAN MAC Address The physical address of the system, as seen from the LAN. IP Address The IP address of the wired LAN. Subnet Mask The subnet mask associated with IP address.
User Manual of WNAP-7206 WDS Status Auth: Try to authenticate; ASSOC: Try to associate; Run: Associated successfully. The status of WDS. This field is only available in AP Router Mode. WAN MAC Address The physical address of the WAN port, as seen from the Internet. The current WAN (Internet) IP Address. This field will be blank IP Address or 0.0.0.0 if the IP Address is assigned dynamically and there is no connection to Internet.
User Manual of WNAP-7206 5.2 Quick Setup The Quick Setup helps you configure the basic functions of your Wireless AP within minutes. Please refer to the Step 2 in the section “4.2 Starting Setup in the Web UI” for the detail procedure. Figure 5-2-1 Quick Setup 5.
User Manual of WNAP-7206 The page includes the following fields: Object Description WPS Status Enable or disable the WPS function here. The current value of the Device's PIN displayed here. The default PIN of the Device can be found in the label or User Guide. Current PIN Restore PIN - Restore the PIN of the Device to its default. Gen New PIN - Click this button, and then you can get a new random value for the Device's PIN. You can ensure the network security by generating a new PIN.
User Manual of WNAP-7206 Figure 5-3-1-1 PBC b. Click Connect to start the process. c. At the same time (within 120 seconds) in the wireless adapter, select “Push-Button” in the Add WPS Profile. Then, click the right arrow to go next step. Figure 5-3-1-2 Client - WPS d. Click “Start PBC” to start the WPS process.
User Manual of WNAP-7206 Figure 5-3-1-4 Figure 5-3-1-5 e. Once connected, your WPS profile appears in the Profile List screen of Wireless Adapter, and the “Connect Successfully!” message appears in the WNAP-7206.
User Manual of WNAP-7206 Figure 5-3-1-6 AP – PBC Connect Successfully 5.3.2 PIN Input Config (PIN) If the device supports Wi-Fi Protected Setup and the PIN method, you can add it to the network by PIN in the following two methods. Method One: Enter the PIN into my AP a. To use the PIN method, select “PIN” and, in the “WPS AP List” field, select the name of the network to which you connecting. Click the right arrow to save your settings. Figure 5-3-2-1 Client – PIN b.
User Manual of WNAP-7206 Figure 5-3-2-2 Client – Type PIN in AP c. In the AP, enter the PIN Code of the Wireless Adapter. Click Connect to start the process. Figure 5-3-2-3 AP – Enter the new device’s PIN d. Click Start PIN in Wireless Adapter. Figure 5-3-2-4 Client – Start PIN e. Once connected, your WPS profile appears in the Profile List screen of Wireless Adapter, and the “Connect Successfully!” message appears in the WNAP-7206.
User Manual of WNAP-7206 Figure 5-3-2-5 Client – Profile List Figure 5-3-2-5 AP – PIN Connect Successfully Method Two: Enter the PIN from my AP a. Get the Current PIN code of the AP in Figure 5-3-1 (Each AP has its unique PIN code. Here takes the default PIN code 12345670 of this AP for example). b. In the Client, select “PIN” and, in the “WPS AP List” field, select the name of the network to which you connecting. Click the right arrow to save your settings.
User Manual of WNAP-7206 c. In the PIN Entry Method, select “Type PIN below”, and enter the PIN Code of AP in the PIN Code field. Figure 5-3-2-7 Client – Enter PIN Code f. Go to next step, click Start PIN. Figure 5-3-2-8 Client – Start PIN d. In the AP, click Connect. Figure 5-3-2-9 AP – PIN e. Once connected, your WPS profile appears in the Profile List screen of Wireless Adapter, and the “Connect Successfully!” message appears in the WNAP-7206.
User Manual of WNAP-7206 Figure 5-3-2-10 Client – Profile List Figure 5-3-2-11 AP – PIN Connect Successfully 5.4 Operation Mode There are 3 operation modes (Standard AP, AP Router, AP Client Router) can be configured to meet various applications.
User Manual of WNAP-7206 The page includes the following fields: Object Description In this mode, the device enables multi-users to access, and provides Standard AP six wireless modes: Access Point, Multi-SSID, Client, Repeater, Universal Repeater, and Bridge with AP. In this mode, the device enables multi-users to share Internet via AP Router ADSL/Cable Modem. The wireless port share the same IP to ISP through Ethernet WAN port.
User Manual of WNAP-7206 Figure 5-5-1 LAN The page includes the following fields: Object Description MAC Address Display the LAN port MAC address of the Wireless AP. IP Address Subnet Mask The Wireless AP’s LAN IP. The default is 192.168.1.1. You can change it according to your need. Enter the subnet mask of the LAN IP. 5.5.2 WAN Choose menu “Network > WAN”, and then you can configure the IP parameters of the WAN on the screen below. WAN Connection Types: a. AP Router Mode b.
User Manual of WNAP-7206 5.5.2.1. Dynamic IP If your ISP provides the DHCP service, please choose Dynamic IP (DHCP) type, and the AP Router will automatically obtain IP parameters from your ISP. You can see the page shown as the below. Figure 5-5-2 WAN - DHCP The page includes the following fields: Object Description WAN Connection Type Select Dynamic IP from the list. IP Address The IP address assigned by your ISP dynamically. Subnet Mask The subnet mask assigned by your ISP dynamically.
User Manual of WNAP-7206 site, it is likely that your DNS servers are set up improperly. You should contact your ISP to get DNS server addresses. The normal MTU (Maximum Transmission Unit) value for most Ethernet networks is 1500 Bytes. For some ISPs you need to MTU Size (in bytes) modify the MTU. But this is rarely required, and should not be done unless you are sure it is necessary for your ISP connection.
User Manual of WNAP-7206 Figure 5-5-3 WAN – Static IP The page includes the following fields: Object Description WAN Connections Select Static (Fixed IP) from the list. IP Address Subnet Mask Default Gateway Enter the IP address in dotted-decimal notation provided by your ISP. Enter the subnet Mask in dotted-decimal notation provided by your ISP, usually is 255.255.255.0 (Optional) Enter the gateway IP address in dotted-decimal notation provided by your ISP.
User Manual of WNAP-7206 5.5.2.3. PPPoE/Russia PPPoE If local ISP provides a PPPoE connection, choose PPPoE (ADSL) and fill the necessary parameters below. Figure 5-5-4 WAN – PPPoE The page includes the following fields: Object Description WAN Connections Select PPPoE/Russia PPPoE from the list. PPPoE Connection User Name Enter the User Name and Password provided by your ISP. Password These fields are case-sensitive.
User Manual of WNAP-7206 Disabled Dynamic IP Static IP (For Dual Access/Russia PPPoE) The Secondary Connection is disabled by default, so there is PPPoE connection only. This is recommended. Use dynamic IP address to connect to the local area network provided by ISP. Use static IP address to connect to the local area network provided by ISP. Wan Connection Mode You can configure the Device to disconnect your Internet connection after a specified period of the Internet connectivity (Max Idle Time).
User Manual of WNAP-7206 Advanced Click the Advanced button to set up the advanced options. If you want to do some advanced configurations, please click the Advanced button, and then the page shown in Figure 5-5-5 will appear. Figure 5-5-5 PPPoE - Advanced The page includes the following fields: Object Description The default MTU (Maximum Transmission Unit) size is 1480 MTU Size bytes, which is usually fine. For some ISPs, you need modify the MTU.
User Manual of WNAP-7206 120. The Device will detect Access Concentrator online every interval seconds. If the value is 0, it means not detecting. If your ISP specifies a DNS server IP address for you, click the Use the following DNS Servers checkbox, and fill the Primary DNS and Secondary DNS blanks below. The Secondary DNS is optional. Otherwise, the DNS servers will be assigned dynamically from ISP.
User Manual of WNAP-7206 Figure 5-5-6 L2TP The page includes the following fields: Object Description WAN Connections Select L2TP/Russia L2TP from the list. User Name Enter the User Name and Password provided by your ISP. Password These fields are case-sensitive. Choose either one as you are given by your ISP. Click the Dynamic IP/ Static IP Connect button to connect immediately. Click the Disconnect button to disconnect immediately.
User Manual of WNAP-7206 Server IP Address/Name IP Address Subnet Mask Gateway DNS Enter the Server IP address or domain name provided by your ISP. Enter the IP address used for dial-up. (Only can be configured when Static IP is selected) Enter the subnet Mask provided by your ISP. (Only can be configured when Static IP is selected) Enter gateway provided by your ISP. (Only can be configured when Static IP is selected) Enter DNS Server provided by your ISP.
User Manual of WNAP-7206 Sometimes the connection cannot be disconnected although you specify a time to Max Idle Time, because some applications are visiting the Internet continually in the background. 5.5.2.5. PPTP/Russia PPTP If your ISP provides PPTP connection, please select PPTP. And enter the following parameters.
User Manual of WNAP-7206 Object Description WAN Connections Select PPTP/Russia PPTP from the list. User Name Enter the User Name and Password provided by your ISP. Password These fields are case-sensitive. Choose either one as you are given by your ISP. Click the Dynamic IP/ Static IP Connect button to connect immediately. Click the Disconnect button to disconnect immediately.
User Manual of WNAP-7206 your Internet connection to remain active at all time, enter "0" in the Max Idle Time field. Otherwise, enter the number of minutes that you wish to have the Internet connecting last unless a new link is requested. Save Click the Save button to save your settings. Sometimes the connection cannot be disconnected although you specify a time to Max Idle Time, because some applications are visiting the Internet continually in the background. 5.5.2.6.
User Manual of WNAP-7206 The page includes the following fields: Object Description WAN Connections Select BigPond Cable from the list. User Name Enter the User Name and Password provided by your ISP. Password These fields are case-sensitive. Auth Server Enter the authenticating server IP address or host name. Type in the domain suffix server name based on your location. Auth Domain NSW / ACT - nsw.bigpond.net.au VIC / TAS / WA / SA / NT - vic.bigpond.net.au QLD - qld.bigpond.net.
User Manual of WNAP-7206 5.5.3 MAC Clone Choose menu “Network > MAC Clone”, and then you can configure the WAN MAC Address on the screen below, as shown in Figure 5-5-8. Figure 5-5-8 MAC Clone The page includes the following fields: Object Description This field displays the current MAC address of the WAN port. If your ISP requires that you register the MAC address of your WAN MAC Address adapter, please enter the correct MAC address into this field. Usually, you do not need to change anything here.
User Manual of WNAP-7206 5.6 Wireless You could configure the minimum number of Wireless settings for communication, such as Network Name (SSID) and Channel. The Access Point can be set simply with only the minimum setting items. 5.6.1 Wireless Settings Choose menu “Wireless > Wireless Settings”, and then you can configure the basic settings for the wireless network on the Wireless Settings page The Wireless Settings page in Standard AP mode allows you to configure the wireless mode for your device.
User Manual of WNAP-7206 Figure 5-6-1-1 AP Mode First at all, you should select your location, save it and reboot, or you may not search any APs. Ensure you select a correct country to conform local law. Incorrect settings may cause interference. The page includes the following fields: Object Description Enter a string of up to 32 characters. The same Name (SSID) must be assigned to all wireless devices in your network. The default SSID is set SSID to be default.
User Manual of WNAP-7206 Transmit Power You can limit the Transmit Power of the Device through this field. You can select one of the options listed as the below items. This field determines which operating frequency will be used. It is not Channel necessary to change the wireless channel unless you notice interference problems with another nearby access point. If you select auto, then the Device will select the best channel automatically.
User Manual of WNAP-7206 Figure 5-6-1-2 Multi-SSID Mode First at all, you should select your location, save it and reboot, or you may not search any APs. Ensure you select a correct country to conform local law. Incorrect settings may cause interference. The page includes the following fields: Object Description Check this box to enable the VLAN function. The AP supports up to 4 VLANs. All wireless PCs in the VLANs are able to access this AP. The AP Enable VLAN can also work with an IEEE 802.
User Manual of WNAP-7206 directly connected to the LAN port of the AP, please make sure that its adapter supports Tag function, or this PC will not be able to access the AP. Enter a value of up to 32 characters. The same Name (SSID) must be SSID assigned to all wireless devices in your network. In Multi-SSID operation mode, enter SSID for each BSS in the field "SSID1" ~ "SSID4". The ID of a VLAN. Only in the same VLAN can a wireless PC and a wired PC communicate with each other.
User Manual of WNAP-7206 5.6.1.3. Client Mode (Client Bridge) Figure 5-6-1-3 Client Mode First at all, you should select your location, save it and reboot, or you may not search any APs. Ensure you select a correct country to conform local law. Incorrect settings may cause interference.
User Manual of WNAP-7206 The page includes the following fields: Object Description The AP client can connect to AP with WDS enabled or disabled. If WDS is enabled, all traffic from wired networks will be forwarded in the Enable WDS format of WDS frames consisting of four address fields. If WDS is disabled, three address frames are used. If your AP supports WDS well, please enable this option. The SSID of the AP your Device is going to connect to as a client.
User Manual of WNAP-7206 2. In the AP List, select the AP you want to access, and click Connect. 3. The target network’s SSID will be automatically filled into the SSID field. Click Save to apply the setting.
User Manual of WNAP-7206 The operating distance or range of your wireless connection varies significantly based on the physical placement of the Device. For best results, place your Device: Near the center of the area in which your wireless stations will operate; In an elevated location such as a high shelf; Away from the potential sources of interference, such as PCs, microwaves, and cordless phones; With the Antenna in the upright position; Away from large metal surfaces. 5.6.1.4.
User Manual of WNAP-7206 Figure 5-6-1-4 Repeater Mode First at all, you should select your location, save it and reboot, or you may not search any APs. Ensure you select a correct country to conform local law. Incorrect settings may cause interference. The page includes the following fields: Object MAC of AP Description The BSSID of the AP your Device is going to connect to as a client. You can also use the search function to select a BSSID to join. Select your region from the pull-down list.
User Manual of WNAP-7206 to access the Device; otherwise, wireless stations will not be able to access the Device. Enable DFS Search Save Check Enable DFS to enable DFS function. Click this button; you can search the AP which runs in the current channel. Click the Save button to save your settings on this page. 5.6.1.5.
User Manual of WNAP-7206 Figure 5-6-1-5 Universal Repeater Mode First at all, you should select your location, save it and reboot, or you may not search any APs. Ensure you select a correct country to conform local law. Incorrect settings may cause interference. The page includes the following fields: Object MAC of AP Description The BSSID of the AP your Device is going to connect to as a client. You can also use the search function to select a BSSID to join.
User Manual of WNAP-7206 access the Device. Enable DFS Check Enable DFS to enable DFS function. Click this button; you can search the AP which runs in the current Search channel. Click the Save button to save your settings on this page. Save 5.6.1.6. Bridge with AP Mode (PtP & PtMP) In this mode, you can establish Point to Point (PtP) connection or Point to Multi-Point (PtMP) connection.
User Manual of WNAP-7206 Figure 5-6-1-6 Bridge with AP Mode First at all, you should select your location, save it and reboot, or you may not search any APs. Ensure you select a correct country to conform local law. Incorrect settings may cause interference. The page includes the following fields: Object Description Enter a value of up to 32 characters. The same Name (SSID) must be SSID assigned to all wireless devices in your network.
User Manual of WNAP-7206 be illegal to use the wireless function of the Device in a region other than one of those specified in this filed. If your country or region is not listed, please contact your local government agency for assistance. Transmit Power You can limit the Transmit Power of the Device through this field. You can select one of the options listed as the below items. This field determines which operating frequency will be used.
User Manual of WNAP-7206 5.6.1.7. AP Router Mode Figure 5-6-1-7 AP Router Mode First at all, you should select your location, save it and reboot, or you may not search any APs. Ensure you select a correct country to conform local law. Incorrect settings may cause interference.
User Manual of WNAP-7206 Object Description Enter a string of up to 32 characters. The same Name (SSID) must be assigned to all wireless devices in your network. The default SSID is set SSID to be default. But it is recommended strongly that you change your networks name (SSID) to a different value. This value is case-sensitive. For example, MYSSID is NOT the same as MySsid. Select your region from the pull-down list.
User Manual of WNAP-7206 5.6.1.8.
User Manual of WNAP-7206 Figure 5-6-1-8 AP Client Router Mode First at all, you should select your location, save it and reboot, or you may not search any APs. Ensure you select a correct country to conform local law. Incorrect settings may cause interference. The page includes the following fields: Object Description The SSID of the AP your Device is going to connect to as a client. You SSID can also use the search function to select a SSID to join.
User Manual of WNAP-7206 BSSID The BSSID of the AP your Device is going to connect to as a client. You can also use the search function to select a BSSID to join. Select your region from the pull-down list. This field specifies the region where the wireless function of the Device can be used. It may Region be illegal to use the wireless function of the Device in a region other than one of those specified in this filed.
User Manual of WNAP-7206 2. In the AP List, select the AP you want to access, and click Connect. 3. The target network’s SSID will be automatically filled into the SSID field. Click Save to apply the setting. The operating distance or range of your wireless connection varies significantly based on the physical placement of the Device.
User Manual of WNAP-7206 Away from the potential sources of interference, such as PCs, microwaves, and cordless phones; With the Antenna in the upright position; Away from large metal surfaces. 5.6.2 Wireless Security Choose menu “Wireless > Wireless Security”, and then you can configure the security settings of your wireless network.
User Manual of WNAP-7206 5.6.2.1. Operation Mode – Access Point Figure 5-6-2-1 Wireless Security - AP Object Description The wireless security function can be enabled or disabled. If disabled, Disable Security the wireless stations will be able to connect the AP without encryption. It is recommended strongly that you choose one of following options to enable security. WEP Select 802.11 WEP security. WPA/WPA2 Select WPA based on Radius Server.
User Manual of WNAP-7206 Each security option has its own settings as described follows: WEP WEP is intended to provide data confidentiality comparable to that of a traditional wired network. Two methods of authentication can be used with WEP: Open System authentication and Shared Key authentication.
User Manual of WNAP-7206 WPA - Wi-Fi Protected Access. WPA2 - WPA version 2. Encryption You can select either Automatic, or TKIP or AES. Radius Server IP Enter the IP address of the Radius Server. Radius Port Enter the port that radius service uses. Radius Password Enter the password for the Radius Server. Group Key Update Specify the group key update interval in seconds. The value can be Period either 0 or at least 30. Enter 0 to disable the update.
User Manual of WNAP-7206 5.6.2.2. Operation Mode – Multi-SSID Figure 5-6-2-2 Wireless Security – Multi-SSID Object Description The wireless security function can be enabled or disabled. If disabled, Disable Security the wireless stations will be able to connect the AP without encryption. It is recommended strongly that you choose one of following options to enable security. WPA/WPA2 Select WPA based on Radius Server. WPA-PSK/WPA2-PSK Select WPA based on pre-shared passphrase.
User Manual of WNAP-7206 WPA - Wi-Fi Protected Access. WPA2 - WPA version 2. Encryption You can select either Automatic, or TKIP or AES. Radius Server IP Enter the IP address of the Radius Server. Radius Port Enter the port that radius service uses. Radius Password Enter the password for the Radius Server. Group Key Update Specify the group key update interval in seconds. The value can be either 0 or at least 30. Enter 0 to disable the update.
User Manual of WNAP-7206 5.6.2.3. Operation Mode – Client Figure 5-6-2-3 Wireless Security - Client Object Description The wireless security function can be enabled or disabled. If disabled, Disable Security the wireless stations will be able to connect the AP without encryption. It is recommended strongly that you choose one of following options to enable security. WEP Select 802.11 WEP security. WPA-PSK/WPA2-PSK Select WPA based on pre-shared passphrase.
User Manual of WNAP-7206 Automatic - Select Shared Key or Open System authentication type automatically based on the wireless station's capability and request. Shared Key - Select 802.11 Shared Key authentication. Open System - Select 802.11 Open System authentication. You can select ASCII or Hexadecimal format. ASCII Format stands WEP Key Format for any combination of keyboard characters in the specified length.
User Manual of WNAP-7206 You can enter ASCII or Hexadecimal characters. For Hexadecimal, the PSK Password length should be between 8 and 64 characters; for ASCII, the length should be between 8 and 63 characters. Group Key Update Period Specify the group key update interval in seconds. The value can be either 0 or at least 30. Enter 0 to disable the update. 5.6.2.4.
User Manual of WNAP-7206 Each security option has its own settings as described follows: WEP WEP is intended to provide data confidentiality comparable to that of a traditional wired network. Two methods of authentication can be used with WEP: Open System authentication and Shared Key authentication.
User Manual of WNAP-7206 Object Description You can select one of following versions: Version Encryption Automatic - Select WPA-PSK or WPA2-PSK automatically based on the wireless station's capability and request. WPA-PSK - Pre-shared key of WPA. WPA2-PSK - Pre-shared key of WPA2. You can select either Automatic, or TKIP or AES. You can enter ASCII or Hexadecimal characters.
User Manual of WNAP-7206 Object Description The wireless security function can be enabled or disabled. If disabled, Disable Security the wireless stations will be able to connect the AP without encryption. It is recommended strongly that you choose one of following options to enable security. WEP Select 802.11 WEP security. WPA/WPA2 Select WPA based on Radius Server. WPA-PSK/WPA2-PSK Select WPA based on pre-shared passphrase.
User Manual of WNAP-7206 If you do not set the key, the wireless security function is still disabled even if you have selected Shared Key as Authentication Type. WPA-PSK/WPA2-PSK The later WPA2 protocol features compliance with the full IEEE 802.11i standard and uses Advanced Encryption Standard (AES) in addition to TKIP encryption protocol to guarantee better security than that provided by WEP or WPA.
User Manual of WNAP-7206 Object Description The wireless security function can be enabled or disabled. If disabled, Disable Security the wireless stations will be able to connect the AP without encryption. It is recommended strongly that you choose one of following options to enable security. WEP Select 802.11 WEP security. Each security option has its own settings as described follows: WEP WEP is intended to provide data confidentiality comparable to that of a traditional wired network.
User Manual of WNAP-7206 5.6.2.7. Operation Mode – AP Router Figure 5-6-2-7 Wireless Security – AP Router Object Description The wireless security function can be enabled or disabled. If disabled, Disable Security the wireless stations will be able to connect the AP without encryption. It is recommended strongly that you choose one of following options to enable security. WEP Select 802.11 WEP security. WPA/WPA2 Select WPA based on Radius Server.
User Manual of WNAP-7206 Each security option has its own settings as described follows: WEP WEP is intended to provide data confidentiality comparable to that of a traditional wired network. Two methods of authentication can be used with WEP: Open System authentication and Shared Key authentication.
User Manual of WNAP-7206 WPA2 - WPA version 2. Encryption You can select either Automatic, or TKIP or AES. Radius Server IP Enter the IP address of the Radius Server. Radius Port Enter the port that radius service uses. Radius Password Enter the password for the Radius Server. Group Key Update Specify the group key update interval in seconds. The value can be Period either 0 or at least 30. Enter 0 to disable the update.
User Manual of WNAP-7206 5.6.2.8. Operation Mode – AP Client Router Figure 5-6-2-8 Wireless Security – AP Client Router Object Description The wireless security function can be enabled or disabled. If disabled, Disable Security the wireless stations will be able to connect the AP without encryption. It is recommended strongly that you choose one of following options to enable security. WEP Select 802.11 WEP security. WPA/WPA2 Select WPA based on Radius Server.
User Manual of WNAP-7206 Each security option has its own settings as described follows: WEP WEP is intended to provide data confidentiality comparable to that of a traditional wired network. Two methods of authentication can be used with WEP: Open System authentication and Shared Key authentication.
User Manual of WNAP-7206 WPA - Wi-Fi Protected Access. WPA2 - WPA version 2. Encryption You can select either Automatic, or TKIP or AES. Radius Server IP Enter the IP address of the Radius Server. Radius Port Enter the port that radius service uses. Radius Password Enter the password for the Radius Server. Group Key Update Specify the group key update interval in seconds. The value can be Period either 0 or at least 30. Enter 0 to disable the update.
User Manual of WNAP-7206 Figure 5-6-3-1 Wireless Advanced The page includes the following fields: Object Description Operation Mode Display the current operation mode. Enable: Click Enable to enable the MAC Filtering. Wireless MAC Filtering Disable: Click Disable to disable the MAC Filtering. The MAC Filtering was not available in Client Mode. There are two policies can be used for filtering rule. Select a policy by clicking the radio button in front of the following items.
User Manual of WNAP-7206 wireless network. Figure 5-6-4-1 Wireless Advanced The page includes the following fields: Object Antenna Setting Description The polarization of an antenna. You can select Vertical Antenna, Horizontal Antenna, or External Antenna. The beacons are the packets sent by the Device to Beacon Interval synchronize a wireless network. Beacon Interval value determines the time interval of the beacons. You can specify a value between 20-1000 milliseconds. The default value is 100.
User Manual of WNAP-7206 recommended enabled. Enable Short GI This function is recommended for it will increase the data capacity by reducing the guard interval time. Isolate all connected wireless stations so that wireless stations Enable AP Isolation cannot access each other through WLAN. This function will be disabled if WDS/Bridge is enabled. Save Click the Save button to save the setting. 5.6.
User Manual of WNAP-7206 Figure 5-6-6-1 Distance Setting This is a critical feature required for stabilizing outdoor links. Enter the distance of your wireless link, and then the software will optimize the frame ACK timeout value automatically. One hundred-meter is the smallest unit of this setting. The page includes the following fields: Object Description Specify the distance value in kilometers, accurate to the first decimal place.
User Manual of WNAP-7206 5.6.7 Throughput Monitor Selecting Wireless > Throughput Monitor will help to watch wireless throughput information in the following screen shown in Figure 5-6-7-1. Figure 5-6-7-1 Throughput Monitor The page includes the following fields: Object Description Rate The Throughput unit. Run Time How long this function is running. Transmit The Wireless transmit rate information. Receive The Wireless receive rate information.
User Manual of WNAP-7206 5.6.8 Wireless Statistics Choose menu “Wireless > Wireless Statistics”, and then you can see the MAC Address, Current Status, Received Packets and Sent Packets for each connected wireless station. Figure 5-6-8-1 Wireless Statistics The page includes the following fields: Object Description MAC Address The connected wireless station's MAC address.
User Manual of WNAP-7206 There are three submenus under the DHCP menu: DHCP Settings, DHCP Clients List and Address Reservation. Clicking any of them will enable you to configure the corresponding function. The detailed explanations for each submenu are provided below. 5.7.1 DHCP Settings Selecting DHCP > DHCP Settings will enable you to set up the AP as a DHCP server, which provides the TCP/IP configuration for all the PCs that are connected to the system on the LAN.
User Manual of WNAP-7206 connecting to the device with the current DHCP Address. Enter the amount of time (in minutes), and then the DHCP address will be "leased". The time range is 1~2880 minutes. The default value is 120 minutes. Default Gateway (Optional) Input the IP Address of the gateway. Default Domain (Optional) Input the domain name of your network. Primary DNS Secondary DNS (Optional) Input the DNS IP address provided by your ISP or consult your ISP.
User Manual of WNAP-7206 To update this page and to show the current connected devices, click on the Refresh button. 5.7.3 Address Reservation Choose menu “DHCP > Address Reservation”, and then you can view or add a reserved address for clients via the next screen (shown in Figure 5-7-3). Figure 5-7-3 Address Reservation The page includes the following fields: Object MAC Address Description The MAC Address of the PC that you want to reserve an IP address for.
User Manual of WNAP-7206 Delete All Click the Next button to go to the next page, or click the Next Click the Delete All button to delete all the entries in the table. Previous button return to the previous page. How to Reserve IP Addresses 1. Click the Add New... button to add a new Address Reservation entry. 2. Enter the MAC Address (the format for the MAC Address is XX-XX-XX-XX-XX-XX.) and the IP address in dotted-decimal notation of the computer you wish to add. 3. Click the Save button.
User Manual of WNAP-7206 Figure 5-8-1-1 Virtual Servers To setup a virtual server entry, you can follow these steps: 1. Click the Add New... button. 2. Select the service you want to use from the Common Service Port list. If the Common Service Port menu does not list the service that you want to use, enter the number of the service port or service port range in the Service Port box. 3. Enter the IP address of the computer running the service application in the IP Address box. 4.
User Manual of WNAP-7206 protocols are supported by the Device.). The status of this entry. "Enabled" means the virtual server entry is Status enabled. Common Service Port Modify Some common services already exist in the pull-down list. To modify or delete an existing entry. If your computer or server has more than one type of available service, please select another service, and enter the same IP Address for that computer or server. To modify or delete an existing entry: 1.
User Manual of WNAP-7206 Figure 5-8-2-1 Port Triggering To add a new rule on the Port Triggering screen: 1. Click the Add New... button. 2. Enter a port number used by the application to send an outgoing request in the Trigger Port box. 3. Select the protocol used for the Trigger Port from the pull-down list of Trigger Protocol, either TCP, UDP, or All. 4. Enter the range of port numbers used by the remote system when it responds to the PC's request in the Incoming Ports box. 5.
User Manual of WNAP-7206 The port or port range used by the remote system when it responds to the outgoing request. A response using one of these ports will be Incoming Port forwarded to the PC which triggered this rule. You can input at most 5 groups of ports (or port sections). Every group of ports must be separated with ",". For example, 2000-2038, 2046, 2050-2051, 2085, 3010-3030.
User Manual of WNAP-7206 5.8.3 DMZ Choose menu “Forwarding > DMZ”, and then you can view and configure DMZ host in the screen as shown in Figure 5-8-3-1. The DMZ host feature allows one local host to be exposed to the Internet for a special-purpose service such as Internet gaming or video-conferencing. DMZ host forwards all the ports at the same time.
User Manual of WNAP-7206 Figure 5-8-4-1 UPnP Object Enable UPnP Current UPnP Settings List Description UPnP can be enabled or disabled by clicking the Enable or Disable button. This feature is enabled by default. Displays the current UPnP information. App Description Description about the application which initiates the UPnP request. External Port Port that the Device opened for the application. Protocol Type of protocol that is opened.
User Manual of WNAP-7206 Figure 5-8-4-2 UPnP – Network Device -110-
User Manual of WNAP-7206 5.9 Security There are four submenus under the Security menu: Basic Security, Advanced Security, Local Management and Remote Management. Click any of them, and you will be able to configure the corresponding function. 5.9.1 Basic Security Choose menu “Security > Basic Security” and then you can configure the basic security in the screen as shown in Figure 5-9-1-1. Figure 5-9-1-1 Basic Security Settings You can configure the Basic Security Settings on this page.
User Manual of WNAP-7206 It is recommended to enable Application Layer Gateway (ALG) because ALG allows customized Network Address Translation ALG (NAT) traversal filters to be plugged into the gateway to support address and port translation for certain application layer "control/data" protocols such as FTP, TFTP, H323 etc. The page includes the following fields: Object Description Firewall Stateful Packet Inspection (SPI) helps to prevent cyber attacks by tracking more state per session.
User Manual of WNAP-7206 5.9.2 Advanced Security Choose menu “Security > Advanced Security”, and then you can protect the Device from being attacked by ICMP-Flood, UDP Flood and TCP-SYN Flood in the screen as shown in Figure 5-9-2-1. Figure 5-9-2-1 Advanced Security Settings The page includes the following fields: Object Description The default value is 10. Select a value between 5 and 60 seconds Packets Statistics interval (5~60) in the pull-down list.
User Manual of WNAP-7206 Enable UDP-FLOOD Enable or Disable the UDP-FLOOD Filtering. Filtering UDP-FLOOD The default value is 500. Enter a value between 5 ~ 3600. When Packets Threshold the current UPD-FLOOD Packets number is beyond the set value, (5~3600) the Device will start up the blocking function immediately. Enable TCP-SYN-FLOOD Enable or Disable the TCP-SYN-FLOOD Attack Filtering. Attack Filtering TCP-SYN-FLOOD The default value is 50. Enter a value between 5 ~ 3600.
User Manual of WNAP-7206 5.9.3 Local Management Choose menu “Security > Local Management”, and then you can configure the management rule in the screen as shown in Figure 5-9-3-1. The management feature allows you to deny computers in LAN from accessing the Device. Figure 5-9-3-1 Local Management Settings By default, the radio button All the PCs on the LAN are allowed to access the Router's Web-Based Utility is selected.
User Manual of WNAP-7206 5.9.4 Remote Management Choose menu “Security > Remote Management”, and then you can configure the Remote Management function in the screen as shown in Figure 5-9-4-1. This feature allows you to manage your Device from a remote location via the Internet. Figure 5-9-4-1 Remote Management Settings The page includes the following fields: Object Description Web browser access normally uses the standard HTTP service port 80.
User Manual of WNAP-7206 5.10 Parental Control Choose menu “Parental Control”, and then you can configure the parental control in the screen as shown in Figure 5-10-1. The Parental Control function can be used to control the Internet activities of the children, their access to certain websites, as well as the time of surfing.
User Manual of WNAP-7206 Add New... Click the Add New... button to add a new Parental Control entry Enable All Click the Enable All button to enable all the rules in the list. Disable All Click the Disable All button to disable all the rules in the list. Delete All Click the Delete All button to delete all the entries in the table. Next Click the Next button to go to the next page. Previous Click the Previous button return to the previous page.
User Manual of WNAP-7206 5.11.1 Rule Choose menu “Access Control > Rule”, and then you can view and set Access Control rules in the screen as shown in Figure 5-11-1-1.
User Manual of WNAP-7206 The page includes the following fields: Object Description Enable Internet Select the check box to enable the Internet Access Control Access Control function, and then the Default Filter Policy can take effect. Rule Name Here displays the name of the rule and this name is unique. Host Here displays the host selected in the corresponding rule. Target Here displays the target selected in the corresponding rule.
User Manual of WNAP-7206 5.11.2 Host Choose menu “Access Control > Host”, and then you can view and set a Host list in the screen as shown in Figure 5-11-2-1. The host list is necessary for the Access Control Rule. Figure 5-11-2-1 Host Setting The page includes the following fields: Object Description Host Description Here displays the description of the host and this description is unique. Information Here displays the information about the host. It can be IP or MAC.
User Manual of WNAP-7206 Save Click the Save button to save the changes. Back Click the Back button to back to the previous page. 5.11.3 Target Choose menu “Access Control > Target”, and then you can view and set a Target list in the screen as shown in Figure 5-11-3-1. The target list is necessary for the Access Control Rule.
User Manual of WNAP-7206 Next Click the Next button to go to the next page. Previous Click the Previous button return to the previous page. Mode IP Address Target Port Protocol Here are two options, IP Address and Domain Name. You can choose either of them from the drop-down list. Enter the IP address (or address range) of the target (targets) in dotted-decimal format, for example 192.168.1.23. Specify the port or port range for the target.
User Manual of WNAP-7206 Figure 5-11-4-1 Schedule Setting The page includes the following fields: Object Description Schedule In this field, create a description for the schedule. Note that this Description description should be unique, for example Schedule_1. Day Here displays the day(s) in a week. Time Here displays the time period in a day. Modify Here you can edit or delete an existing schedule. Add New... Click the Add New... button to add a new target entry.
User Manual of WNAP-7206 example 2000 is 20:00. Save Click the Save button to save the changes. Back Click the Back button to back to the previous page. 5.12 Static Routing There is only one submenu under the Static Routing menu: Static Routing List. Click it, and you will be able to configure the corresponding function. Choose menu “Static Routing > Static Routing List”, and then you can configure the static route in the next screen (shown in Figure 5-12-1).
User Manual of WNAP-7206 Destination IP Address Subnet Mask Default Gateway The address of the network or host that you want to assign to a static route Determines which portion of an IP address is the network portion, and which portion is the host portion. The IP address of the default gateway device that allows for the contact between the Device and the network or host Enable - Select the Enabled in the Status pull-down list to Status enable the entry.
User Manual of WNAP-7206 Figure 5-13-1-1 Bandwidth Control Settings The page includes the following fields: Object Enable Bandwidth Control Description If enabled, the Bandwidth Control rules will take effect. Line Type Select your Line Type provided by your ISP. Egress Bandwidth The upload speed through the WAN port. Ingress Bandwidth The download speed through the WAN port. 5.13.
User Manual of WNAP-7206 Figure 5-13-2-1 Rules List The page includes the following fields: Object Description ID The sequence of entry. Description Egress Bandwidth Ingress Bandwidth The information of description includes address range, the port range and protocol of transport layer. The max upload speed which through the WAN port. The default number is 0. The max download speed which through the WAN port. The default number is 0.
User Manual of WNAP-7206 5.14 IP & MAC Binding There are two submenus under the IP &MAC Binding menu: Binding Settings and ARP List. Click either of them, and you will be able to view or configure the corresponding function. The detailed explanations for each submenu are provided below. 5.14.1 Binding Settings Choose menu “IP & MAC Binding > Binding Settings”, and then you can view and configure the IP&MAC Binding in the screen below.
User Manual of WNAP-7206 Add New… Click the Add New… button to add a new entry to the table. Enable All Click the Enable All button to enable all entries. Disable All Click the Disable All button to disable all entries. Delete All Click the Delete All button to delete all entries. Find Click Find button to find existed entry you want. 5.14.2 ARP List Choose menu “IP&MAC Binding > ARP List”, and then you can view and configure the ARP List in the screen below shown in Figure 5-14-2-1.
User Manual of WNAP-7206 5.15 Dynamic DNS The Device offers a Dynamic Domain Name System (DDNS) feature. DDNS lets you assign a fixed host and domain name to a dynamic Internet IP address. It is useful when you are hosting your own website, FTP server, or other server behind the Device. Before using this feature, you can sign up the PLANET DDNS free service www.planetddns.com. Then you will be able to use PLANET DDNS service.
User Manual of WNAP-7206 If you want to login again with another account after a successful login, please click the Logout button, then input your new username and password and click the Login button. Example of Planet DDNS Settings: Please go to http://www.planetddns.com/ to register a Planet DDNS account. Please refer to the FAQ (http://www.planetddns.com/index.php/faq) for how to register a free account. Please refer to the procedure listed as following to configure using Planet DDNS service. Step 1.
User Manual of WNAP-7206 Figure 5-15-3 Step 4. Go to “Network-> WAN” to configure WAN Connection using Static (Fixed IP). Figure 5-15-4 Step 5. Save the settings, and connect your WAN port of the Wireless AP to the internet by Ethernet cable. Step 6. In a remote computer, enter the DDNS host name as the figure shown as below. Then, you should be able to login the WNAP-7350 remotely. Please remember to enter the remote management port number that you have configured in Step 3 except port 80.
User Manual of WNAP-7206 You can go to My Devices page of Planet DDNS website to check if the “Last Connection IP” is displayed. This indicates your DDNS service is work properly. Figure 5-15-6 5.16 System Tools There are nine submenus under the System Tools main menu (as shown in Figure 5-78): Time Settings, Diagnostic, Firmware Upgrade, Factory Defaults, Backup & Restore, Reboot, Password, System Log and Statistics. Click any of them, and you will be able to configure the corresponding function.
User Manual of WNAP-7206 Figure 5-16-1-1 Time Settings The page includes the following fields: Object Description Time Zone Select your current time zone. Date To set time manually: Enter the Date in Month/Day/Year format. Time Enter the Time in Hour/Minute/Second format. NTP Server Prior For automatic time synchronization: Enter the address of the NTP Server Prior. Get GMT Click the Get GMT button to get GMT from the Internet. Save Click the Save button to save the settings. 1.
User Manual of WNAP-7206 Figure 5-16-2-1 Diagnostic The page includes the following fields: Object Ping Description This diagnostic tool troubleshoots connectivity, reachability, and name resolution to a given host or gateway. Traceroute This diagnostic tool tests the performance of a connection. IP Address/ Enter the IP Address or Domain Name of the PC whose connection Domain Name Ping Count you wish to diagnose. Specifies the number of Echo Request messages sent. The default is 4.
User Manual of WNAP-7206 5.16.3 Ping Watch Dog Selecting “System Tools > Ping Watch Dog” allows you to continuously monitor the particular connection between the device and a remote host. It makes this device continuously ping a user defined IP address (it can be the Internet gateway for example.). If it is unable to ping under the user defined constraints, this device will automatically reboot. Figure 5-16-3-1 Ping Watch Dog This function is only available in Standard AP Mode.
User Manual of WNAP-7206 5.16.4 Speed Test Selecting “System Tools > Speed Test” helps to test the connection speed to and from any reachable IP address on current network, especially when we are building wireless network between devices which are far away from each other. It should be used for the preliminary throughput estimation between two network devices. Figure 5-16-4-1 Speed Test This function is only available in Standard AP Mode.
User Manual of WNAP-7206 5.16.5 Firmware Upgrade Choose menu “System Tools > Firmware Upgrade”, and then you can update the latest version of firmware for the Device on the following screen. Figure 5-16-5-1 Firmware Upgrade Click the “Browse…” button to select the new firmware for upgrading. Object Description Firmware Version Display the current Software Version info. Hardware Version Display the current Hardware Version info.
User Manual of WNAP-7206 5.16.6 Factory Defaults Choose menu “System Tools > Factory Defaults” and you can restore the configurations of the Device to factory defaults on the following screen. Figure 5-16-6-1 Factory Defaults Click the Restore button to reset all configuration settings to their default values. Default User Name - admin. Default Password - admin. Default IP Address - 192.168.1.1. Default Subnet Mask - 255.255.255.0.
User Manual of WNAP-7206 Object Description Backup Click the Backup button to backup the configuration. Browse… Restore Click the Browse… button to select the configuration file in this field for restoring settings. Click the Restore button to restore the configuration. 5.16.8 Reboot Choose menu “System Tools > Reboot”, and then you can click the Reboot button to reboot the Device via the next screen. Figure 5-16-8-1 Reboot Click the Reboot button to reboot the Device.
User Manual of WNAP-7206 Figure 5-16-9-1 Password 1. The new user name and password must not exceed 14 characters in length and must not include any spaces. Enter the new Password twice to confirm it. 2. It is strongly recommended that you change the factory default user name and password of the AP. All users who try to access the AP's web-based utility will be prompted for the AP's user name and password.
User Manual of WNAP-7206 Figure 5-16-10-1 System Log -143-
User Manual of WNAP-7206 Figure 5-16-10-2 Mail Account Settings The page includes the following fields: Object Description Log Type By selecting the log type, only logs of this type will be shown. Log Level By selecting the log level, only logs of this level will be shown. Refresh Refresh the page to show the latest log list. Save Log Click to save all the logs in a txt file.
User Manual of WNAP-7206 Set the receiving and sending mailbox address, server Mail Settings address, validation information as well as the timetable for Auto Mail Feature. From Your mail box address. To Recipient's address. SMTP Server Your SMTP server. Authentication Most SMTP Server requires Authentication. User Name Your mail account name. Password Your mail account password. Confirm The Password Re-type your mail account password for confirmation.
User Manual of WNAP-7206 Figure 5-16-11-1 Statistics The Statistics page shows the network traffic of each PC on the LAN, including total traffic and the value of the last Packets Statistic interval in seconds. The page includes the following fields: Object Current Statistics Status Packets Statistics Interval Description Enabled or Disabled. The default value is disabled. To enable, click the Enable button. If disabled, the function of DoS protection in Security settings will be disabled.
User Manual of WNAP-7206 Appendix A: FAQ A.1 What and how to find my PC’s IP and MAC address? IP address is the identifier for a computer or device on a TCP/IP network. Networks using the TCP/IP protocol route messages based on the IP address of the destination. The format of an IP address is a 32-bit numeric address written as four numbers separated by periods. Each number can be zero to 255. For example, 191.168.1.
User Manual of WNAP-7206 Example 1: wireless Infrastructure Mode Ad hoc mode (also called peer-to-peer mode or an Independent Basic Service Set, or IBSS) is simply a set of 802.11 wireless stations that communicate directly with one another without using an access point or any connection to a wired network.
User Manual of WNAP-7206 Solutions to overcome the interferences: Minimizing the number of walls and ceilings. Position the WLAN antenna for best reception. Keep WLAN devices away from other electrical devices, eg: microwaves, monitors, electric motors…etc. Add additional WLAN Access Points if necessary. A.8 What are the Open System and Shared Key authentications? IEEE 802.11 supports two subtypes of network authentication services: open system and shared key.
User Manual of WNAP-7206 want to try lowering your fragmentation threshold. This will cause packets to be broken into smaller fragments. These small fragments, if corrupted, can be resent faster than a larger fragment. Fragmentation increases overhead, so you'll want to keep this value as close to the maximum value as possible. A.11 What is RTS (Request to Send) Threshold? The RTS threshold is the packet size at which packet transmission is governed by the RTS/CTS transaction. The IEEE 802.
User Manual of WNAP-7206 run that way to enhance network security. However it's no replacement for WEP, MAC filtering or other protections. A.15 What is Wi-Fi Protected Access (WPA)? Wi-Fi’s original security mechanism, Wired Equivalent Privacy (WEP), has been viewed as insufficient for securing confidential business communications. A longer-term solution, the IEEE 802.11i standard, is under development. However, since the IEEE 802.
User Manual of WNAP-7206 A.20 What is Inter-Access Point Protocol (IAPP)? The IEEE 802.11f Inter-Access Point Protocol (IAPP) supports Access Point Vendor interoperability, enabling roaming of 802.11 Stations within IP subnet. IAPP defines messages and data to be exchanged between Access Points and between the IAPP and high layer management entities to support roaming. The IAPP protocol uses TCP for inter-Access Point communication and UDP for RADIUS request/response exchanges.
User Manual of WNAP-7206 A.27 What is VPN? VPN is the abbreviation of Virtual Private Network. It is designed for creating point-to point private link via shared or public network. A.28 What is IPSEC? IPSEC is the abbreviation of IP Security. It is used to transferring data securely under VPN. A.29 What is WLAN Block Relay between Clients? An Infrastructure Basic Service Set is a BSS with a component called an Access Point (AP). The access point provides a local relay function for the BSS.
User Manual of WNAP-7206 A.34 What is Guard Intervals (GI)? A GI is a period of time between symbol transmission that allows reflections (from multipath) from the previous data transmission to settle before transmitting a new symbol. The 802.11n specifies two guard intervals: 400ns (short) and 800ns (long). Support of the 400ns GI is optional for transmit and receive.
User Manual of WNAP-7206 Appendix B: Configuring the PC in Windows 7 In this section, we’ll introduce how to configure the TCP/IP correctly in Windows 7. First make sure your Network Adapter is working, refer to the adapter’s manual if needed. 1) On the Windows taskbar, click the Start button, and then click Control Panel. 2) Click the Network and Sharing Center icon, and then click the Change adapter settings on the left side of the screen.
User Manual of WNAP-7206 Figure B-2 4) In the prompt page shown below, double click on the Internet Protocol Version 4 (TCP/IPv4).
User Manual of WNAP-7206 5) The following TCP/IP Properties window will display and the IP Address tab is open on this window by default. Now you can configure the TCP/IP protocol below: Setting IP address manually 1 Select Use the following IP address radio button. 2 If the AP's LAN IP address is 192.168.1.1, type in IP address 192.168.1.x (x is from 2 to 254), and Subnet mask 255.255.255.0. 3 Select Use the following DNS server addresses radio button.
User Manual of WNAP-7206 Appendix C: Specifications Product WNAP-7206 150Mbps 802.11a/n Wireless Outdoor Access Point Hardware IEEE 802.11a/n Standard compliance IEEE 802.3 IEEE 802.3u IEEE 802.3x Memory 32 Mbytes DDR SDRAM 4 Mbytes Flash Button Reset Button x 1 LED Provides 4-Level signal LED indicator PoE Passive PoE (Up to 60 meters) Wireless IEEE 802.
User Manual of WNAP-7206 and countries. RF Output Power Receiver Sensitivity 802.11a: 27 ± 1dBm 802.11n: 24 ± 1dBm 802.11a: 802.11n: 54M: -77dBm 150M: -73dBm 48M: -79dBm 121.5M: -76dBm 36M: -83dBm 108M: -77dBm 24M: -86dBm 81M: -81dBm 18M: -91dBm 54M: -84dBm 12M: -92dBm 40.5M: -88dBm 9M: -93dBm 27M: -91dBm 6M: -94dBm 13.
User Manual of WNAP-7206 AP Client Router (WISP Client Router) NAT firewall with SPI (Stateful Packet Inspection) NAT with ALG (Application Layer Gateway) Firewall Built-in NAT server supporting Port Triggering, Virtual Server, and DMZ Built-in firewall with IP address / MAC / DNS filtering Supports ICMP-FLOOD, UDP-FLOOD, TCP-SYN-FLOOD filter, DoS protection AP Client WDS PTP Wireless Mode WDS PTMP WDS Repeater (AP+WDS) Universal Repeater (AP+Client) Channel Width 20MHz / 40MHz Wireless
User Manual of WNAP-7206 Appendix D: Factory Default Settings Item Default Value Common Default Settings Username admin Password admin IP Address 192.168.1.1 Subnet Mask 255.255.255.0 Wireless Operation Mode Standard AP – Access Point SSID default Wireless Security Disable Wireless MAC Address Filtering Disable DHCP DHCP Server Disable Start IP Address 192.168.1.100 End IP Address 192.168.1.199 Address Lease Time 120 minutes (Range:1 ~ 2880 minutes) Default Gateway (optional) 0.
EC Declaration of Conformity For the following equipment: *Type of Product : 5GHz 802.11a/n Wireless LAN Outdoor CPE AP/Router *Model Number : WNAP-7206 * Produced by: Manufacturer’s Name : Manufacturer’s Address: Planet Technology Corp. 10F., No.96, Minquan Rd., Xindian Dist., New Taipei City 231, Taiwan (R.O.C.) is herewith confirmed to comply with the requirements set out in the Council Directive on the Approximation of the Laws of the Member States relating to 1999/5/EC R&TTE.
User Manual of WNAP-7206 EC Declaration of Conformity English Hereby, PLANET Technology Corporation, declares that this 802.11a/n Wireless Outdoor AP/Router is in compliance with the essential requirements and other relevant provisions of Directive 1999/5/EC. Lietuviškai Šiuo PLANET Technology Corporation,, skelbia, kad 802.11a/n Wireless Outdoor AP/Router tenkina visus svarbiausius 1999/5/EC direktyvos reikalavimus ir kitas svarbias nuostatas.