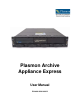
Plasmon Archive Appliance Express User Manual P/N 800-102913-00 B
PREFACE Copyright Copyright 2007 by Plasmon®. All rights reserved. This item and the information contained herein are the property of Plasmon. No part of this document may be reproduced, transmitted, transcribed, stored in a retrieval system, or translated into any language or computer language in any form or by any means, electronic, mechanical, magnetic, optical, chemical, manual, or otherwise, without the express written permission of Plasmon.
Conventions Used WARNING A WARNING is used to alert the reader to situations or conditions that could potentially result in personal injury, fire hazard, or equipment damage. CAUTION A CAUTION is used to warn of undesirable procedures, or of situations in which equipment damage, or data loss could result. NOTE A NOTE is used to emphasize an area of text or to provide additional information.
Product Warranty This Plasmon® product is warranted free from defects in materials, parts, and workmanship and to conform to the current product specification upon delivery. For the specific details of your warranty, refer to your sales contract or contact the company from which the product was purchased. The Plasmon quality system is in compliance with and registered to ISO9001:2000. All products are assembled from new or remanufactured parts.
Preface Page 4 Plasmon AA Express User Manual Document Revision B
TABLE OF CONTENTS PREFACE . . . . . . . . . . . . . . . . . . . . . . . . . . . . . . . . . . . . . . . . . . . . . . . . . 1 Copyright . . . . . . . . . . . . . . . . . . . . . . . . . . . . . . . . . . . . . . . . . . . . . . . . . . . . . . . . . . . . . .1 Disclaimer . . . . . . . . . . . . . . . . . . . . . . . . . . . . . . . . . . . . . . . . . . . . . . . . . . . . . . . . . . . . .1 Trademark Notices. . . . . . . . . . . . . . . . . . . . . . . . . . . . . . . . . . . . . . . . . . . . . . . . .
APPENDIX B SAFETY AGENCY STANDARDS . . . . . . . . . . . . . . . . . . . . . . . . . . . . . . . . . 27 FCC Notice . . . . . . . . . . . . . . . . . . . . . . . . . . . . . . . . . . . . . . . . . . . . . . . . . . . . . . . . . . .27 Industry Canada Notice per ICES-003. . . . . . . . . . . . . . . . . . . . . . . . . . . . . . . . . . . . . . .27 European Notice . . . . . . . . . . . . . . . . . . . . . . . . . . . . . . . . . . . . . . . . . . . . . . . . . . . . . . .27 Australia/New Zealand. . . . . . .
L IST OF FIGURES The Plasmon Archive Appliance Express . . . . . . . . . . . . . . . . . . . . . . . . . . . . . . . . . . . . . . . . . . . . . . . 9 UDO Drive Types . . . . . . . . . . . . . . . . . . . . . . . . . . . . . . . . . . . . . . . . . . . . . . . . . . . . . . . . . . . . . . . . 10 UDO Media . . . . . . . . . . . . . . . . . . . . . . . . . . . . . . . . . . . . . . . . . . . . . . . . . . . . . . . . . . . . . . . . . . . . . 11 Write Protecting UDO Media . . . . . . . . . . . . . . . . .
List of Figures Page 8 Plasmon AA Express User Manual Document Revision B
C HAPTER 1 P RODUCT OVERVIEW General Information The RoHS compliant Plasmon Archive Appliance ExpressTM is a Network Attached Storage (NAS) device providing long term storage for archived and fixed content data. It combines the performance benefits of network attached RAID with the reliability and robustness of Plasmon UDO® (Ultra Density Optical) optical storage.
UDO Drive Type The Archive Appliance Express (AAE) can have either a UDO30 or a UDO60 drive installed. The drive type is indicated on the front of the drive as shown in the pictures below. UDO30 drives read and write only 30GB media. UDO60 drives read and write 60GB media, and can read 30GB media. Figure 2. UDO Drive Types The door on the UDO30 drive opens back into the drive case, while the door on the UDO60 drive opens out from the case. Media is inserted into the UDO30 by pushing it in against the door.
UDO Media The Plasmon AA Express uses UDO media with either 30GB or 60GB capacity, depending on the UDO drive type. These are available in both true Write Once and Rewritable media types. Figure 3. UDO Media UDO Media Labeling To identify each UDO media cartridge used in the AA Express a sequence number, and the start and stop dates for the cartridge must be entered on a label provided with the media.
Media Care and Handling To maintain maximum reliability, the operator should take the time to inspect each media cartridge before use, and whenever it is removed. CAUTION Always condition the unopened media to the normal operating temperature of the room before using. Improper handling or an inappropriate environment can damage the media. To ensure continued reliability: • When media is loaded, or when handling media, ensure that the cartridge case is clean.
C HAPTER 2 H ARDWARE INSTALLATION Getting Started This chapter provides a guide to installing the Plasmon Archive Appliance Express (AAE) and the procedures necessary to get it on-line. Unpacking Save all packing material in case it is ever necessary to ship the appliance. Position Position the appliance to allow a minimum three inch clearance at the back for ventilation. Do not cover or block the air vents on the appliance.
Rack Mounting Rack Mount Guidelines This document provides information for mounting the Archive Appliance Express enclosure into an Electronics Industry Association (EAI 310-D) standard 19” (48.3 cm) rack. The standard 19" rack must have between 22" and 34" (56 to 142 cm) between front and back mounting columns to provide sufficient depth for the enclosure. The appliance takes up 2U of rack space. In this document, one rack unit (1U) equals 1.75" (4.445 cm).
Rack Mount Installation The Archive Appliance Express can be rack mounted using a sliding rail kit available from Plasmon. The rack mount kit works in racks with a depth of 22" to 34" (56 to 142 cm) from front to back rails. Short L Brackets Long L Brackets Sliding Rail Fixed Rail Figure 5. Rack Mounting Kit for AAE To install the rack mounting rails, perform the following steps: 1.
3. Attach two of the L brackets to the ends of the fixed rails that have four mounting holes using four of the short M4, 6mm x 16 screws, as shown below. Repeat for the other rail. Choose either the long L brackets, or the short L brackets, depending on the depth of the rack. These brackets can be mounted with the L end facing either forward or to the back to provide maximum adaptability. Try different combinations to fit the rack. 4.
Installing the SATA Drives The appliance is shipped without the SATA drives installed. The SATA drives, in their own shuttles, are packaged separately, along with blank shuttles to fill any empty drive slots. To mount the drives into the unpopulated slots of the appliance, prepare each SATA drive shuttle by pushing the release lever lock to the right to pop out the release lever.
Cable Connections Power On/Off Button AC Power Connector Diagnostics Connector Ethernet 0 Connector Ethernet 1 Connector Figure 7. Cable Conections Power Connection Route the power cable to the power connector located at the the back of the appliance. The power cable can be plugged into a standard 120 volt to 240 volt wall outlet. The appliance uses an auto-ranging power supply. Do not use an extension cord. The unit must be located next to the AC outlet, and the outlet must be easily accessible.
LED Indicators There are three LED indicators on the left front of the appliance. Labels on the unit identify these indicators as shown below. A blue light indicates proper conditions, red indicates a fault. Power LED Temperature LED SATA Drive Power On LED Fan LED SATA Drive Activity or Fault LED Figure 8. Archive Controller LED Indicators There are two LED indicators at the right front corner of each SATA drive shuttle. The top LED lights blue to indicate a drive is powered on.
Packing Instructions This section is provided in case it is necessary to ship the appliance. These procedures must be followed. CAUTION Plasmon products must be shipped in the original packaging. Shipping a unit in anything other than the manufacturers packaging voids the warranty. Remove all media before shipping the appliance. 1. Lay the appliance double box out with the foam insert in place as shown below. Line up the slots in the foam blocks front to back.
2. Remove all SATA drives and blank shuttles from the appliance, and place it into the double box so the front tabs fit into the foam as shown below. 3. Place the covering foam piece, with the rack rail kit in the provided slot, on top of the appliance as shown below, and close the inner box.
4. In many cases the SATA drives do not leave the customer site. In this case pack the drive boxes empty (or provide other packing material) to fill the space. If the drives are being packed for moving or return, pack the SATA drives with shuttles, and the blank shuttles, into the drive boxes as shown below. Each drive and shuttle should be in an anti-static bag. 5. Place the top foam piece in place over the drives as shown below and close the drive box.
6. Place the two SATA drive boxes on top of the appliance box. 7. Two more boxes hold the blank shuttles and accessories. Place these on top of the drive boxes as shown below, and seal the double box for shipping.
Hardware Installation Page 24 Plasmon AA Express User Manual Document Revision B
APPENDIX A SPECIFICATIONS Overall Specifications The following table provides information about the Plasmon Archive Appliance Express. These specifications are subject to change without notice. Table 1.
Specification Dimensions-Rack Mount Dimensions-Shipping Width (in/cm) Height (in/cm) Depth (in/cm) Weight (lbs/kg) Appendix A Page 26 Archive Appliance Express With Plasmon 20" Rack Mounting Rails, fits in racks with a depth of 22 to 34 inches (56- to 142cm). Uses 2U rack space. 22.
SAFETY APPENDIX B AGENCY STANDARDS FCC Notice The equipment to which this manual pertains has been tested and found to comply with the limits for a Class A digital device, pursuant to part 15 of the FCC Rules. These limits are designed to provide reasonable protection against harmful interference when the equipment is operated in a commercial environment.
Australia/New Zealand This equipment has been tested and complies with AS/NZS 3548. Japan This is a Class A product based on the standard of the Voluntary Control for Interference by Information Technology Equipment (VCCI). If this equipment is used in a domestic environment, radio disturbance may occur, in which case, the user may be required to take corrective actions.
Laser Safety Notice This is a Class 1 Laser Product. It complies with 21 CFR 1010.10, 1040.11, and IEC 608251:1993+A1:1997+A2:2001 as a Class 1 Laser product. The maximum output power and wavelength of the laser in the Plasmon UDO30 and UDO60 drive is 65mW (403-413nm). WARNING Use of controls or adjustments, or performance of procedures other than those specified herein, may result in hazardous radiation exposure. CDRH Regulations The Center for Devices and Radiological Health (CDRH) of the U.S.
Power Cord Set Selection The voltage rating and the current rating of the power cord set shall be higher than the rated voltage and current of this unit. The voltage of the power cord set shall be higher than the power source. For the U.S. and Canada Power cord must be UL listed and CSA labeled. Type SJT, SVT, ST, SJO or SO, 3-conductors, No. 18 AWG, rated 125v, 10A.
INDEX C P cable network ................................................. power ............................................. 18, connection network ................................................. power ................................................... customer support ......................................... packing instructions ..................................... 20 power connection ............................................ 18 cord ................................................
Index Page 32 Plasmon AA Express User Manual Document Revision B
C ONTACTING P LASMON Technical Support in the United States Plasmon Technical Support 1-877-585-6793 1-719-593-4192 (fax) e-mail tech.support@plasmon.com Internet www.plasmon.com Technical Support in Europe, Middle East, and Africa Plasmon Technical Support +44 (0) 1763 262 963 +44 (0) 1763 264 407 (fax) e-mail support@plasmon.co.uk Internet www.plasmon.