scrivo1_manual_eng_rz_kb2.qxd 06.12.2004 17:39 Uhr Seite 1 User’s Guide _ Product Specification and System Requirements _ How to use scrivo.1 _ Bluetooth Installation and Configuration _ scrivo.
scrivo1_manual_eng_rz_kb2.qxd 06.12.2004 17:39 Uhr Seite 2 Thank You Contents Thank you for purchasing the scrivo.1. You have made an excellent choice for your next digital input device. scrivo.1 is designed to be used for many functions with ease. Trademarks The following are registered trademarks of plawa-feinwerktechnik GmbH & Co. KG: scrivo.1, the scrivo.1 logo, and plawa mobilities logo is a trademark of plawa.
scrivo1_manual_eng_rz_kb2.qxd 06.12.2004 17:39 Uhr Seite 4 1. Description Software package Make hand written notes, design and contol your desktop. Create MMS messages on a smart phone and manage memos on a PDA. Finger NoteTM (Only for PC users) Features _ _ _ _ _ Optical navigation & mouse-hover technology Portable and convenient: light and durable (perfect for notebook users) Ergonomic design: Fits comfortably in your hand. No wrist pains after long hours of use. USB connection: plug and play.
scrivo1_manual_eng_rz_kb2.qxd 06.12.2004 17:39 Uhr Seite 6 3. Using scrivo.1 Correct way to hold scrivo.1 When using a typical ballpoint pen, you can write on a paper regardlessof how you hold the pen. On the other hand, if you hold a fountain pen and rotate its pen tip to an upright position, you cannot write at all since the tip of a fountain pen has a different structure to that of a typical ballpoint pen. Similarly, the performance of scrivo.1 greatly depends on how you hold it.
scrivo1_manual_eng_rz_kb2.qxd 06.12.2004 17:39 Uhr Seite 8 OCR (Optical Character Recognition) Changing Pen Tip If users´ PC has Windows XP or Office XP installed, they will be able to use their OCR programs to convert their users own handwriting to text or save it as a picture file. (Handwritten to text conversion will not be supported if OCR isn’t Windows XP and Office XP or above isn’t installed.) scrivo.1´s pen tip is designed to withstand abrasion.
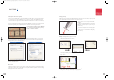
scrivo1_manual_eng_rz_kb2.qxd 06.12.2004 17:39 Uhr Seite 10 _ Using in Microsoft Paint or as a graphic tool _ Using in Microsoft OneNote scrivo.1 can be used in graphic software programs such as Corel Painter, PhotoShop, PaintShop, Microsoft Paint: www.corel.com / www.adobe.com / www.jasc.com _ Correction function in Word documents Using correction function in Microsoft Word. Practical use in document-creating applications such as Microsoft Excel, Power Point, etc.
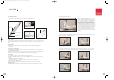
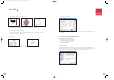
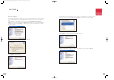
scrivo1_manual_eng_rz_kb2.qxd 06.12.2004 17:39 Uhr Seite 12 2) Please read the License Agreement carefully and choose “I accept the terms in the license agreement”. Then click [Next] to continue setup. 3) Assign a Destination folder for Bluetooth software. We recommend you leave the default. Click [Next] to continue with the next step. 4) The following window appears when ready to install. Click (Install). 12 5) The following picture shows the installation process.
scrivo1_manual_eng_rz_kb2.qxd 06.12.2004 17:39 Uhr Seite 14 7) Checks whether hardware installation is completed or not. If you want to install hardware later, simply click [Cancel]. Always, install software first and then hardware. Connect charger to your computer Bluetooth software installation is complete. Lastly, you need to connect pen and cradle with configuration. 1) Connect your charger to an available USB port.
scrivo1_manual_eng_rz_kb2.qxd 06.12.2004 17:39 Uhr Seite 16 Bluetooth Configuration 4) The following is the list of Bluetooth services. In this case, scrivo.1 does not require any of the services so you can uncheck everything and click [Next] to continue with the next installation. After hardware installation is complete, you need to configure the Bluetooth connection. This process is required in Bluetooth technology different from previous version such as IR or RF technology.
scrivo1_manual_eng_rz_kb2.qxd 06.12.2004 17:40 Uhr Seite 18 7) When you are done with configuration, double click [My Bluetooth Places] on the desktop. Or right click the Bluetooth Icon in the taskbar to run [Explore My Bluetooth Places]. You can select [Bluetooth] -> [Search For Devices] from the menu instead of [Find Bluetooth Devices]. 8) Turn on the scrivo.1 switch after you have completed previous steps.
scrivo1_manual_eng_rz_kb2.qxd 06.12.2004 17:40 Uhr Seite 20 11) After you double click the icon, a window will pop up and ask for your confirmation. Click (Yes). 4.2 Update Bluetooth setting in Windows XP service pack2 1. Please check the Bluetooth Device is already in the “Device Manager”, as shown on the following image.To open the “Device Manager”, please follow the following steps: Press the right mouse button on the Desktop, press “My Computer“ and then “Properties“. Open the option “Hardware“.
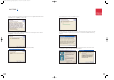
scrivo1_manual_eng_rz_kb2.qxd 06.12.2004 17:40 Uhr Seite 22 4. After step number 3, you will see a new window as shown below. Select “COM Ports” and then click the “Add” button for adding COM Ports. 6. Select “Options” in the Bluetooth Devices Window and then check the correspondent boxes as shown below. 7. Select “Devices” in the Bluetooth Devices Window and then click the “Add” button for adding the device. 5. In the Add COM Port window, select the “Incoming” button and click “OK”, as shown above.
scrivo1_manual_eng_rz_kb2.qxd 06.12.2004 17:40 Uhr Seite 24 9. The system will search for the device. If the system can not find the device, push the pairing button, and then click “search again“. 4.3 Windows 98SE/ME Environment Please install/configure in following order _ Bluetooth Software (BTW) Installation _ Connect charger to your computer _ Bluetooth Configuration Software Installation 1) Windows Installer will automatically run when you insert the CD into your CD/DVD ROM drive.
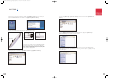
scrivo1_manual_eng_rz_kb2.qxd 06.12.2004 17:40 Uhr Seite 26 4) When the software is ready to be installed, the following window appears. Click (Install). 8) Click (Finish) to complete software installation. 5) The following picture shows the installation process. 9) Restart your computer after installation is complete. 6) During the installation process, you might be asked to put the Windows 98SE/ME CD into your CD-ROM drive as shown in the following picture.
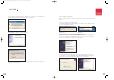
scrivo1_manual_eng_rz_kb2.qxd 06.12.2004 17:40 Uhr Seite 28 5. scrivo.1 Driver and Software 5.2 scrivo.1 driver setting 5.1 Installing scrivo.1 driver and utilities After installation, an icon will be created in the System Tray as shown in the figure below . Caution: Please exit other programs before connecting scrivo.1 or installing scrivo.1 driver and utilities. Setup Bluetooth communication pen and receiver before installing scrivo.1 driver. (Use Bluetooth Dongle CD). Insert the scrivo.
scrivo1_manual_eng_rz_kb2.qxd 06.12.2004 17:40 Uhr Seite 30 Double Click Wheel setting This setting allows users to adjust the double clicking action using scrivo.1. Move your cursor to the target diagram and double click. The values in the small dialog box will change. By clicking “Apply” you can set the value according to the double click action you just made. It will be helpful to click several times. The corresponding range values appear.
scrivo1_manual_eng_rz_kb2.qxd 06.12.2004 17:40 Uhr Seite 32 5.3 Changing mode and usage Restarting Driver Changing mode If scrivo.1 is connected to the PC after the PC has been started, scrivo.1 may not operate correctly. If so, end the scrivo.1 driver in the System Tray and restart the driver. (Refer to the figure below) _ Changing mode using the hot key Change mode using the hot key (Standard: F4). It will appear on the screen at the same time when mode has been changed as shown in the figure below.
scrivo1_manual_eng_rz_kb2.qxd 06.12.2004 17:40 Uhr Seite 34 6. Using Finger NoteTM b. Windows Mode button This button allows you to go back to the Windows mode from captured screen mode. Here, you can work on your computer in normal setting. 6.1 What is Finger NoteTM? (Only for PC users) Finger NoteTM is a tool which can be used to capture anything on your computer screen. You can also write and draw on the captured image, and save it to file. c. List button 6.
scrivo1_manual_eng_rz_kb2.qxd 06.12.2004 17:40 Uhr Seite 36 f. Import documents button m. Eraser button This button enebles you to erase writing or drawing in case you make mistakes. The left button is for erasing only the parts you want to erase. The right button is used to clear everything. n. Line button This button enables you to draw a straight line. Left click your mouse and hold it down, then drag it to the point you want to draw a line. o.
scrivo1_manual_eng_rz_kb2.qxd 06.12.2004 17:40 Uhr Seite 38 7. Troubleshooting 8. Contact & Support Although scrivo.1 is designed to be highly reliable, you may occasionally experience a problem. The following will help you to identify the cause of possible problems and suggest solutions for related problems The plawa technical support team is eager to help you enjoy your new plawa product.