Corolla_Navi_EE_12J57E.
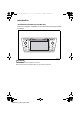
Corolla_Navi_EE_12J57E.book 2 ページ 2014年3月3日 月曜日 午後1時44分 Introduction ■EXISTENCE OF NAVIGATION CAPABILITIES Existence of navigation capabilities can be confirmed by performing the following method: INFORMATION ● This illustration is for left-hand drive vehicles. ● The button positions and shapes differ for right-hand drive vehicles.
Corolla_Navi_EE_12J57E.book 3 ページ 2014年3月3日 月曜日 午後1時44分 XVehicles without smart entry & start system 1 When the engine switch is turned to the “ACC” or “ON” position, the initial screen will be displayed and the system will begin operating. XVehicles with smart entry & start system 1 When the engine switch is turned to the ACCESSORY or IGNITION ON mode, the initial screen will be displayed and the system will begin operating. 2 Press the “MAP/NAV” button.
Corolla_Navi_EE_12J57E.book 4 ページ 2014年3月3日 月曜日 午後1時44分 SYMBOLS USED IN ILLUSTRATIONS Safety symbol The symbol of a circle with a slash through it means “Do not”, “Do not do this”, or “Do not let this happen”. Arrows indicating operations Indicates the action (pushing, turning, etc.) used to operate switches and other devices. Indicates the outcome of an operation (e.g. a lid opens). HOW TO READ THIS MANUAL No. Name Description Operational Outlines An outline of the operation is explained.
Corolla_Navi_EE_12J57E.book 5 ページ 2014年3月3日 月曜日 午後1時44分 NAVIGATION SYSTEM OWNER’S MANUAL This manual explains the operation of the navigation/multimedia system. Please read this manual carefully to ensure proper use. Keep this manual in your vehicle at all times. The screen shots in this document and the actual screens of the navigation/multimedia system differ depending on whether the functions and/or a contract existed and the map data available at the time of producing this document.
Corolla_Navi_EE_12J57E.book 6 ページ 2014年3月3日 月曜日 午後1時44分 IMPORTANT INFORMATION ABOUT THIS MANUAL For safety reasons, this manual indicates items requiring particular attention with the following marks. CAUTION ● This is a warning against anything which may cause injury to people if the warning is ignored. You are informed about what you must or must not do in order to reduce the risk of injury to yourself and others.
Corolla_Navi_EE_12J57E.book 7 ページ 2014年3月3日 SAFETY INSTRUCTION (MULTIMEDIA SYSTEM) To use this system in the safest possible manner, follow all the safety tips shown below. Do not use any feature of this system to the extent it becomes a distraction and prevents safe driving. The first priority while driving should always be the safe operation of the vehicle. While driving, be sure to observe all traffic regulations.
Corolla_Navi_EE_12J57E.book 8 ページ 2014年3月3日 CAUTION ● For safety, the driver should not operate the navigation system while he/she is driving. Insufficient attention to the road and traffic may cause an accident. ● While driving, be sure to obey the traffic regulations and maintain awareness of the road conditions. If a traffic sign on the road has been changed, route guidance may not have the updated information such as the direction of a one way street.
Corolla_Navi_EE_12J57E.
Corolla_Navi_EE_12J57E.book 10 ページ 2014年3月3日 月曜日 午後1時44分 TABLE OF CONTENTS 1 QUICK GUIDE 1. QUICK GUIDE ................................. 14 SYSTEM FUNCTION INDEX ................ 14 OVERVIEW BUTTONS......................... 16 3 1. BASIC INFORMATION BEFORE OPERATION ................. 74 QUICK REFERENCE ............................ 74 2. CONTROLS AND FEATURES........ 16 HANDS-FREE SYSTEM........................ 77 TOUCH SCREEN GESTURES............. 18 TOUCH SCREEN OPERATION ...........
Corolla_Navi_EE_12J57E.book 11 ページ 5 2014年3月3日 SETUP 1. SETUP OPERATION .................... 112 月曜日 7 午後1時44分 NAVIGATION SYSTEM 1 QUICK REFERENCE .......................... 112 1. BASIC INFORMATION BEFORE OPERATION................ 158 GENERAL SETTINGS......................... 114 QUICK REFERENCE.......................... 158 DISPLAY SETTINGS........................... 117 DISPLAYING THE NAVIGATION SCREEN........................................... 163 ® Bluetooth SETTINGS...................
Corolla_Navi_EE_12J57E.book 12 ページ 2014年3月3日 TABLE OF CONTENTS 8 APPLICATION 1. APPLICATIONS OPERATION ...... 222 QUICK REFERENCE.......................... 222 PICTURE SLIDESHOW ...................... 225 E-MAIL ................................................ 227 MirrorLink.......................................... 229 TOYOTA EUROCARE ........................ 230 2. CONNECTED SERVICE................ 232 CONNECTED SERVICE OVERVIEW ......................................
Corolla_Navi_EE_12J57E.book 13 ページ 2014年3月3日 月曜日 午後1時44分 1 1 QUICK GUIDE 2 1 QUICK GUIDE 1. SYSTEM FUNCTION INDEX......... 14 2 CONTROLS AND FEATURES 3 4 1. OVERVIEW BUTTONS ................. 16 2. TOUCH SCREEN GESTURES...... 18 5 3. TOUCH SCREEN OPERATION................................ 19 ENTERING SCREEN OPERATION...... 20 6 LIST SCREEN OPERATION.................
Corolla_Navi_EE_12J57E.book 14 ページ 2014年3月3日 月曜日 午後1時44分 1. QUICK GUIDE 1. SYSTEM FUNCTION INDEX AUDIO SYSTEM VEHICLE INFORMATION To access the audio system, press the “MEDIA” button. The audio control screen will be displayed. (→P.25) Bluetooth® HANDS-FREE SYSTEM ® To access the Bluetooth hands-free system, press the button. Each time the button is pressed, the screen will change between the “Phone” menu screen and the “Extras”/“Toyota online” menu screen.
Corolla_Navi_EE_12J57E.book 15 ページ 2014年3月3日 月曜日 午後1時44分 1. QUICK GUIDE REAR VIEW MONITOR SYSTEM To access the application system, press the button. Each time the button is pressed, the screen will change between the “Phone” menu screen and the “Extras”/“Toyota online” menu screen. The driver can use applications. (→P.221) NAVIGATION SYSTEM To access the navigation system, press the “MAP/NAV” button.
Corolla_Navi_EE_12J57E.book 16 ページ 2014年3月3日 月曜日 午後1時44分 2. CONTROLS AND FEATURES 1. OVERVIEW BUTTONS No. Function Page By touching the screen with your finger, you can control the selected functions. 18 Insert a disc into this slot. The CD player turns on immediately. 36 Press to customise the function settings. 111 Turn the tune/scroll knob to select a radio station or skip to the next or previous track. This knob can also be used to magnify or reduce the map scale.
Corolla_Navi_EE_12J57E.book 17 ページ 2014年3月3日 月曜日 午後1時44分 2. CONTROLS AND FEATURES No. Page Press the “ ” or “ ” button to seek up or down for a radio station or to access a desired track or file. 30, 36, 42, 47, 55 Press to access the audio system. The audio system turns on in the last mode used. 26, 27, 28 Press the power/volume knob to turn navigation/multimedia system on and off, and turn it to adjust the volume. 27 Press to eject a disc.
Corolla_Navi_EE_12J57E.book 18 ページ 2014年3月3日 月曜日 午後1時44分 2. CONTROLS AND FEATURES 2. TOUCH SCREEN GESTURES Operations are performed by touching the touch screen directly with your finger. Operation method Outline Main use Touch Quickly touch and release once. Changing and selecting various settings. Drag* Touch the screen with your finger, and move the screen to the desired position. • Scrolling the lists • Using scroll bar in lists • Adjusting the zoom bar of the map (→P.
Corolla_Navi_EE_12J57E.book 19 ページ 2014年3月3日 月曜日 午後1時44分 2. CONTROLS AND FEATURES 3. TOUCH SCREEN OPERATION This system is operated mainly by the screen buttons. NOTICE ● To prevent damaging the screen, lightly touch the screen buttons with your finger. ● Do not use objects other than your finger to touch the screen. ● Wipe off fingerprints using a glass cleaning cloth. Do not use chemical cleaners to clean the screen, as they may damage the touch screen.
Corolla_Navi_EE_12J57E.book 20 ページ 2014年3月3日 月曜日 午後1時44分 2. CONTROLS AND FEATURES ENTERING SCREEN OPERATION When searching for a name, letters and numbers, etc. can be entered via the screen. ENTERING LETTERS AND NUMBERS 1 Select the keys directly to enter letters or numbers. No. Function Select to delete one letter. Select and hold to continue deleting letters. Select to enter symbols. Select to select lower case or upper case. Select to change keyboard types. 2 Select “OK”.
Corolla_Navi_EE_12J57E.book 21 ページ 2014年3月3日 月曜日 午後1時44分 2. CONTROLS AND FEATURES ENTERING FROM THE LIST OF MATCHING ENTRIES 1 1 When a list is displayed, use the appropriate screen button to scroll through the list. Enter letters. z If a candidate entry text displayed in the enter field is what is desired, select “OK” or the candidate entry text. z Select to display the candidate entry text list. The number of matching items is shown. Up to 300 items are displayed.
Corolla_Navi_EE_12J57E.book 22 ページ 2014年3月3日 月曜日 午後1時44分 2. CONTROLS AND FEATURES ■AUTOMATIC TEXT SCROLLING Entries that are too long to fit in the current field are scrolled automatically from right to left. This function is not available while driving. INFORMATION ● This function can be changed to on or off. (→P.114) CHARACTER JUMP BUTTONS IN LISTS Some lists contain character screen buttons, “A-C”, “D-F” etc.
Corolla_Navi_EE_12J57E.book 23 ページ 2014年3月3日 月曜日 午後1時44分 2. CONTROLS AND FEATURES USING STEERING SWITCHES 1 On list screens, can be operated with the switches on the steering wheel. QUICK GUIDE No. Function Press: Cursor up/down Press and hold: Page up/down Return to the previous screen.
Corolla_Navi_EE_12J57E.
Corolla_Navi_EE_12J57E.book 25 ページ 2014年3月3日 月曜日 午後1時44分 2 1 AUDIO SYSTEM 2 1 BASIC OPERATION 2. USB MEMORY .............................. 42 OVERVIEW ........................................... 42 PLAYING A USB MEMORY.................. 46 1. QUICK REFERENCE .................... 26 3 USB MEMORY OPTIONS..................... 46 2. SOME BASICS.............................. 27 TURNING THE AUDIO SYSTEM ON OR OFF ........................................ 27 OVERVIEW ..................................
Corolla_Navi_EE_12J57E.book 26 ページ 2014年3月3日 月曜日 午後1時44分 1. BASIC OPERATION 1. QUICK REFERENCE To access the audio system, press the “MEDIA” button. The audio system turns on in the last mode used.
Corolla_Navi_EE_12J57E.book 27 ページ 2014年3月3日 月曜日 午後1時44分 1. BASIC OPERATION 2. SOME BASICS This section describes some of the basic features of the audio system. Some information may not pertain to your system. TURNING THE AUDIO SYSTEM ON OR OFF XVehicles without smart entry & start system 2 AUDIO SYSTEM Your audio system works when the engine switch is turned to the “ACC” or “ON” position.
Corolla_Navi_EE_12J57E.book 28 ページ 2014年3月3日 月曜日 午後1時44分 1. BASIC OPERATION SELECTING AN AUDIO SOURCE 1 INSERTING OR EJECTING A DISC Press the “MEDIA” button. INSERTING A DISC 1 Insert a disc with the label side up. z The audio system turns on in the last mode used. 2 Select or press the “MEDIA” button to display the audio source selection screen.
Corolla_Navi_EE_12J57E.book 29 ページ 2014年3月3日 月曜日 午後1時44分 1. BASIC OPERATION EJECTING A DISC 1 Press the button. USB/AUX PORT 1 Open the cover of the auxiliary box and then open the cover of the USB/AUX port. 2 AUDIO SYSTEM z The disc will be ejected. 2 Connect a device. z If a device is inserted, it starts playing automatically. As soon as it is ready to play, the audio control screen is shown automatically. z If a USB hub is plugged-in, two devices can be connected at a time.
Corolla_Navi_EE_12J57E.book 30 ページ 2014年3月3日 月曜日 午後1時44分 2. RADIO OPERATION 1. AM/FM RADIO OVERVIEW The radio operation screen can be reached by the following method: Press the “MEDIA” button to display the audio source selection screen, then select “AM” or “FM” to display the radio control screen.
Corolla_Navi_EE_12J57E.book 31 ページ 2014年3月3日 月曜日 午後1時44分 2.
Corolla_Navi_EE_12J57E.book 32 ページ 2014年3月3日 月曜日 午後1時44分 2. RADIO OPERATION No. Function Select to set the sound settings. (→P.140) The tune/scroll knob: • Preset tuning screen: Turn to select a preset station. • Station list screen: Turn to move up/down the station list. • Manual tuning screen: Turn to step up/down frequencies. • Preset tuning screen: Press to move up/down the preset stations. • Station list screen: Press to move up/down the station list.
Corolla_Navi_EE_12J57E.book 33 ページ 2014年3月3日 月曜日 午後1時44分 2. RADIO OPERATION PRESETTING A STATION 1 2 3 Select “Favourites”. MANUAL TUNING 1 Select “Manual”. Tune in the desired station. 2 2 AUDIO SYSTEM Select one of the station selector buttons (1-6) and hold it until a beep is heard. Tune the desired station. z The station’s frequency or name will be displayed in the screen button. z To change the preset station to a different one, follow the same procedure. No.
Corolla_Navi_EE_12J57E.book 34 ページ 2014年3月3日 月曜日 午後1時44分 2. RADIO OPERATION TA (TRAFFIC ANNOUNCEMENT) FUNCTION RDS (RADIO DATA SYSTEM) Depending on the availability of RDS infrastructure, the service may not function. FM ALTERNATIVE FREQUENCY (AF) A better reception frequency of the same broadcasting program will be automatically tuned if the reception of the current frequency degrades.
Corolla_Navi_EE_12J57E.book 35 ページ 2014年3月3日 月曜日 午後1時44分 2. RADIO OPERATION FM RADIO OPTIONS 1 Display the FM radio control screen. (→P.30) 2 3 Select 2 . No. AUDIO SYSTEM Select the button to be set. Function Select to select “By broadcaster” or “Alphabetical” for the listing order of the station list. The tuner will automatically seek a station that regularly broadcasts traffic information and the station broadcasts when the traffic information program starts.
Corolla_Navi_EE_12J57E.book 36 ページ 2014年3月3日 月曜日 午後1時44分 3. MEDIA OPERATION 1. CD OVERVIEW The CD operation screen can be reached by the following methods: XInserting a disc (→P.28) XPress the “MEDIA” button to display the audio source selection screen, then select “CD” to display the CD control screen.
Corolla_Navi_EE_12J57E.book 37 ページ 2014年3月3日 月曜日 午後1時44分 3.
Corolla_Navi_EE_12J57E.book 38 ページ 2014年3月3日 月曜日 午後1時44分 3. MEDIA OPERATION No. Function Select to set the sound settings. (→P.140) The tune/scroll knob: • Turn to select a track. • Turn to move up/down the list. • Press to select a track. • Press and hold to fast forward/rewind. Press to display the media mode selection screen. The power/volume knob: • Turn to adjust volume. • Press to turn the audio system on/off. Press to eject a disc.
Corolla_Navi_EE_12J57E.book 39 ページ 2014年3月3日 月曜日 午後1時44分 3. MEDIA OPERATION PLAYING AN AUDIO CD PLAYING AN MP3/WMA/AAC DISC REPEATING The track currently being listened to can be repeated. Select 2 The track or folder currently being listened to can be repeated. . 1 z Each time is selected, the mode changes as follows: • track repeat → off Select .
Corolla_Navi_EE_12J57E.book 40 ページ 2014年3月3日 月曜日 午後1時44分 3. MEDIA OPERATION RANDOM ORDER Tracks can be automatically and randomly selected. 1 Select AUDIO CD OR MP3/WMA/AAC DISC OPTIONS 1 Display the (→P.36) 2 3 Select . z Each time is selected, the mode changes as follows: • random → off 40 COROLLA_14CY_Navi_EE CD control . Select the button to be set. screen.
Corolla_Navi_EE_12J57E.book 41 ページ 2014年3月3日 月曜日 午後1時44分 3. MEDIA OPERATION No. Page • Audio CD: Select to display a track list. • MP3/WMA/AAC disc: Select to display a folder list. Select to resume playback of tracks from the beginning of the track list when the playback of the last track on the list is finished. Select to set random playback track. 39, 40 Select to set repeat playback track. 39 ∗1 Select to set repeat playback folder.
Corolla_Navi_EE_12J57E.book 42 ページ 2014年3月3日 月曜日 午後1時44分 3. MEDIA OPERATION 2. USB MEMORY OVERVIEW The USB memory operation screen can be reached by the following methods: XConnecting a USB memory (→P.29) XPress the “MEDIA” button to display the audio source selection screen, then select “USB” to display the USB memory control screen.
Corolla_Navi_EE_12J57E.book 43 ページ 2014年3月3日 月曜日 午後1時44分 3.
Corolla_Navi_EE_12J57E.book 44 ページ 2014年3月3日 月曜日 午後1時44分 3. MEDIA OPERATION No. Function Select to set the sound settings. (→P.140) The tune/scroll knob: • Turn to select a track. • Press to select a track. • Press and hold to fast forward/rewind. Press to display the media mode selection screen. The power/volume knob: • Turn to adjust volume. • Press to turn the audio system on/off. Shows progress Select to display the USB options screen.
Corolla_Navi_EE_12J57E.book 45 ページ 2014年3月3日 月曜日 午後1時44分 3. MEDIA OPERATION CAUTION ● Do not operate the player’s controls or connect the USB memory while driving. 2 NOTICE INFORMATION ● With navigation function: This system supports MTP devices. 45 COROLLA_14CY_Navi_EE AUDIO SYSTEM ● Depending on the size and shape of the USB memory that is connected to the system, the auxiliary box may not close fully.
Corolla_Navi_EE_12J57E.book 46 ページ 2014年3月3日 月曜日 午後1時44分 3. MEDIA OPERATION PLAYING A USB MEMORY REPEATING The track currently being listened to can be repeated. 1 Select USB MEMORY OPTIONS 1 Display the USB memory control screen. (→P.42) 2 3 Select Select the button to be set. . No. z Each time is selected, the mode changes as follows: • track repeat → off RANDOM ORDER Tracks can be automatically and randomly selected. 1 Select . .
Corolla_Navi_EE_12J57E.book 47 ページ 2014年3月3日 月曜日 午後1時44分 3. MEDIA OPERATION 3. iPod OVERVIEW The iPod operation screen can be reached by the following methods: XConnecting an iPod (→P.29) XPress the “MEDIA” button to display the audio source selection screen, then select “iPod” to display the iPod control screen.
Corolla_Navi_EE_12J57E.book 48 ページ 3.
Corolla_Navi_EE_12J57E.book 49 ページ 2014年3月3日 月曜日 午後1時44分 3. MEDIA OPERATION No. Function Select to set the sound settings. (→P.140) The tune/scroll knob: • Turn to select a track. 2 AUDIO SYSTEM • Press to select a track. • Press and hold to fast forward/rewind. Press to display the media mode selection screen. The power/volume knob: • Turn to adjust volume. • Press to turn the audio system on/off. Shows progress Select to display the iPod audio options screen.
Corolla_Navi_EE_12J57E.book 50 ページ 2014年3月3日 月曜日 午後1時44分 3. MEDIA OPERATION CAUTION ● Do not operate the player’s controls or connect the iPod while driving. NOTICE ● Depending on the size and shape of the iPod that is connected to the system, the auxiliary box may not close fully. In this case, do not forcibly close the auxiliary box as this may damage the iPod or the terminal, etc. ● Do not leave a portable player in the vehicle.
Corolla_Navi_EE_12J57E.book 51 ページ 2014年3月3日 月曜日 午後1時44分 3. MEDIA OPERATION iPod AUDIO iPod AUDIO OPTIONS REPEATING The track currently being listened to can be repeated. Select Display the (→P.47) 2 3 Select screen. 2 . Select the button to be set. No. RANDOM ORDER Tracks can be automatically and randomly selected. Select control . z Each time is selected, the mode changes as follows: • track repeat → off 1 iPod AUDIO SYSTEM 1 1 . Function Page Select to display a track list.
Corolla_Navi_EE_12J57E.book 52 ページ 2014年3月3日 月曜日 午後1時44分 3. MEDIA OPERATION 4. AUX OVERVIEW The AUX operation screen can be reached by the following methods: XConnecting a device to the AUX port (→P.29) XPress the “MEDIA” button to display the audio source selection screen, then select “AUX” to display the AUX control screen.
Corolla_Navi_EE_12J57E.book 53 ページ 2014年3月3日 月曜日 午後1時44分 3. MEDIA OPERATION ■CONTROL SCREEN 2 AUDIO SYSTEM No. Function Select to set the sound settings. (→P.140) Press to display the media mode selection screen. The power/volume knob: • Turn to adjust volume. • Press to turn the audio system on/off. Select to display the media source selection screen.
Corolla_Navi_EE_12J57E.book 54 ページ 2014年3月3日 月曜日 午後1時44分 3. MEDIA OPERATION CAUTION ● Do not connect portable audio device or operate the controls while driving. NOTICE ● Depending on the size and shape of the portable audio device that is connected to the system, the auxiliary box may not close fully. In this case, do not forcibly close the auxiliary box as this may damage the portable audio device or the terminal, etc. ● Do not leave a portable audio device in the vehicle.
Corolla_Navi_EE_12J57E.book 55 ページ 2014年3月3日 月曜日 午後1時44分 3. MEDIA OPERATION 5. Bluetooth® AUDIO The Bluetooth® audio system enables users to enjoy listening to music that is played on a portable player on the vehicle speakers via wireless communication. This audio system supports Bluetooth®, a wireless data system capable of playing portable audio music without cables. If your device does not support Bluetooth®, the Bluetooth® audio system will not function.
Corolla_Navi_EE_12J57E.book 56 ページ 3.
Corolla_Navi_EE_12J57E.book 57 ページ 2014年3月3日 月曜日 午後1時44分 3. MEDIA OPERATION No. Function Select to set the sound settings. (→P.140) The tune/scroll knob: • Turn to select a track. • Turn to move up/down the list. 2 AUDIO SYSTEM • Press to select a track. • Press and hold to fast forward/rewind. Press to display the media mode selection screen. The power/volume knob: • Turn to adjust volume. • Press to turn the audio system on/off.
Corolla_Navi_EE_12J57E.book 58 ページ 2014年3月3日 月曜日 午後1時44分 3. MEDIA OPERATION CAUTION ● Do not operate the player’s controls or connect to the Bluetooth® audio system while driving. ● Your audio unit is fitted with Bluetooth® antennas. People with implantable cardiac pacemakers, cardiac resynchronization therapy-pacemakers or implantable cardioverter defibrillators should maintain a reasonable distance between themselves and the Bluetooth® antennas.
Corolla_Navi_EE_12J57E.book 59 ページ 2014年3月3日 月曜日 午後1時44分 3. MEDIA OPERATION CONNECTING Bluetooth® AUDIO ® ■IF NO DEVICE HAS BEEN CONNECTED XMultimedia system (→P.120) In order to use the Bluetooth audio system, it is necessary to pair a portable player and connect the audio profile (A2DP) with the system. XNavigation system (→P.127) Once you have connected a device with audio profile (A2DP), you can enjoy your music on the vehicle’s audio system. XMultimedia system (→P.
Corolla_Navi_EE_12J57E.book 60 ページ 2014年3月3日 月曜日 午後1時44分 3. MEDIA OPERATION LISTENING TO Bluetooth® AUDIO Bluetooth® AUDIO OPTIONS 1 Display the Bluetooth® control screen. (→P.55) 2 3 Select REPEATING The track currently being listened to can be repeated. 1 Select Select the button to be set. . No. z Each time is selected, the mode changes as follows: • track repeat → off RANDOM ORDER Tracks can be automatically and randomly selected. 1 Select . .
Corolla_Navi_EE_12J57E.book 61 ページ 2014年3月3日 月曜日 午後1時44分 3. MEDIA OPERATION INFORMATION ● If a portable device supports AVRCP 1.4 and browsing, title list and browse for music will be available. (If the device does not support browsing, these menu entries will be displayed grayed out.) Lower grade devices do not support these features. For these devices, the title list and browse for music will be displayed grayed out.
Corolla_Navi_EE_12J57E.book 62 ページ 2014年3月3日 月曜日 午後1時44分 4. AUDIO REMOTE CONTROLS 1. STEERING SWITCHES Some parts of the navigation/multimedia system can be adjusted with the switches on the steering wheel. No.
Corolla_Navi_EE_12J57E.book 63 ページ 2014年3月3日 月曜日 午後1時44分 4.
Corolla_Navi_EE_12J57E.book 64 ページ 2014年3月3日 月曜日 午後1時44分 5. TIPS FOR OPERATING THE AUDIO SYSTEM 1. OPERATING INFORMATION NOTICE ● To avoid damaging the audio system: • Be careful not to spill beverages over the audio system. • Do not put anything other than appropriate discs into the CD player slot. INFORMATION ● The use of a cellular phone inside or near the vehicle may cause a noise from the speakers of the audio system which you are listening to. However, this does not indicate a malfunction.
Corolla_Navi_EE_12J57E.book 65 ページ 2014年3月3日 月曜日 午後1時44分 5. TIPS FOR OPERATING THE AUDIO SYSTEM FM Fading: AM broadcasts are reflected by the upper atmosphere especially at night. These reflected signals can interfere with those received directly from the radio station, causing the radio station to sound alternately strong and weak.
Corolla_Navi_EE_12J57E.book 66 ページ 2014年3月3日 月曜日 午後1時44分 5. TIPS FOR OPERATING THE AUDIO SYSTEM COMPATIBLE MODELS iPod The following iPod®, iPod nano®, iPod classic®, iPod touch® and iPhone® devices can be used with this system. Made for z “Made for iPod”, “Made for iPhone” and “Made for iPad” mean that an electronic accessory has been designed to connect specifically to iPod, iPhone, or iPad, respectively, and has been certified by the developer to meet Apple performance standards.
Corolla_Navi_EE_12J57E.book 67 ページ 2014年3月3日 月曜日 午後1時44分 5. TIPS FOR OPERATING THE AUDIO SYSTEM CARING FOR YOUR CD PLAYER AND DISCS 2 AUDIO SYSTEM z Extremely high temperatures can keep your CD player from working. On hot days, use air conditioning to cool the vehicle interior before you listen to a disc. z Bumpy roads or other vibrations may make your CD player skip. z If moisture gets into your CD player, you may not hear any sound even though your CD player appears to be working.
Corolla_Navi_EE_12J57E.book 68 ページ 2014年3月3日 月曜日 午後1時44分 5. TIPS FOR OPERATING THE AUDIO SYSTEM NOTICE ● Do not use special shaped, transparent/ translucent, low quality or labeled discs such as those shown in the illustrations. The use of such discs may damage the player, or it may be impossible to eject the disc. ● This system is not designed for use of Dual Disc. Do not use Dual Disc because it may cause damage to the player. ● Do not use discs with a protection ring.
Corolla_Navi_EE_12J57E.book 69 ページ 2014年3月3日 月曜日 午後1時44分 5. TIPS FOR OPERATING THE AUDIO SYSTEM ■CORRESPONDING BIT RATES FILE INFORMATION File type ■COMPATIBLE USB DEVICES File formats FAT 16/32 Correspondence class Mass storage class ■COMPATIBLE COMPRESSED FILES Item USB Compatible file format (audio) DISC MP3 files: MPEG 1 LAYER 3 32 - 320 MP3 files: MPEG 2 LSF LAYER 3 8 - 160 WMA files: Ver. 7, 8 CBR 48 - 192 WMA files: Ver. 9 (9.1/9.
Corolla_Navi_EE_12J57E.book 70 ページ 2014年3月3日 月曜日 午後1時44分 5. TIPS FOR OPERATING THE AUDIO SYSTEM z MP3 (MPEG Audio Layer 3), WMA (Windows Media Audio) and AAC (Advanced Audio Coding) are audio compression standards. z This system can play MP3/WMA/AAC files on CD-R, CD-RW discs and USB memory. z This system can play disc recordings compatible with ISO 9660 level 1 and level 2 and with the Romeo and Joliet file system. z When naming an MP3/WMA/AAC file, add an appropriate file extension (.mp3/.wma/.m4a).
Corolla_Navi_EE_12J57E.book 71 ページ 2014年3月3日 月曜日 午後1時44分 5. TIPS FOR OPERATING THE AUDIO SYSTEM CD-R AND CD-RW DISCS PACKET WRITE z This is a general term that describes the process of writing data on-demand to CDR, etc., in the same way that data is written to floppy or hard discs. ID3 TAG z This is a method of embedding trackrelated information in an MP3 file.
Corolla_Navi_EE_12J57E.book 72 ページ 2014年3月3日 月曜日 午後1時44分 5. TIPS FOR OPERATING THE AUDIO SYSTEM ISO 9660 FORMAT z This is the international standard for the formatting of CD-ROM folders and files. For the ISO 9660 format, there are two levels of regulations. z Level 1: The file name is in 8.3 format (8 character file names, with a 3 character file extension. File names must be composed of one-byte capital letters and numbers. The “_” symbol may also be included.
Corolla_Navi_EE_12J57E.book 73 ページ 2014年3月3日 月曜日 午後1時44分 3 1 Bluetooth® HANDS-FREE SYSTEM 2 1 BASIC INFORMATION BEFORE OPERATION 1. QUICK REFERENCE .................... 74 2. RECEIVING CALLS ON A Bluetooth® PHONE .................... 90 3. TALKING ON A Bluetooth® PHONE ........................................ 91 SENDING TONES................................. 92 2. HANDS-FREE SYSTEM ............... 77 DIALING A SECOND NUMBER............ 93 USING THE PHONE SWITCH/ MICROPHONE......................
Corolla_Navi_EE_12J57E.book 74 ページ 2014年3月3日 月曜日 午後1時44分 1. BASIC INFORMATION BEFORE OPERATION 1. QUICK REFERENCE ■“Phone” MENU SCREEN Pressing the button allows access to the “Phone” menu screen. Each time the button is pressed, the screen will change between the “Phone” menu screen and the “Extras”/“Toyota online” menu screen. When the shown. Select button is pressed, the screen that was last displayed will be to display the “Phone” menu screen.
Corolla_Navi_EE_12J57E.book 75 ページ 2014年3月3日 月曜日 午後1時44分 1. BASIC INFORMATION BEFORE OPERATION No. Function Page 85 Select to display the “Contacts” screen. An entry from the list of contacts in the “Stored” and “Phone book” screen can be selected and called. 86 Select to display the “Call lists” screen. An entry from the missed, received or dial call lists can be selected and called. 87 Select to display the “Messages” screen.
Corolla_Navi_EE_12J57E.book 76 ページ 2014年3月3日 月曜日 午後1時44分 1. BASIC INFORMATION BEFORE OPERATION ■“Dial” SCREEN ■“Messages” SCREEN z This screen can be displayed by selecting z This screen can be displayed by selecting on any of the phone screens. on any of the phone screens. ■“Contacts” SCREEN z This screen can be displayed by selecting on any of the phone screens. ■“Call lists” SCREEN z This screen can be displayed by selecting on any of the phone screens.
Corolla_Navi_EE_12J57E.book 77 ページ 2014年3月3日 月曜日 午後1時44分 1. BASIC INFORMATION BEFORE OPERATION 2. HANDS-FREE SYSTEM Bluetooth® hands-free system allows you to make or receive a call without taking your hands off the steering wheel by connecting your cellular phone. The operating procedure of the system is explained in this section. CAUTION ● Use a cellular phone or connect the Bluetooth® phone only when safe and legal to do so. ● Your audio unit is fitted with Bluetooth® antennas.
Corolla_Navi_EE_12J57E.book 78 ページ 2014年3月3日 月曜日 午後1時44分 1. BASIC INFORMATION BEFORE OPERATION USING THE PHONE SWITCH/ MICROPHONE XSteering switch By pressing the phone switch, a call can be received or ended without taking your hands off the steering wheel. Volume control switch z Press the “+” side to increase the volume. z Press the “-” side to decrease the volume. Off hook switch On hook switch XMicrophone The microphone is used when talking on the phone.
Corolla_Navi_EE_12J57E.book 79 ページ 2014年3月3日 月曜日 午後1時44分 1. BASIC INFORMATION BEFORE OPERATION ABOUT THE PHONE BOOK IN THIS SYSTEM z The following data is stored for every registered phone. When another phone is connecting, you cannot read the registered data. • Phone book data • Call history data INFORMATION A lot of personal data is registered when you use the Hands-free system. When you release your car, initialize your data. (→P.116) z You can initialize the following data in the system.
Corolla_Navi_EE_12J57E.book 80 ページ 2014年3月3日 月曜日 午後1時44分 1. BASIC INFORMATION BEFORE OPERATION CONNECTING A Bluetooth® PHONE 2 Select “Yes”. In order to use the hands-free system, it is necessary to pair the phone and connect the phone’s profile (HFP) with the system. Once the profile has been connected, hands-free calls can be made.
Corolla_Navi_EE_12J57E.book 81 ページ 2014年3月3日 月曜日 午後1時44分 1. BASIC INFORMATION BEFORE OPERATION 3. REGISTERING AN ENTRY 7 REGISTERING A NEW ENTRY Check that the entry is registered in the “Stored” list. Up to 200 numbers can be registered with this system. REGISTERING FROM THE “Contacts” SCREEN Display the “Phone” menu screen and select “Contacts”. (→P.74) 2 Select the “Stored” tab. 3 Select “Create new entry”. 3 z Select to display and edit the entry information. (→P.
Corolla_Navi_EE_12J57E.book 82 ページ 2014年3月3日 月曜日 午後1時44分 1. BASIC INFORMATION BEFORE OPERATION REGISTERING FROM THE “Phone book” SCREEN REGISTERING FROM AN EXTERNAL DEVICE∗ 1 Search the entry by “Phone book”. (→P.86) 2 Select 3 4 Select “Add to stored contacts”. for desired item. “vCard” formatted data can be transferred from a USB memory to this system. Transferred addresses and numbers will be stored in the “Stored” list on the “My destinations” screen and “Contacts” screen. (→P.
Corolla_Navi_EE_12J57E.book 83 ページ 2014年3月3日 月曜日 午後1時44分 1. BASIC INFORMATION BEFORE OPERATION DISPLAYING AND EDITING THE ENTRY INFORMATION XEntry options screen of the “Stored” list Detailed information of entries in the list can be displayed or edited. Display the “Phone” menu screen and select “Contacts”. (→P.74) 2 Select the “Stored” tab or the “Phone book” tab. 3 Select XEntry options screen of the “Phone book” list next to the desired entry. No.
Corolla_Navi_EE_12J57E.book 84 ページ 2014年3月3日 月曜日 午後1時44分 1. BASIC INFORMATION BEFORE OPERATION CHANGING THE ENTRY NAME 1 2 Select “Rename”. Enter the entry name and then select “OK”. EDITING PHONE NUMBERS 1 2 Select “Edit phone numbers”. SENDING STORED CONTACTS TO A USB MEMORY∗ The entries stored in the “Stored” list on the “My destinations” screen and “Contacts” screen can be transferred to a USB memory. (→P.209) Select one of 4 phone types and enter a number and then .
Corolla_Navi_EE_12J57E.book 85 ページ 2014年3月3日 月曜日 午後1時44分 2. PHONE OPERATION 1. CALLING ON A Bluetooth® PHONE After a Bluetooth® phone has been connected, a call can be made using the hands-free system. How to make a call list Page 85 By contacts list 86 By phone book 86 By call lists 87 By using a short message 88 By POI call∗ 88 ∗ By selecting SOS screen button 89 By using the Toyota Eurocare∗ 230 1 Display the “Phone” menu screen and select “Dial”. (→P.74) 2 Enter a phone number.
Corolla_Navi_EE_12J57E.book 86 ページ 2014年3月3日 月曜日 午後1時44分 2. PHONE OPERATION BY CONTACTS LIST To use this function, it is necessary to register the entry. (→P.81) 1 Display the “Phone” menu screen and select “Contacts”. (→P.74) 2 3 Select the “Stored” tab. Select the desired entry. to display and edit the entry information. (→P.83) BY PHONE BOOK Calls can be made using the phone book data of the connected cellular phone. The phone book changes depending on the phone connected.
Corolla_Navi_EE_12J57E.book 87 ページ 2014年3月3日 月曜日 午後1時44分 2. PHONE OPERATION INFORMATION ● When a phone is connected for the first time, its phone book must be downloaded. If the phone book can not be downloaded, a pop-up window will be displayed. ● If the contact does not have phone number stored, the entry will be dimmed. ● The phone book list can be updated. (→P.139) BY CALL LISTS Each call list (missed, received, and dialed) stores up to 15 entries.
Corolla_Navi_EE_12J57E.book 88 ページ 2014年3月3日 月曜日 午後1時44分 2. PHONE OPERATION z When is selected, the entry is registered in the “Stored” list on the “Contacts” screen. (→P.82) 3 4 Select the desired entry. Check that the connecting screen is displayed. BY POI CALL∗ Calls can be made to a POI when its details are displayed on the screen. (→P.173, 181) 1 Select 2 Check that the connecting screen is displayed. . z To cancel a call, select “End call”.
Corolla_Navi_EE_12J57E.book 89 ページ 2014年3月3日 月曜日 午後1時44分 2. PHONE OPERATION BY SELECTING SOS SCREEN BUTTON∗ 112 EMERGENCY CALL SUPPORT z When “...” appears on the screen, select to display the following position details. On freeways: Freeway number, driving direction and next exit. On other roads: Address information. Each time “...” is selected, the screen changes between the geographical coordinates and position details. This feature is used to make a 112 emergency call with the select of a button.
Corolla_Navi_EE_12J57E.book 90 ページ 2014年3月3日 月曜日 午後1時44分 2. PHONE OPERATION 2. RECEIVING CALLS ON A Bluetooth® PHONE When a call is received, this screen is displayed and a sound is heard. 1 Press the wheel. XCall waiting switch on the steering z The first call is put on hold and the information of the party will be dimmed. z For details about this screen: →P.91 “Accept”: Select to talk on the phone. “Reject”: Select to reject the call.
Corolla_Navi_EE_12J57E.book 91 ページ 2014年3月3日 月曜日 午後1時44分 2. PHONE OPERATION 3. TALKING ON A Bluetooth® PHONE While you are talking on a Bluetooth® phone, a telephone conversation screen is displayed. The operations outlined below can be performed on this screen. XSingle call No. Function Select to hang up the phone. • The switch on the steering wheel can also be pressed to hang up the phone. Select to dial a second number. (→P.93) 3 Select to send a tone. (→P.
Corolla_Navi_EE_12J57E.book 92 ページ 2014年3月3日 月曜日 午後1時44分 2. PHONE OPERATION INFORMATION ● When you change from a cellular phone call to a hands-free call, the hands-free screen will be displayed and the call can be operated on the screen. ● Depending on the cellular phone connected, the Bluetooth® connection may be canceled if and when a call is transferred to the cellular phone. ● Transferring methods will be different depending on the type of cellular phone which you have.
Corolla_Navi_EE_12J57E.book 93 ページ 2014年3月3日 月曜日 午後1時44分 2. PHONE OPERATION DIALING A SECOND NUMBER 1 2 XWhen “Dial from contacts” is selected 3 Select “Dial”. Select the desired list and then select the desired entry. Select the desired method to call. 3 XWhen “Dial number” is selected 3 3 Select the desired list and then select the desired entry. 4 Check that the connecting screen is displayed. Enter the number and then select . z To cancel a call, select “End call”.
Corolla_Navi_EE_12J57E.book 94 ページ 2014年3月3日 月曜日 午後1時44分 2. PHONE OPERATION ■CHANGING PARTIES 1 Select “Swap calls”. z Every time “Swap calls” is selected, the party who is on hold will be switched. z The other party can also be switched by selecting the picture of the desired party (With navigation function) or pressing the switch on the steering wheel. ■CHANGING TO A CONFERENCE CALL 1 Select “Link calls”.
Corolla_Navi_EE_12J57E.book 95 ページ 2014年3月3日 月曜日 午後1時44分 3. SHORT MESSAGE FUNCTION 1. SHORT MESSAGE FUNCTION Received short messages can be forwarded from the connected Bluetooth® phone, enabling checking and replying using this system. CHECKING RECEIVED SHORT MESSAGES 1 Display the “Phone” menu screen and select “Messages”. (→P.74) 2 3 Select the “Inbox” tab. ® Depending on the type of Bluetooth phone connected, received short message may not be transferred to the message inbox.
Corolla_Navi_EE_12J57E.book 96 ページ 2014年3月3日 月曜日 午後1時44分 3. SHORT MESSAGE FUNCTION REPLYING TO A SHORT MESSAGE 1 Select “Reply free text” or “Reply template”. z When “Reply template” is selected, select the desired template. 2 Enter the message and then select “OK”. CHECKING SENT SHORT MESSAGES 1 Display the “Phone” menu screen and select “Messages”. (→P.74) 2 3 Select the “Sent” tab. Select the desired short message. z The short message will be sent.
Corolla_Navi_EE_12J57E.book 97 ページ 2014年3月3日 月曜日 午後1時44分 3. SHORT MESSAGE FUNCTION SENDING A NEW SHORT MESSAGE 1 2 3 Display the “Phone” menu screen and select “Messages”. (→P.74) Select the “Create new” tab. Select “Create message” or “Use template”. XWhen “New number” is selected 6 z The short message will be sent. XWhen “Select contact” or “Select from call lists” is selected 6 5 Select the desired number/contact to whom the short message should be sent. Select the desired contact.
Corolla_Navi_EE_12J57E.book 98 ページ 2014年3月3日 月曜日 午後1時44分 3. SHORT MESSAGE FUNCTION CREATE A NEW SHORT MESSAGE ■WHEN “Create message” IS SELECTED 1 Enter the message and then select “OK”. ■WHEN “Use template” IS SELECTED 1 Select the desired template. : Select to delete the template. 2 Edit the short message and then select “OK”. 98 COROLLA_14CY_Navi_EE INFORMATION ● 10 messages have already been registered to the message template screen.
Corolla_Navi_EE_12J57E.book 99 ページ 2014年3月3日 月曜日 午後1時44分 3. SHORT MESSAGE FUNCTION REGISTER NEW TEMPLATES New templates can be created. Up to 15 templates can be registered. 1 Select “Prepare template message”. 3 Bluetooth® HANDS-FREE SYSTEM 2 Enter the message and then select “OK”. z The message is registered in the template list.
Corolla_Navi_EE_12J57E.book 100 ページ 2014年3月3日 月曜日 午後1時44分 4. WHAT TO DO IF... 1. TROUBLESHOOTING If there is a problem with the hands-free system or a Bluetooth® device, first check the table below. XWhen using the hands-free system with a Bluetooth® device Page Symptom The hands-free system or Bluetooth® device does not work. Likely cause Solution The connected device may not be a compatible Bluetooth® cellular phone.
Corolla_Navi_EE_12J57E.book 101 ページ 2014年3月3日 月曜日 午後1時44分 4. WHAT TO DO IF... XWhen pairing/connecting a cellular phone Page Symptom Solution An incorrect passcode was entered on the cellular phone. Enter the correct passcode on the cellular phone. The pairing operation has not been completed on the cellular phone side. Complete the pairing operation on the cellular phone (approve pairing on the telephone). ∗ Old pairing information remains on either this system or the cellular phone.
Corolla_Navi_EE_12J57E.book 102 ページ 2014年3月3日 月曜日 午後1時44分 4. WHAT TO DO IF... Page Symptom Likely cause Solution Another Bluetooth® device is already connected. Bluetooth® function is not enabled on the cellular phone. Cellular phone This system Manually connect the cellular phone you wish to use to this system. 124, 134 Enable the Bluetooth® function on the cellular phone. ∗ 119, 126 ∗ 124, 134 XVehicles without smart entry & start system A Bluetooth® connection cannot be made.
Corolla_Navi_EE_12J57E.book 103 ページ 2014年3月3日 月曜日 午後1時44分 4. WHAT TO DO IF... XWhen making/receiving a call Page Symptom A call cannot made/received. be Likely cause Solution Your vehicle is in a no service area. Move to an area where the service signal appears on the display. Cellular phone This system 3 XWhen using the phone book Phone book data cannot be transferred manually/automatically.
Corolla_Navi_EE_12J57E.book 104 ページ 2014年3月3日 月曜日 午後1時44分 4. WHAT TO DO IF... XWhen using the Bluetooth® message function Page Symptom Likely cause Solution Messages cannot be viewed. Message transfer is not enabled on the cellular phone. New message notifications are not displayed. Notification of SMS/ E-mail reception on this system is set to off. 104 COROLLA_14CY_Navi_EE Cellular phone This system Enable message transfer on the cellular phone (approve message transfer on the telephone).
Corolla_Navi_EE_12J57E.book 105 ページ 2014年3月3日 月曜日 午後1時44分 4. WHAT TO DO IF... XIn other situations Page Symptom Likely cause Solution The cellular phone is not close enough to this system. Bring the cellular phone closer to this system. Radio interference has occurred. Turn off Wi-Fi® devices or other devices that may emit radio waves. Turn the cellular phone off, remove and reinstall the battery pack, and then restart the cellular phone.
Corolla_Navi_EE_12J57E.book 106 ページ 4. WHAT TO DO IF...
Corolla_Navi_EE_12J57E.book 107 ページ 2014年3月3日 月曜日 午後1時44分 4 1 VEHICLE INFORMATION 2 1 VEHICLE INFORMATION 1. QUICK REFERENCE .................. 108 3 2. FUEL CONSUMPTION................ 109 TRIP INFORMATION .......................... 109 4 PAST RECORD ..................................
Corolla_Navi_EE_12J57E.book 108 ページ 2014年3月3日 月曜日 午後1時44分 1. VEHICLE INFORMATION 1. QUICK REFERENCE Fuel consumption information can be displayed. To access the vehicle information system, press the “CAR” button. No.
Corolla_Navi_EE_12J57E.book 109 ページ 2014年3月3日 月曜日 午後1時44分 1. VEHICLE INFORMATION 2. FUEL CONSUMPTION TRIP INFORMATION PAST RECORD No. No. Information/Function Information/Function Best recorded fuel economy Cruising range Current fuel economy Current instantaneous fuel consumption Select to delete past record data. Select to delete trip information data. fuel Select to update the average fuel consumption data.
Corolla_Navi_EE_12J57E.book 110 ページ 1.
Corolla_Navi_EE_12J57E.book 111 ページ 2014年3月3日 月曜日 午後1時44分 5 1 SETUP 2 1 SETUP OPERATION 1. QUICK REFERENCE .................. 112 3 2. GENERAL SETTINGS................. 114 GENERAL SETTINGS SCREEN ........ 114 4 3. DISPLAY SETTINGS................... 117 4. Bluetooth® SETTINGS ............... 119 5 Bluetooth® FUNCTION ON/OFF ......... 119 PAIRING A Bluetooth® DEVICE ......... 120 PAIRED DEVICE LIST ........................ 124 6 EDITING THE SYSTEM NAME .......... 125 SETTING PIN............
Corolla_Navi_EE_12J57E.book 112 ページ 2014年3月3日 月曜日 午後1時44分 1. SETUP OPERATION 1. QUICK REFERENCE To customise the function settings, press the “SETUP” button.
Corolla_Navi_EE_12J57E.book 113 ページ 2014年3月3日 月曜日 午後1時44分 1. SETUP OPERATION No. Function Page Select to set language, operation sound, etc. 114 Select to adjust the contrast and brightness of the screens, turn the screen off, etc. 117 Select to adjust sound. 140 Select to connect to Bluetooth® device. Settings are available for Bluetooth® phones and Bluetooth® audio devices. 119 Select to connect.
Corolla_Navi_EE_12J57E.book 114 ページ 2014年3月3日 月曜日 午後1時44分 1. SETUP OPERATION 2. GENERAL SETTINGS Settings are available for language selection, operation sounds, etc. 1 2 Display the “Setup” screen. (→P.112) 3 Select items to be set. Select “General”.
Corolla_Navi_EE_12J57E.book 115 ページ 2014年3月3日 月曜日 午後1時44分 1. SETUP OPERATION No. Function No. Select to display an open source information. Notices related to third party software used in this product are enlisted. (This includes instructions for obtaining such software, where applicable.) Select to change the language. Select to set the volume for the phone/navigation. (→P.116) ∗1 Select to change the unit of measure for distance. Select to set the sounds beeps on/ off.
Corolla_Navi_EE_12J57E.book 116 ページ 2014年3月3日 月曜日 午後1時44分 1. SETUP OPERATION VOLUME SETTINGS Volume is shown numerically for each of the different functions. 1 Display the general settings screen. (→P.114) 2 3 Select “Volume settings”. Select “+” or “-” to adjust the a volume. No. ∗ Item Navigation prompt volume. Reception volume for phone calls Sending volume for phone calls Ringtone volume.
Corolla_Navi_EE_12J57E.book 117 ページ 2014年3月3日 月曜日 午後1時44分 1. SETUP OPERATION 3. DISPLAY SETTINGS The contrast and brightness of the screen display and the image of the camera display can be adjusted. The screen can also be turned off, and/or changed to either day or night mode. 1 2 Display the “Setup” screen. (→P.112) Select “Display”. No. Function Page Select to set day mode on/ off. 118 Select to turn the screen off. To turn it on, press any button on the audio panel.
Corolla_Navi_EE_12J57E.book 118 ページ 2014年3月3日 月曜日 午後1時44分 1. SETUP OPERATION CHANGING BETWEEN DAY AND NIGHT MODE Depending on the position of the headlight switch, the screen changes to day or night mode. This feature is available when the headlight is switched on. 1 Display the display settings screen. (→P.117) 2 Select “Day mode”. ADJUSTING THE CAMERA DISPLAY The contrast and brightness of the camera display can be adjusted. 1 Display the display settings screen. (→P.117) 2 Select “Camera”.
Corolla_Navi_EE_12J57E.book 119 ページ 2014年3月3日 月曜日 午後1時44分 1. SETUP OPERATION 4. Bluetooth® SETTINGS 1 2 3 Display the “Setup” screen. (→P.112) Select “Bluetooth*”. The following screen will be displayed. Bluetooth® FUNCTION ON/ OFF 1 Display the Bluetooth® screen. (→P.119) 2 Select “Bluetooth*”.
Corolla_Navi_EE_12J57E.book 120 ページ 2014年3月3日 月曜日 午後1時44分 1. SETUP OPERATION 4 PAIRING A Bluetooth® DEVICE your Bluetooth® device. ® Up to 4 Bluetooth devices can be paired. A paired device can be connected to any of its supported profiles such as phone (HFP), music (A2DP). ADDING A NEW DEVICE 1 Display the Bluetooth® screen. (→P.119) 2 Select “Add new device”.
Corolla_Navi_EE_12J57E.book 121 ページ 2014年3月3日 月曜日 午後1時44分 1. SETUP OPERATION z Once you have connected the Bluetooth® device, it is automatically connected whenever the engine switch is in the following status. XVehicles without smart entry & start system The engine switch is turned to the “ACC” or “ON” position. XVehicles with smart entry & start system The engine switch is turned to ACCESSORY or IGNITION ON mode.
Corolla_Navi_EE_12J57E.book 122 ページ 2014年3月3日 月曜日 午後1時44分 1. SETUP OPERATION PROFILES This system supports the following services. Bluetooth® device Bluetooth® Phone/ Bluetooth® Audio Player Specification Profile PBAP (Phone Profile) Book Access MAP (Message Access Profile) Bluetooth® Audio Player A2DP (Advanced Audio Distribution Profile) AVRCP (Audio/Video Control Profile) Ver. 1.1 Ver. 3.0 +EDR Requirements Recommendations Hands-free system Ver. 1.0 Ver. 1.
Corolla_Navi_EE_12J57E.book 123 ページ 2014年3月3日 月曜日 午後1時44分 1. SETUP OPERATION STATUS DISPLAY The condition of the Bluetooth® connection, as well as the level of reception and the amount of device battery charge left, are displayed on the status bar. INFORMATION ● An antenna for the Bluetooth® connection is built into the instrument panel.
Corolla_Navi_EE_12J57E.book 124 ページ 2014年3月3日 月曜日 午後1時44分 1. SETUP OPERATION 4 PAIRED DEVICE LIST Check that the following screen is displayed. Each profile connection status can be changed from the “Paired device list”. 1 Display the Bluetooth® screen. (→P.119) 2 3 Select “Paired device list”. settings Select the desired device. No. z Dimmed icons can be selected to connect to the function directly. z The tone of the icons show which profiles the device supports.
Corolla_Navi_EE_12J57E.book 125 ページ 2014年3月3日 月曜日 午後1時44分 1. SETUP OPERATION EDITING THE SYSTEM NAME 1 Display the Bluetooth® screen. (→P.119) 2 3 Select “Set system name”. settings Enter a name and then select “OK”. SETTING PIN 1 Display the Bluetooth® screen. (→P.119) 2 3 Select “Set PIN for pairing”. settings Enter the desired number and then select “OK”. 5 SETUP z A PIN code must be 4 digits.
Corolla_Navi_EE_12J57E.book 126 ページ 2014年3月3日 月曜日 午後1時44分 1. SETUP OPERATION 5. CONNECTIVITY SETTINGS∗ Settings are available for Bluetooth® devices, internet connection methods and Toyota web account. 1 2 Display the “Setup” screen. (→P.112) 3 Select items to be set. Select “Connectivity”. Bluetooth® SETTINGS 1 Display the connectivity screen. (→P.126) 2 3 Select “Bluetooth*”. Select items to be set. Function ® Bluetooth function on/off ® No.
Corolla_Navi_EE_12J57E.book 127 ページ 2014年3月3日 月曜日 午後1時44分 1. SETUP OPERATION Bluetooth® FUNCTION ON/OFF 1 Select “Bluetooth*”. When “Bluetooth*” is on: XVehicles without smart entry & start system The Bluetooth® device is automatically connected when the engine switch is turned to the “ACC” or “ON” position. XVehicles with smart entry & start system The Bluetooth® device is disconnected, and the system will not connect to it next time.
Corolla_Navi_EE_12J57E.book 128 ページ 2014年3月3日 月曜日 午後1時44分 1. SETUP OPERATION 3 Confirm the PIN. z A PIN code is not required for SSP (Secure Simple Pairing) compatible Bluetooth® devices. Depending on the type of Bluetooth® device being connected a message confirming registration may be displayed on the Bluetooth® device’s screen. Respond and operate the Bluetooth® device according to the confirmation message. 4 Check that the following screen is displayed.
Corolla_Navi_EE_12J57E.book 129 ページ 2014年3月3日 月曜日 午後1時44分 1. SETUP OPERATION z Once you have connected the Bluetooth® device, it is automatically connected whenever the engine switch is in the following status. XVehicles without smart entry & start system The engine switch is turned to the “ACC” or “ON” position. XVehicles with smart entry & start system The engine switch is turned to ACCESSORY or IGNITION ON mode. INFORMATION ■PAIRING FROM THE DEVICE 1 Select “Make system discoverable”.
Corolla_Navi_EE_12J57E.book 130 ページ 2014年3月3日 月曜日 午後1時44分 1. SETUP OPERATION ■LOGIN PROCESS INTERNET PROFILE XIf “Connect for Internet” is selected 1 XIf is selected 1 Select 2 Follow the steps “LOGIN PROCESS INTERNET PROFILE” from “STEP 2”. (→P.130) . Select “Connect for Internet”. z If the automatic connection failed, the following screen will be displayed. Select the desired provider to be connected. 2 Select the desired provider.
Corolla_Navi_EE_12J57E.book 131 ページ 2014年3月3日 月曜日 午後1時44分 1. SETUP OPERATION ■RECONNECTING Bluetooth® DEVICE If a Bluetooth® device is disconnected due to poor reception from the Bluetooth® network when the engine switch is in the following status, the system will automatically reconnect the Bluetooth® device. XVehicles without smart entry & start system The engine switch is turned to the “ACC” or “ON” position.
Corolla_Navi_EE_12J57E.book 132 ページ 2014年3月3日 月曜日 午後1時44分 1. SETUP OPERATION ■PROFILES This system supports the following services. Bluetooth® device Bluetooth® Phone/ Bluetooth® Audio Player Specification Profile Bluetooth Phone Book Access ® MAP (Message Access Profile) DUN (Dial-up Networking Profile) PAN (Personal Area Networking) Bluetooth® Audio Player A2DP (Advanced Audio Distribution Profile) AVRCP (Audio/Video Control Profile) Ver. 1.1 Ver. 3.
Corolla_Navi_EE_12J57E.book 133 ページ 2014年3月3日 月曜日 午後1時44分 1. SETUP OPERATION ■STATUS DISPLAY The condition of the Bluetooth® connection, as well as the level of reception and the amount of device battery charge left, are displayed on the status bar. No. INFORMATION ● An antenna for the Bluetooth® connection is built into the instrument panel.
Corolla_Navi_EE_12J57E.book 134 ページ 2014年3月3日 月曜日 午後1時44分 1. SETUP OPERATION PAIRED DEVICE LIST 3 Check that the following screen is displayed. Each profile connection status can be changed from the “Paired device list”. 1 2 Select “Paired device list”. Select the desired device. No. z Dimmed icons can be selected to connect to the function directly. z The tone of the icons show which profiles the device supports. (Dimmed icons are not available.
Corolla_Navi_EE_12J57E.book 135 ページ 2014年3月3日 月曜日 午後1時44分 1. SETUP OPERATION SETTING CHARGE WARNINGS 1 2 Select “Charge warnings”. Select items to be set. No. SETTING THE SYSTEM NAME AND PIN 1 2 Select “Set system name and PIN”. Select items to be set. Function Select to set the roaming warning function on/off. No. Function Select to enter a name. To confirm, select “OK”. 5 Select to enter a desired number. To confirm, select “OK”. • A PIN code must be 4 digits.
Corolla_Navi_EE_12J57E.book 136 ページ 2014年3月3日 月曜日 午後1時44分 1. SETUP OPERATION QUICK SETUP OF AN INTERNET CONNECTION This function is a shortcut for an internet connection. 1 Display the connectivity screen. (→P.126) 2 Select “Connect me to Internet”. settings z When an Internet connection is already active, a popup window is displayed. To return to the previous screen, select the “OK”. 3 TOYOTA WEB ACCOUNT SETTINGS The following detailed Toyota web account settings can be set.
Corolla_Navi_EE_12J57E.book 137 ページ 2014年3月3日 月曜日 午後1時44分 1. SETUP OPERATION ADDING A NEW ACCOUNT OR CHANGING AN ACCOUNT DETAILS 1 Display the Toyota web account settings screen. (→P.136) 2 Select “Change account”. 3 Select “New account” or 4 Select items to be set. . No. Function Select to enter a username. To confirm, select “OK”. Select to enter a password. To confirm, select “OK”. Select to turn the automatic download of POIs and routes function on or off.
Corolla_Navi_EE_12J57E.book 138 ページ 2014年3月3日 1. SETUP OPERATION ■DELETING USER NAME AND PASSWORD 1 2 Select “Delete account”. Select “Yes” when the confirmation screen appears.
Corolla_Navi_EE_12J57E.book 139 ページ 2014年3月3日 月曜日 午後1時44分 1. SETUP OPERATION 6. TELEPHONE SETTINGS Settings are available for ringtone selection, announcing incoming short messages and e-mails etc. 1 2 Display the “Setup” screen. (→P.112) Select “Phone”. No. Function Select to set the incoming short message announcement function on/off. Select to set the incoming e-mail announcement function on/off. Select to set the desired ringtone. 3 Select items to be set.
Corolla_Navi_EE_12J57E.book 140 ページ 2014年3月3日 月曜日 午後1時44分 1. SETUP OPERATION 7. AUDIO SETTINGS 1 2 Display the “Setup” screen. (→P.112) Select “Audio”. 3 TONE How good an audio program sounds is largely determined by the mix of the treble, mid and bass levels. In fact, different kinds of music and vocal programs usually sound better with different mixes of treble, mid and bass. Select items to be set. 1 Display the audio settings screen. (→P.140) 2 Select “Bass/Mid/Treble”.
Corolla_Navi_EE_12J57E.book 141 ページ 2014年3月3日 月曜日 午後1時44分 1. SETUP OPERATION BALANCE INFORMATION A good balance of the left and right stereo channels and of the front and rear sound levels is also important. Keep in mind that when listening to a stereo recording or broadcast, changing the right/left balance will increase the volume of one group of sounds while decreasing the volume of another. 1 Display the audio settings screen. (→P.140) 2 3 Select “Balance/Fader”.
Corolla_Navi_EE_12J57E.book 142 ページ 2014年3月3日 1. SETUP OPERATION 8. VEHICLE SETTINGS Vehicle customisation settings can be changed. 1 2 Display the “Setup” screen. (→P.112) 3 4 Select “Vehicle customisation”. 5 Select the desired item. Select “Vehicle”. Check that the “Vehicle customisation” list is displayed. z For a list of the settings that can be changed, refer to “Owner’s manual”. z A message indicating that the settings are being saved will appear.
Corolla_Navi_EE_12J57E.book 143 ページ 2014年3月3日 月曜日 午後1時44分 6 1 REAR VIEW MONITOR SYSTEM 2 1 REAR VIEW MONITOR SYSTEM 3 1. REAR VIEW MONITOR SYSTEM .................................... 144 DRIVING PRECAUTIONS .................. 144 4 SCREEN DESCRIPTION.................... 146 2. REAR VIEW MONITOR SYSTEM PRECAUTIONS ......... 148 5 AREA DISPLAYED ON SCREEN ....... 148 THE CAMERA..................................... 149 DIFFERENCES BETWEEN THE SCREEN AND THE ACTUAL ROAD ........................
Corolla_Navi_EE_12J57E.book 144 ページ 2014年3月3日 月曜日 午後1時44分 1. REAR VIEW MONITOR SYSTEM 1. REAR VIEW MONITOR SYSTEM The rear view monitor system assists the driver by displaying an image of the view behind the vehicle with fixed guide lines on the screen while backing up, for example while parking. INFORMATION ● The screen illustrations used in this text are intended as examples, and may differ from the image that is actually displayed on the screen.
Corolla_Navi_EE_12J57E.book 145 ページ 2014年3月3日 月曜日 午後1時44分 1. REAR VIEW MONITOR SYSTEM CAUTION ● Never depend on the rear view monitor system entirely when backing up. The image and the position of the guide lines displayed on the screen may differ from the actual state. Use caution, just as you would when backing up any vehicle. ● Be sure to back up slowly, depressing the brake pedal to control vehicle speed. ● The instructions given are only guide lines.
Corolla_Navi_EE_12J57E.book 146 ページ 2014年3月3日 月曜日 午後1時44分 1. REAR VIEW MONITOR SYSTEM SCREEN DESCRIPTION XVehicles without smart entry & start system The rear view monitor system screen will be displayed if the shift lever is shifted to the “R” position while the engine switch is in the “ON” position. XVehicles with smart entry & start system The rear view monitor system screen will be displayed if the shift lever is shifted to the “R” position while the engine switch is in ON mode.
Corolla_Navi_EE_12J57E.book 147 ページ 2014年3月3日 月曜日 午後1時44分 1. REAR VIEW MONITOR SYSTEM CANCELING REAR VIEW MONITOR SYSTEM The rear view monitor system is canceled when the shift lever is shifted into any position other than the “R” position. z When the shift lever is shifted to the “R” position and any mode button (such as “MEDIA”) is pressed ¨ The rear view monitor system is canceled, and the screen is switched to the mode of the button that was pressed.
Corolla_Navi_EE_12J57E.book 148 ページ 2014年3月3日 月曜日 午後1時44分 1. REAR VIEW MONITOR SYSTEM 2. REAR VIEW MONITOR SYSTEM PRECAUTIONS AREA DISPLAYED ON SCREEN The rear view monitor system displays an image of the view from the bumper of the rear area of the vehicle. Displayed area Screen Corners of bumper z The image adjustment procedure for the rear view monitor system screen is the same as the procedure for adjusting the navigation/multimedia system screen. (→P.
Corolla_Navi_EE_12J57E.book 149 ページ 2014年3月3日 月曜日 午後1時44分 1. REAR VIEW MONITOR SYSTEM THE CAMERA The camera for the rear view monitor system is located as shown in the illustration. USING THE CAMERA ● The rear view monitor system may not operate properly in the following cases. • If the back of the vehicle is hit, the position and mounting angle of the camera may change. • As the camera has a water proof construction, do not detach, disassemble or modify it. This may cause incorrect operation.
Corolla_Navi_EE_12J57E.book 150 ページ 2014年3月3日 月曜日 午後1時44分 1. REAR VIEW MONITOR SYSTEM DIFFERENCES BETWEEN THE SCREEN AND THE ACTUAL ROAD z The distance guide lines and the vehicle width guide lines may not actually be parallel with the dividing lines of the parking space, even when they appear to be so. Be sure to check visually. z The distances between the vehicle width guide lines and the left and right dividing lines of the parking space may not be equal, even when they appear to be so.
Corolla_Navi_EE_12J57E.book 151 ページ 2014年3月3日 月曜日 午後1時44分 1. REAR VIEW MONITOR SYSTEM WHEN THE GROUND BEHIND THE VEHICLE SLOPES DOWN SHARPLY The distance guide lines will appear to be farther from the vehicle than the actual distance. Because of this, objects will appear to be closer than they actually are. In the same way, there will be a margin of error between the guide lines and the actual distance/course on the road.
Corolla_Navi_EE_12J57E.book 152 ページ 2014年3月3日 月曜日 午後1時44分 1. REAR VIEW MONITOR SYSTEM WHEN APPROACHING THREE-DIMENSIONAL OBJECTS The distance guide lines are displayed according to flat surfaced objects (such as the road). It is not possible to determine the position of three-dimensional objects (such as vehicles) using the vehicle width guide lines and distance guide lines. When approaching a three-dimensional object that extends outward (such as the flatbed of a truck), be careful of the following.
Corolla_Navi_EE_12J57E.book 153 ページ 2014年3月3日 月曜日 午後1時44分 1. REAR VIEW MONITOR SYSTEM DISTANCE GUIDE LINES Visually check the surroundings and the area behind the vehicle. On the screen, it appears that a truck is parking at point B. However, in reality if you back up to point A, you will hit the truck. On the screen, it appears that A is closest and C is farthest away. However, in reality, the distance to A and C is the same, and B is farther than A and C.
Corolla_Navi_EE_12J57E.book 154 ページ 2014年3月3日 月曜日 午後1時44分 1. REAR VIEW MONITOR SYSTEM 3. THINGS YOU SHOULD KNOW IF YOU NOTICE ANY SYMPTOMS If you notice any of the following symptoms, refer to the likely cause and the solution, and re-check. If the symptom is not resolved by the solution, have the vehicle inspected by your Toyota dealer or another duly qualified and equipped professional.
Corolla_Navi_EE_12J57E.book 155 ページ 2014年3月3日 月曜日 午後1時44分 1.
Corolla_Navi_EE_12J57E.book 156 ページ 1 2014年3月3日 BASIC INFORMATION BEFORE OPERATION 1. QUICK REFERENCE................... 158 2. DISPLAYING THE NAVIGATION SCREEN............. 163 3 月曜日 午後1時44分 DESTINATION SEARCH 1. DESTINATION SEARCH INDEX........................................ 178 2. SEARCH OPERATION ............... 179 DISPLAYING MAP SCREEN .............. 163 SEARCHING BY REGISTERED POINTS............................................. 179 DISPLAYING THE NAVIGATION MENU SCREEN ..................
Corolla_Navi_EE_12J57E.book 157 ページ 2014年3月3日 月曜日 午後1時44分 7 1 NAVIGATION SYSTEM*1 2 3. SETTING AND DELETING THE ROUTE.............................. 192 STOPPING ROUTE GUIDANCE......... 193 ADDING AND EDITING STOPOVERS .................................... 193 DISPLAYING ROUTE INFORMATION ................................. 195 6 1. MAP SETTINGS .......................... 211 DETOURING A SEGMENT ON THE ROUTE ............................... 197 2. ROUTE SETTINGS......................
Corolla_Navi_EE_12J57E.book 158 ページ 2014年3月3日 月曜日 午後1時44分 1. BASIC INFORMATION BEFORE OPERATION 1. QUICK REFERENCE ■“Navigation” MENU SCREEN To display the “Navigation” menu screen, select “NAV” on the map or press the “MAP/NAV” button. When “NAV” is selected or the “MAP/NAV” button is pressed, the screen that was last displayed is returned to. Select or press the “MAP/NAV” button again to display the “Navigation” menu screen.
Corolla_Navi_EE_12J57E.book 159 ページ 2014年3月3日 月曜日 午後1時44分 1. BASIC INFORMATION BEFORE OPERATION No. Function Page Select to display the “My destinations” screen. A destination can be entered by selecting an item from the list of stored destinations, previous destinations or the addresses from the connected phone’s phone book. 164 Select to display the “Enter destination” screen. A destination can be entered by address, POI or using advanced options.
Corolla_Navi_EE_12J57E.book 160 ページ 2014年3月3日 1.
Corolla_Navi_EE_12J57E.book 161 ページ 2014年3月3日 月曜日 午後1時44分 1. BASIC INFORMATION BEFORE OPERATION No. Function Page Displays the distance, the estimated arrival time or remaining time to the destination. 189 Displays the distance to the next turn with the arrow indicating the turn direction. 189 Guidance route Select to change the map scale. 168 This symbol indicates a map layout. Selecting this symbol changes the map layout.
Corolla_Navi_EE_12J57E.book 162 ページ 2014年3月3日 月曜日 午後1時44分 1. BASIC INFORMATION BEFORE OPERATION ■OPTIONS SCREEN To display the options screen, select No. * on the map. Function Page Select to stop the current route guidance. 193 Select to change the map setting. 211 * Select to display the destination and stopover information. The route preferences and the avoidance criteria for the route calculation can be changed. 195 * Select to display a list of the different segments of the route.
Corolla_Navi_EE_12J57E.book 163 ページ 2014年3月3日 月曜日 午後1時44分 1. BASIC INFORMATION BEFORE OPERATION 2. DISPLAYING THE NAVIGATION SCREEN DISPLAYING MAP SCREEN 1 Press the “MAP/NAV” button. DISPLAYING THE NAVIGATION MENU SCREEN 1 Select “NAV” on the map or press the “MAP/NAV” button. z When the “MAP/NAV” button is pressed, any of the navigation screens is displayed, press the “MAP/NAV” button again. 2 Select “Confirm”.
Corolla_Navi_EE_12J57E.book 164 ページ 2014年3月3日 月曜日 午後1時44分 1. BASIC INFORMATION BEFORE OPERATION 2 Check that the “Navigation” menu is displayed. ■“Enter destination” screen z This screen can be displayed by selecting No. Function Select to display the “My destinations” screen. on any of the navigation screens. ■“Traffic messages” screen Select to display the “Enter destination” screen. Select to display the “Traffic messages” screen. Select to display the “Route options” screen.
Corolla_Navi_EE_12J57E.book 165 ページ 2014年3月3日 月曜日 午後1時44分 1. BASIC INFORMATION BEFORE OPERATION 3.
Corolla_Navi_EE_12J57E.book 166 ページ 2014年3月3日 月曜日 午後1時44分 1.
Corolla_Navi_EE_12J57E.book 167 ページ 2014年3月3日 月曜日 午後1時44分 2. MAP SCREEN OPERATION AND MAP ICONS 1. MAP SCREEN OPERATION CURRENT VEHICLE POSITION DISPLAY When starting the navigation system, the current position is displayed first. This screen displays the current vehicle position and a map of the surrounding area. ■CURRENT LOCATION AND GPS INFORMATION 1 2 Select 3 Check that current location information is displayed. on the map. Select “Location & GPS information”.
Corolla_Navi_EE_12J57E.book 168 ページ 2014年3月3日 月曜日 午後1時44分 2. MAP SCREEN OPERATION AND MAP ICONS SCREEN SCROLL OPERATION When any point on the map is selected, that point moves to the centre of the screen and is shown by the cursor mark MAP CONFIGURATIONS CHANGING MAP SCALE 1 Select the zoom bar button. 2 Select “+” or “-” to change the scale of the map screen. . z If a finger is continuously held on the screen, the map will continue scrolling in that direction until the finger is removed.
Corolla_Navi_EE_12J57E.book 169 ページ 2014年3月3日 月曜日 午後1時44分 2. MAP SCREEN OPERATION AND MAP ICONS CHANGING MAP LAYOUT 1 X3D heading Select the map layout button. X2D heading z Each time the map layout button is selected, the map layout changes as follows: 3D heading ( ( ) → 2D north ( ) → 2D heading ) X2D north 7 selecting (→P.211) then “Map settings”.
Corolla_Navi_EE_12J57E.book 170 ページ 2014年3月3日 月曜日 午後1時44分 2. MAP SCREEN OPERATION AND MAP ICONS 2. MAP ICONS DISPLAYING VARIOUS INFORMATION ON THE MAP Various information can be displayed on the map. ■SPEED LIMITS The speed limit of the road currently being travelled on can be displayed. POI ICONS DISPLAYING POI ICONS Points of Interest such as petrol stations and restaurants can be displayed on the map screen. Their location can also be set as a destination.
Corolla_Navi_EE_12J57E.book 171 ページ 2014年3月3日 月曜日 午後1時44分 2. MAP SCREEN OPERATION AND MAP ICONS ■LIST OF POI ICONS Icon Name XPublic Medical, Doctor, Health & Care Icon Name Ambulance, Hospital/Polyclinic Library Fire Station College/University Police Station School Phone Box, Communication Tourist office Dentist Cemetery, funeral director Veterinarian Government Office, Institution, City hall, Community gen.
Corolla_Navi_EE_12J57E.book 172 ページ 2014年3月3日 月曜日 午後1時44分 2. MAP SCREEN OPERATION AND MAP ICONS Icon Name Icon Restaurant, French, Belgian, Chinese, German, Greek, Vegetarian, Fast Food, Grill, Sea Food, Sandwich, Steak... Rent-a-Car,-Facility, -Parking Ferry Terminal Parking, Open Parking Area, P. Area general Name XSport Icon Name Sport, Sport General, sport activities Parking Garage Open P.A.
Corolla_Navi_EE_12J57E.book 173 ページ 2014年3月3日 月曜日 午後1時44分 2. MAP SCREEN OPERATION AND MAP ICONS Icon DISPLAYING POI INFORMATION Name Tourist Attractions, Tourist Attractions Important 1 Select the desired POI icon on the map. 2 Select Park/Recreational Area Yacht Basin, Harbour .
Corolla_Navi_EE_12J57E.book 174 ページ 2014年3月3日 月曜日 午後1時44分 2. MAP SCREEN OPERATION AND MAP ICONS 3 Check that the POI information is displayed. TRAFFIC MESSAGES CHANGING TO TRAFFIC MAP MODE The map screen can change modes to normal map mode or traffic map mode. 1 No. Function Page Select to call the registered telephone number. 88 Select to register the point in the “Stored” list on the “My destinations” screen. 200 Select to display the starting route guidance screen.
Corolla_Navi_EE_12J57E.book 175 ページ 2014年3月3日 月曜日 午後1時44分 2. MAP SCREEN OPERATION AND MAP ICONS DISPLAYING DETAILED TRAFFIC INFORMATION ■DISPLAYING DETAILED TRAFFIC ■DISPLAYING TRAFFIC MESSAGE LIST 1 Display the “Navigation” menu screen and select “Traffic messages”. (→P.163) 2 Select the desired tab to select the list. MESSAGE ICONS 1 Select the desired traffic message icon on the map. 2 Check that the traffic message information is displayed. No.
Corolla_Navi_EE_12J57E.book 176 ページ 2014年3月3日 月曜日 午後1時44分 2. MAP SCREEN OPERATION AND MAP ICONS 3 Select the desired message. No. 4 Check that the traffic message is displayed. Information Route segment If route segment is not available, information such as street name, city name, region or country will be displayed.
Corolla_Navi_EE_12J57E.book 177 ページ 2014年3月3日 月曜日 午後1時44分 2.
Corolla_Navi_EE_12J57E.book 178 ページ 2014年3月3日 月曜日 午後1時44分 3. DESTINATION SEARCH 1. DESTINATION SEARCH INDEX There are several ways to search for a destination. How to search a destination list Page Searching by registered points in the system. 179 Searching from previously set destinations. 179 Searching by the phone book of a connected cellular phone. 180 Searching by address. 180 Searching by POIs. 181 Searching on the map. 184 Searching by coordinates.
Corolla_Navi_EE_12J57E.book 179 ページ 2014年3月3日 月曜日 午後1時44分 3. DESTINATION SEARCH 2. SEARCH OPERATION SEARCHING BY REGISTERED POINTS To use this function, it is necessary to register the entry. (→P.200) 1 2 3 Display the “Navigation” menu screen and select “My destinations”. (→P.163) SEARCHING FROM PREVIOUS DESTINATIONS 1 Display the “Navigation” menu screen and select “My destinations”. (→P.163) 2 3 Select the “Last” tab. Select the desired entry. Select the “Stored” tab.
Corolla_Navi_EE_12J57E.book 180 ページ 2014年3月3日 月曜日 午後1時44分 3. DESTINATION SEARCH SEARCHING BY PHONE BOOK Before using this function, connect a Bluetooth® phone with a phone profile. (→P.127) If a contact does not have address information stored, the entry will be dimmed. 1 Display the “Navigation” menu screen and select “My destinations” (→P.163) 2 3 Select the “Phone book” tab. SEARCHING BY ADDRESS 1 Display the “Navigation” menu screen and select “Enter destination”. (→P.
Corolla_Navi_EE_12J57E.book 181 ページ 2014年3月3日 月曜日 午後1時44分 3. DESTINATION SEARCH INFORMATION ● “Calculate route” can be selected once a “Town” or “Code” has been entered. If “Calculate route” is selected when only “Town” or “Code” has been entered, a route search starts with the centre of the town entered as the destination. ● If is selected, entered data other than “Country” will be deleted. SEARCHING BY POIs 1 Display the “Navigation” menu screen and select “Enter destination”. (→P.
Corolla_Navi_EE_12J57E.book 182 ページ 2014年3月3日 月曜日 午後1時44分 3. DESTINATION SEARCH ■SEARCHING BY CATEGORY 1 2 5 Select for the desired POI. Select “By category”. Select the desired item to search the area. z If you select the desired POI, the route will be calculated. 6 No. Select “Go”. Function Select to set around the current position. Select to set around the main destination. POIs around stopovers will not be searched. Select to set around the current route. Select to set the desired city.
Corolla_Navi_EE_12J57E.book 183 ページ 2014年3月3日 月曜日 午後1時44分 3. DESTINATION SEARCH INFORMATION ● Search areas are available as follows. Search by “At current position”, “At destination” or a town name: Search radius is 30 miles (50km). Search by “Along route”: Search area is within 0.3 mile (500m) on both sides of the route. ● The POI search result list is sorted by the distance to the POI from the following points.
Corolla_Navi_EE_12J57E.book 184 ページ 2014年3月3日 月曜日 午後1時44分 3. DESTINATION SEARCH SEARCHING ON THE MAP 1 2 3 4 5 Display the “Navigation” menu screen and select “Enter destination”. (→P.163) Select the “Advanced” tab. Select “Select point on map”. Select the desired point on the map. Select “Go”. SEARCHING BY COORDINATES Geo coordinates can be entered in DMS format (Degrees°, Minutes’, Seconds”). Only coordinate values that can potentially exist are able to be entered.
Corolla_Navi_EE_12J57E.book 185 ページ 2014年3月3日 月曜日 午後1時44分 3. DESTINATION SEARCH 9 Select “Go”. z The route will be calculated. INFORMATION ● If a destination that is not located on a road is set, the vehicle will be guided to the point on a road nearest to the destination.
Corolla_Navi_EE_12J57E.book 186 ページ 2014年3月3日 月曜日 午後1時44分 4. ROUTE GUIDANCE 1. STARTING ROUTE GUIDANCE RECOMMENDED ROUTE SCREEN STARTING ROUTE GUIDANCE SCREEN After searching the destination, the starting route guidance screen will be displayed. The recommended route will be displayed on the map. 1 Select “Go”. According to the setting, either the recommended route screen or route alternatives screen will be displayed. (→P.
Corolla_Navi_EE_12J57E.book 187 ページ 2014年3月3日 月曜日 午後1時44分 4. ROUTE GUIDANCE ROUTE ALTERNATIVES SCREEN ADJUSTING THE ROUTE XThe recommended route screen Three route alternatives are displayed on the map. 1 Select one of the three route alternatives to select it. z “Avoid”: Select to adjust the avoidance criteria of current route before starting the route guidance. (→P.187) z “Street View”: Select to display the Street View. (→P.243) 1 2 Select “Route options”. 3 Select “Route options”.
Corolla_Navi_EE_12J57E.book 188 ページ 2014年3月3日 4. ROUTE GUIDANCE XThe route alternatives screen 1 2 Select “Avoid”. 3 Select “Avoid”. Select the desired item to adjust the avoidance criteria. z The route will be recalculated and then the starting route guidance screen will be displayed. INFORMATION ● Adjusting the route preference and avoidance in the above method affects current route only. Route option defaults can be changed from the “Route options” screen. (→P.
Corolla_Navi_EE_12J57E.book 189 ページ 2014年3月3日 月曜日 午後1時44分 4. ROUTE GUIDANCE 2. ROUTE GUIDANCE ROUTE GUIDANCE SCREEN While guiding the route, the route guidance screen will be displayed. No. Information Distance and arrival or remaining time to the destination Each time information box is selected, the screen will change between arrival time and remaining time to the destination. ■SIGNPOSTS When approaching the turn, a signpost will automatically be displayed.
Corolla_Navi_EE_12J57E.book 190 ページ 2014年3月3日 月曜日 午後1時44分 4. ROUTE GUIDANCE ■LANE RECOMMENDATION When approaching a maneuver point, the lane recommendation will automatically be displayed. VOICE GUIDANCE The voice guidance provides various messages as you approach an intersection, or other points where maneuvering the vehicle is necessary. INFORMATION ● If the vehicle goes off the guided route, the route will be recalculated.
Corolla_Navi_EE_12J57E.book 191 ページ 2014年3月3日 月曜日 午後1時44分 4. ROUTE GUIDANCE CAUTION ● Be sure to obey the traffic regulations and keep the road condition in mind especially when you are driving on IPD roads (roads that are not completely digitized in our database). The route guidance may not have the updated information such as the direction of a one way street.
Corolla_Navi_EE_12J57E.book 192 ページ 2014年3月3日 月曜日 午後1時44分 4. ROUTE GUIDANCE 3. SETTING AND DELETING THE ROUTE During route guidance, routes can be checked, changed or recalculated.
Corolla_Navi_EE_12J57E.book 193 ページ 2014年3月3日 月曜日 午後1時44分 4. ROUTE GUIDANCE STOPPING ROUTE GUIDANCE 1 2 Select on the map. XIf “Replace” is selected z The route will be recalculated. XIf “Add” is selected 3 Select “Go”. Select “Stop guidance”. ADDING AND EDITING STOPOVERS ADDING STOPOVERS In addition to the main destination, a maximum of 9 stopovers can be set. 1 Search for an additional stopover in the same way as a destination search. (→P.178) 2 Select the desired item.
Corolla_Navi_EE_12J57E.book 194 ページ 2014年3月3日 月曜日 午後1時44分 4. ROUTE GUIDANCE EDITING STOPOVERS ■DELETING STOPOVERS 1 Display the route information screen. (→P.195) 2 Select over. next to the desired stop- ■CHANGING THE ORDER OF THE STOPOVERS 1 Display the route information screen. (→P.195) 2 Drag a stopover to the desired position. z The route will be recalculated.
Corolla_Navi_EE_12J57E.book 195 ページ 2014年3月3日 月曜日 午後1時44分 4. ROUTE GUIDANCE DISPLAYING ROUTE INFORMATION 1 2 3 Select on the map. No. Information Arrival time, remaining time and distance to destination Address of destination Select “Route information”. Check that the destination information screen is displayed. XDestination information (displayed when no stopovers are set) Distance to the destination Select to change the route preference and avoidance criteria. (→P.
Corolla_Navi_EE_12J57E.book 196 ページ 2014年3月3日 月曜日 午後1時44分 4. ROUTE GUIDANCE DISPLAYING THE TURN LIST 1 2 3 Select on the map. BLOCKING ROAD AHEAD A fixed distance on the road ahead can be blocked. Select “Turn list”. Select the desired item to display the segment. 1 2 3 Select on the map. Select “Block road ahead”. Select the desired item to select the desired detour distance. z Guidance arrow, street name, distance to the point are displayed.
Corolla_Navi_EE_12J57E.book 197 ページ 2014年3月3日 月曜日 午後1時44分 4. ROUTE GUIDANCE DETOURING A SEGMENT ON THE ROUTE DETOURING A SEGMENT FROM THE TURN LIST ■CANCELLING THE DETOURED SEGMENT 1 2 Display the turn list. (→P.196) 3 Select “Detour off”. Select “Detours”. ■DETOURING THE SEGMENT 1 2 3 Display the turn list. (→P.196) Select the desired segment to detour. Select “Detour”. z The route will be recalculated.
Corolla_Navi_EE_12J57E.book 198 ページ 2014年3月3日 月曜日 午後1時44分 4. ROUTE GUIDANCE DETOURING A SEGMENT FROM THE TRAFFIC MESSAGE LIST ■DETOURING THE SEGMENT 1 Display the (→P.175) 2 3 traffic message list. ■CANCELLING THE DETOURED SEGMENT 1 Display the (→P.175) 2 3 Select the “On route” tab. 4 Select “Detour off”. traffic message list. Select the detoured segment. Select the “On route” tab. Select the desired segment to detour. 4 Select “Detour”. z The route will be recalculated.
Corolla_Navi_EE_12J57E.book 199 ページ 2014年3月3日 月曜日 午後1時44分 4. ROUTE GUIDANCE RECALCULATING THE ROUTE BY THE TRAFFIC MESSAGES XIf “Manual” is selected 1 Check that the confirmation screen is displayed. XIf “Automatic” is selected 2 Select “Show detour”. 1 z Select “Ignore” to return to the previous screen. You will be informed about relevant traffic messages on the route by a popup window. A pop-up window may differ depending on the traffic message settings. (→P.
Corolla_Navi_EE_12J57E.book 200 ページ 2014年3月3日 月曜日 午後1時44分 5. MY DESTINATIONS 1. REGISTERING AN ENTRY REGISTERING A NEW ENTRY 6 Check that the entry is registered in the “Stored” list. Up to 200 entries can be registered with this system. REGISTERING FROM THE “Stored” LIST 1 Display the “Navigation” menu screen and select “My destinations”. (→P.163) 2 3 Select the “Stored” tab. 4 Enter the entry address (→P.180) and then select “Save new entry”. 5 Enter the entry name and then select “OK”.
Corolla_Navi_EE_12J57E.book 201 ページ 2014年3月3日 月曜日 午後1時44分 5. MY DESTINATIONS ■REGISTERING “Home” If “Home” has not been registered, selecting “Home” allows a home address to be registered. 1 Select “Home”. XIf you select “Use current location” z The entry is registered as “Home” in the “Stored” list. XIf you search the destination by “Enter address” 4 Enter the address and then select “Save as Home address”.
Corolla_Navi_EE_12J57E.book 202 ページ 2014年3月3日 月曜日 午後1時44分 5. MY DESTINATIONS REGISTERING FROM THE MAP 1 2 3 Select the desired point on the map. Select “Save”. Follow the steps “REGISTERING FROM THE “Stored” LIST” from “STEP 5”. (→P.200) REGISTERING THE CURRENT POSITION 1 Display location & GPS information screen. (→P.167) 2 Select “Save current location”. 3 Follow the steps “REGISTERING FROM THE “Stored” LIST” from “STEP 5”. (→P.
Corolla_Navi_EE_12J57E.book 203 ページ 2014年3月3日 月曜日 午後1時44分 5. MY DESTINATIONS REGISTERING FROM ENTRY OPTIONS SCREEN 1 2 3 Display entry (→P.206) options screen. REGISTERING FROM THE ROUTE INFORMATION SCREEN 1 Display the route information screen. (→P.195) 2 Select next to the desired stopover or main destination. 3 Select “Add to stored contacts”. Select “Add to stored contacts”. Follow the steps “REGISTERING FROM THE “Stored” LIST” from “STEP 5”. (→P.
Corolla_Navi_EE_12J57E.book 204 ページ 2014年3月3日 月曜日 午後1時44分 5. MY DESTINATIONS REGISTERING FROM AN EXTERNAL DEVICE ■LOADING POIs AND ROUTES VIA A USB MEMORY “vCards” formatted data can be transferred from a USB memory to this system. Transferred POIs and routes will be stored in the “Stored” list on the “My destinations” screen. (→P.200) 1 Open the cover of the auxiliary box and then open the cover of the USB/AUX port. 2 3 Connect a USB memory. 4 5 Select the “Advanced” tab.
Corolla_Navi_EE_12J57E.book 205 ページ 2014年3月3日 月曜日 午後1時44分 5. MY DESTINATIONS ■LOADING POIs AND FROM A SERVER ROUTES POIs and routes can be added by downloading from the Toyota portal site. They will be stored in the “Stored” list on the “My destinations” screen. (→P.200) For detailed information about connected service: →P.
Corolla_Navi_EE_12J57E.book 206 ページ 2014年3月3日 月曜日 午後1時44分 5. MY DESTINATIONS 2. DISPLAYING AND EDITING THE ENTRY INFORMATION DISPLAYING AND EDITING THE ENTRY INFORMATION 1 Display the “Navigation” menu screen and select “My destinations”. (→P.163) 2 Select the desired tab. 3 Select next to the desired entry. XThe entry options screen of “Stored” list. (When the entry is selected) XThe entry options screen of “Stored” list.
Corolla_Navi_EE_12J57E.book 207 ページ 2014年3月3日 月曜日 午後1時44分 5. MY DESTINATIONS CHANGING THE ENTRY NAME INFORMATION ● If an entry that is transferred from a cellular phone is edited, the change will affect the entry in the “Stored” list on the “My destinations” screen and “Contacts” screen. (→P.86, 200) 1 Display the entry options screen. (→P.206) 2 3 Select “Rename”. DISPLAYING DETAILS OF THE ENTRY INFORMATION Enter the new name and then select “OK”.
Corolla_Navi_EE_12J57E.book 208 ページ 2014年3月3日 5. MY DESTINATIONS EDITING THE ROUTE 1 Display the entry options screen. (→P.206) 2 Select “Edit route”. 3 Select next to the desired entry. z The order of stopover can be changed by dragging a destination to the desired position. 4 Select the desired item. No. Function Select to edit address. (→P.207) Select to delete stopover. Select to delete all stopovers.
Corolla_Navi_EE_12J57E.book 209 ページ 2014年3月3日 月曜日 午後1時44分 5. MY DESTINATIONS 3. SENDING AND RESTORING STORED CONTACTS USING A USB MEMORY SENDING STORED CONTACTS TO A USB MEMORY 4 5 Select “General”. 6 Check that a progress bar is being displayed while the data sending is in progress. 7 Check that a confirmation screen is displayed when the operation is complete. Select “Backup stored contacts to USB”.
Corolla_Navi_EE_12J57E.book 210 ページ 2014年3月3日 月曜日 午後1時44分 5. MY DESTINATIONS RESTORING STORED CONTACTS FROM A USB MEMORY 4 5 Select “General”. 6 Check that a progress bar is being displayed while the data loading is in progress. 7 Check that a confirmation screen is displayed when the operation is complete. Select “Restore contact backup from USB”. Backed-up data can be transferred from a USB memory to this system.
Corolla_Navi_EE_12J57E.book 211 ページ 2014年3月3日 月曜日 午後1時44分 6. NAVIGATION SETTING 1. MAP SETTINGS SETTING THE MAP 1 2 3 Select on the map. Select “Map settings”. Select the item to be set. No. Page Select to set the map layout to 3D heading, 2D heading or 2D north. 169 Select to set the screen mode to “Automatic”, “Day” or “Night”. 213 Select to set the arrival information display to arrival time, remaining time to the destination, or off. Select to set displayed POI icon categories.
Corolla_Navi_EE_12J57E.book 212 ページ 2014年3月3日 月曜日 午後1時44分 6. NAVIGATION SETTING No. Function Page Select to set the display of the safety cameras icons on/off. 170 INFORMATION ● The current setting of each item is displayed on its right. POIs ON MAP 1 Display the “Map settings” screen. (→P.211) 2 3 Select “POIs on map”. Select the desired POI categories. No. Function Select to display all categories. Select to hide all icons. Select to select main categories.
Corolla_Navi_EE_12J57E.book 213 ページ 2014年3月3日 月曜日 午後1時44分 6. NAVIGATION SETTING DAY/NIGHT MODE SPEED LIMITS 1 Display the “Map settings” screen. (→P.211) 1 Display the “Map settings” screen. (→P.211) 2 3 Select “Day/Night mode”. 2 3 Select “Speed limits”. Select the desired item. No. Function Select to change the screen to day or night mode depending on the position of the headlight switch. Select to always display the map in day mode. Select the desired item. No.
Corolla_Navi_EE_12J57E.book 214 ページ 2014年3月3日 月曜日 午後1時44分 6. NAVIGATION SETTING 2. ROUTE SETTINGS SETTING THE AVOIDANCE CRITERIA FOR THE ROUTE CALCULATION SETTING THE ROUTE OPTIONS SETTING THE ROUTE CALCULATION 1 Display the “Navigation” menu screen and select “Route options”. (→P.163) 2 3 Select the “Preferences” tab. 1 Display the “Navigation” menu screen and select “Route options”. (→P.163) 2 3 Select the “Avoid” tab. Select the desired item. Select the desired item. No.
Corolla_Navi_EE_12J57E.book 215 ページ 2014年3月3日 月曜日 午後1時44分 6. NAVIGATION SETTING 3. TRAFFIC MESSAGE SETTINGS SETTING REROUTE METHOD TRAFFIC MESSAGE SETTINGS 1 2 3 Display the “Navigation” menu screen and select “Traffic messages”. (→P.163) Select the “Settings” tab. 1 Display the (→P.215) 2 3 Select “Dynamic reroute”. “Settings” screen. Select the desired item. Select the desired item. No. No. Page Select to set the reroute method. 215 Select to turn off traffic messages.
Corolla_Navi_EE_12J57E.book 216 ページ 2014年3月3日 月曜日 午後1時44分 6. NAVIGATION SETTING RECEIVING TRAFFIC INFORMATION VIA THE TMC RADIO STATION 1 Display the (→P.215) 2 3 Select “TMC radio station”. “Settings” screen. ■SETTING RADIUS FILTER 1 2 Select “Radius filter”. Select desired item. Select the desired item. No. Function Select to deactivate the function. No. Function Select to set the radius for displaying traffic messages.
Corolla_Navi_EE_12J57E.book 217 ページ 2014年3月3日 月曜日 午後1時44分 6. NAVIGATION SETTING 4 RECEIVING TRAFFIC INFORMATION VIA THE INTERNET 1 Display the (→P.215) 2 Select “Traffic information over internet”. 3 Select the desired item. “Settings” Select the desired item. screen. No. Function Select to update automatically every 3 minutes. Select to update automatically every 6 minutes. Select to update manually.
Corolla_Navi_EE_12J57E.book 218 ページ 2014年3月3日 月曜日 午後1時44分 7. NAVIGATION SYSTEM INFORMATION 1. LIMITATIONS OF THE NAVIGATION SYSTEM This navigation system calculates the current vehicle position using satellite signals, various vehicle signals, map data, etc. However, an accurate position may not be shown depending on satellite condition, road configuration, vehicle condition or other circumstances. The Global Positioning System (GPS) developed and operated by the U.S.
Corolla_Navi_EE_12J57E.book 219 ページ 2014年3月3日 月曜日 午後1時44分 7. NAVIGATION SYSTEM INFORMATION INFORMATION ● This navigation system uses tyre turning data and is designed to work with factory-specified tyres for the vehicle. Installing tyres that are larger or smaller than the originally equipped diameter may cause inaccurate display of the current vehicle position. The tyre pressure also affects the diameter of the tyres so make sure the tyre pressure of all four tyres is correct.
Corolla_Navi_EE_12J57E.book 220 ページ 2014年3月3日 月曜日 午後1時44分 7. NAVIGATION SYSTEM INFORMATION 2. NAVIGATION DATABASE UPDATES UPDATING NAVIGATION DATABASE Navigation database that contains system software and map data, etc. can be updated using a USB memory. For details, contact Toyota dealer or refer to Toyota portal site (www.my.toyota.eu). 1 Open the cover of the auxiliary box and then open the cover of the USB/AUX port. 2 3 Connect a USB memory.
Corolla_Navi_EE_12J57E.book 221 ページ 2014年3月3日 月曜日 午後1時44分 8 1 APPLICATION 2 1 APPLICATIONS OPERATION 1. QUICK REFERENCE .................. 222 2. PICTURE SLIDESHOW .............. 225 DISPLAYING THE PICTURES ............ 225 OPERATING A PICTURE SLIDESHOW ..................................... 226 3. E-MAIL ........................................ 227 RECEIVING AN E-MAIL ...................... 227 CHECKING E-MAIL ............................. 228 4. MirrorLink ................................
Corolla_Navi_EE_12J57E.book 222 ページ 2014年3月3日 月曜日 午後1時44分 1. APPLICATIONS OPERATION 1. QUICK REFERENCE The applications can be accessed by pressing the button. Each time the button is pressed, the screen will change between the “Phone” menu screen and the “Extras”/“Toyota online” menu screen. When the button is pressed, the screen that was last displayed is returned to. Select to display the “Extras”/“Toyota online” menu screen.
Corolla_Navi_EE_12J57E.book 223 ページ 2014年3月3日 月曜日 午後1時44分 1.
Corolla_Navi_EE_12J57E.book 224 ページ 2014年3月3日 月曜日 午後1時44分 1. APPLICATIONS OPERATION No. ∗ Function Select to access connected service. Select to access preinstall application. Application Page Online search 239 Street View 243 Panoramio 245 Pictures∗ 225 Email 227 MirrorLink 229 Toyota Eurocare∗ 230 ∗ : With navigation function INFORMATION ● The shown screen in the illustrations may differ from your vehicle's screen in terms of equipment.
Corolla_Navi_EE_12J57E.book 225 ページ 2014年3月3日 月曜日 午後1時44分 1. APPLICATIONS OPERATION 2. PICTURE SLIDESHOW∗ Pictures stored on a USB memory can be viewed. DISPLAYING THE PICTURES 1 Open the cover of the auxiliary box and then open the cover of the USB/AUX port. 2 3 Connect a USB memory. 4 Select “Pictures”. INFORMATION ● This function is not available while driving. ● When the vehicle starts moving while viewing pictures, a pop-up window will be displayed and pictures cannot be displayed.
Corolla_Navi_EE_12J57E.book 226 ページ 2014年3月3日 1. APPLICATIONS OPERATION OPERATING A PICTURE SLIDESHOW A slideshow can be played, paused, and desired images can be selected. 1 Select 2 Check that the operating switches are displayed. No. . Function Select to display the previous/ next picture. Select to pause the slideshow. Select again. to play the slideshow Select to close the operating switches.
Corolla_Navi_EE_12J57E.book 227 ページ 2014年3月3日 月曜日 午後1時44分 1. APPLICATIONS OPERATION 3. E-MAIL Incoming e-mails to a connected Bluetooth® phone can be downloaded. Before using this application, connect a Bluetooth® phone with a phone profile. (→P.119, 126) RECEIVING AN E-MAIL When a new e-mail is received, a pop-up window is displayed on the screen. 1 2 Select “Show” to check the e-mail. Check that the e-mail is displayed. INFORMATION ● This function may not be available depending on the phone.
Corolla_Navi_EE_12J57E.book 228 ページ 2014年3月3日 1. APPLICATIONS OPERATION CHECKING E-MAIL 1 Display the “Extras”/“Toyota online” menu screen. (→P.222) 2 Select “Email”. z When the downloading of an e-mail has been completed, the mail list will be displayed. 3 Select the desired e-mail. z The state of an e-mail is shown by the following icons. : Unread mail : Read mail 4 Check that the message is displayed.
Corolla_Navi_EE_12J57E.book 229 ページ 2014年3月3日 月曜日 午後1時44分 1. APPLICATIONS OPERATION 4. MirrorLink When a MirrorLink compatible device is connected via USB, a MirrorLink screen is displayed on the navigation/ multimedia system display. The MirrorLink device can be operated via navigation/multimedia system. 1 Open the cover of the auxiliary box and then open the cover of the USB/AUX port. 2 Connect a MirrorLink device. z Only one MirrorLink device can be connected at a time.
Corolla_Navi_EE_12J57E.book 230 ページ 2014年3月3日 月曜日 午後1時44分 1. APPLICATIONS OPERATION 5. TOYOTA EUROCARE∗ This feature is used to make a call to Toyota Eurocare service. Before using this function, connect a Bluetooth® phone with a phone profile. (→P.126) CHANGING A COUNTRY 1 Display the “Toyota online” menu screen. (→P.222) 2 3 Select “Toyota Eurocare”. 4 Select another country to replace the existing country. 5 Check that the country is displayed on the screen. Select the registered country.
Corolla_Navi_EE_12J57E.book 231 ページ 2014年3月3日 月曜日 午後1時44分 1. APPLICATIONS OPERATION USING THE TOYOTA EUROCARE 1 Display the “Toyota online” menu screen. (→P.222) 2 Select “Toyota Eurocare”. 5 Check that the following screen will be displayed. z The geographic coordinates of the current location will be displayed at the top-left corner of the screen. 3 Select “Call Eurocare”. z When “...” appears on the screen, select to display the following position details.
Corolla_Navi_EE_12J57E.book 232 ページ 2014年3月3日 月曜日 午後1時44分 2. CONNECTED SERVICE 1. CONNECTED SERVICE OVERVIEW∗ The following services are available by connecting the navigation system to Toyota portal site via the internet using a cellular phone. z Online search: New establishments, such as restaurants, bars etc., that are not registered in the navigation system can be set as a destination.
Corolla_Navi_EE_12J57E.book 233 ページ 2014年3月3日 月曜日 午後1時44分 2. CONNECTED SERVICE XImporting memory points and routes: Downloading via a cellular phone XImporting memory points and routes: Downloading from a USB memory No. Name Operation Your personal computer and Toyota portal site* Access the portal site and search POIs and routes. Toyota portal site* The POIs and routes are saved at Toyota portal site.
Corolla_Navi_EE_12J57E.book 234 ページ 2014年3月3日 月曜日 午後1時44分 2. CONNECTED SERVICE XVehicle customisation: Sending vehicle's settings data to and from the Toyota portal site No. Name Operation Navigation system Via the internet, the vehicle’s settings are sent to/receive from the Toyota portal site. Toyota portal site* The vehicle’s settings are saved at Toyota portal site. Your personal computer and Toyota portal site* Access the portal site and change the vehicle’s settings.
Corolla_Navi_EE_12J57E.book 235 ページ 2014年3月3日 月曜日 午後1時44分 2. CONNECTED SERVICE XDownloadable application No. Name Operation Your personal computer and Toyota portal site* Access the portal site and download application. USB memory The downloaded application is saved to a USB. Navigation system Via the USB the application is downloaded to the navigation system. Runs applications on the navigation system. Contents provider Contents received via a cellular phone.
Corolla_Navi_EE_12J57E.book 236 ページ 2014年3月3日 月曜日 午後1時44分 2. CONNECTED SERVICE 2. BEFORE USING CONNECTED SERVICE∗ CHECKING DEVICE IDENTIFICATION OBTAINING A PORTAL SITE ACCOUNT Before using connected services, it is necessary to first access Toyota portal site (www.my.toyota.eu) via a personal computer and create an account. z In order to use this service, a Bluetooth® DUN/PAN capable cellular phone with a valid data plan subscription is required.
Corolla_Navi_EE_12J57E.book 237 ページ 2014年3月3日 月曜日 午後1時44分 2. CONNECTED SERVICE 4 Check that the device ID is displayed. LOGIN PROCESS CONNECTED SERVICES Before using connect services, connect a Bluetooth® phone with an internet profile. (→P.126) 1 Activate any connected service.
Corolla_Navi_EE_12J57E.book 238 ページ 2014年3月3日 2. CONNECTED SERVICE 6 Select “Confirm login information”. z When “Remember password” is on, the entered user login information will be remembered for every login. z If the account already has 5 cars registered, it is not possible to register another car.
Corolla_Navi_EE_12J57E.book 239 ページ 2014年3月3日 月曜日 午後1時44分 2. CONNECTED SERVICE 3. ONLINE SEARCH∗ ONLINE SEARCH 4 Select the desired search area. A destination can be selected via connected service. Online search will not be available in all countries. 1 Display the “Toyota online” menu screen. (→P.222) 2 Select “Online search” No. Select to set a location around the current position. z Online search can be entered on the “POI” screen. (→P.
Corolla_Navi_EE_12J57E.book 240 ページ 2014年3月3日 月曜日 午後1時44分 2. CONNECTED SERVICE 6 Check that the search results is displayed. Select the desired item. 7 Select “Go”. No. No. Function Search results • Up to 20 search results are downloaded at a time. • Highlighted advertisements may be displayed at the top of the search result list. Select to display a full screen map. z At the end of the list “Download more” will be shown. Select “Download more” to search up to 20 new items.
Corolla_Navi_EE_12J57E.book 241 ページ 2014年3月3日 月曜日 午後1時44分 2. CONNECTED SERVICE ENTERING KEYWORDS FROM THE LIST Search can be again started from the history of a search word. The maximum number of search word history is 10. 1 Select on the search word entering screen. 2 Select the desired word. 3 ■DELETE SEARCH WORDS HISTORY 1 2 Select 3 Select “Yes”. . Select the desired item. Select “OK”.
Corolla_Navi_EE_12J57E.book 242 ページ 2014年3月3日 月曜日 午後1時44分 2. CONNECTED SERVICE VIEWING POI DETAILS 1 Select on the POI information screen. 2 SELECTING A SEARCH ENGINE Check that the details of the selected POI are displayed. Throughout the entire search process it is possible to change the search engine by selecting on the logo of the current search engine. 1 Select the search engine logo. z Select the desired picture to display full screen.
Corolla_Navi_EE_12J57E.book 243 ページ 2014年3月3日 月曜日 午後1時44分 2. CONNECTED SERVICE 4. Street View* The Street View of the desired location can be viewed. 1 Display the “Toyota Online” menu screen. (→P.222) 2 Select “Street View”. No. Function Select to set a location by using the current position. Select to set the location around the main destination. Select to set the desired location. Select “Enter location” to enter house number, street, town or place name and then select “OK”.
Corolla_Navi_EE_12J57E.book 244 ページ 2014年3月3日 2. CONNECTED SERVICE 4 Check that the picture is displayed. No. Function Select to calculate the route. Select to display the next picture. Select to display the previous picture. z Up to 6 pictures per location can be displayed. INFORMATION ● The Street View function can also be selected from the following screens: • Starting route guidance screen (→P.186) • Online search result screen (→P.239) ● This function is not available while driving.
Corolla_Navi_EE_12J57E.book 245 ページ 2014年3月3日 月曜日 午後1時44分 2. CONNECTED SERVICE 5. Panoramio* The available pictures on the network, comments and other information can be viewed. 1 Display the “Toyota Online” menu screen. (→P.222) 2 Select “Panoramio”. 4 Select the desired picture. No. Function Select to display the next picture. Select to display the previous picture. 3 Select the desired item to search a point. No. Function Select to set the location around the main destination.
Corolla_Navi_EE_12J57E.book 246 ページ 2014年3月3日 月曜日 午後1時44分 2. CONNECTED SERVICE 6. LOADING POIs/ROUTE∗ POIs and routes can be added by downloading from the Toyota portal site. They will be stored in the “Stored” list on the “My destinations” screen. (→P.81) DOWNLOADING VIA A CELLULAR PHONE 1 Display the “Navigation” menu screen and select “Enter destination”. (→P.163) 2 3 Select the “Advanced” tab. Select “Load POIs and routes from server”.
Corolla_Navi_EE_12J57E.book 247 ページ 2014年3月3日 月曜日 午後1時44分 2. CONNECTED SERVICE 7. OPERATING AN APPLICATION USING CONNECTED SERVICE∗ DOWNLOADING AN APPLICATION TO THE SYSTEM To download an application, a USB memory that contains the application data is required. For details about an application, refer to Toyota portal site (www.my.toyota.eu). 1 Open the cover of the auxiliary box and then open the cover of the USB/AUX port. 2 3 Connect a USB memory.
Corolla_Navi_EE_12J57E.book 248 ページ 2014年3月3日 月曜日 午後1時44分 2. CONNECTED SERVICE OPERATING AN APPLICATION 3 Check that the application option screen is displayed. For details about operating the application, refer to www.my.toyota.eu. 1 Display the “Toyota online” menu screen. (→P.222) 2 Select the desired application. No. SETTING AN APPLICATION 1 2 Display the “Toyota online” menu screen. (→P.222) Select next to the desired applica- Function Displays information about the application.
Corolla_Navi_EE_12J57E.
Corolla_Navi_EE_12J57E.book 250 ページ 2014年3月3日 月曜日 午後1時44分 ALPHABETICAL INDEX A AAC .............................................. 36, 69, 71 Adding and editing stopovers ................. 193 Address .................................................. 180 AF (Alternative frequency)........................ 34 AM ............................................................ 30 Application .............................................. 222 Arrival time..............................................
Corolla_Navi_EE_12J57E.book 251 ページ 2014年3月3日 月曜日 午後1時44分 B C Before using connected service ............. 236 Calibration................................................. 21 Login process...................................... 237 Call lists .................................................... 87 Portal site account .............................. 236 Calling on a Bluetooth® phone ................. 85 Blocking road ahead............................... 196 Call lists..............................
Corolla_Navi_EE_12J57E.book 252 ページ 2014年3月3日 月曜日 午後1時44分 ALPHABETICAL INDEX CD ............................................................ 36 Control panel/screen............................. 36 Options.................................................. 40 Playing an audio CD ............................. 39 Playing an MP3/WMA/AAC disc ........... 39 CD player and discs ................................. 67 CD-R and CD-RW discs ........................... 71 Cellular phone .............................
Corolla_Navi_EE_12J57E.book 253 ページ 2014年3月3日 月曜日 午後1時44分 E F e-mail...................................................... 227 File (audio)................................................ 69 Checking ............................................. 228 FM............................................................. 30 Receiving ............................................ 227 Fuel consumption ................................... 108 Editing route ...........................................
Corolla_Navi_EE_12J57E.book 254 ページ 2014年3月3日 月曜日 午後1時44分 ALPHABETICAL INDEX I M Icon information ...................................... 170 Map......................................................... 167 Inserting or ejecting a disc........................ 28 Map icons ............................................... 170 Internet connection ................................. 130 Icon information................................... 170 Quick setup of an internet connection .......................
Corolla_Navi_EE_12J57E.book 255 ページ 2014年3月3日 月曜日 午後1時44分 N P Navigation............................................... 158 Panoramio .............................................. 245 Navigation database updates ................. 220 Phone ....................................................... 74 Navigation menu screen......................... 163 Phone book................................. 79, 86, 180 Navigation system function index ........... 165 Phone switch/microphone...................
Corolla_Navi_EE_12J57E.book 256 ページ 2014年3月3日 月曜日 午後1時44分 ALPHABETICAL INDEX R Receiving calls on a Bluetooth® phone ............................... 90 Radio .................................................. 30, 64 Registered points.................................... 179 Control panel/screen............................. 30 Registering entry............................... 81, 200 Options.................................................. 35 Displaying and editing ...........................
Corolla_Navi_EE_12J57E.book 257 ページ 2014年3月3日 月曜日 午後1時44分 S T Scrolling the map.................................... 168 TA (Traffic announcement) ....................... 34 Search engine ........................................ 242 Talking on a Bluetooth® phone................. 91 Sending tones........................................... 92 Dialing a second number ...................... 93 Setup ...................................................... 112 Receiver volume ..........................
Corolla_Navi_EE_12J57E.book 258 ページ 2014年3月3日 ALPHABETICAL INDEX U USB memory ............................................ 42 Control panel/screen............................. 42 Options.................................................. 46 Playing a USB memory......................... 46 USB/AUX port........................................... 29 V Vehicle settings ...................................... 142 Voice guidance ....................................... 190 Volume settings .......................
Corolla_Navi_EE_12J57E.book 259 ページ 2014年3月3日 月曜日 午後1時44分 Map database information END-USER TERMS The data (“Data”) is provided for your personal, internal use only and not for resale. It is protected by copyright, and is subject to the following terms and conditions which are agreed to by you, on the one hand, and Harman (“Harman”) and its licensors (including their licensors and suppliers) on the other hand. © 2011 NAVTEQ B.V.
Corolla_Navi_EE_12J57E.book 260 ページ 2014年3月3日 LICENSE GRANT NAVTEQ grants you a non-exclusive license to use the Database for your personal use or, if applicable, for use in your business’ internal operations. This license does not include the right to grant sub-licenses. LIMITATIONS ON USE The Database is restricted for use in the specific system for which it was created. Except to the extent explicitly permitted by mandatory laws (e.g.
Corolla_Navi_EE_12J57E.book 261 ページ 2014年3月3日 If you did not acquire the Database from NAVTEQ directly, you may have statutory rights against the person from whom you have acquired the Database in addition to the rights granted by NAVTEQ hereunder according to the law of your jurisdiction. The above warranty of NAVTEQ shall not affect such statutory rights and you may assert such rights in addition to the warranty rights granted herein.
Corolla_Navi_EE_12J57E.
Corolla_Navi_EE_12J57E.
Corolla_Navi_EE_12J57E.
Corolla_Navi_EE_12J57E.
Corolla_Navi_EE_12J57E.