
Stereo Amplifier User Manual


17INTEGRATED AMPLIFIER
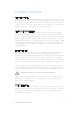
Product Features
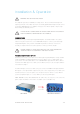
REMOTE CONTROL
Provided with your Hautonga Integrated Amplifier is a 16 function remote control. Two
AAA batteries power the remote, and these are replaced by removing the two screws
on the base of the remote that hold the battery compartment in place. The bottom
end of the remote is now free to slide out for access to the batteries. Replace the two
batteries, taking care to refit the new ones with correct polarity.
PHONO GAIN ADJUSTMENT
The phono stage can also be set to high or low gain to suit your phono turntable
specifications (high gain is the factory setting). Disconnect the lead from the IEC
socket on your Hautonga Integrated Amplifier and make sure the Mains switch is OFF.
Carefully remove the lid by undoing the cap screws on the top and side. Locate the
small black phono jumpers to the middle-right side of the top circuit board. The gain
can now be adjusted noting that high gain (factory setting) is set with jumpers to the
left, and low gain is set with jumpers to the right. Now re-assemble your Hautonga
Integrated Amplifier.
FUSE PROTECTION
When any rail fuse is damaged one or more fuse warning LED’s will light. These LED’s
are located next to the fuse that has blown. To replace the fuse, disconnect the
amplifier from the mains power and wait 30 minutes, then firmly push in the round fuse
cap with your fingers. When the cap cannot push in any further, rotate the cap anti-
clockwise (to the left) until it comes to a stop. Release inward pressure on the fuse cap
and it can now be removed from the amplifier. Replace them with the same type only.
To re-fit the fuse, insert the fuse and gently turn it as far as possible anti-clockwise (to
the left). Now push the fuse cap in firmly, then turn clockwise (to the right) until it comes
to a stop. Release inward pressure on the cap and the fuse will be fitted securely.
IMPORTANT: DO NOT FIT A FUSE WITH A HIGHER RATING.
NOTE: that fuse failure may indicate a severe problem. Check all speakers and
speaker cables for damage etc. Should the amplifier continue to exhibit rail fuse
failure, contact your Plinius dealer.
MAINS/LINE FUSE
A Mains/Line fuse is fitted within the IEC socket on the rear of the amplifier. A small
drawer at the bottom of this socket may be removed (after the IEC plug is removed)
by levering it out with a flat blade screwdriver. The fuse fitted should be rated as
specified on the rear panel.