
Users Manual Part 2


E-20
UsingUSBMemory
The content of what has been drawn on the sheet surface of the network board can be saved in USB memory.
Later, the saved image can be read into a personal computer and made into a document of the proceedings of
the meeting, or affixed to a document.
Notice
• NoUSBflashmemorydeviceisincluded.WhenpurchasingaUSBflashmemorydevice,payattentiontothefollowing:
1.USBflashmemorydevicesformattedinFAT16/FAT32aresupported.USBflashmemorydevicesinNTFSformatcannot
beused.
2.USBflashmemorydevicesprotectedbyasecurityfunctioncannotbeused.
3.USBflashmemorydeviceswithacapacityofover32GBcannotbeused.
4.IftheUSBflashmemorydeviceisdividedintomultiplepartitions,onlyonepartitioncanberecognizedwiththisunit.
USBMemoryStorageProcedure
Preparation:
Checkthatthenetworkboard’sACpowerplugisconnectedtoawallpoweroutlet.
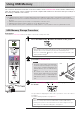
PresstheON/Standby buttonandswitchonthepower.
Note
• Whenturningonthepower,waitabout5secondsormoreafterthepower
plughasbeenconnectedbeforepressingtheON/Standbybutton.
• PresstheON/Standby buttontoswitchonthepower.TheLEDofthe
displaywindowwilllight.
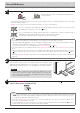
InserttheUSBmemorydeviceintotheUSBAMemory
portofthenetworkboard.
Notice
• Checktheside(polarity)oftheUSBmem-
ory device before inserting it. Forcing it
in the reverse orientation will damage the
USB A Memory port or USB memory
device.
• Be careful not to bump into the USB
memory device with hand or body while
itismounted.Doingsocoulddamagethe
USB memory device or USB A Memory
port.
Theprocedurefordisplayingthesheetsurfaceyouwanttostoreisthesameas
forprinting.
See“BasicPrintingOperation”onpageE-16.
Note
• TheonescreenportionthatisviewablewillbesavedinUSBmemory.
• Savingoftheportionlocatedaroundthesheetsurfacemightnotbepos-
sible.Pleasesee“Effectivereadingsize”onPageE-5.
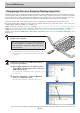
PresstheScroll/Stop or buttontodisplaythescreento
bestored.