
User Manual


MacAction Help54
All rights are reserved.
·
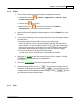
Right-click
the icon
in the Dock, and then choose
Button
Configuration...
in the pop-up menu that opens.
2.
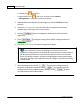
When the Button Configuration window appears, click the
Copy
icon in the left
pane.
3.
If you are printing to a printer other than your default printer, select a correct
printer from the drop-down menu.
4.
Click
to configure the printer.
5.
Enter the number of copies you want to make. Alternatively you can click
to
increase/decrease the number.
6.
Check the
Center on Page
option if you want to center the image in the
printable area of the selected paper.
7.
Scale the print size by clicking the
Fit to Page
(fit the image within the printable
area of the selected paper) or
Custom Ratio
option.
8.
Check the
scan settings
and make any required changes.
9.
After all settings are done, click
to accept the settings and exit this
Button Configuration window, or click
to save what you have
configured and continue adjusting other settings, or click
to abort
your adjustments and exit this window.
The Copy button is only for making quick copies of documents or
images. It does not save the scanned image to your computer and does not
give you a preview of what the output will look like. For more control over the
scanning and printing process, including previewing, resizing, color control, use
an image editor to scan and print the document or image.