
User Manual


Scanner Buttons Guide6
2
Button Configuration Window Overview
DocAction allows you to tailor
each individual scanner button
to meet your
scanning needs of all time.
There are two ways to
configure or view the button
settings
of DocAction
:
·
Double-click the icon
in the Windows system tray.
·
Right-click
the icon
in the Windows system tray, and then choose
Button Configuration
in the pop-up menu that opens.
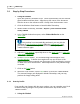
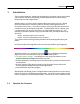
Within the Button Configuration window, you can find a row of icons running through
the left side of the window. Each icon corresponds to a single-touch button on your
scanner's panel (as well as DocAction's on-screen Execute menu
)
. If not all
available buttons are displayed, drag the scrolling bar up and down to navigate
through them. Clicking any icon on the left pane and its current button settings are
displayed immediately on the right pane. You may adjust the settings as desired.
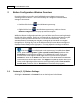
If the icon
is not displayed on the system tray, from Windows
Start
menu, point to
All
Programs
>
(your scanner model name)
and then click
DocAction
to reactivate the program
. (
For Windows 8.1 users: Point your
mouse cursor to the upper or lower right corner of your screen to open the
Charm
bar. Click on the
Start
charm, then click on the downwards arrow button
in the lower left corner of the screen. The
Apps
screen will be shown. Move your
cursor to the right edge of the screen to scroll right until you find
Your scanner
model name
, and then click on
DocAction
to reactivate the program
.)
2.1
Custom (1, 2) Button Settings
Clicking the
Custom 1
or
Custom 2
icon on the left pane in the Button