
User Manual


21
ALIGNING THE SCANNER
In most cases, the scanner doesn’t need to be aligned but there are instances
when the alignment might be required. You need to align the scanner only if parts of
the scanned document are missing from any of its edges. For example, the heading of
a document might be missing from the top edge after the document has been scanned.
Alignment for Flatbed Scan:
1. Place the document onto the scanner glass headfirst and face-down. Align the
top left corner of the document with the arrow on the reference mark.
2. Right click the icon
on the Windows system tray and select Scanner
Utility from the menu that pops up.
3. The Scanner Utility window opens. Find the Initial Scanning Position
Alignment section and select Flatbed Reflective as the source.
4. Click the Scan button. Part of the document image will be displayed in the
Alignment Window.
5. Click the Alignment Position buttons (Up, Down, Left, Right) until the top left
corner of the scanned document aligns with the top left corner of the Alignment
Window.
6. When the alignment completes, click on OK button to save settings and exit.
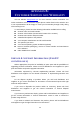
Alignment
Source
Alignment
Position
Alignment
Window