
Installation Guide


Care and Storage
Ply-Bead
®
panels should be
stored and handled with care
to avoid damaging before
installing and finishing.
Store in a cool, dry place
out of direct sunlight.
Stack on a level surface.
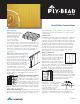
To minimize the amount of dimensional change that can occur
due to changes in panel moisture content, acclimate panels to
the environment in which they will be installed for at least 48
hours prior to application. Stack the panels on the floor with a
minimum of 3 spacers between each sheet. This allows air
to circulate around each panel for proper acclimatization
(see illustration).
Wall/Ceiling Framing and Preparation
Panels can be installed over studs, 1( x2(
wood furring or existing solid backing wall
surface by fastening to the furring or
through the backing into the studs. Panels
may be oriented with their long dimension
(strength axis) vertically over supports
16( o.c. for wall paneling, garage liner, and
wainscoting applications, or horizontally
over supports 24( o.c. When used
on porch or interior ceilings, the long
dimension (strength axis) must be perpendicular to ceiling joists.
All panel ends and edges must be supported by framing,
blocking, furring or a solid nailable backing. Drywall is not a
nailable backing.
Below Grade and All Masonry Walls
should be free of cracks and leaks.
Repair cracks or leaks with a waterproof
compound or sealer. Apply a minimum
4 mil polyethylene vapor retarder over the
masonry wall prior to furring to prevent
moisture from accumulating on the back
of the panels. Preservative-treated furring is recommended if
masonry walls are below grade. If the below grade wall is open
frame, treat as an exterior wall.
Exterior Walls and Ceilings separating attics from living spaces
should be insulated and have a vapor retarder between the panel
back and inner face of the studs, furring or solid backing. The
vapor retarder may be a facing attached to the insulation or be a
separate layer such as 4 mil polyethylene or a closed cell foam
insulation panel.
Cutting Panels
Use a sharp cross-cut hand saw or power saw with a combination
or cross-cut blade. If using a hand saw or table saw, mark and
cut panels face up. If using a portable circular saw or a sabre saw,
mark and cut panels face down. Where rough edges develop, they
can be dressed with a carpenter’s plane, rasp, file or sandpaper.
Measure and mark carefully cutouts for door and window sections,
electrical switches, outlets and heat registers. Many a good
panel has been ruined by inaccurate measurement, marking
and cutting. Double check your work before cutting. Always
wear eye protection when cutting or nailing.
Measuring and Fitting
Start panel installation at a corner by fitting
the panel loosely into the corner. Scribing
to the corner may be helpful to plumb the
leading panel edge over the center line of
the stud or furring, especially if the
adjacent wall is rough or irregular. Leave a
1/4( gap at the top and bottom of the wall.
This space and a 1/8( gap at corners and around window and
door openings and cutouts can be concealed by mouldings,
faceplates, etc. For interior applications, space panels at least
1/32( apart at edges, 1/8( for protected exterior applications,
such as porch ceilings. Walls and studs
behind joints can be painted, stained or
taped to blend with the panel finish and
prevent show-through. Gaps can be caulked
with a non-hardening paintable caulk. Install
subsequent panels in the same manner,
checking for plumb periodically.
Fastening
Nail panels 6( o.c. at panel ends and
edges and 12( o.c. at intermediate
supports in the field of the panel.
Do not nail directly through the
shiplap at long edges. Place
nails 3/8( from panel ends and edges. Nail under-lap and over-lap
separately. For interior paneling, garage liner and wainscot
applications, use a 6d casing, finishing or ring shank paneling
(continued)
Installation Instructions