
Instructions / Assembly

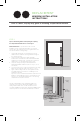


Here is a basic, step-by-step guide to installing a nail fin type, new construction
window, including recommended flashing details often used in the industry.
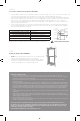
Rough Opening (REQUIRED)
(Before beginning, always review the instructions supplied with the window.)
Check the Rough Opening:
• The Rough Opening should be level, plumb, and square, and should be properly sized to
receive the window being installed.
• The framing must be substantial enough to properly support the structure around it.
NOTE: For open-stud installation: Before the window can be installed, wall framing must be
covered by backing support material suitable for your region. Mount the window with the
nail fin flush against the applied backing support material. Completely surround the rough
opening with the backing support material as applicable by local requirements. Be sure
backing support is applied prior to weather-resistant barrier.
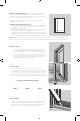
STEP 1:
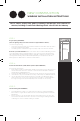
Weather Resistant Barrier, (WRB) Wall Preparation (RECOMMENDED)
At the Rough Opening (RO):
1. Ensure that the weather resistant barrier (WRB) is properly and securely fastened to the
exterior wall surface and is free of wrinkles, cuts and tears with adequate overlaps as
described by the WRB manufacturer.
2. Following the WRB manufacturer’s instructions, begin cutting out the RO as instructed.
3. Cut and remove any excess material as necessary or directed by the WRB manufacturer.
4. Cut two 45-degree slits as described, (based on the width of the flashing products
used), from the top corners of the rough opening at the header, to create a flap above
the rough opening. Fold it up and temporarily secure this flap over the opening.
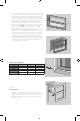
STEP 2:
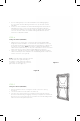
Wider than
Window Width
Taller than
Window Height
Sill Pan Flashing (RECOMMENDED)
1. Most manufacturers require you to measure and cut a portion of flashing membrane
that is a least 12” longer than the width of the RO sill. This flashing will be used as a sill
pan flashing.
2. Remove a portion of the release paper along the horizontal portion of the sill. Do Not
remove all release paper at this time to prevent over-stretching the flashing membrane
or allowing it to stick to itself and rendering it unusable.
STEP 3:
NEW CONSTRUCTION
WINDOW INSTALLATION INSTRUCTIONS