
Instructions / Assembly

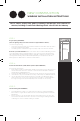


Here is a basic, step-by-step guide to installing a replacement window.
Inspect the Existing Frame and Preparing the Opening
For Vinyl Flush Fin Windows Proceed to Page 7
Flush Fin Window: A vinyl window used for retrofit
installation into an existing window frame. The integral
exterior trim is decorative and covers the gap between the
new window and the existing siding.
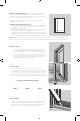
1. Verify width and height of new window are each ¾”
smaller than the minimum opening width and height of
the existing opening.
2. Verify the existing opening is square. Diagonal
measurements should be the same. Maximum allowable
deviation from square is 1/8” for windows 20 sq ft and
smaller, and ¼” for windows larger than 20 sq ft.
3. Verify the existing opening is level and plumb. The
maximum allowable deviation is 1/16” for every 2’ (not to
exceed 1/8”).
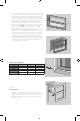
4. The exterior face of the rough opening must be in a single
plane with less than 1/8” twist from corner to corner.
5. Signs of water leakage near the existing frame must be
investigated and corrected prior to installing the new
replacement window.
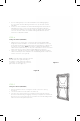
Dry fit the new closed and locked window (without the sill
adapter or head expander) into the opening with the sill
resting on the old sill. Make adjustments to the opening
until plumb-level-square is assured.
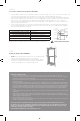
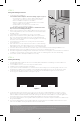
The lack of an adequate return significantly adds to the
complexity of a long-term, water-tight installation. If the
existing window frame does not have a sucient return,
consult an installation professional to design an installation that
completely seals the new window in a weatherproof manner.
STEP 1:
Drywall Interior
}
Drywall
Return
Weep Hole
Return
3/8” minimum
No
Extending
Fins or Lips
Exterior
Siding
REPLACEMENT
WINDOW INSTALLATION
INSTRUCTIONS