
Instructions / Assembly

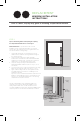


Prepare the Frame
1. Remove the sashes and/or glass in the existing window. Then
remove the meeting stile (if a slider) with a screwdriver or hacksaw.
A meeting stile is a vertical frame member of a window that sits in the
center of the exterior sill track and either holds one side of the fixed
glass or keeps the stationary sash from moving. Seal all four corners
of the window frame, and remove all existing window frame cladding.
Prepare the Window
1. To use your new window in an existing opening, you may have
to use a utility knife and score and snap the nailing fin o of the
window and pre-drill holes thru the side jamb as described above.
2. If your new replacement window is an aluminum window with a
nail fin, you may have to use an angle grinder with a metal cut-o
blade to remove the nail fin from the window, and pre-drill holes
through the side jamb as described above.
Install the Window
1. Apply backer rod and a continuous bead of exterior grade sealant
between the new window frame and the existing frame around the
window. Leave 2 x 2-1/2” gaps in your backer rod and sealant at sill
and in weep locations to allow for proper water drainage.
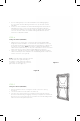
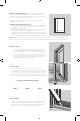
STEP 3:
STEP 2:
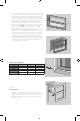
STEP 4:
Sealant
Meeting
Stile
Exterior
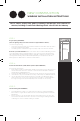
Minimum Opening Width/Height: Measurements taken to determine
the size of window that will fit into a retrofit opening. For example, the
minimum opening height is the distance between the highest frame point
on the sill to the lowest frame point on the header.
This installation assumes that the existing frame has a water-tight
installation into the structure.
Vinyl Windows with Nail Fin and Flush Fin
1. These instructions are based on CSA A440.4. For any specific details
(ex: dierent siding type) that may be dierent, please contact your
supplier for recommendations.
2. If installing in an area of high winds, see the structural engineering
report of the product for specific fastening requirements.
3. Any local building code requirements supersede the recommended
installation instructions. Failure to install square, level and plumb could result
in denial of warranty claims for operational or performance problems.
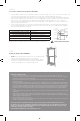
Drywall Interior
NOTE: Installation such that the window sill is higher than 35 feet above ground level or any window installation into a
wall condition not specifically addressed in these instructions must be designed by an architect or structural engineer.
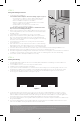
Type a
Type b Type c
SILL ANGLE OPTIONS BY WINDOW MODEL