
Instructions / Assembly


After Installation
1. Apply interior trim as desired. Adjust the windows for best
operations (if applicable). Protect recently installed units from
damage from plaster, paint, etc. by covering the units with
plastic. For casement windows, remove the shipping blocks
underneath the sash.
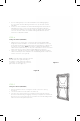
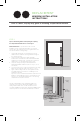
STEP 5:
Center
Interior
Sealant
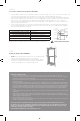
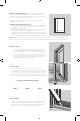
2. Shim the side jambs aligned with the fasteners from the corners
at each end and footer. Inspect the window for square, level and
plumb. Adjust as needed with shims. Fasten window through
side jambs and shims. Use Chart A for fastener intervals. If the
window is wider than 3’, fasten the head jamb at 24” maximum
intervals with a free floating screw. Do not shim the head. Install
vinyl plugs supplied or available through suppliers if desired.
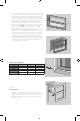
3. From the exterior, place the new flush window into the existing
frame. Ensure the window sill rests completely on the sill and
shim as necessary. NOTE: Hold window in place until fully
fastened. Fasten window temporarily through the predrilled
holes in the jamb from one upper corner. If there are no
predrilled holes, us a 1/8” tapered drill bit with 3/8” countersink
to drill a screw hole through the side jamb and into the buck
(on the interior, or exterior if insucient space). Countersink
should not penetrate the back wall of the frame. Apply sealant
to threads of a 3-1/2” screw and drive into the side jamb.
4. Insulate with fiberglass batting or low-expansion foam. Fill gap
with low-expansion foam around the window perimeter at the
sash position. Fill remaining cavity with fiberglass batting. Use
as per manufacturer’s instructions.
1
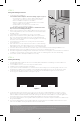
Quantity of pre-drilled holes may vary by brand or series.
JAMB HEAD SILL
SH/DH Provided
1
Not required Not allowed
SLIDING WINDOW Provided
1
At meeting rail Not allowed
CASEMENT 20” Not required Not allowed
AWNING 12” 16” Not allowed
FIXED 16” 16” 16”
Chart A – Hole Spacing