
Instructions / Assembly

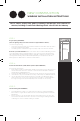


Here is a basic, step-by-step guide to installing a flush fin window.
Preparing the Opening
1. Dry fit the new closed and locked window (without the sill adapter or head expander) into the opening with the
sill resting on the old sill. Make adjustments to the opening until plumb-level-square is assured
STEP 1:
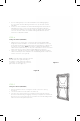
Preparing the Window
1. Single hung, double hung,
and sliding windows may
have pre-drilled installation
holes. Hung windows
may have balance covers
that must be removed
temporarily to access the
holes. If the window has
shipping clips attached,
leave them on until
installation is complete.
2. If your windows do not
have pre-drilled holes in
the jambs and head, you
will need to drill them
according to the schedule
on Chart A.
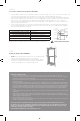
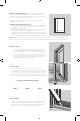
3. Drill using a 1/8” to 3/8”
step drill through the jamb
at 4” from the head and
another hole at 4” from the sill on each jamb as shown in Figure 1. Reference * marks in Figure 1 to determine
which screw locations are required.
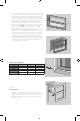
4. If you have a side-by-side combination window assembly, you must fasten additional screws in the head 4” on
each side of the mullion and 4” from each jamb (see Figure 1).
5. For positions of remaining required installation holes, see Figure 1 and Chart A.
6.
STEP 2:
1
Quantity of pre-drilled holes may
vary by brand or series.
JAMB HEAD SILL
SH/DH Provided
1
Not required Not allowed
SLIDING WINDOW Provided
1
At meeting rail Not allowed
CASEMENT 20” Not required Not allowed
AWNING 12” 16” Not allowed
FIXED 16” 16” 16”
Chart A – Hole Spacing
FLUSH FIN
WINDOW INSTALLATION INSTRUCTIONS
Figure 1