
Installation Guide

44
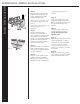
basic installation
horizontal siding installation
1"
Fig.2
Fig. 1
1/4" Bigger
Fig. 3
1"
Fig. 4
Beaded Horizontal
Siding
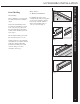
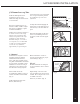
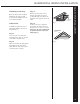
Beaded panels are factory notched
in three places (Fig. 1). For best
results, overlap panels using fac-
tory notched ends only. This panel
should be overlapped 1˝ due to the
unique design of the locking and
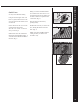
lapping system. Overlapping more
than 1˝ will result in less than optimal
laps and increase the chances of panel
restriction (Fig. 2). For easiest panel
installation, start locking the panel at
one end and tap the lock into place
toward the other end. This panel will
not lock by pushing straight up as in
standard panel installation.
TIP Always overlap joints away
from entrances and away from the
point of greatest traffic. This will
improve the overall appearance of
the installation.
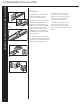
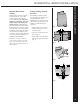
Fitting Siding around
Fixtures
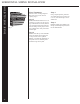
For handling protrusions around
the wall, refer to the figure (Fig. 3)
for hand fabricating, or use
manufacturers’ accessories specifi-
cally designed for this purpose. In
addition, the following tips are
suggested:
• Always begin a new course of
siding at the fixture to avoid
excess lap joints.
• Cut a slot 1/4˝ bigger than the
fixture. (Fig. 3)
• When cutting, match the shape
and contour of the obstruction.
(Fig. 4)