
Owners manual

©2015 POISON SPYDER CUSTOMS 951-849-5911•WWW.POISONSPYDER.COM
INSTALLATION INSTRUCTIONS INST-45-12-R50_A
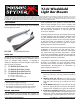
YJ-CJ Windshield
Light Bar Mounts
IMPORTANT: Thank you for purchasing this Poison Spyder product. Please read through this entire document before proceeding with installation. If you are not
confident in your mechanical skills, please seek the help of a professional to perform the installation. Check your packages immediately upon arrival to ensure that
everything listed is included, and to check for damage during shipping. If anything is missing or damaged, or if you need technical assistance with any aspect of
this installation, call Poison Spyder at (951) 849-5911 as soon as possible. This document last updated May 2015.
APPLICATIONS
These installation instructions apply to the following
Poison Spyder products:
45-12-R50 YJ-CJ Windshield Light Bar Mounts
PARTS LIST
Please check your packages immediately upon arrival
to ensure that everything listed is included, and to
check for damage during shipping. If anything is
missing or damaged, call Poison Spyder at (951) 849-
5911 as soon as possible.
(1) YJ-CJ Windshield Light Bar Mount, Driver
(1) YJ-CJ Windshield Light Bar Mount, Passenger
(2) YJ-CJ Windshield Light Bar Mount Rubber Liner
(1) YJ-CJ Windshield Light Bar Mount Hardware Kit
PN: HWKIT-45-12-R50 includes:
(8) 5/16-18 X 1 SS Button Head Cap Screw
TOOLS NEEDED
• Paint and paint supplies (if painting)
• Torx and hex key (Allen) driver bit sets and ratchet.
• See light bar manufacturer’s installation instructions for
tools needed to install the light bar into these mounts
BEFORE YOU BEGIN
The Windshield Light Bar Mounts are shipped un-
painted. Before you paint or powder coat, perform the
entire installation of the product to ensure that it ts
without risking damage to your paint or powder coat
nish. Poison Spyder Customs is not responsible for
paint or powder coat costs in the event you damage
the nish during installation, or that the parts are
incorrect or defective.
If painting them yourself, we recommend starting with
a quality etching primer and allowing sufcient cure/
dry time between coats and before you apply color.
Quality spray-can paints are ne if properly applied.
A little extra time and attention to detail on your
preparation and paint process will pay off in longer-
lasting good looks and rust prevention.
IMPORTANT: These instructions pertain to the physical
installation of the mounts and the light bar only—
installation of switches and electrical connections
are beyond the scope of these instructions. Please
consult the documentation provided by the light bar
and/or wiring harness manufacturer for instructions on
completing the electrical connections.
This product is designed for use with Rigid Industries
E-Series or SR-Series 50” LED Light Bars ONLY.
Use with other brands or models of light bar is not
recommended, tech-supported or warranteed by
Poison Spyder Customs, Inc.
INSTALLATION PROCEDURE
1. Park vehicle on a level surface and set the emergency
brake. You will want to wear eye protection beyond this
point.
2. Working with one side at a time, begin by using
a Torx bit and ratchet to remove the four OE windshield
hinge bolts above the hinge pin (windshield side of the
hinge).
3. FittheRubberLinertothe inside surface of the Light
Bar Mount, aligning the holes in each piece, then place the
Light Bar Mount and Rubber Liner against the windshield.
4. Installfoursupplied5/16-18X1 SS Button Head
Cap Screws through the holes in the Light Bar Mount and
Rubber Liner, into the corresponding threaded holes in the
windhsield hinge. Leave the fasteners loose at this time.