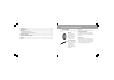
FRA 17925810.00 ENG/FRA A Polar F6™ Fitness Heart Rate Monitor Press OK to enter the menu. Press the / buttons to move forward in the menus. Press and hold the Back button to return to the Time of Day display. BOUTONS MANUEL D’UTILISATION Lumière OK Back Retour OK ENG 17925810.00 ENG/FRA A USER MANUAL Light BUTTONS Appuyez sur OK pour entrer dans un menu. Appuyez sur les boutons / pour avancer dans les menus. Appuyez longuement sur le bouton BACK/RETOUR pour revenir à l’affichage de l’Heure.
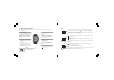
INSTRUCTIONS RAPIDES POLAR F6 Cher client, Visualisez les données d'exercice de la semaine en cours. Contrôlez des données comme votre fréquence cardiaque et votre consommation calorique pendant vos séances d’exercice. Visualisez en détail les données de votre dernière séance d’exercice, ainsi que les données cumulées de tous vos exercices. Changez l’heure, l’alarme et d’autres réglages.
CONTENTS 1. 2. 3. 4. 5. INTRODUCTION TO THE F6 HEART RATE MONITOR ........................................................................................................... 7 1.1 PRODUCT ELEMENTS .............................................................................................................................................. 7 1.2 WRIST UNIT BUTTONS AND SYMBOLS ..................................................................................................................... 8 1.
1. INTRODUCTION TO THE F6 HEART RATE MONITOR 6. 7. 8. 9. 10. 11. 12. 13. DATA TRANSFER ............................................................................................................................................................. 50 CARE AND MAINTENANCE .............................................................................................................................................. 51 PRECAUTIONS ...................................................................................
1.2 WRIST UNIT BUTTONS AND SYMBOLS Symbols Note: Pressing a button briefly (approximately one second) has a different effect than pressing and holding the button for a longer period of time (at least two seconds). Light • Switch the backlight on. By pressing and holding the Light button, you can: Lock and unlock all the buttons, except the Light button, in the Time of Day display or while recording your exercise. Press and hold the Light button until Buttons Locked or Unlocked is displayed.
1.3 BASIC SETTINGS Start from the Basic Settings mode when you use your product for the first time. You only need to activate the blank wrist unit once. Once activated, the wrist unit cannot be switched off. Alternatively, you can transfer the Basic Settings to the wrist unit from your computer. For further information, see the chapter Data Transfer on page 50.
1.4 MEASURING YOUR HEART RATE 3. Lift the transmitter off your chest and moisten the two grooved electrode areas on the back. To measure your heart rate, you need to wear the transmitter. Heart rate coding reduces interference from other heart rate monitors that are close by. To make sure that the code search is successful and ensure trouble-free heart rate monitoring, keep the wrist unit within 3 feet/1 meter of your transmitter.
2. EXERCISING In the Exercise menu you can view and record your exercise information, such as your heart rate, exercise time, and energy expenditure. 2.2 FUNCTIONS DURING EXERCISE Note: Your exercise information is saved only if the stopwatch has been on for more than one minute. Checking the Time of Day 2.1 STARTING EXERCISE RECORDING 1. Wear the transmitter as described in the section Measuring Your Heart Rate on page 12.
Calories (displayed as Cal/kcal, depending on your units settings) The calories you have burned until now. Changing the Displayed Exercise Information In the Exercise and Calories display, you can change the upper row information to personalize the display by pressing and holding the button. Polar calorie calculation shows your energy expenditure while exercising. You can use the feature to set daily and weekly exercise goals in terms of calories (Cal/kcal).
Switching the Backlight On Changing Settings During Exercise Press the Light button and the display is illuminated for a few seconds. After you have illuminated the display once while exercising night mode symbol appears in the display. The display automatically illuminates each time you press any button or bring the wrist unit near the Polar logo on the transmitter, until you stop recording the exercise.
2.3 EXERCISE SETTINGS Stopping the Exercise and Viewing Exercise Summary 1. Press the Back button. Your current heart rate is displayed. Exercise recording is paused. 2. Select EXIT with the / buttons and press OK. is displayed. Summary of your exercise is displayed. Exercise duration (hh.mm.ss) Calories burned during the exercise (Cal/kcal) The maximum (max) and average (avg) heart rate of the exercise session (bpm/%HRmax) alternate. 3.
2.4 OWNZONE Polar F6 heart rate monitor is able to determine your individual aerobic exercise heart rate zone automatically. This is called OwnZone (OZ) and it can be determined during a warm-up period lasting 1-5 minutes by walking or jogging. You can also determine your OwnZone in other exercise modes. The main idea is that you start exercising slowly at a light intensity. You then gradually increase the intensity of your exercise to raise your heart rate.
3. MONITORING YOUR PROGRESS 5. At some point during stages 1-5, you hear two beeps. Your OwnZone has been determined. If the OwnZone determination succeeds, the following information is displayed: OwnZone Updated OwnZone heart rate limits as beats per minute (bpm) or as a percentage of your maximum heart rate (%HRmax) depending on your settings Your current heart rate This chapter describes how to monitor your progress with your Polar heart rate monitor. 3.
3.1.1 DIARY 26 3.1.2 HR ZONES Exe.Count (exercise count) The exercise count bar is highlighted The total exercise counts you have achieved Light The Light intensity zone bar is highlighted The exercise duration in the zone you have achieved Exe.
Changing the Default Diary View Press Back to return to the Diary or HR zones view, and the previously viewed value will be set as a default value. Next time you enter the Diary or HR zones view the default value will be displayed. Default value 3.2 WEEKLY FOLLOW-UP The weekly follow-up function automatically reviews your progress and reminds you to check the previous week's exercises. The reminder appears between Sunday and Monday at midnight. 1. Press the button to open the reminder . 2.
4.1 EXERCISE FILE Heart Rate Maximum (Max) and average (Avg) heart rate in beats per minute alternate with the percentage of maximum heart rate reading. The following information is displayed: Graphic bars indicate the amount of exercise performed. The height of the bar indicates the exercise duration. The selected exercise is shown by a cursor Date of the selected exercise Select the exercise with the / buttons. Press OK.
4.2 TOTALS FILE In the Totals File you can view your total cumulative exercise count, duration, and burned calories in several exercises, starting from the previous reset. Total Calories The last reset date of the total cumulative calories. Total cumulative calories burned during several exercise sessions, starting from the previous reset. 1. If you start from the Time of Day display, press OK. 2. Press the / buttons until File is displayed. Press OK. 3. Press the / buttons to select TOTALS.
4.3 DIARY FILE You can check the automatically saved weekly Diary information in the Diary File. The Diary File includes information for the 12 most recent weeks. When the Diary File becomes full, the next week's information replaces the oldest. The Diary week is saved in the Diary File on Sunday at midnight. At the same time, the current Diary is reset. 1. 2. 3. 4. If you start from the Time of Day display, press OK. Press the / buttons until File is displayed. Press OK.
5. SETTINGS In the Settings menu, you can view or change the information you have set earlier, such as the time of day and date, or you can set information, such as heart rate limits, volume, and alarm settings. 5.1.1 TIMER SETTING You can set the countdown timer to sound an alarm once after a set time. • Set the hours with the / buttons. Press OK. • Set the minutes with the / buttons. Press OK. The countdown timer starts running and Timer is displayed. 5.
5.1.2 ALARM SETTING 1. If you start from the Time of Day display, press OK. 2. Press the / buttons until Settings is displayed. Press OK. 3. Press the / buttons to select WATCH. Press OK. 4. Press the / buttons to select ALARM. Press OK. 5. Press the / buttons to select alarm DAILY, MON-FRI, or OFF. Press OK. If you select off, press OK and continue from following setting. If you are using 12 hours mode: select AM or PM with the / buttons. Press OK. 6. Set the hours with the / buttons. Press OK. 7.
5.2 HEART RATE SETTINGS OWNZONE: In the HR (Heart Rate) Set menu, you can edit the settings used during exercise sessions. Exercise settings, heart rate limits, alarm settings, and the view mode are combined in HR Set. With HR Set, you can easily use your desired exercise settings and do not need to set each setting separately. Press Press Watch Press HR Set Press User General HR Limits HR View Press OK HR Alarm 1. 2. 3. 4.
MANUAL: Instead of determining your target heart rate zone by using OwnZone or Automatic limits, you can determine your target heart rate limits manually by using the age formula. Your target heart rate zone is a range between lower and upper heart rate limits expressed as percentages of your maximum heart rate (HRmax) or as beats per minute (bpm). HRmax is the highest number of heartbeats per minute during maximum physical exertion.
5.3 USER SETTINGS In the User Settings menu, you can edit your personal data, weight, height, birthday, gender, and extra user settings. Press Press Watch Press HR Set Press User General 7. Adjust the day (dd) or month (mm) with the / buttons. Press OK. 8. Adjust the year (yy) with the / buttons. Press OK. 9. Sex: Select MALE or FEMALE with the / buttons. Press OK. 10.
13. Maximal oxygen uptake value (VO2max, ml/kg/min): Press the Press OK. / buttons to set your maximal oxygen uptake value. 5.4 GENERAL SETTINGS In the General Settings menu, you can edit general settings for the wrist unit. The general settings include volume, keylock, help, and units. VO2max is the maximum capacity for oxygen consumption by your body during maximum exertion. This is also known as aerobic power or maximal oxygen intake/consumption.
1. Volume for Sounds Press the / buttons to select VOL 2 (loud), VOL 1 (quiet), or sounds OFF. Press OK. 3. Help Settings If you switch Help-texts On, texts guide you in the Exercise and Diary modes. If you change the Vol 2 or Vol 1 setting, the following wrist unit tones are not affected: HR alarm, watch, and timer alarms. If you select sounds off, the button and activity sounds are switched off. The alarm sounds can be switched on or off in the Watch Settings, page 36.
6. DATA TRANSFER 7. CARE AND MAINTENANCE Polar Fitness Trainer is a complete web service tailored to support your exercise goals. Free registration gives you access to a personalized exercise program, diary, tests, calculators, useful articles and much more. You can gain access and start the registration process for the web service at www.PolarFitnessTrainer.com.
Transmitter Battery The estimated average battery life span of the transmitter is 2500 hours of use. If you suspect that the transmitter battery has run out, contact your authorized Polar Service Center for a replacement transmitter. Polar recycles used transmitters. Wrist Unit Battery The estimated average battery life of the wrist unit is one and half year in normal use. Please note that excessive use of the backlight and the alarm signals drain the battery more rapidly.
8.2 MINIMIZING POSSIBLE RISKS WHEN EXERCISING Exercise may include some risk, especially for those who have been sedentary. Before starting a regular exercise program you are recommended to answer to the following questions for health status checking. If the answer is yes to any of the questions, we recommend that you consult a doctor before starting an exercise program.
...the wrist unit battery needs to be changed? We recommend that all service should be done by an authorized Polar Service Center. The 2-year International Guarantee does not cover damage or consequential damage caused by service not authorized by Polar Electro. The Polar Service Center will test your wrist unit for water resistance after battery replacement and makes a full periodic check of your complete Polar heart rate monitor. ...the buttons do not react? Reset the wrist unit.
11. LIMITED POLAR INTERNATIONAL GUARANTEE 12. DISCLAIMER • This limited Polar international guarantee is issued by Polar Electro Inc. for the consumers who have purchased this product in the USA or Canada. This limited Polar international guarantee is issued by Polar Electro Oy for the consumers who have purchased this product in other countries. • Polar Electro Inc.
13. INDEX 12h/24h time mode ................................................................ 10, 39 Alarm setting ................................................................................ 38 Backlight ........................................................................................ 8 Basic settings .............................................................................. 10 Battery replacement ..................................................................... 52 Buttons ...............