3.
Safety Notice: 1. Do not drop, puncture or disassemble the camera; otherwise the warranty will be voided. 2. Avoid all contact with water, and dry hands before using. 3. Do not expose the camera to high temperature or leave it in direct sunlight. Doing so may damage the camera. 4. Use the camera with care. Avoid pressing hard on the camera body. 5. For your own safety, avoid using the camera when there is a storm or lightning. 6. Do not use batteries of different types.
Loading the battery Please use two AA batteries. 1. Slide open the battery compartment cover as indicated. 2. Load the batteries into the battery compartment with + and - ends correctly installed. 3. Replace the cover. open close Inserting the SD/MMC card (optional) 1. Lift the SD card cover. 2. Insert the card in the direction of indication until it reaches the end of the slot. 3. When using a SD card, the built-in memory will become inaccessible. 4.
Turning on the camcorder Open the LCD panel. OR ) for 3 seconds. Press and hold down the Power button ( Turning off the camcorder Close the LCD panel. OR Press and hold down the Power button ( Press the Power button ( ) for 3 seconds. ) quickly will turn the video light on/off.
Reading LCD indicators Digital Camcorder mode: Flash mode Focus mode Photo resolution NightShot 1.1x Zoom ratio Smart Zoom SD card inserted Battery life Number of pictures/files Playback thumbnail mode: Current/total recordings Play mode File type Highlight box Playback full mode: Recording time Play mode Volume Video REC mode: Video light mode Recording time Focus mode Video resolution NightShot 1.
Recording a video clip 1. Set the focus to an appropriate setting. Normally, you may set the focus to ( ) only for close-ups. filming conditions. Select ( 2. Press the Record button ( 3. Use the Zoom buttons ( 4. Press the Record button ( ) for most ) to start recording. ) to zoom in or zoom out the screen. ) again to stop recording. Taking a still picture 1. Set the focus to an appropriate setting. Normally, you may set the focus to ( ) for most picture taking conditions. Select ( ) only for close-ups.
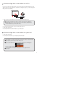
Connecting the camcorder to a TV Connect your camcorder and TV via the accessory AV cable for real-time display. You can display your video clips, still pictures, and audio recordings directly on your TV, sharing them with your friends and family. TV AV-Mode Video Audio TV OUT Earphone 1. Turn on your TV and switch the TV to the appropriate TV AV input mode. TV systems are different for various countries. You may need to adjust the TV-out setting, please refer to page 8 for more information.
Mode selection 1. Turn on the camcorder. 2. Press the button. 3. Use the Zoom buttons ( 4. Press the ) to select the desired item. button to confirm. Basic operation How to... Action Move the highlight bar Use the Zoom buttons ( Confirm an item Press the Exit menu/Go back to upper menu Press the Mode/ ) to move up or down. button. button (when in sub-menu).
Menu items in Digital Camera mode (cont’d) Item Video Option VGA Description Set the video resolution to VGA (640x480 pixels). QVGA Set the video resolution to QVGA (320x240 pixels). Stabilizer On/Off Reduces blurry images in certain lighting conditions. Smart Zoom On/Off This setting allows you to get a clearer image when using the zoom buttons. Auto White Balance This setting is suitable for outdoor recording in sunny weather.
Menu items in Playback mode Power-on → Press the Mode button → Enter the Playback ( the Menu/OK button. ) mode → Press Item Option Delete One Yes/No Delete current file. Description Delete All Yes/No Delete all pictures and video/audio files stored in the memory. Menu items in Setting mode Power-on → Press the Mode button → Enter the Setting ( Item Option Beep On/Off Flicker 50Hz/60Hz Description Enable beep sound on/off. Set flicker frequency to 50Hz or 60Hz.
Menu items in Setting mode (cont’d) Item Option Language USB Mode Description Lets you select the language used for OSD. Menu When connected to a PC, the camcorder displays a menu for you to choose a desired connection mode. Camera When connected to a PC, the camcorder automatically enters Camera (PC camera) mode. Disk When connected to a PC, the camcorder automatically enters Disk (removable disk) mode. Start Movie On/Off Enable/disable the movie sequence when the camcorder is powered on.
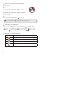
Storage Capacity VGA QVGA Audio (min.) Maximum SD/MMC card (128MB) 2 9 100 SD/MMC card (256MB) 5 18 200 SD/MMC card (512MB) 10 36 300 SD/MMC card (1GB) 20 72 400 Memory Memory Video (min.