Table of contents 1 Introduction 2 Loading film 3 Connecting the power supply 3 Determining the processing time of the film 3 Setting the exposure control 5 Setting the color-filtration controls 6 Preparing to make a print 7 Exposing the film 7 Processing the film 9 Possible problems, causes 10 Warranty 10 For information or assistance 11 FCC Notice (U.S.A.
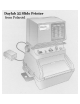
1 Introduction The Daylab 35 Slide Printer allows you to make prints of 35mm slides onto Polaroid 31/4 x 41/4 in. peel-apart instant films. The Daylab35 is easy to operate and offers such features as preset focusing, automatic exposure control, exposure adjustment, automatic film-development timing, and built-in color filters for creative effects. With the Daylab 35, you can explore a wide range of creative applications, including the Polaroid Emulsion and image Transfer processes.
2 Close and latch the film-holder door: Hold the door closed and push the latch up overthe end of the film holder (5) so Loading film Remove the base of the Daylab 35 by lifting the exposure unit up. Invert the film holder. that it snaps into position., Caution: Before continuing with the next steps, check the dark slide/viewing panel to be sure that it is inserted all the way into the film holder. If it is not, you risk exposing the film. The black safety-cover tab (5n) must extend from the film holder.
3 Connecting the power supply Plug the Daylab 35 power supply (110 125 VAC) into an appropriate electrical outlet and then into the connection on the back of the Daylab 35. Determining the processing time of the film Processing times vary for different film types. Also, temperature affects the processing time of your film.
4. The VIEW-OFF-PRINT switch: VIEW: Select VIEW to compose an image on the dark slide/viewing panel. This setting turns on the lamp that projects your slide image onto the dark slide/viewing panel. Warning: Never leave your slide under the VIEW lamp longer than necessary. Heat from the lamp can damage your slide. The Daylab 35 has a built-in switch that automatically shuts off the VIEW lamp after approximately 4 minutes. This prevents the lamp from overheating and damaging your slide.
5 Setting the Color-filtration controls (8) On the front of the Daylab 35 are three color-filtration controls for correcting color balance and for creating special effects. If you want to adjust the color balance of your print, use the color-filtration controls to add amounts of the three primary colors: cyan, magenta and yellow to your print. Add one color or a combination of two colors at a time. The filters are scaled so you can measure the amount of filtration for each color. Use "0= for no filtration.
6 Note: As you set the filters to make color adjustments, the Daylab 35 does not show the effects of the adjustments as you preview the image projected on the dark slideviewing panel. Make test exposures to gauge what effects you want to achieve with color filtration. Note: Adding filtration extends exposure time. Use the exposure-adjustment dial to compensate for these changes. Also note that extending the exposure times can result in further color shift. Note: Use no more than two filters at any one time.
7 Exposing the film 1 Set the film-type selection switch at the setting appropriate for the type of film you are using. See Setting the exposure controls. 2 Set the exposure-adjustment dial at the setting appropriate for your slide. For a slide image with average lighting conditions, start with the (0) setting. 3 Set the VIEW-OFF-PRINT switch at PRINT. 4 Set the color filtration controls at the appropriate settings for your slide. You should initially set the 3 color-filtration controls at "0".
8 If no processing tab appears when you pull the Ieader tab: Stop! Do not pull another leader tab. Instead, carefully open the film holder, in dim light, without disturbing the film pack. You can use your fingertip to make sure the pack does not move (15). Take hold of the processing tab that failed to come out, gently pull it all the way out of the film holder (16), and discard it. While the door is open, check the developer rollers and the processing-tab slot and, if necessary, clean them.
9 Possible problems, causes An image blurred. out of focus Most likely cause is: · Selecting a slide that is not in sharp focus. Use a properIy focused image. A black or blank print Most likely causes are: · Forgetting to press the START button to expose the film. · Forgetting to move the VIEW-OFF-PRINT switch to PRINT before pressing the START button to expose the film. (No exposure will have been made.
10 A curtain-shaped mark or broad streak If you start to pull the processing tab and then stop or hesitate briefly, a curtain-shaped mark along the print edge appears. If you stop mid-way into the pull, a broad streak results. Always pull the processing tab out in one smooth, continuous motion. An oblong in the print(20) This indicates that you did not pull the leader tab all the way out. When you then pulled the processing tab, the leader tab retracted into the film holder, thus spoiling the picture.
11 FCC Notice (U.S.A. only) This equipment has been tested and found to comply with the limits for a Class B digital device, pursuant to Part 15 of the FCC Rules. These limits are designed to provide reasonable protection against harmful interference when the equipment is operated in a residential installation.
12 Parts end Accessories To order Daylab 35 parts or accessories, call Polaroid Corporation toll-free at 1-800-343-5000, Mon - F r i, 8 AM to 8 PM (Eastern Time). Listed below are parts and accessories for the Daylab 35 and the Daylab 35 Plus.