7” Under-the-Cabinet LCD / DVD FDX-0700T Operating Manual 20050121
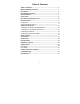
Table of Contents Table of Contents ----------------------------------------------------------- 2 Important Safety Instruction--------------------------------------------- 3 FCC Notice--------------------------------------------------------------------- 5 Characteristic Features --------------------------------------------------- 6 Disc Information ------------------------------------------------------------- 7 Front Panel -------------------------------------------------------------------- 8 Rear Panel and
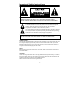
Important Safety Instructions CAUTION: TO REDUCE THE RISK OF ELECTRIC SHOCK, DO NOT REMOVE COVER (OR BACK). NO USE-SERVICEABLE PARTS INSIDE. REFER SERVICING TO QUALIFIED SERVICE PERSONNEL. The lightning flash with arrowhead symbol, within an equilateral triangle, is intended to alert the user to the presence of uninsulated “dangerous voltage” within the product’s enclosure that may be of sufficient magnitude to constitute a risk of electric to persons.
Important Safety Instructions Note: 1. 2. 3. 4. 5. 6. 7. 8. 9. 10. 11. 12. 13. 14. 15. IMPORTANT FOR LASER PRODUCTS 1. CLASS 1 LASER PRODUCT Read these instructions. 2. DANGER: Visible laser radiation when open and interlock failed or defeated. Avoid direct exposure to beam. Keep these instructions. 3. CAUTION: Do not open the top cover. There are no user service-able Heed all warnings. parts inside the unit. Leave all servicing to qualified service personnel. Follow all instructions.
FCC Notice Note: This equipment has been tested and found to comply with the limits for a Class B digital device, pursuant to part 15 of the FCC Rules. These limits are designed to provide reasonable protection against harmful interference in a residential installation. This equipment generates, uses and can radiate radio frequency energy and, if not installed and used in accordance with the instructions, may cause harmful interference to radio communications.
Characteristic Features Advanced Playing Functions This product incorporates a DVD player, LCD display, TV receiver and radio in one system. It is designed for convenient use in the kitchen. Please refer to page 31 for the installation instructions. Compatibility Plays: DVD, CD and JPEG discs. On-Screen Display Displays your choice of English, Spanish or French. Fast Search Function Multi-speed, fast forward, fast reverse, slow play and repeat playback.
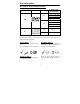
Disc Information Disc Formats Supported By This Player DISC LOGO DIAMETER PLAYBACK TIME/ PLAYABLE SIDES 133 min (SS-SL) 12cm 242 min (SS-DL) 266 min (DS-SL) 484 min (DS-DL) DVD 41 min (SS-SL) 8cm 75 min (SS-DL) 82 min (DS-SL) 150 min (DS-DL) 12cm 74 min 8cm 20 min CD The disc maker specifies the operation of some DVD discs. instruction manual with the disc. Please refer to the Care of Discs Cleaning of Discs Do not touch the playing surface of the disc.
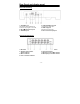
Front Panel Front Panel Drawing 1. POWER button Press to enter or exit the STANDBY mode. 2. PLAY/PAUSE button Press to start or pause playback under DVD mode. 3. Disc Tray Used to load disc. 4. STOP button Press to stop playback under DVD mode. 5. Under DVD mode, press once to go to beginning of the current track/chapter. Press twice to go to the previous track/chapter. 6. Press to go to the next track under DVD mode. 7. SOURCE button Press to shift among DVD, TV, AV, FM and AM mode. 8.
Front Panel 11. SEEK –/+ button 16. ▲ Under radio mode, press once to fine Press to select items in the setup menu. tune frequency backward or forward. Press to select channels or radio Press for about 1.5 seconds to search stations forward under TV or radio mode. radio stations backward or forward Press to adjust the value upward when automatically. setting the time on the display panel. Under DVD mode, press to activate fast 17. OK button backward or forward playback.
Rear Panel and display panel Rear Panel Drawing 1. ANT INPUT jack Connected to external antenna to receive the TV program in TV mode. 2. FM 75Ωcoaxial antenna jack 3. AM antenna jack 4. Left/Right AUDIO input jack Connection for audio input. 5. VIDEO input jack Connection for video input. 6. Direct current 12V input jack Display Panel Drawing 1. FM radio status indicator 2. AM radio status indicator AM time indicator 3. PM time indicator 4. Hour or character indicators 5.
Remote Control Preparation Use Of Remote Control Refer to the drawing and remove the Point the remote control towards the main unit when operating. The remote works best at a distance less than 7m empty battery receptacle. and at an angle of up to 60°to the front of the unit. No obstacles may stand in the way between the remote and the infrared sensor. Insert the battery into the receptacle. Make sure the polarity matches the marks on the remote. The battery normally last for about six months.
Remote Control - 12 -
Remote Control 1. POWER button Press to access to or exit the STANDBY mode. 2. SUBTITLE button Press to select a subtitle language or to turn subtitles off when a DVD with multisubtitles is playing. 3. DVD button Press to enter DVD mode. 4. TV button Press to enter TV mode. 5. AV button Press to shift to external AV input mode. 6. FM/AM button Press to shift to FM/AM signal input mode. 7. TV/LCD SETUP button Press to enter the LCD SETUP menu. 8. OK button Press to confirm selections. 9.
Remote Control 19. EJECT button Press to open or close the disc tray. 20. AUDIO button Press to access various audio languages, when the DVD disc contains multiple audio languages. 21. 0-9 number buttons Select numbers by pressing these buttons. 22. GOTO button Press to select the desired disc starting Time, Track or Title. 23. +10 button Select numbers greater than 9 by pressing the (+10) button first, and then additional number buttons as needed. 24.
System Connections ◆ Do not connect the power cord until all other connections have been made. ◆ Each time you restart the unit, it remembers the last function used.
System Connections Connecting To Antenna Connect the supplied AM/FM antennas to listen to the radio. ◆ In order to improve the signal, move AM loop antenna away from system and other equipment. ◆ Extend FM antenna fully. ◆ Keep the FM antenna as horizontal as possible after connection. ◆ When connecting the supplied AM loop antenna, connect two black cords to AM and ground jacks as shown below.
System Connections Connecting To the Power Adapter This unit is powered via the switching power adapter (supplied). See the below figure for details: 1. Connect the AC adapter to jack marked with “DC 12V IN” on the rear panel of the unit. 2. Plug the two-prong end of the power cord to the grounded electrical socket. 3. When not using the unit, turn off the power of the unit first, and then unplug the power supply to prevent malfunctions.
Radio Function Radio Function Operation Press the AM or FM button on the remote control or front panel to enter AM or FM radio mode. Then press the SEEK+/- button for about 1.5 seconds on the remote control or front panel to start searching forward/backward from the current frequency. Press the SEEK+/- button again to stop searching. Radio frequency will be displayed on the display panel. The frequency range of FM is from 87.5MHz to 107.9MHz, frequency range of AM is from 520kHz to 1710kHz.
TV Function Basic Operation Connect the antenna to the antenna jack on the rear panel. After connecting the antenna, connect the power supply cord. If the player is in standby mode, press the POWER button on the front panel to turn on the power. Press the TV button on the remote control to shift to TV mode. Press the buttons on the remote control to select the desired channel.
TV Function Use the ▼、▲ buttons to select the item you want to set. Use the ►, ◄ buttons to select the item and enter it. First use the ▼、▲ buttons to highlight the TV SETUP, then press the ► button on the remote control to exit from the setup menu, and press the ◄ button on the remote control to return to the picture setup menu. Signal Use the ► direction button to select CATV TV signal input mode. Use the ◄ direction button to select ANT TV signal input mode.
TV Function The auto memory will take a few minutes. The unit will search channels from the lowest channel to the highest channel in the standard channel list. When tuning operations are complete the unit will exit and store the channels by sequence in the memory. During tuning, press the ◄ button to exit the auto memory. Use the ▼、▲ direction buttons to select the desired channel from those in memory.
TV Function Power off To set the playback end time of the signal source, use number buttons to input the desired time in sequence of hour, minute. Press the ►, ◄ direction buttons to shift between am and pm. When the playback of the signal source is over, the player will enter standby mode. Signal Use the ►, ◄ direction buttons to select CATV, ANT, FM or AM. Channel Use number buttons to input the desired TV channels.
AV Function AV Function The player has an additional AV input so it can function as a monitor for a DVD player, video cassette player, satellite receiver, video game, etc. When an AV source is connected, press the AV button on the remote control to enter external input AV mode.
Play Operation Preparation 1. Install the unit in the kitchen; refer to page 32 for details. 2. After connecting the unit to the AC power, turn on the unit’s power by pressing the POWER button on the front panel or the remote control. 3. Press the DVD button on the remote control or the SOURCE button to shift to DVD mode. 4. Press the EJECT button on the front panel or the remote control to open the disc tray. 5. Load the disc with the label facing up. 6.
Play Operation Subtitle A DVD disc can be recorded with up to 32 subtitles. Press the SUBTITLE button on the remote control during playback to select the one you prefer. NOTE: This function is only available on DVD discs that are recorded with multisubtitles. CD Playback The player will play all tracks on a CD disc by default. You can use the and (PREV/NEXT skip) buttons, or number buttons to select a track.
Playback Functions Stop During playback, press the STOP button once on the remote control to stop playback of a disc. Press the PLAY button and the DVD Player will resume playback of the disc from the point where it was stopped. Pause Press the PAUSE button once on remote control or front panel to pause playback. Press the PLAY button to resume normal playback. Resume Playback Press the STOP button at the point if you wish to stop the playback of a disc.
Playback Functions Previous and Next Press the PREV button once to return to the currently playing Chapter or Track. Press the PREV button twice repeatedly and playback will start from the previous Chapter or Track. Press the NEXT button on the remote control and playback of the disc will start from the next Chapter or Track. Repeat To repeat a Title, Chapter or Track press the REP button on the remote control.
System Setup DVD Setup You can customize the set up menu to your own preference. Press the “DVD SETUP” button on the remote control to display the setup menu. The menu will include “General Setup”, “Speaker Setup”, “Dolby Digital Setup”, “Video Setup”, and “Preference Setup”. Press the direction button ( ) on the remote control to select a category. All the items in the category will appear on the screen. Press the “OK” button to enter the category.
System Setup Speaker Setup Downmix Select “LT/RT” in DOWNMIX, the player will output the audio signal IN MIXED NONO. Select “Stereo”, then the player will output a stereo signal. Dolby Digital Setup Dual Mono The function is used to select from stereo, left only, right only, and mixed mono. Dynamic Use this item to adjust linear dynamic compression rate to get different signal compression effects.
System Setup LCD Setup Under DVD mode, press the TV/LCD SETUP button on the remote control or front panel, there will be menu displayed on the screen. PICTURE BRIGHTNESS CONTRAST COLOR LANGUAGE RESET 10 10 10 ENGLISH EXIT ◄ Use the ▼、▲ buttons to select the item you want to set (Brightness, Contrast, Color). Use the ►, ◄ buttons to adjust the items between 0 and 20. Use the ▼, ▲ buttons to select the Language, press the ►, ◄ buttons to select English, French or Spanish.
Installing the Unit In Kitchen Installing the unit under a cabinet The player unit may be installed in the kitchen with or without the spacer. The suggested mounting position of the unit is under a wall cabinet. See drawings below: NOTE: The dimensions of the player: 355mm x 75mm x 285 mm (W/H/D) There should be at least 35mm distance between the unit and the wall. Installation steps 1. Mark the position of the 4 holes by using the supplied template. Drill four 6.5 mm diameter holes.
Installing the Unit in Kitchen 2. If the cabinet door overhangs the shelf and obstructs the unit, adjust the unit or the shelf height for clearance. 3. Install the unit with the supplied mounting screws. 4. There should be at least 35mm distance between the unit and the wall. Quick hints ◆ Since the unit is rather heavy, be careful while doing the fixing work. ◆ To reduce risk of fire, do not place any heating or cooking appliance beneath the unit, especially while the LCD screen is open for viewing.
Troubleshooting SYMPTOM The player cannot play. There is no sound. There is no picture or picture is unsteady. Position of the picture is incorrect. Cannot continue to play or plays a section repeatedly. The remote control does not work. CHECK ITEM Make sure a disc is loaded. Make sure the disc is loaded with label side up. Disc should be clean, not dirty or warped. Player’s region code should be the same as the region code of the DVD disc. Make sure water condensation has not occurred.
Specifications LCD screen size 7 inches Laser Wavelength Wavelength: 780/650nm Video System NTSC Frequency Response 20Hz~20kHz ±2.5dB Audio Signal-to-Noise ≥ 85 dB Audio distortion + noise ≤ -70dB (1KHz) Channel Separation ≥ 70dB (1KHz) Dynamic Range ≥ 80dB (1KHz) System Radio Frequency Range PLL AM 520~1710kHz FM 87.5~107.9MHz Power AC100V~ 240V, 50/60Hz Power Consumption ≤30W Dimension 355mm X 75mm x 285mm (W/H/D) Weight About 3.
For service, support and warranty information, visit www.polaroidelectronics.com or in the US call 1-866-289-5168, in Canada call 1-866-301-7922 and in Mexico call 01-800400-2443. “Polaroid” is a registered trademark of Polaroid Corporation of Waltham, MA USA and licensed for use on the FDX-0700T to Petters Consumer Brands, LLC.