
User Manual


25
2) Press the LEFT or RIGHT button to scroll and select the ‘Self Timer’ menu.
3) Press the UP or DOWN button to highlight a specific option.
4) Press the MENU button to confirm and select the highlighted menu option.
A selected option icon appears on the selected item.
5) To continue within the menus and select a different menu option:
Press the LEFT or RIGHT button to select the next menu item.
6) To exit the menu view:
Press the MODE button to exit the menu and return to your previous mode.
An icon reflecting your selection is displayed on the LCD screen.
Anti-Shake Menu
The ‘Anti-Shake’ feature reduces image distortion that can be caused by movement of the
camera while capturing the image.
1) Press the MENU button to open the menus for the current mode.
2) Press the LEFT or RIGHT button to scroll and select the ‘Anti-Shake’ menu.
3) Press the UP or DOWN button to highlight a specific option.
4) Press the MENU button to confirm and select the highlighted menu option.
A selected option icon appears on the selected item.
5) To continue within the menus and select a different menu option:
Press the LEFT or RIGHT button to select the next menu item.
6) To exit the menu view:
Press the MODE button to exit the menu and return to your previous mode.
An icon reflecting your selection is displayed on the LCD screen.
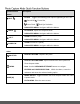
Macro Menu
With the ‘Macro’ feature you can capture images at close range (30 ~ 45 cm).
MACRO ON: To enable the Macro mode, select ‘On’.
The flower icon appears on the LCD display and indicates that the Macro mode is ON.