
User Manual


29
the positive + count) to increase the amount of light allowed into the lens by your camera.
1) Press the MENU button to open the menus for the current mode.
2) Press the LEFT or RIGHT button to scroll and select the ‘Light Exposure’ menu.
3) Press the UP or DOWN button to highlight a specific option.
4) Press the MENU button to confirm and select the highlighted menu option.
A selected option icon appears on the selected item.
5) To continue within the menus and select a different menu option:
Press the LEFT or RIGHT button to select the next menu item.
6) To exit the menu view:
Press the MODE button to exit the menu and return to your previous mode.
An icon reflecting your selection is displayed on the LCD screen.
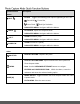
ISO Menu
The ‘ISO’ menu allows you to set the level of sensitivity that your camera has to light in the
surrounding environment. When the ISO level is increased, the image sensor in your camera will
be more sensitive to light and allow you to capture images in lower-light situations. The higher
sensitivity to light however, may reduce the quality of the images that are taken.
When the ISO is reduced, the image sensor in your camera will be less sensitive to light and will
optimize the image quality in environments with bright lighting.
1) Press the MENU button to open the menus for the current mode.
2) Press the LEFT or RIGHT button to scroll and select the ‘ISO’ menu.
3) Press the UP or DOWN button to highlight a specific option.
4) Press the MENU button to confirm and select the highlighted menu option.
A selected option icon appears on the selected item.
5) To continue within the menus and select a different menu option:
Press the LEFT or RIGHT button to select the next menu item.
6) To exit the menu view:
Press the MODE button to exit the menu and return to your previous mode.
An icon reflecting your selection is displayed on the LCD screen.