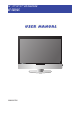
26” /27”/32”/37” LCD Television KF SERIES USER MANUAL KF271 50 . 5mm 13 . 8mm 5mm 5mm 10mm 丝 印430C VOL. 2006060706 VOL. CH. CH.
FCC Federal Communications Commission Statement 1. Reorient/Relocate the receiving antenna. 2. Increase the separation between the equipment and receiver. 3. Connect the equipment into an outlet on a circuit which is different from what the receiver is connected to. 4. Consult the dealer or an experienced radio/TV technician for help. Changes or modifications not expressly approved by the manufacturer responsible for compliance could void the user authority to operate the equipment.
Warnings and Precautions Warnings and Precautions To prevent any injuries, the following safety precautions should be observed in the installation, use, servicing and maintenance of this equipment. Before operating this equipment, please read this manual completely, and keep it nearby for future reference. WARNING CAUTION This symbol is intended to alert the user to avoid the risk of electric shock. This equipment must not be disassembled by anyone except qualified service personnel.
Warnings and Precautions ▪ Use and handle the power cord with care. Do not place any heavy objects on the AC power cord. ▪ Do not touch the power cord and antenna cable during lightning. ▪ Remove the plug from the wall outlet, if the equipment will not be used for a long period of time. ▪ Do not place, use or handle this equipment near water. ▪ Never expose the equipment to liquid, rain, or moisture. Seek for service if any of the above is spilled into the equipment.
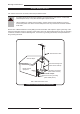
Warnings and Precautions Outdoor Antenna Safety Instructions If an outdoor antenna is connected, follow the precautions below: ▪ An outdoor antenna should not be located in any area where it could come in contact with overhead power lines, or any other electric light or power circuits. ▪ When installing an outdoor antenna system, extreme caution should be taken to prevent contact with power lines. Direct contact with power lines may be fatal and should be avoided at all costs.
TABLE OF CONTENTS Federal Communications Commission Statement........................... 1 Important Safety Instructions........................................................................................ 2 Antenna Safety Instructions.......................................................................................... 4 Chapter 1 Introducing the LCD TV Key Features................................................................................................................ 6 Package Contents...
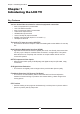
Chapter 1 Introducing the LCD TV Chapter 1 Introducing the LCD TV Key Features Various Audio/Video terminals for external equipment connection ▪ ▪ ▪ ▪ ▪ ▪ ▪ ▪ 2 set of composite A/V input terminals 1 set of S-VIDEO terminals 2 set of component Video input terminals 1 VGA/ Audio input terminal 1 HDMI/Auido input terminal 1 sets of Audio(L/R) output terminals 2 SPDIF output terminal (Optical x 1 /Coaxial x 1) 1 Headphone terminal The built-in TV tuner to receive HD ATSC ▪ This function allows the receptio
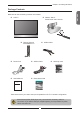
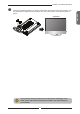
Chapter 1 Introducing the LCD TV Package Contents LCD TV Bottom Stand / Screw Driver and 6 Screws KF271 50 . 5mm 13 . 8mm 5mm 5mm 10mm 丝 印430C VOL. VOL. CH. CH. MENU SOURCE Remote Control/ AAA Batteries x 2 VIDEO Cable POWER P.MODE SWAP PIP S.MODE MTS MUTE CAPTION SLEEP P.SIZE 1 2 4 5 7 3 6 8 9 . 0 JUMP AIR/CABLE CH. VOL. SOURCE EXIT GUIDE OK INFO LIST Power Cord MENU FAV.
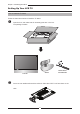
Chapter 1 Introducing the LCD TV Setting Up Your LCD TV How to install the TV Stand Follow the instructions below to install the TV stand: Open the box, and make sure all necessary parts are in the box. The package contains: KF271 50 . 5mm 13 . 8mm 5mm 5mm 10mm 丝 印430C VOL. VOL. CH. CH. MENU SOURCE Stand LCD TV Screw Driver and 6 Screws Cover an even stable surface with a soft cloth. Place the LCD TV unit face-down on the cloth.
Chapter 1 Introducing the LCD TV completed KF271 50 . 5mm 13 . 8mm 5mm 5mm 10mm 丝 印430C VOL. VOL. CH. CH. MENU SOURCE If you prefer to mount your LCD TV on a wall instead of attaching it to the stand, please reference the instructions included in the wall mounting kit (not included). ENGLISH Hold the TV stand and place it on the six screw holes on the back of the unit as shown. Use the screwdriver to tighten the six screws on the rear of the until the screw is firmly fixed in place.
Chapter 1 Introducing the LCD TV Use a supplied antenna cable to connect the VHF/UHF signal to the LCD TV’s ANT. terminal (refer to page17). Connect the AC power cord at the back of the TV and connect the power cord to wall outlet. Insert the 2 batteries supplied in remote control. Step1 Slide the back cover up to open the battery compartment of the remote control. Step2 Insert two AAA size batteries.
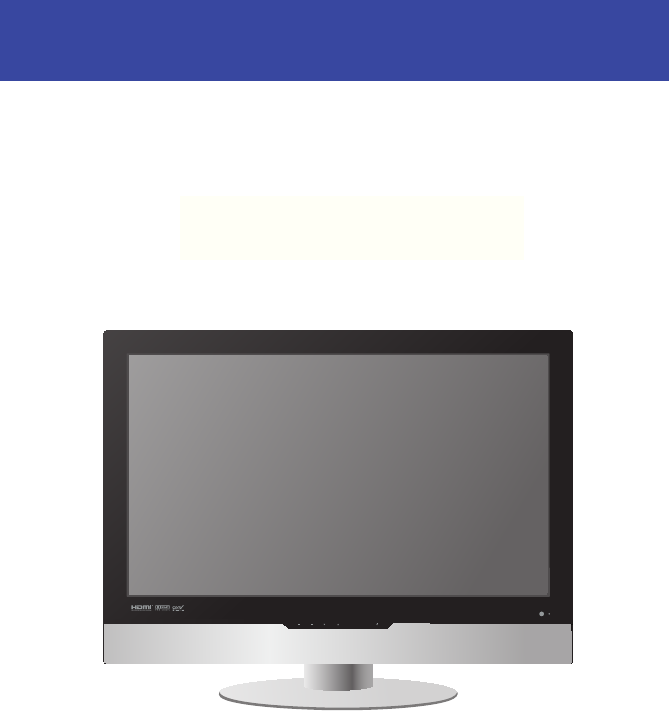
Chapter 1 Introducing the LCD TV Your LCD TV ENGLISH Front/Right Side View and Controls LED The LED light indicates when the LCD TV is activated. KF271 50 . 5mm 13 . 8mm 5mm 5mm 10mm 丝 印430C VOL. VOL. CH. CH. MENU SOURCE IR Infrared Receiver VOLUME▲▼ Adjusts the volume up and down. Selects the main-menu item and change values for items when in the OSD mode. VIDEO1 IN VIDEO L Connects to the composite Video and Audio output jacks on external video equipment.
Chapter 1 Introducing the LCD TV Rear View and Jacks VIDEO2 IN Connects to the composite VIDEO and AUDIO(L/R) output jacks on external video equipment. HDMI IN Connects the all digital AV equipment with HDMI connector.HDMI supports enhanced, high-definition video and two-channel digital audio. The AUDIO(L/R) of HDMI IN is for DVI connection. S-VIDEO IN Connects to the S-VIDEO and AUDIO(L/R) output jacks on external video equipment.
Chapter 1 Introducing the LCD TV Your Remote Control 1 2 1 P.MODE SWAP PIP S.MODE MTS MUTE CAPTION SLEEP P.SIZE 8 7 10 9 11 12 Swaps between the main and sub window in PIP/POP mode 3 P.MODE Selects picture mode: Vivid/Standard/ Cinema/Sport/User/High-Bright 4 PIP Turns PIP/POP on and off 5 MTS Cycles through the multi-channels TV sound(MTS) options: SAP/MONO/ STEREO 6 S.
Chapter 2 Installing the LCD TV POWER P.MODE SWAP PIP S.MODE MTS MUTE CAPTION SLEEP P.SIZE 1 2 3 4 5 6 7 8 9 JUMP 0 . 17 GUIDE In HDTV mode, pressing GUIDE display the Program Guide on the screen 18 EXIT Exits the OSD menu 19 ▲▼►◄ Cycles through OSD options and selects individual menu items.
Chapter 2 Installing the LCD TV Chapter 2 Installing the LCD TV Connecting a TV Cable or an Antenna Antenna Connection The antenna requirements for good color TV reception are more important than those for a black & white TV reception. For this reason, a good quality outdoor antenna is strongly recommended. The following is a brief explanation of the type of connection that is provided with the various antenna systems.
Chapter 2 Installing the LCD TV Use one of the following two diagrams when connecting an outdoor antenna. A: Shows how to use a VHF/UHF combination outdoor antenna. B: Shows how to use a separate VHF and/or UHF outdoor antenna. A. Combination VHF/UHF antenna VHF/UHF Antenna 300/75-ohm adapter (not included) 300-ohm twinlead cable VHF/UHF Antenna 75-ohm coaxial cable B.
Chapter 2 Installing the LCD TV Cable TV (CATV) Connection ■ A 75-ohm coaxial cable connector is built into the set for easy hookup. When connecting the 75-ohm coaxial cable to the set, connect the 75ohm cable into the ANT. terminal. ■ Some cable TV companies offer premium pay channels. Since the signals of these premium pay channels are scrambled, a cable TV converter/descrambler is generally provided to the subscriber by the cable TV company.
Chapter 2 Installing the LCD TV METHOD A: Use a supplied antenna cable to connect the NTSC signal to the LCD TV’s TV CABLE terminal. TV CABLE HDTV AIR VHF/UHF IN B A METHOD B: Use a supplied antenna cable to connect the ATSC signal to the LCD TV’s HDTV AIR terminal. Connect the AC power cord at the back of the TV and connect the power cord to wall outlet. TV CABLE HDTV AIR VHF/UHF IN Press the button on the remote to turn on the LCD TV.
Chapter 2 Installing the LCD TV Connecting a VCR HDMI IN ENGLISH Rear of TV VGA IN AUDIO OUT YPbPr IN AUDIO L AUDIO R L Y Pb Pr R L Y Pb STEREO AUDIO Pr DIGITAL OPTICAL R TV CABLE HDTV AIR L COAXIAL AUDIO VHF/UHF IN VIDEO L R AUDIO VIDEO IN L R S-VIDEO AUDIO S-VIDEO IN YPbPr IN L R R AUDIO Cable S-VIDEO Cable AV Cable A B METHOD A: Use a composite cable to connect the VCR’s composite video/audio jacks to the LCD TV’s VIDEO2 IN jacks.
Chapter 2 Installing the LCD TV Connecting a Video Camera or Play Station Rear of TV Right Side HDMI IN VGA IN AUDIO OUT VIDEO YPbPr IN AUDIO L AUDIO Y Pb Pr STEREO AUDIO DIGITAL OPTICAL AUDIO R L R L R L Y Pb Pr R TV CABLE HDTV AIR L COAXIAL AUDIO VIDEO1 IN VHF/UHF IN VIDEO L AUDIO VIDEO IN R L R S-VIDEO AUDIO S-VIDEO IN YPbPr IN L R R AUDIO Cable or S-VIDEO Cable B PLAY STATION AV Cable A METHOD A: Use a composite cable to connect the video camera’s or pla
Chapter 2 Installing the LCD TV Connecting a DVD Player HDMI IN ENGLISH Rear of TV VGA IN AUDIO OUT YPbPr IN AUDIO AUDIO L R L R L Y Pb Pr R L Y Pb STEREO AUDIO Pr DIGITAL OPTICAL R TV CABLE HDTV AIR L COAXIAL AUDIO VHF/UHF IN VIDEO AUDIO VIDEO IN L R S-VIDEO AUDIO S-VIDEO IN YPbPr IN L R R or Pb Pr COMPONENT/AUDIO Cable AUDIO Cable S-VIDEO Cable AV Cable A C B Pb Pr DVD PLAYER METHOD A: Use a composite cable to connect the DVD player’s composite video/audio
Chapter 2 Installing the LCD TV Connect all AC power sources, before turning on the power switch of the LCD TV or other connected equipment. Press the button on the remote to turn on the LCD TV. To watch a DVD, press the Source button on the remote to select VIDEO2( METHOD A), or VIDEO3 ( METHOD B), or VIDEO4/VIDEO5 (METHOD C). For best picture quality, if your equipment has component video output, use a component cable instead of a composite video or S-video cable.
Chapter 2 Installing the LCD TV Connecting a Digital TV Cable Box or Digital Satellite Receiver HDMI IN ENGLISH Rear of TV VGA IN AUDIO OUT YPbPr IN AUDIO AUDIO L R L R L Y Pb Pr R L Y Pb STEREO AUDIO Pr DIGITAL OPTICAL R TV CABLE HDTV AIR L COAXIAL AUDIO VHF/UHF IN VIDEO AUDIO VIDEO IN L R S-VIDEO AUDIO S-VIDEO IN YPbPr IN L R R or Pb Pr COMPONENT/AUDIO Cable Pb Pr Use a component cable to connect the satellite receiver’s/TV Cable Box’s component (YPbPr1)
Chapter 2 Installing the LCD TV Connecting an AV Equipment with HDMI Connector Rear of TV HDMI IN VGA IN AUDIO OUT YPbPr IN AUDIO L AUDIO R L Y Pb Pr R L Y Pb STEREO AUDIO Pr DIGITAL OPTICAL R TV CABLE HDTV AIR L COAXIAL AUDIO VHF/UHF IN VIDEO L R AUDIO VIDEO IN L R S-VIDEO AUDIO S-VIDEO IN YPbPr IN L R R HDMI Cable AV EQUIPMENT Use a HDMI cable to connect the AV equipment’s HDMI output jack to the LCD TV’s HDMI IN jacks.
Chapter 2 Installing the LCD TV Connecting an AV Equipment with DVI Connector HDMI IN ENGLISH Rear of TV VGA IN AUDIO OUT YPbPr IN AUDIO L AUDIO R L Y Pb Pr R L Y Pb STEREO AUDIO Pr DIGITAL OPTICAL R TV CABLE HDTV AIR L COAXIAL AUDIO VHF/UHF IN VIDEO L R AUDIO VIDEO IN L R S-VIDEO AUDIO S-VIDEO IN YPbPr IN L R R AUDIO Cable AUDIO L HDMI-to-DVI Cable R DVI IN AV EQUIPMENT Use a HDMI-to-DVI cable to connect the AV equipment’s DVI output jack to the LCD TV’s HDMI IN j
Chapter 3 Using the LCD TV Connecting a PC Rear of TV HDMI IN VGA IN AUDIO OUT YPbPr IN AUDIO L AUDIO R L Y Pb Pr R L Y Pb STEREO AUDIO Pr DIGITAL OPTICAL R TV CABLE HDTV AIR L COAXIAL AUDIO VHF/UHF IN VIDEO L R AUDIO VIDEO IN L R S-VIDEO AUDIO S-VIDEO IN YPbPr IN L R R AUDIO Cable VGA Cable PC Use a D-SUB cable to connect the PC’s D-SUB output jack to the LCD TV’s VGA input jack. Use an audio cable to connect the PC’s audio output jacks to LCD TV’s.
Chapter 3 Using the LCD TV Connecting an Audio Receiver or a Dolby Digital 5.
Chapter 3 Using the LCD TV Chapter 3 USING THE FEATURES Using Picture-In-Picture The PIP/POP feature allows simultaneous viewing of video from two sources (TV, VCR, DVD etc). Only one source’s audio is played at a time; the user may select which source’s audio is heard. Press the PIP button once to enter picture in picture mode. KF271 Main 50 . 5mm 13 . 8mm 5mm 5mm 10mm Sub 丝 印430C VOL. VOL. CH. CH.
Chapter 3 Using the LCD TV Press the PIP button again to view images side by side. ENGLISH KF271 Main 50 . 5mm 13 . 8mm Sub 5mm 5mm 10mm 丝 印430C VOL. VOL. CH. CH. MENU SOURCE ▪ Press ◄ ► to toggle the audio source between the main window and the sub window. ▪ Press the OK button to swap the pictures between the main and sub windows. KF271 50 . 5mm 13 . 8mm 5mm 5mm 10mm 丝 印430C VOL. VOL. CH. CH.
Chapter 3 Using the LCD TV Wide Screen Viewing Wide Screen function allows viewing of 4:3/16:9 images in wide screen mode, cycling through the following wide screen settings. Press the P.SIZE button repeatedly to select the screen format you want. NORMAL Displays at 4:3 aspect ratio.
Chapter 3 Using the LCD TV Operating the Menu Press the button to turn the LCD TV on. Press the MENU button on the remote control,the on-screen menu will appear on the screen. Use the ◄► buttons to select your main menu option. VIDEO MENU: Allows you to make adjustments to your picture settings.
Chapter 3 Using the LCD TV SETUP MENU: Allows you to set up a variety of features: Language, Closed Caption, factory reset, V-Chip, Parental Control sleep timer. Language English Timer 15 Closed Caption off V-Chip Parental Default Setup Select Exit TV MENU: Allows you to edit and label channels. Searching Tuner Mode Channel Skip Channel Name TV Cable-STD On Select Exit HDTV MENU: Allows you to set up the HDTV program function.
Chapter 3 Using the LCD TV Setting up the HDTV Function With the LCD TV connected to a television programming source, press the TV button on the remote control. Press the MENU button on the remote control to display the Main menu, and use the ◄► buttons to select the HDTV.
Chapter 3 Using the LCD TV The HDTV menu includes the following options: Audio Language Allows to select the audio language: English/Spanish/French. Time Zone SPDIF Type Allows selection of regional TV systems of USA: Eastern Time/Indiana/ Central time/Mountain Time/Arizona/Pacific Time/Alaska/Hawaii Allows to selection of the digital sound format: PCM/OFF/Dolby Digital Auto Scan Automatically sets up channel list on TV for all receivable channels.
Chapter 3 Using the LCD TV Using the Program Guide With the LCD TV connected to a television programming source, press the TV button on the remote control.
Chapter 3 Using the LCD TV Customizing the VIDEO Settings Press the button to turn the LCD TV on. Press the MENU button on the remote control to display the Main menu, and use the ◄► buttons to select the VIDEO.
Chapter 3 Using the LCD TV Customizing the AUDIO Settings Press the button to turn the LCD TV on. Press the MENU button on the remote control to display the Main menu, and use the ◄► buttons to select the AUDIO.
Chapter 3 Using the LCD TV Customizing the SETUP Settings Press the button to turn the LCD TV on. Press the MENU button on the remote control to display the Main menu, and use the ◄► buttons to select the SETUP. Use the ▲▼buttons to highlight an individual SETUP option, use the ◄► buttons to change the setting, and press the MENU to exit the menu.
Chapter 3 Using the LCD TV V-Chip Allows to setup the TV and MPAA Rating Lock options(refer to “Using the V-CHIP Setting”). Parental Allows to setup the Parental Lock options. Default Restores factory settings. 39 ENGLISH Closed Caption Allows to select from 4 closed caption modes: ▪ CC1 /CC2 /CC3 /CC4: Display a printed version of the dialog and sound effects of the program being viewed.
Chapter 3 Using the LCD TV Using the V-CHIP Settings The US has 2 rating system for viewing content: Movie blocking(MPAA) and TV Blocking. The TV Blocking conjuncts with the V-CHIP to help parents block inappropriate programs from their children. The Movie blocking(MPAA) is used for original movies rated by the Motion Picture Association of America(MPAA) as broadcasted on cable TV and not edited for television. The V-CHIP can also be set to block MPAA-rated movies.
Chapter 3 Using the LCD TV The TV GUIDELINE has 2 rating methods: Content-Based Rating and Age-Based Rating.
Chapter 3 Using the LCD TV Using the Parental Settings The Parental blocking can be set up to the TV to block a Channel or a Video Source. Use the ▼ button to select the Parental, and press the OK to display the Parental menu. Channel Lock 1 Video Lock VIDEO5(YPbPr2) Change Password Setup Select Exit Use the V-CHIP function, must enter a four-digit password. The factory password is 0000.
Chapter 3 Using the LCD TV Customizing the TV Settings Press the button to turn the LCD TV on. Press the MENU button on the remote control to display the Main menu, and use the ◄► buttons to select the TV. Use the ▲▼buttons to highlight an individual TV option, use the ◄► buttons changes the setting, and press the MENU exits the menu.
Specifications SPECIFICATIONS MODEL LCD Panel KF-271 KF-321 Panel Size 27’’ TFT LCD 32’’ TFT LCD Brightness 550 500 Contrast Ratio 1000:1 1000:1 Max. Resolution Input Connector 1366x768 1366x768 VIDEO/AUDIO(L/R) 2 2 S-VIDEO/AUDIO(L/R) 1 1 YPbPr/AUDIO(L/R) 2 2 VGA/AUDIO(L/R) 1 1 HDMI/AUDIO(L/R) 1 1 AUDIO OUT(L/R) 1 1 OPTICAL/COAXIAL 1 1 HEADPHONE 1 1 Power Source AC100~240V, 50/60HZ, 2.2A AC100~240V, 50/60HZ, 2.
Specifications LCD Panel 37’’ TFT LCD Brightness 500 Contrast Ratio 1000:1 Max. Resolution Input Connector KF-371 Panel Size 1366x768 VIDEO/AUDIO(L/R) 2 S-VIDEO/AUDIO(L/R) 1 YPbPr/AUDIO(L/R) 2 VGA/AUDIO(L/R) 1 HDMI/AUDIO(L/R) 1 AUDIO OUT(L/R) 1 OPTICAL/COAXIAL 1 HEADPHONE 1 Power Source AC100~240V, 50/60HZ, 3.0A Power Consumption 275 W, standby < 8 W Dimension 36.6 w x 28.2 h x 11.3d inch WEIGHT 62.